Showing posts with label DIY. Show all posts

Thursday, June 27, 2019

Huaweific…

Coping with this weather, still. And yet, people don't call me a superman or anything. Ah well. On the other hand, I'm kind of running out of ideas with my camera; Well, I do have ideas, but no time or power to do them still. Specially after adding more languages to my Duolingo and taking my time in doing the exercises daily. I'm somewhat taking it seriously here, and if I have the power I would have added more languages as well. Well, who knows; I might, one day.
However, away from the bulky camera and such, I've found a vent (or maybe you want to call it a breach) in that photo-shooting activity by sorting things out with my phone. Don't get me wrong though, I still love my camera; Yes, the very bulky camera. However, there are times when we have to do things that we are usually not into just to get what we want to! (Did I say that right?)

Huaweifying

Well, away from all the fuss about Huawei and the crappy politics (and lies), I have to say that I do like my phone. I would also like to try their upcoming operating system but probably since I have a working phone here I would have to wait a bit to see how things develop in the near future.
Anyway, I'm here about art. I've discovered that Huawei do have a photography contest which is on the run for some years now. Luckily, the deadline for this one will be by the end of July (and I thought it was by the end of June actually) which gives me some time to try stuff. Of course, as you may have guessed already, the first and utmost important condition is that the photos must be taken with a Huawei phone. And that is part of the challenge for me, in fact.
I was reluctant to participate first, and with the nearing end of June, I thought "Ah well, I have no ideas to shoot anything and maybe I should pass this," but then Ta Da! I've realized it's the end of July not June! So, my engines got to work again and I'm really trying to shoot with my phone, even though I kind of never liked this process (used to the more versatile options of a DSLR) but it proved to be a fun-activity, and the main key-point that may push me to shoot further, or at least try to, is the light-weight and the easy movement with the phone. But there are limitations of course which I will try to brief out after a while below.

Macro Feather


Being creative and having a variety of options with phone-photography would somewhat require some special sets of lenses (to gain broader aspects and view, as well creativity potential). However, I've always believed in innovation. One of the most common tricks to do macro photography with your phone is to use a water drop on the lens (after covering the lens with some transparent protection like tape for example), and this is what I did here with Macro Feather shot. I've saved this feather to shoot with my DSLR in fact, but since we are at it, I've decided to work now with my Huawei. Of course it is a normal shot and not very special and I'm not expecting it to be that "attention seeker" in the contest, but after all it is a good engine grease; My engine greasing that is.

The first trial
In Macro Feather, I had a problem with my choice of crop because there was some black space all around the shot. In the beginning I've left the shot in its original orientation (portrait orientation), and cropped all black spaces leaving just vertical lines standing there, but then I thought maybe I should leave a cue or a hint about the object instead of being just completely abstract, so I re-edited the shot again and cropped some black space and left some, beside tilting the image 90o to the right. This is just to give a hint of the edge here. However, seeing how (somewhat) the camera app on my phone is limited and looking for some more editing capabilities, specially with RAW images which my Huawei can shoot, I've looked for some alternatives and so I've found and picked Pixlr, which can get some work done, and in fact, Macro Feather also underwent Pixlr for some sharpening and contrast (and I think some Hue and Saturation fixes). But there are other options in this app that got me interested a bit further, like the "double exposure" option.

Eye On Coffee

To be honest, I didn't think of using the "Double Exposure" option in Pixlr until my attempts to shoot reflections off a mirror covered in coffee did fail drastically (and I don't have cooperative family members to help out with the work). Thus, I thought "why not shoot separate images and combine them and see what we can do then?" And do I did! It took me a bit to figure out how to use this option in the app, but the delicacy of the work is not a match for the typical mouse and Photoshop work with layers on PC or laptop. But I think it is somewhat an acceptable degree here. There were some filters (outside the app if I remember) that I did use to enhance the looks as well, and of course there was the cropping all things related to that. The thing is, I'm not sure if this is considered legal for Huawei's contest or not! They did mention that the image MUST be taken with a Huawei phone, and it is fine to use a third party app on the phone to edit the photo, but no mention about merging photos and montage or collage! There is only one way to know, and that's to upload it!
This is it for now with my Huawei photo-shoots, and I'm still trying to do more ideas in that venture as I'm typing these words, but I got swept away with many things so I didn't have enough time to try many things yet.

Thoughts and Finale

I've mentioned earlier that I had my own thoughts about this trend of phone photography. There are definitely advantages and disadvantages here, but probably the cons overwhelm the pros for my case here. Nevertheless, it is a source of juicing ideas out of my brain somehow. Probably the biggest and sole advantage of phone photography is the mobility and the relative ease in which one can handle it. Probably, to me, this is the sole and the only advantage that I can see in using the smartphone to take photos (on an artistic level and not merely documenting).
Now, to the disadvantages, there are a number of them on my list, and probably I've always argued about the size of the sensor relative to the number of pixels and how that affects the clarity of the image and the print size in production later on (if there is need to be for printing), but I won't go to that right now as I'm speaking here solely about the "operation" of photo shooting by the phone.
Probably the prime disadvantage for me here, is the cumbersome controls and options. Like, the resolution would change by changing the mode of shooting in the camera (Max is 20MP, but it comes down to 12MP for maximum in some modes). Shooting in RAW is, also, a matter of mode changing (only allowed in the PRO mode). Ironically as well, the PRO mode does have a shutter speed control, ISO control, EV control... etc, but NOT aperture control. To control the aperture alone, one must use the Aperture mode which controls only the aperture without any other controls. It's a mess of options and I'm not sure if this is only in my Huawei phone or in other phones and models as well.
Another thing that makes it such a cumbersome operation is the flash control. One might be able to control the flash in the phone itself but usually in a "higher" level of photography we tend to move the light source away from the camera to add depth to the image. I know that there are probably some innovative lighting solutions that can be controlled with smartphones but of course I won't be venturing into that yet. Not now, not in the near future. For this reason, I've been using some external light sources (LED torches) when shooting, as in the case of Macro Feather and Eye On Coffee.
There are a number of stuff that I still didn't get a hang of them yet, like how long exposure works (there is a special mode for Light Painting) and a number of other options (and panoramas as well) but I'm sure they are not as "trendy" as a real DSLR or camera in general would be. There is also no remote control, so the timer is my only choice to take selfies if need raises. There is no "time fixing" to do long exposures, but probably there are other apps that are specialized in this process, and I do believe that most options are controlled via AI and simulations rather than real "light painting" or "long exposure" effects and looks.
Still though, I'm still trying to have fun and try as much as I can with this phone. Currently, I've been working on a pinhole made out of cardboard fixed on the lens. I didn't take any serious shot yet (otherwise I would have posted it here already), and still, I'm trying to watch videos and surfing Pinterest to get inspired, if possible!
All in all, I won''t be optimistic here at all of course. It is my first try to enter a contest based solely on phone photography (a.k.a. Phonography) and I'm trying to have fun as much as possible. There are of course those add-ons that can be added to the lens to extend its capabilities but I'll keep my approach simple and more into DIY. I would be wasting money on that ONLY if I'm taking it seriously, and that won't happen in the near future. Let's see what to shoot next now…


Thursday, October 18, 2018

Rimming…

Well, that was a break! A break from blogging that is, but a forced one unfortunately. I was preparing a post for my Arabic blog about "rim lighting" and things started to build up as my work demanded some work which required some dedicated time. I even worked on that during the weekend! Can you imagine? Doing a work-related work in a weekend? Pfft… Just to add to my misery, a car accident occurred which actually wasted my whole day (I had it as an off-day from work).

Meanwhile, because of that article I was preparing, or even before starting with it, I did prepare some images and probably would be working in the future about some more. But first things first!

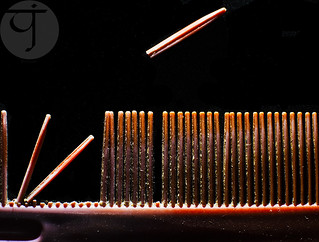
Split

It all started with a comb. Yes, a comb. And not just any comb. A comb which might be used with beards or baby hair (I guess?)... and it's broken into pieces. Probably, as an INFP myself, metaphors and symbols do play an integral part of my expressions; Visually and linguistically. Thus, when I saw this tiny comb, I think something inside had been moved…

One By One

580EX II Speedlite covered and
leaving a small slit on the top only.
Now to business: Lighting. I knew from the beginning that lighting this shot is going to be somewhat picky. It needs to be dramatic, as well as directed to the comb itself alone as much as possible. The situation was settled by using a black paper on the speedlite to block all the light except of a tiny strip. This tiny strip was also somewhat wide for the comb but it did the job after all, and an increase in f-number (to f/8 actually from f/2 I think) was required to give it that dramatic look. I had to, however, paint the background in black myself because the black surface I used had a texture and with lighting on its side it gives out quite a visible texture behind the comb. This little quickie shot, triggered more work later on in fact.
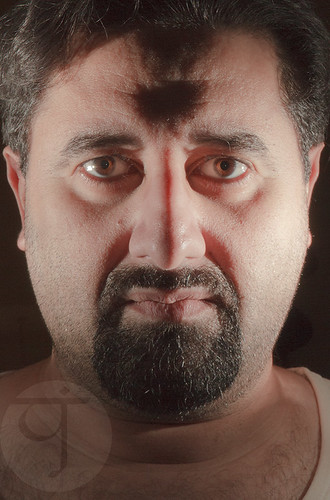
I could not resist the temptations for trying out this method (of covering the speedlite) with a selfie, and so I did. This time though, I've covered 2 speedlites with black papers and made a vertical slit in the middle (almost) about 1mm wide or so (tried to make it as thin as possible and yet passing some light). The results were... interesting!

Split


I didn't have the time to fix the speedlites on tripods or anything and then level them up and down. I just held them both in my hands and extended my arms to the sides at full length. The looks are somewhat similar to the hatchet lighting style but with more drastic shadows I guess. Quite a strange look to me as if the light beam stopped at some limit on my face though! But the strangest thing was the black "hole" in my forehead is if my forehead had a bulge! I guess I won't know if this is normal or not until I have to shoot faces of other people (with the camera of course), and see the results for myself.

Rimming

A cylinder opened on both sides.
This is what I used for the next
few experiments with the speedlites.
These experiments with "slitting" the light beam reminded me of an old method which I've read in some books but didn't get the chance to apply it much. That method is specifically dedicated to shooting engraved flat objects, like coins or medals. Having a plenty of cans around (from consuming those delicious chocolate biscuit sticks!), I decided to go on and experiment further to see for myself what can be done with those. Thus, I picked one (and I have an arsenal of them!) and removed its bottom, and stuffed it with black paper (don't have a black paint). In the beginning, I thought of lifting the cylinder a bit with some coins but they were too slippery and shaky, so I used small paper clippers (and they would help holding the paper inside the cylinder firmly as well).

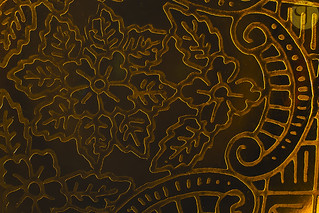
Golden Curves

The first trial was with a decorated golden tray. We use it here for serving coffee (my favorite Turkish style!). It was tricky somewhat for a number of reasons:
  • The tray was smooth and caused the metallic can to slide easily.
  • The tray was polished and that caused some reflection problems.
This is beside the common problem of lighting inside the cylinder when the camera is placed on top (and turning the inside of the cylinder into pitched dark), but that was a minor problem somehow because light was still seeping through and I could even use the AF function of the lens sometimes. For those situations where light is critically needed inside the cylinder with the camera on top, I would be using some LED light placed near the speedlites. However, the critical problem with those polished surfaces is the reflections of my hand and the camera's strip (the camera's body is black so that was not a big deal). The best I could do about these reflections is to try to let them be on the edges of the frame as much as possible and then crop them later. Usually in such situations, specifically when shooting glass (like those in museums), we would place the camera and lens into somewhat large black paper or foam board (just big enough to cover the actual frame to be photographed) and in that way the black color is reflected off the glass or in other words: clearing the glass. This is beside using polarizers too sometimes. However, all of these techniques are for the "macro" world and not for the macro shooting we are doing here with a lens going inside a cylinder! Anyway, to keep things a bit interesting, I've created a "texture" made out of the repetition of Golden Curves, and it's now available exclusively on Dreamstime.

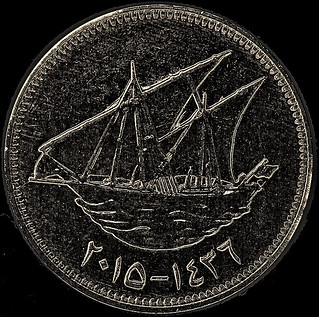
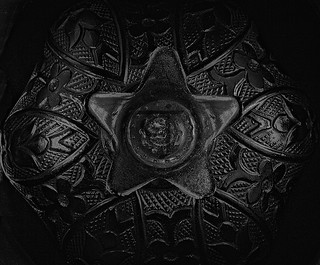
Glowing 20.

There is one thing for sure in such shots and that is cleaning is a must. By cleaning I mean working on Photoshop to clean the image. Here in Glowing 20, I didn't work on cleaning the image (except of replacing the background with black), and adding some sharpening to that and the surface of the coin got bloomed with these small dots like digital noise! Now, the challenge still did not begin, yet.

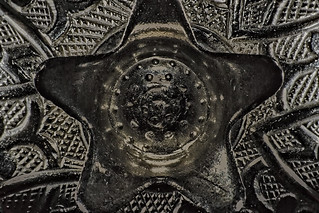
Delicati

Shooting objects which are not flat proved to be difficult with such a cylinder. Mainly, of course, because the light is projected from below and we do need details of the top part. Thus, the light should strike at about the middle of the object or on its top (from the side to give a rimming effect). In Delicati above, I got desperate and I was back again to the black paper slits covering the speedlite head. For this reason, I've decided to "make" another cylinder with various slits on the sides, and holes as well. It's too early to talk about the results from these 2 as I didn't experiment with them much (and I would delay this blog post if I want to include the results here!), so I might keep this for another post. However, I did try a cylinder with slits with the same object in Delicati.

Argentum

Cylinder with slits, the one I used
to shoot Argentum. Covered
some slits with black pieces of
paper with the help a rubber band
so the light from speedlites would
pass through certain slits only.
The looks of Argentum look pretty impressive, more than Delicati. Well, to my eyes at least. But the mystical look as I believe is greatly emphasized in Argentum rather than in Delicati. But one problem here remains: Flares. By flares here I mean the harsh highlights reflecting off the metallic surface. Probably to solve such issue I would have to place some kind of a modifier to soften the light as it enters through the slits of the cylinder but this is another issue I need to test with in the near future to see how it would work out; Though I have my own suspicions about the usefulness of this. In Argentum I've worked around such strong flares on the metallic body in Photoshop doing some magic with the "Blending" options for the layers. Just to note, Argentum is also available on the stock, in 123RF
After working on Argentum, I did continue to do some work and little projects with this method of lighting and some of them are on the stock already indeed, but let's keep that for another post maybe.

On The Side

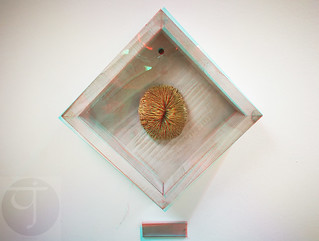
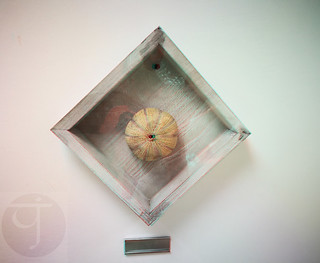
Beside all of this fuss going on with my speedlites, I couldn't hold myself further from capturing and making some new 3D anaglyphs. The target this time was some fossils in the Geology department in my workplace. The department was renovated and the display cases had been changed or re-organized and I have to say some of those was really, really, appetite-instigating for some 3D work. 

Fossil I

Fossil II

Even though I've noticed those a month or two ago, but I couldn't work out with them except in recent weeks, and I had to do it using my Huawei Mate 9 smartphone, and there is a word I'd like to say but let's end this 3D talk first. It would have been better if I could have shot those using my DSLR camera but the situation is not on my side here specially that I go to that department in the final minutes before leaving my workplace (to do the fingerprint scanning for leaving). Moreover, I would have probably used a polarizer or some black board to hide the glass flare but with a mobile phone camera there was not much I could do. Thus, though the illusion is good enough for pop up (at least to my eyes), but the flare and reflections from the glass case makes it a bit annoying.

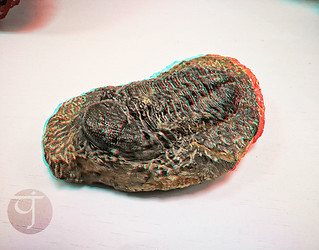
Trilobite?

The case with the trilobite (if my memory serves me right here about the name) was a bit better but the probably the shit was too much between shots that it took me some time further to ensure that this illusion goes without ghosting effect. It is with this image that it was prevalent that higher pixel resolution does not mean necessarily a good image quality. The resolution for my Huawei Mate 9 is 20MP, while it's 18MP for my old Canon EOS 7D. Naturally, the file size for shots taken with a 20MP camera is larger than those taken with 18MP camera. However, the resolution when zoomed in at 100% proved to me that there is a critical factor related to the sensor and its size and not just its resolution which decides how clear the image can be. At close up, the shot for this trilobite was a bit muddy-like and not quite sharp. One might say it's motion blur or a focusing problem, but all that is (with time) can be quite easily distinguished when seen on the image. And that murky-looking details is absolutely a resolution issue and not anything else. Anyway, I'm limited with my options here and at the end, I do have to work with the mobile phone (I even look weird shooting several shots for these fossils with students roaming the place!). I still have some specimens in my mind and I might try to shoot them for 3D work in the coming few days!

Finale

Now, I was going, hopelessly, to write down a new poem but unfortunately, because of this busy schedule and pressed time and exhausted body, it was really hard to focus on the words and feelings I need to write, even though I do have a general concept in my mind about what I want to express. All I can hope for for now is that I would be able to do something about it in 2 weeks from this post!
The weather is getting down with its temperatures. Such a good tiding and announcement for the coming of winter. This summer really exhausted me as it is already. I can't believe how I'm coping with this for 3 years now without traveling. 
After quitting Instagram, I'm trying to focus my attention onto Twitter, as I'm using it as a platform to "advertise" for my stock images on somewhat a daily basis. Not sure how effective this is but this is the least I can do to publish my work. I am also publishing some weird panoramas (mostly planets) that I didn't think of uploading to the stocks before, but with a catch: Each stock website would be responsible (or exclusively offering) a specific type of images; From Malta, Ireland or even those tiny projects I do at home. Beside Twitter, I'm also publishing my work on Pinterest, even though it kind of feels weird and I'm not sure how it really works! This said, I'm also trying to cancel out my accounts in some stock websites as I deem them not useful at all. Who knows though, I might consider finding new venues as well.
Meanwhile, my time is passing in such a strange way as my life goes on. It is slow, yet so fast in the same time. Memories from the old days are frequently passing my mind and evoke emotions that I've been trying hard to hide in every single damn day that passes. I'm not ashamed to say even that some times I had to cry alone, but well, who cares after all. It's me, and it's my time and no one else's. The question remains though, how much time is left for me to live what I want to live, or maybe I'm not destined to live what I wanted to live…