Showing posts with label vertical panorama. Show all posts

Thursday, July 21, 2011

Casper...

A sort of an idle week. Been trying to figure out some ways to use my camera here and there and totally forgetting about my Ayvarith projects COMPLETELY. There were attacks of fatigue, maybe because of my long gone fasting, I'm not sure really. However, it didn't go out completely idle as I was able to reach my camera somewhat, but most of the time I was working on old pictures from Ireland, dating back to 2009! Simply, I just felt like paying a visit to these pictures and having some rest myself, and tried my best to touch the RAW files only, without creating HDR.

Done an experiment just to test how it is to do some long exposure. If I remember correctly, the longest exposure I've done before was for 5 minutes on the roof on my house, when I was testing my new (back then) lens, Tamron 70-300mm Macro lens. I was pointing at Saturn if I remember correctly and made a little trail.

Trail of Saturn. Two trails imposed on each other.

This time the experiment was a bit different, and with me reading the new book I got about Night Photography (a great book, makes me want to try my luck with film cameras instead of digital ones), I'm getting inspired as I read, but unfortunately lot of my dreams need some nice landscapes and some nice people to be surrounded with. I went into trouble with cops before and I'm really not intending to have more at the current time.
My little experiment was to use a longer exposure time, but not outside. Simply in my room. I got the idea as I was reading the book (as usual, in my bed time to help me fall asleep more easily). The process to measure for the required time was somehow long, and I had to use a ND filter in an awkward position, because I was using a Fisheye lens, and in Fisheye lenses you need to a Gel filter to be placed at the back of the lens and not in the front of the lens, but I did it anyway and I stuck it with a duct tape even though it fell down later on because of the bad quality of the tape! That didn't affect the result much. It is an experiment after all and the results were not to be published in stock sites.

Night Photography: Finding your way in the dark
Night Photography by Lance Keimig
 

In the beginning I've fixed the camera in one corner and turned off the TV just keeping my PC monitor on (need it). I mounted my Fisheye 15mm lens to get a bigger portion of the room and went on configuring the setting that I would need. In fact I was aiming to expose for one hour but with all the mess in the mathematics the maximum I could achieve was 44 minutes, theoretically. I wanted one hour to give chance for more blur as I would lay in bed later on and, as usual, I would flip all over the place.
I've fixed the mode to Av (Aperture priority) and pushed the ISO to the maximum value "H", which counts for 12800. This is just to take the reading for the time needed at this level at 0EV. The time reading was about 20 seconds, taken while setting the metering to Center-Weight. I used this metering because, logically, I want the whole area to be measured and averaged and not only one spot of the scene. However, with some calculations and keeping in mind that going up and down in ISO in stops, will increase or decrease the time in doubles or halves accordingly (a stop = 2x), all what was to be done is multiplication (20 seconds X 128, or 27, that is 7 stops) and the result was around 2560 seconds (i.e. 43 minutes approximately). The ND2 (one stop) was stuck to the front of the lens hoping to increase the time of exposure and keeping the exposure as it is but seems I've done some wrong calculations here and there was no need for it. With my intervalometer remote control then I've fixed the exposure time to 44 minutes, and changed the mode to Bulb of course for such long exposures (and had to change the battery to be on the safe side).


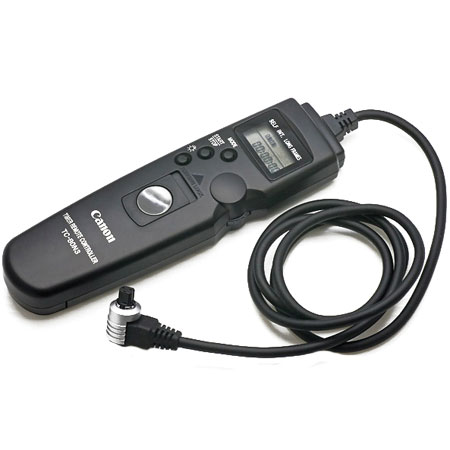
TC-80N3 intervalometer (remote control)
Image Source

Snapshot from ACR (Adobe Camera RAW editor) with the time of exposure circled.

The histogram above is not a good histogram under the light of what I've read recently in Keimig's book. It is better, as mentioned, to have a histogram pushed toward the highlights (to the right that is) as much as possible (and clipping would occur most of the time) and it's just a rule of thumb, as this would grant a good exposure for the shadows. The histogram above was adjusted to avoid clipping from both sides. Few minutes after fixing everything and after opening the shutter (with a timer to give me time to go to bed first!), I've heard a sound of something falling down, and no wonder, it was the ND filter. I knew it would fall down with this bad quality of tapes! I didn't try to fix it but rather left it like that to see the results later on and the fact is, it didn't change much of the exposure.

Sleeping Ghost
general view

Sleeping Ghost (cut)
zooming into the blur movement


In fact during the exposure I did indeed get up to do something with my PC and get back to bed but such movement was not recorded in this long exposure because I would need to stay more into one position and then move to record my image on the sensor. My movement to the PC and back to bed was fast so it was not registered on the sensor, but instead all what there is to see was my flipping in my place. A nice experiment that makes me somehow confident about my approach to this matter. Hope I can target the sky soon.

Another trial took place, with my little gift to my niece for her birthday. Well, I have to say it is a cheap one but I guess she wouldn't mind :). The take was to take a picture of it with a candle light, simply because I was sick of using that softbox I've made myself. It's clumsy and bigger than it's supposed to be I think. The shoot was done with Tamron 70-300mm Macro lens, as I wanted to get a closer look on the stones.


Juveler (jewels)

Juveler means "jewels" in Swedish. Why I chose Swedish? I don't know. Probably because I have now many Swedish online friends via MostPhotos, anyway the sound of the word was appealing to me. Yu-ve-ler. Has a sense of Turkish if you ask me (plural article in Turkish is -lar or -ler)!.
Despite its simplicity, the white balance here was hard to pick up and I had to adjust it by the RAW editor. Anyway, I preferred the hot tones to reflect the goldish hue (gold is attached to money and jewels and richness in general) even though the bluish hue when using Tungsten WB was appealing as well. Many ideas were crossing my mind just to shoot this simple bracelet, like long exposure (but there was no need for it really) and focus stacking. Focus stacking was probably more reasonable to do, because in such macro lenses the shallow depth is common and it depends on what kind of effect you like to achieve. If you want to increase the depth of field, then, focus stacking is the solution (and more work awaits) to include the whole subject into the depth. After looking at this result here, I think I can say I'm satisfied. The blurring effect at the back is nice enough. One thing I'm not satisfied about is, the luster of the stones. I wanted them to sparkle but I think I should have changed the angle of the light or the camera. I need to read more on this topic specifically.
Still working on some vertical panoramas and trying to understand more about the looks and trying to make a decision what would look good or bad about them. I can say that I've discovered that not all locations might be suitable for this. Naturally! Not all structures are suitable for such panoramas (or for other types of techniques as well). This is nature I believe. There are often times though when flipping (rotating) the point of view (the roll) would be better, but you might sacrifice some aspects. This is exactly what happened to me.


Alice in Thornbrook
Considered, by me, one of the worst panoramas I've ever made. This panorama can't be stitched directly in HDR, but I had to go around and tone-map, then stitch. However, what I like is the light lamp in the ceiling which gives an illusion of a tilt while the ground is straight still, and the window on the right which gives a depth to the inside. The image is for the dining (or breakfast) room in Thornbrook House (B&B) where I stayed for 14 days. Miss those days.
Another panorama, which was a bad too, and even worse than this one because of the shake and shifts of the tripod and the VR-head rotating my camera. This panorama even got severe stitching errors even after stitching the tone-mapped version instead of the HDR version.


In Terra Horologiis (in land of clocks)

I like the tones, and the window on the left, which like the previous vertical panorama gives some depth into the inside, but the bad part is that it has so much distortion in the chairs and clocks, and other furniture pieces. Unlike the previous one, which was a simple room, the lounge was filled with objects making distortion in such locations appear so severe. Conclusion: Always check the location and see if you can re-arrange objects in case you would think of doing such vertical panoramas. Also, don't forget the roll part, which can be a good trade between good features (like a window in perspective for example) and the good looks (not much distortion in vital parts).

It's Thursday, finally. I'm praying for some rest now after a week of unexplained fatigue. Words are stuck in my mind and can't put them on paper or on monitor. A sense of panic and fear occupies me from time to time but I don't know why, and my daydreams are having a great toll on my mind with negative thoughts. I'm going to hit this Post button and try to forget the world while reading a book... by the way, did you know that I hate Internet Explorer? Yeah...

Serial Photography: Using Themed Images to Improve Your Photographic Skills


Thursday, July 14, 2011

New Heights...

What a mix of a week. Slow and fast, but nevertheless, I'm happy it's over already. To me at least since it's the last day here and the beginning of a weekend by tomorrow. Started out the week with a drama when the AC stopped working suddenly and the weather was humid, at a time I was already planning to do some experimenting with my camera on the roof. Anyway, after fixing the AC and after having a shower in sweat (then a shower with real water), everything got back to normal. Literally speaking, on Monday, July 11th, I did NOT sleep at all, and even went to work the very early morning without sleeping prior to that (I was awake since 7 p.m. the Sunday before). Could not sleep until the next day, Tuesday, at around 2 a.m..
I got some story here to tell, but before I go on talking about it I got to announce that I got a new tripod now (headless) and I think I've should have had this long time ago. It fits my VR-head perfectly giving more stability and on the other hand I can fit a previously-purchased tripod head (or panning head) separately. This pan head has one handle to rotate around making it easier (and faster) to handle rather than using two controls for panning sideways and vertically. I couldn't find this brand on the net or on B&H, but it's called Fancier, followed by some model number.
Just as a little review, the tripod is extremely useful for my work specially when it comes to panoramas, and it extends to some lengths longer than my previous tripods (only matched maybe by my monopod). The camera can fixed on the central column of the tripod either way (up and down). The weight is not an issue, but I have to say it is a bit heavier than my previous aluminum tripod. The legs can be stretched out to low levels as well (giving me some ideas now).
Now to the bad points: It doesn't have a handle to carry around. To carry it around I'd have to put it in its case. It does not have a lock around the central column to hold the 3 legs firmly, making sliding legs a possibility.
I've measured the full length of the tripod extended, with central column completely stretched, and having my VR-head above that, it gives out a length of around 204cm (~ 6.69 ft), and that inspired me for a little thing to do, as I will explain later. Now let's start the little story...

1. Chapter One: Idiocy:

Yes; Idiocy. I admit (but maybe you need to look in the mirror in case you are laughing now, ahem). Early this week, I was going on and on trying to figure out a way to extract a vertical panorama out of a full panorama, which I did successfully, with delicate calculations and procedures. To explain this, I might need to draw a little diagram.

Panorama Plan

Instead of using the slide numbers that I usually get after converting to HDR images for the panorama stitching, I'm using simply numbers for angles. The outer circle is for the horizon or 0 degrees tilt, and the inner circle is for 45 degrees upward tilt. There is no need to use a downward 45 degrees tilt when we talk about vertical panoramas, but maybe in certain occasions it might add some depth by putting more of the background. The middle point "Z" here means the Zenith of the panorama. I will be using the notion "^" for angles on the inner circle.
Now, an example to work with. The first target to work with was the Ardeaglais, as I explained in the previous post last week. This vertical panorama followed with the same plan, but as a comparison I will put it here again...

Suas agus Síos (up and down)

To make out this panorama, I've started with frontal angles first [12,1,2] and start from there going upward [12^,1^,2^]. At the zenith, I realized one slide from the zenith won't be enough, so I must take others on the side, i.e. [10^,4^]. Now, the hard part, which had to be done outside in Photoshop then plugging in the results into PTGui. The coming part includes the slides at angles [8,7,6] at 0 and 45 tilts (notice that I keep the order from left to right). I had to rotate these slides upside down to mimic the view of upside down (duh!) because simply, I couldn't change the rotation of these slides within PTGui without affecting the whole stitching process. The stitch was successful, to some degree, and the image was there online.
Later on, I thought that this is not enough. The vertical panorama was too thin to my eyes. So I decided to include more width, and that is by taking angles 11 and 3, and also 9 and 5. This inclusion meant I had to include more from angles 10 and 4, and other work related to flip the images of the lower side and... wait a minute! huh! How come I didn't see this coming...

The Hanging Dominican
more width added.

2. Chapter Two: Spark of Light:

In case you wonder why I named the last chapter "Idiocy" and didn't know why yet, well, here it is! After working with the above panorama, The Hanging Dominican,  I realized that I'm practically... using the full set of the panorama! Should I flip some and keep some? Is it really easier than I thought? It's really amazing how we lose our conscious when we concentrate about details of procedures and forget about the whole picture or concept! The whole procedure of flipping images before stitch, picking the proper slides, and all the fuss in the memory because of that - all of that could have been avoided by a simple touch. Changing the pitch parameter for the spherical panorama and point it upward to the roof! As simple as that! The width of the panorama can be controlled then later on by cropping in Photoshop after all.

Monkish Design
full spherical panorama with changing pitch orientation

3. Chapter Three: Complicated Simplicity:

Now, this is something related to panoramas but it's not related to the previous points before. I explained above some aspects of my new tripod and I had plans to try it out on the roof. I thought such good height that this tripod can provide for me would be a good start to see how it works with a simple panorama from above. I had to climb on the highest point on the house and from there spread out my tools. My aim was a simple panorama; a 360, i.e. one horizontal line.

Homeland Summer
Despite its simplicity, the stitching took me hours to fix, and I'm still not satisfied with the results. Technically, the process of taking the panorama took me less than 5 minutes, literally. To take this panorama, I used a method that I've read about before but never used it, which uses metering for highlights and shadows of the scene with a fixed aperture (f-number) and then take the shutter speeds that you get from metering, and work in Manual mode, fixing the shutter speed to something in between the two shutter speeds (of the highlights and of the shadows). This way would make a coherent exposure across the whole set, but it didn't work quite well probably because I'm in the open sun (and I don't want to talk about the heat).
For some reasons unknown to me, there was always break in lines even in this simple panorama, and optimization would fix this but with some weird stretching lines (caused by distorting some images to fit some areas down there). The biggest problem was one of the slides didn't have control points to stitch with others, and fixing my own control point did make the situation worse. I tried to optimize the exposure in hope that would fix the control points problem (exposure might be a factor for not recognizing some points or pixels on adjacent images, sometimes), but that didn't work out. There was some crop in some of the slides, but it was not much of a big deal (one to three pixels I believe) so this reason was rolled out.
Finally and just to get the process going on, I gave up stitching in HDR. I simply tone-mapped the whole set, and stitched from there. The set was stitched nicely without any loss in control points! Since I'm satisfied with the colors already, I thought it's not needed to save the control points and stitch back in HDR to tone-map again. No need for this. There were some broken lines and optimization saved the work, but with some stretching in the lower portion (can be apparent even after cropping it in the image above). Left now with problems of noise and grain pixels which were hard to remove without losing some details. I still don't understand why such problems occurred in such a simple panorama as this one...

My books arrived now and I can "waste" some of my time reading. Three books they are:

Night Photography: Finding your way in the dark 

Capture: Digital Photography Essentials (English and English Edition) 

Serial Photography: Using Themed Images to Improve Your Photographic Skills
Of the three, the Night Photography book is the one that captures my interest the most. Did I mention that I have an artificial language to look after?...