Caution! A long and a boring post ahead! Read (or try to read) at your own risk!
OK. Been off away from the blog for a week but that doesn't mean I was not working on it behind the curtains. There had been so much work to be done and, accordingly, so many troubles to overcome. I've (almost) dedicated one full week for my photographic experimentation, and I think I've came up with some results after all. I should thank Alexa Phillips for filling in!
Anyway, this is going to be some long post I suppose, so I'm typing this as early as possible; in other words, I'm still working with the same schedule but probably with more material at hand! Let's go!
I. Viva Al Beach - Again
Still coping with the heat and combing the beach for long exposures. It is an endless struggle as it seems, but this time I got my weapons out. I've brought some cooling pads to wrap the camera with and work on reducing the noise caused by the heat to the sensor. There was a major disappointment though to find out that the cool gel pads, even though were coming out of the freezer, they didn't keep their coolness long - 30 minutes of working on the camera and 5 minutes reaching the location in the first place - all of that was enough to leave the pads slightly cold instead of freezing cold. However, to some extent, there was some noticeable reduction, specially that the weather that night was cooler (that doesn't mean it's not hot!).
 |
| Cosmos Rokinon 8mm f/11 8min ISO 100. Corrected with DxO |
In that awkward position, and because the cooling pads were sort of hard to settle on the camera tightly (some breeze there was and I was afraid they'd fall down), it was (again) not a good time to use my portable monitor. The situation could have been more critical if I was to use my 18-55mm lens (used it later), which somehow has a shaky focusing ring and it could move easily. I've picked the time specifically for a regressing water tide instead of transgressing one; not only to keep it safe, but also to show more rocks in the foreground.
In the processing phase, regular distortion fixation took place (and I somehow started to like this elongated format as well; I wonder if it has a name). Later on though, I was reluctant whether should I crop the lower portion to keep the horizon line perfectly in the middle or not, but I've decided to leave it like that since some rocks at the bottom would be cut in not-so-nice way. The noise now were less, but that doesn't mean they are much lesser, but on the bright side, it means something is working here (but maybe also because the exposure time was not as long as 33 minutes like before!). We'll come to that later.
 |
| Traum Canon Ef-S 18-55mm @34mm f/11 21min. ISO 100 |
Now, one thing I've totally forgot here and that was the time I've came in into the beach area. The sunrise was getting closer and I just didn't count for that in my long exposure planning. Initially, and according to my calculations, after framing and zooming properly for Traum, the exposure should take as much as 43 minutes! However, as I started the exposure and settled down by the beach reading a book under the flashlight light, I've recognized that the atmosphere is becoming brighter and I could almost see my way around with no need for a flashlight. Seeing that, I've ran to my camera and stopped the exposure directly at 21 minutes, and it was excessively bright already.
Back home, the processing became a bit funny because of using the Fluorescent WB. After trying to reduce the loss in the highlights (which was not completely successful as you can see), and after using some shadow enhancements like Fill Light, I've arrived at something that looks more like a radioactive material. The green line in the horizon provided some connection to the rest of the image as if making a note that "there is something in here!". With such surreal effect, I've found myself calling it Traum, a dream.
 |
| Lunatic Sea Canon EF-S 18-55mm @18mm f/22 ISO 100. HDR |
Working with Fluorescent WB is fun indeed. It adds magic. I think I will call it the Magical Blue WB. Unlike Cosmos I didn't want to add a heavy blue tint to the whole scene but a light one to emphasize the blue sky. After taking several shots and deciding to leave, I've noticed the clouds in the horizon; something I do rarely notice in summer here. Nope, not the time to leave yet.
It gives me melancholy though to know and remember that back then I didn't take my ND filters with me. I wanted to be as light as possible. With the light becoming abundant, NDs are required for long exposures, even those for 1 or 2 minutes! Anyway, I've just settled down and decided to bracket-shoot, and I thought let's see what the HDR hides for us then.
The irony here is that, instead of making dramatic light with the HDR capabilities, I've decided to smooth out the light giving in for a soft and smooth feeling. The color is adjusted while tone-mapping too by changing the Temperature slide in Photomatix. My strolling on the beach is not over, yet.
 |
| Hinter der Schatten Rokinon 8mm f/11 15min. ISO 100. |
I was exhausted that night, thus I didn't stroll deep into the beach; you need a will power to cross the soft sands! However, I've found me a spot in front of the Pizza Hut, which is not ideal because of the strong backlight, which explains my long shadows in Hinter der Schatten, Behind The Shadows. Another reason was that the timing of the tide, which was advancing, and I was not in mood to get wet here; it is better to play it safe here, until I get more will power (and time) to work as I want.
In the beginning, I didn't find myself working easily here, mainly because there were some people having a picnic or simply fishing (yes, fishing), but I tried to shut my mind's window and act like if they were not there. One of the points of being far off on the sand on the beach is that you get that calm and peaceful solitude.
Some shots with ISO 12,800 (called ISO H on the 7D) to fix the framing as best as I could, knowing that my shadow along with the tripod's will do a cast in the final image, but heck, what I'm supposed to do? Pointing away you might say, but unfortunately, the city lights were around me and in portrait position this is the narrowest band of the sky and the sea I could have without lights in the background. On the right there was this family doing a picnic, and I'm sure they would get annoyed (in fact they left few minutes after my arrival).
However, beside the test shots in ISO H, I had to check the histogram carefully and not depend on the LCD for judging the brightness. I was metering the sky; one good thing about working with live-view, is the easiness to meter any zone in the view by moving a simple square across the scene and check the meter. I've realized that a good histogram (somehow) was not at 0EV, but at +3EV. From there, all the calculations began. Initially, the aperture was at f/8, but I've added one more stop and made it f/11 just to lengthen the time. Finally, it all yielded around 15 minutes.
 |
| 100% crop of the original RAW, at initial settings. Click to enlarge. |
I'm happy with the result after all. I didn't dream of such low noise profile after all! But I better get concrete results in order to work efficiently, and with confidence as well.
The majority of the editing was done in DxO optics of course. I think I'm establishing a style already with these elongated images. They give more depth and a nice surreal effect. I've been filtering the noise in DxO and then in ACR, and sharpening even more with Noise Ninja; I was trying to pronounce the faint lines more. I picked this image for a contest within my group, and I did minimize it and sharpen it with NIK, and man, even the static stars got pronounced making a majestic look - but not to be posted here for now! It is a promising trial, and man I just can't wait for the winter to come!
II. Strobo-tique
 |
| Source: Amazon |
Working out with two Speedlite units proved to be not an easy task after all. Good thing that you just have to set one to master and the other to slave, and everything to be controlled from the LCD - specially if you are working in E-TTL. My first trial didn't work out, as I was literally trying to write down on the paper while the strobe is working on for a 20 second exposure in a completely dark room. You can see that it wasn't the great atmosphere to work. I gave up the first night. Then I thought, why the fuss?
 |
| Love Drunkards Canon EF 100mm macro f/22 ISO 200 |
I thought then, if the whole thing is to record my hand movement, why should I write?! (Duh!). Thus, the next night, I've prepared the set again in my room with the phrase written and ready on paper, and within 10 seconds exposure, all I had to do is move my hands all over the phrase. As Syl put it "imagine you are doing a time-lapse photography in a single frame," this is all what the stroboscopic is about. In order to break the dullness of the white paper, I've set the WB to Flash, and gelled the two Speedlites with 1/2-CTO on the master, and 1/4-CTO on the slave. Some adjustments to the WB later was done when RAW file was edited. Probably one Speedlite was enough to add some drama lighting to the scene from one direction, but I thought it is better to lighten the shadows a bit with some light on the opposite end.
Just a final note about the phrase, it is a line from an old song (from 40s or 50s) sung by Um Kalthoom, a famous Egyptian singer. It translates as: Did the Love see drunkards, like us?
III. Save Me A Disaster!
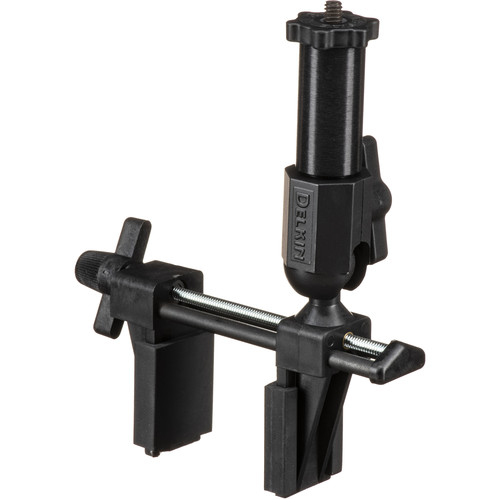 |
| Source: B&H |
If there is a definition for the word disaster, then it would be such a device. The best of it was the clutching hands where it did stick to my window glass firmly without breaking it (because of the rubber covering), and also the coldshoe that comes with it to attach a flash unit; I can use this shoe on various stands (with 1/4" thread). The knob controlling the ball head was hard to move and literally I was moving it with pliers just to ease it down or locking it up. I've decided to leave it locked and move the ballhead by force if possible just to adjust the camera orientation. Everything in the head was sort of loose!
I was trying to do this experiment in daytime in my work place, where I would attach my camera over the vice to the rear window and point it at the side mirror, and with an exposure of seconds I would move my car slowly. First day, after spending about an hour in the sun, I realized that to capture the side mirror I have to attach the camera on the opposite side of that side mirror (i.e. to take a picture of the right side mirror, I have to attach the camera on the left rear window), otherwise I would only see the body of the car at all times (however I move the side mirror). To achieve a longer exposure, I made use of the welding glass piece which provides me easily with 11.7 stops, and this time using big paper claps; easier and less shaky for the focus.
 |
| My camera after the disaster. Ironically taken with my phone camera. Click to enlarge |
As you can see in the picture on the right, when this experiment didn't work out, I've decided to take everything off. In the office when I started to remove everything, the screw from the ballhead got stuck in the camera, and no pliers would take it off. I even got some of the iron filings planted in my hand. After trying for more than one hour, I've finally took off to the nearest garage and used a vice to press hard on the screw while rotating my camera body and take it off easily. After coming back to the office, I've screwed the bolt to the ballhead back again tightly in hope it won't take off again!
 |
| Reflected Move Canon EF 100mm macro f/2.8 20sec., ISO 200. |
 |
| Didn't bring my old 350D, so I had to shoot using my phone. Click to enlarge |
Unfortunately, the text on the mirror and the frame of the mirror did shake little bit. In theory, since the engine shakes the car's body, and the camera is attached to the body, then the side mirror and the camera would shake at the same rate making the image relatively stable, and this was proved by testing shots prior to the final shot. Anyway, as I took the 20 seconds exposure and moving my car in a circle slowly, seems that the car's body shake as a whole (as it was moving on sand and not paved road) caused this little shake after all. Some sharpening took place to compensate a bit for this shake.
 |
| Stadt von Licht Rokinon 8mm f/8 + teleconverter HDR |
Stadt von Licht, or City of Lights, was taken in a haste and I wasn't really careful for the composition. I made some few shots that showed my shadows with Rokinon 8mm fisheye lens, then it occurred to me: why not trying HDR but with a relatively longer exposure instead of automatic bracketing?
I've connected my teleconverter to the Rokinon 8mm, which means technically, the focal length right now is 16mm. I could've used Canon's 15mm here, but I didn't want to touch this for now since my mind was set to manual all the way. After doing some metering to the sky and the ground, I've taken 3 shots with the intervalometer at 13, 25 and 100 seconds. Apparently, each had a different luminance.
Merging the HDR and tone-mapping was done as usual; no magic. But the magic appeared later when I started to correct the image in DxO Optics. Away from the distortion corrections, I've re-discovered that color options in the software and my eye,directly, spotted the Fuji Velvia. Now, I didn't work with films ever and I didn't develop any at all, but from the books I've read, Velvia is known to be the choice for saturated colors. And this is exactly what I did get! The composition and the distortion fix is not something I do like, but I'm happy for the result here for two things: a) I did HDR using longer exposures; an experience I might need for later, and b) expanding my color horizons in DxO which will give me more options to render the colors.
IV. Get Me Outta Here!
Again, another one of those crazy moments just sparked as I was going in and out from my work place and been noticing something that I was completely blind to. The parking lot (or parking garage). After taking a note of it, I've planned my shoot carefully so that I won't be distracted by the security guys. Thank God that it is Ramadhan and people are mostly dizzy and got no mood to hassle with some photographer at 6:30 a.m.! Well, one of the benefits of fasting before Ramadhan for a month or more, everything looks so easy during Ramadhan itself!
 |
| Exit at Infinity Canon EF 100mm Macro f/32 8 sec. ISO 100. |
I took several stands raising my tripod to about 2 meters off the ground (~6 ft) and getting it low, and using my 100mm and my Rokinon 8mm fisheye lenses. I was shooting with brackets for HDR merging later on, but in my mind I've already decided to convert it to B&W. This is mainly due to the composition, as the colors were not so important, nor they were pretty anyway (unless for a horror movie).
 |
| Infinitarium Rokinon 8mm fisheye f/22 4 sec. ISO 100 Corrected with DxO |
Infinitarium, for example, was skewed after correcting many aspects of the image itself. The skew was to force the horizontal lines into place after correcting the horizon, and forcing the vertical lines to be parallel. It was hard to do the perspective correction, however, for Exit at Infinity but merely a tilt to fix some lines. Also, I ended up editing singular shots instead of doing HDRs. After doing on HDR slide, I've realized that there is no need for it and doing B&W from a single chosen shot is faster, and the HDR won't add much in fact. Some dodge and burn were required too.
 |
| Gerade |
In the colored version there were many adjustment layers for fixing the colors, and strangely for some reason there was a green cast, so I just tried to reduce that if not eliminate it. Here also, I tried to frame the image properly, so I cropped (with respect to aspect ratio) stopping at the end of the black pipe on the right, and the red post on the left. I think framing was lousy a bit in the previous B&W versions.
I'm trying few of the tricks that I've encountered so far in George Barr's book that I'm reading currently (more about that below). One of his tricks was to reduce the noise (specially in the shadow areas after dodging) by doing a gentle Gaussian Blur. I did that trick as well to the colored version to around 1.2, and then followed with Noise Ninja filter, using the sharpening and the contrast sliders there to pronounce the edges. Not bad I would say. Print-wise though, I don't know how it would look!
 |
| Park Here! |
A friend of mine as well suggested that I do a color splash; converting everything to B&W and keeping the blue only. I thought it is a good idea so here you go. I've just saved the file directly (from JPEG) without any dodging or burning. I like the light quality on the right and wish if the light would expand further to the left.
Notice how the lines in the middle on the signs, that separates EXIT and P do not coincide exactly; and that what pisses me off!
V. Dark Hours
Same day I did the garage shots, I've decided to break the silence in the office with some work using my Speedlites. The target was my watch. It is not a new idea anyway; I've done it before, but in this instance, I was trying to put on some Speedlite touch just as a training.
 |
| Dark Hours Canon EF 100mm Macro f/2.8 1/160 sec. Series |
After about one hour of trying different positions for the Speedlites and controlling the ambient light by increasing the shutter speed, I've realized that all what I need is only one Speedlite, and a reflective white surface (a piece of opaque white (glossy) paper; a calendar). I did produce some interesting patterns though with two Speedlites but I couldn't control the zones of lighting precisely. Finally, I've settled down with placing 580EX II behind the watch and connected via cord and bouncing the light off a white piece of paper placed in front of the watch.
It was a job for the Intervalometer again, as I configured it to take a shot every 5 minutes and 10 seconds. Around 15 shots were taken but in the final composition I had to give up some shots in the layers stack just to avoid congestion in the image. The layers were blended with Darken. Of course, after flattening the final image, some adjustments were done for the contrast and the glow, and also cleaning some spots. Should have cleaned my watch prior to this shoot! If you are wondering about the format - yes, the image was cropped from the sides and made into semi-square shape.
VI. Bingo, The Flamingo!
Out of boredom, and just two hours before the fast breaking, I've carried my camera and headed to The Free Zone. The Free Zone is a commercial zone, with a port, and usually so busy in regular days, and it is situated on, seemingly, an artificial island named Akkaz (عكاظ). It is a famous sports for flamingos. They say flamingos were immigrating birds and used to pass Kuwait on seasons, but now they are a permanent component in certain coastal lines here. I had no specific goal in my mind, just the idea that it will be the sunset soon, and the light quality is should be good for shooting, but I had no idea what to shoot in the first place!
 |
| Fly, Forrest! Fly! 1200mm f/13 1/500 sec, ISO 400. |
I did take a lot of shoots (in hundreds) but I'm going to post 4 main images here as they are the ones that attracted me. I would still need to work more on the other at some time. The bulk of the images were not good in fact, and a lot were out of focus (specially for the flamingos) but it was, after all, a good trial for my teleconverters at work.
In the beginning I headed where I used to spot flamingos long time ago, behind the Mövenpick hotel in some narrow water intrusion into the land. I didn't find any flamingos, but some pigeons. It was a good practice anyway using my Tamron 70-300mm + Bower Teleconverter + Vivitar Teleconverter. I've discovered prior to this shoot on same day that Bower teleconverter records the focal length data in the EXIT but Vivitar does not - Vivitar's mainly handles the communication between the lens and the camera but does not record much information in the EXIF (that's why I thought that Vivitar teleconverter doesn't shift the f/2.8 for the Canon 100mm Macro. It does, but it doesn't record or communicate that).
It is indeed a hard task to stabilize the camera in that way; not a professional tele-lens and no screws at the bottom to make it stand on a monopod, and to make things even worse, the autofocus is stopped (but this is something I do know already). I had to work all the way by hands and focusing manually too.
 |
| One To The Last 280mm f/11 1/100 sec., ISO400. |
We come to the flamingos now, after moving away from my previous spot. I had many shoots on these calm flamingos from the top of the cliff but the situation was shaky still. I've used a tripod then with my pan-head, which did stabilize a bit, but still with the dark viewfinder and the sun's beams falling on the LCD it was hard to judge the focus there. One of the tricks I've used was to take several fast shots while rotating the focusing ring in hope that one shoot will be sharp. I can't say it is a promising method though!
 |
| Π 280mm f/16 1/30 sec., ISO400. |
And wherever I go there would be always abstract of course. Now, I don't know what is that; a pipe, or knot or whatever, it just did pronounce itself from the ground of the sabkha (swampy land) saying Here I am!. There were several abstract shots taken later from a nearby ground for some of those large shipping containers with various colors, but I have lot of focus issues to sort out, and probably I wouldn't be able to pick a good one after all. I was afraid to be spotted and chased out - who knows what lies in these containers!
 |
| Zwischen die Räuche 200mm f/5.6 1/160 sec., ISO100. |
Why I named it in German? I Don't know. It just sounded to me it is better be in German. The shot was taken in my car using Canon EF 100mm Macro, attached to Bower teleconverter. It was hard to focus of course and keep the camera still, so I've rested the lens combination on the steering wheel first, when that didn't work out, I had to use some muscles and shoot dangling myself out of the window. After the heat and the sweat, I really didn't feel like stepping out of the car! Well, this post is long enough already as it is so I better save pictures from this session for later use!
VII. The Bookies
 |
| Source: Amazon |
 |
| Source: Amazon |
 |
| Source: Amazon |
Well, now, I doubt you've reached this point at the end of this blog post but in case you are reading these words, I do thank you indeed for your patience. You deserve a reward!
Right now, my mind is occupied with traveling and the procedures and bookings. Everything is almost ready - the place, the tickets, all what is needed so far is packing in time and signing up for a leave before that of course. I thought about it for a while and I thought it is better to delay the flight further, and instead of making it on September 30th, I would be, hopefully, flying on October 10th. Until that time comes in, I have many things to look after. Not a cheap vacation I have to say, even though I'm trying to make it so, but hey, why do we save?
... say, isn't it my birthday already!?


No comments:
Post a Comment