Showing posts with label noise ninja. Show all posts

Thursday, August 16, 2012

The Longest Long...

Caution! A long and a boring post ahead! Read (or try to read) at your own risk!

OK. Been off away from the blog for a week but that doesn't mean I was not working on it behind the curtains. There had been so much work to be done and, accordingly, so many troubles to overcome. I've (almost) dedicated one full week for my photographic experimentation, and I think I've came up with some results after all. I should thank Alexa Phillips for filling in!
Anyway, this is going to be some long post I suppose, so I'm typing this as early as possible; in other words, I'm still working with the same schedule but probably with more material at hand! Let's go!

I. Viva Al Beach - Again

Still coping with the heat and combing the beach for long exposures. It is an endless struggle as it seems, but this time I got my weapons out. I've brought some cooling pads to wrap the camera with and work on reducing the noise caused by the heat to the sensor. There was a major disappointment though to find out that the cool gel pads, even though were coming out of the freezer, they didn't keep their coolness long - 30 minutes of working on the camera and 5 minutes reaching the location in the first place - all of that was enough to leave the pads slightly cold instead of freezing cold. However, to some extent, there was some noticeable reduction, specially that the weather that night was cooler (that doesn't mean it's not hot!).

Cosmos
Rokinon 8mm f/11 8min ISO 100.
Corrected with DxO
The first trial took place after spending around 30 minutes (if not more) trying to fix the composition as much as possible in the pitched dark place. I had to point my flashlight (UK: torch) toward some stones in order to see and compose and focus as well. The exposure took 8 minutes here, mainly because I didn't go dramatic with my aperture as I usually do (with f/22). However, prior to that there were many test shots and histogram examination to see if I'm on the right track as well.
In that awkward position, and because the cooling pads were sort of hard to settle on the camera tightly (some breeze there was and I was afraid they'd fall down), it was (again) not a good time to use my portable monitor. The situation could have been more critical if I was to use my 18-55mm lens (used it later), which somehow has a shaky focusing ring and it could move easily. I've picked the time specifically for a regressing water tide instead of transgressing one; not only to keep it safe, but also to show more rocks in the foreground.
In the processing phase, regular distortion fixation took place (and I somehow started to like this elongated format as well; I wonder if it has a name). Later on though, I was reluctant whether should I crop the lower portion to keep the horizon line perfectly in the middle or not, but I've decided to leave it like that since some rocks at the bottom would be cut in not-so-nice way. The noise now were less, but that doesn't mean they are much lesser, but on the bright side, it means something is working here (but maybe also because the exposure time was not as long as 33 minutes like before!). We'll come to that later.

Traum
Canon Ef-S 18-55mm @34mm f/11 21min.
ISO 100
Coming to the beach at around 3:30 a.m. and just spending 8 minutes to take one picture was something, well, annoying. I didn't come all that way just to take one picture in such short time! So, I've decided to work as fast as I can and see for other perspectives to the location by changing lenses. I had my lenses in my vest pockets ready for the action: Rokinon 8mm, and EF-S 18-55mm.
Now, one thing I've totally forgot here and that was the time I've came in into the beach area. The sunrise was getting closer and I just didn't count for that in my long exposure planning. Initially, and according to my calculations, after framing and zooming properly for Traum, the exposure should take as much as 43 minutes! However, as I started the exposure and settled down by the beach reading a book under the flashlight light, I've recognized that the atmosphere is becoming brighter and I could almost see my way around with no need for a flashlight. Seeing that, I've ran to my camera and stopped the exposure directly at 21 minutes, and it was excessively bright already.
Back home, the processing became a bit funny because of using the Fluorescent WB. After trying to reduce the loss in the highlights (which was not completely successful as you can see), and after using some shadow enhancements like Fill Light, I've arrived at something that looks more like a radioactive material. The green line in the horizon provided some connection to the rest of the image as if making a note that "there is something in here!". With such surreal effect, I've found myself calling it Traum, a dream.

Lunatic Sea
Canon EF-S 18-55mm @18mm f/22 ISO 100.
HDR
After finishing with Traum the twilight already began and the atmosphere was lighted enough to see my way with no flashlights. I yet hated to leave just like that and kept on trying my best to form some composition in the middle of the rocks; and let's not talk about what happened to my feet. Yes, I was barefoot.
Working with Fluorescent WB is fun indeed. It adds magic. I think I will call it the Magical Blue WB. Unlike Cosmos I didn't want to add a heavy blue tint to the whole scene but a light one to emphasize the blue sky. After taking several shots and deciding to leave, I've noticed the clouds in the horizon; something I do rarely notice in summer here. Nope, not the time to leave yet.
It gives me melancholy though to know and remember that back then I didn't take my ND filters with me. I wanted to be as light as possible. With the light becoming abundant, NDs are required for long exposures, even those for 1 or 2 minutes! Anyway, I've just settled down and decided to bracket-shoot, and I thought let's see what the HDR hides for us then.
The irony here is that, instead of making dramatic light with the HDR capabilities, I've decided to smooth out the light giving in for a soft and smooth feeling. The color is adjusted while tone-mapping too by changing the Temperature slide in Photomatix. My strolling on the beach is not over, yet.

Hinter der Schatten
Rokinon 8mm f/11 15min.
ISO 100.
Then again, there was a time to head to the beach for another trial in another day. This time, instead of taking mom's cooling pads, I've got myself one of those cooling pads that are usually kept in iceboxes to keep it cool for longer time.
I was exhausted that night, thus I didn't stroll deep into the beach; you need a will power to cross the soft sands! However, I've found me a spot in front of the Pizza Hut, which is not ideal because of the strong backlight, which explains my long shadows in Hinter der Schatten, Behind The Shadows. Another reason was that the timing of the tide, which was advancing, and I was not in mood to get wet here; it is better to play it safe here, until I get more will power (and time) to work as I want.
In the beginning, I didn't find myself working easily here, mainly because there were some people having a picnic or simply fishing (yes, fishing), but I tried to shut my mind's window and act like if they were not there. One of the points of being far off on the sand on the beach is that you get that calm and peaceful solitude.
Some shots with ISO 12,800 (called ISO H on the 7D) to fix the framing as best as I could, knowing that my shadow along with the tripod's will do a cast in the final image, but heck, what I'm supposed to do? Pointing away you might say, but unfortunately, the city lights were around me and in portrait position this is the narrowest band of the sky and the sea I could have without lights in the background. On the right there was this family doing a picnic, and I'm sure they would get annoyed (in fact they left few minutes after my arrival).
However, beside the test shots in ISO H, I had to check the histogram carefully and not depend on the LCD for judging the brightness. I was metering the sky; one good thing about working with live-view, is the easiness to meter any zone in the view by moving a simple square across the scene and check the meter. I've realized that a good histogram (somehow) was not at 0EV, but at +3EV. From there, all the calculations began. Initially, the aperture was at f/8, but I've added one more stop and made it f/11 just to lengthen the time. Finally, it all yielded around 15 minutes.

100% crop of the original RAW,
at initial settings.
Click to enlarge.
We come to the noise now. The noise profile at 100% was much lesser than the usual. However, this exposure was for 15 minutes only and not as before, for 33 minutes. The weather was warm, but not as hot as it was 2 weeks ago when I did a 33 minutes exposure. I've attached the cooling pads to the back of the camera (by means of a rubber band), but I'm not sure yet that this has any real effect. I might as well study the camera's design to see if the sensor is really close to the back of the camera where the LCD lies, hence we can argue that the coldness of the pads would reach there eventually.
I'm happy with the result after all. I didn't dream of such low noise profile after all! But I better get concrete results in order to work efficiently, and with confidence as well.
The majority of the editing was done in DxO optics of course. I think I'm establishing a style already with these elongated images. They give more depth and a nice surreal effect. I've been filtering the noise in DxO and then in ACR, and sharpening even more with Noise Ninja; I was trying to pronounce the faint lines more. I picked this image for a contest within my group, and I did minimize it and sharpen it with NIK, and man, even the static stars got pronounced making a majestic look - but not to be posted here for now! It is a promising trial, and man I just can't wait for the winter to come!

II. Strobo-tique
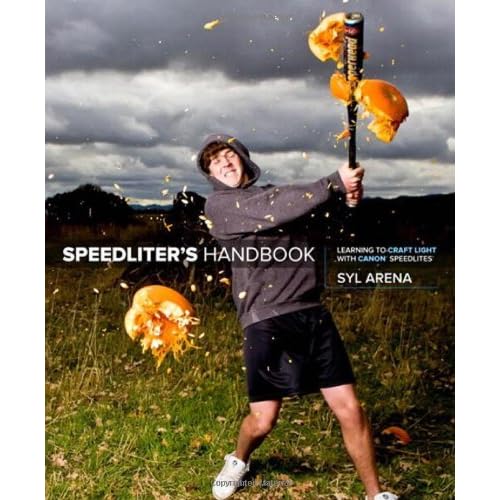
Source: Amazon
After reading Syl Arena's book and getting my new 430EX II I thought it might be the time to start playing around. This time, I wanted to do the hard stuff first - Stroboscopic lighting. As Syl put it, there is no way around it, except by trial and error. For two days, I was trying to record my hand's movement across a piece of paper, writing some phrase in Arabic.
Working out with two Speedlite units proved to be not an easy task after all. Good thing that you just have to set one to master and the other to slave, and everything to be controlled from the LCD - specially if you are working in E-TTL.  My first trial didn't work out, as I was literally trying to write down on the paper while the strobe is working on for a 20 second exposure in a completely dark room. You can see that it wasn't the great atmosphere to work. I gave up the first night. Then I thought, why the fuss?

Love Drunkards
Canon EF 100mm macro f/22 ISO 200

I thought then, if the whole thing is to record my hand movement, why should I write?! (Duh!). Thus, the next night, I've prepared the set again in my room with the phrase written and ready on paper, and within 10 seconds exposure, all I had to do is move my hands all over the phrase. As Syl put it "imagine you are doing a time-lapse photography in a single frame," this is all what the stroboscopic is about. In order to break the dullness of the white paper, I've set the WB to Flash, and gelled the two Speedlites with 1/2-CTO on the master, and 1/4-CTO on the slave. Some adjustments to the WB later was done when RAW file was edited. Probably one Speedlite was enough to add some drama lighting to the scene from one direction, but I thought it is better to lighten the shadows a bit with some light on the opposite end.
Just a final note about the phrase, it is a line from an old song (from 40s or 50s) sung by Um Kalthoom, a famous Egyptian singer. It translates as: Did the Love see drunkards, like us?

III. Save Me A Disaster!
Source: B&H
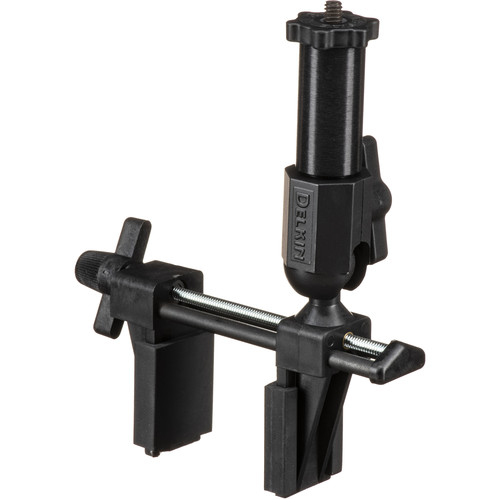
Over the course of two days, I had some hard time trying to achieve one idea that I've been thinking of for sometime, and for which I've ordered the Delkin vice.
If there is a definition for the word disaster, then it would be such a device. The best of it was the clutching hands where it did stick to my window glass firmly without breaking it (because of the rubber covering), and also the coldshoe that comes with it to attach a flash unit; I can use this shoe on various stands (with 1/4" thread). The knob controlling the ball head was hard to move and literally I was moving it with pliers just to ease it down or locking it up. I've decided to leave it locked and move the ballhead by force if possible just to adjust the camera orientation. Everything in the head was sort of loose!
I was trying to do this experiment in daytime in my work place, where I would attach my camera over the vice to the rear window and point it at the side mirror, and with an exposure of seconds I would move my car slowly. First day, after spending about an hour in the sun, I realized that to capture the side mirror I have to attach the camera on the opposite side of that side mirror (i.e. to take a picture of the right side mirror, I have to attach the camera on the left rear window), otherwise I would only see the body of the car at all times (however I move the side mirror). To achieve a longer exposure, I made use of the welding glass piece which provides me easily with 11.7 stops, and this time using big paper claps; easier and less shaky for the focus.

My camera after the disaster.
Ironically taken with my phone camera.
Click to enlarge
Second day, for my good luck (please note the sarcasm), some car parked in the space so I had to move my car a bit further away to be able to move freely for the experiment. However, the sun hit directly on the LCD, and it was hotter than the day before and to adjust the camera, I had to move the whole ballhead with force since it was tightened the day before by pliers. Finally since the camera was swinging easily with any slight shake, I've tightened it to the head firmly; and that's when troubles began.
As you can see in the picture on the right, when this experiment didn't work out, I've decided to take everything off. In the office when I started to remove everything, the screw from the ballhead got stuck in the camera, and no pliers would take it off. I even got some of the iron filings planted in my hand. After trying for more than one hour, I've finally took off to the nearest garage and used a vice to press hard on the screw while rotating my camera body and take it off easily. After coming back to the office, I've screwed the bolt to the ballhead back again tightly in hope it won't take off again!

Reflected Move
Canon EF 100mm macro f/2.8 20sec., ISO 200.

Didn't bring my old 350D,
so I had to shoot using my phone.
Click to enlarge
I've realized already in the two days course that a daytime for such an experiment won't do. I would need interesting lights and a darker atmosphere. A darker atmosphere would give me a longer exposure freely with no need for any filters. In the same day when my disaster with the camera happened, at night time, I've headed after dusk to some open space I've known for a long time in order to be free to move my car. After settling down and around 30 to 45 minutes of fixing the camera and checking the focus, I've finally managed to take Reflected Move. You can see the settings on the left, and pardon me for the quality as it is a phone camera.
Unfortunately, the text on the mirror and the frame of the mirror did shake little bit. In theory, since the engine shakes the car's body, and the camera is attached to the body, then the side mirror and the camera would shake at the same rate making the image relatively stable, and this was proved by testing shots prior to the final shot. Anyway, as I took the 20 seconds exposure and moving my car in a circle slowly, seems that the car's body shake as a whole (as it was moving on sand and not paved road) caused this little shake after all. Some sharpening took place to compensate a bit for this shake.

Stadt von Licht
Rokinon 8mm f/8 + teleconverter
HDR
After finishing from this experiment I couldn't resist the urge to shoot the surrounding buildings. Their lights (which were changing in color and going on and off) made a spectacular view, in a place that I don't recall any beauty in it.
Stadt von Licht, or City of Lights, was taken in a haste and I wasn't really careful for the composition. I made some few shots that showed my shadows with Rokinon 8mm fisheye lens, then it occurred to me: why not trying HDR but with a relatively longer exposure instead of automatic bracketing?
I've connected my teleconverter to the Rokinon 8mm, which means technically, the focal length right now is 16mm. I could've used Canon's 15mm here, but I didn't want to touch this for now since my mind was set to manual all the way. After doing some metering to the sky and the ground, I've taken 3 shots with the intervalometer at 13, 25 and 100 seconds. Apparently, each had a different luminance.
Merging the HDR and tone-mapping was done as usual; no magic. But the magic appeared later when I started to correct the image in DxO Optics. Away from the distortion corrections, I've re-discovered that color options in the software and my eye,directly, spotted the Fuji Velvia. Now, I didn't work with films ever and I didn't develop any at all, but from the books I've read, Velvia is known to be the choice for saturated colors. And this is exactly what I did get! The composition and the distortion fix is not something I do like, but I'm happy for the result here for two things: a) I did HDR using longer exposures; an experience I might need for later, and b) expanding my color horizons in DxO which will give me more options to render the colors.

IV. Get Me Outta Here!

Again, another one of those crazy moments just sparked as I was going in and out from my work place and been noticing something that I was completely blind to. The parking lot (or parking garage). After taking a note of it, I've planned my shoot carefully so that I won't be distracted by the security guys. Thank God that it is Ramadhan and people are mostly dizzy and got no mood to hassle with some photographer at 6:30 a.m.! Well, one of the benefits of fasting before Ramadhan for a month or more, everything looks so easy during Ramadhan itself!

Exit at Infinity
Canon EF 100mm Macro f/32 8 sec.
ISO 100.
Now, prior to the shoot, I've decided to work without a timer. This is just to silent the beeping to make less distraction, even though my location was relatively far away from the security stand post. I think I paid for this dearly.
I took several stands raising my tripod to about 2 meters off the ground (~6 ft) and getting it low, and using my 100mm and my Rokinon 8mm fisheye lenses. I was shooting with brackets for HDR merging later on, but in my mind I've already decided to convert it to B&W. This is mainly due to the composition, as the colors were not so important, nor they were pretty anyway (unless for a horror movie).

Infinitarium
Rokinon 8mm fisheye f/22 4 sec.
ISO 100
Corrected with DxO
The great disappointment was to find later that some of the images were shaken. Another disappointment is that, seems that there is a curse following me for being a left handed. However I fix my point of view and everything would seem alright, yet I would discover that I didn't center my tripod correctly. Unfortunately, such off-center orientation is delicate that only when editing the image it would be noticeable. This problem had been chasing me for a long while now, and I just don't know how to fix it. My eyes seem to be, simply, left-eyed!
Infinitarium, for example, was skewed after correcting many aspects of the image itself. The skew was to force the horizontal lines into place after correcting the horizon, and forcing the vertical lines to be parallel. It was hard to do the perspective correction, however, for Exit at Infinity but merely a tilt to fix some lines. Also, I ended up editing singular shots instead of doing HDRs. After doing on HDR slide, I've realized that there is no need for it and doing B&W from a single chosen shot is faster, and the HDR won't add much in fact. Some dodge and burn were required too.

Gerade
Anyway, I couldn't resist the colored version so I just prepared one just in case, for the Likes.
In the colored version there were many adjustment layers for fixing the colors, and strangely for some reason there was a green cast, so I just tried to reduce that if not eliminate it. Here also, I tried to frame the image properly, so I cropped (with respect to aspect ratio) stopping at the end of the black pipe on the right, and the red post on the left. I think framing was lousy a bit in the previous B&W versions.
I'm trying few of the tricks that I've encountered so far in George Barr's book that I'm reading currently (more about that below). One of his tricks was to reduce the noise (specially in the shadow areas after dodging) by doing a gentle Gaussian Blur. I did that trick as well to the colored version to around 1.2, and then followed with Noise Ninja filter, using the sharpening and the contrast sliders there to pronounce the edges. Not bad I would say. Print-wise though, I don't know how it would look!

Park Here!

A friend of mine as well suggested that I do a color splash; converting everything to B&W and keeping the blue only. I thought it is a good idea so here you go. I've just saved the file directly (from JPEG) without any dodging or burning. I like the light quality on the right and wish if the light would expand further to the left.
Notice how the lines in the middle on the signs, that separates EXIT and P do not coincide exactly; and that what pisses me off!

 V. Dark Hours

Same day I did the garage shots, I've decided to break the silence in the office with some work using my Speedlites. The target was my watch. It is not a new idea anyway; I've done it before, but in this instance, I was trying to put on some Speedlite touch just as a training.

Dark Hours
Canon EF 100mm Macro f/2.8 1/160 sec.
Series

After about one hour of trying different positions for the Speedlites and controlling the ambient light by increasing the shutter speed, I've realized that all what I need is only one Speedlite, and a reflective white surface (a piece of opaque white (glossy) paper; a calendar). I did produce some interesting patterns though with two Speedlites but I couldn't control the zones of lighting precisely. Finally, I've settled down with placing 580EX II behind the watch and connected via cord and bouncing the light off a white piece of paper placed in front of the watch.
It was a job for the Intervalometer again, as I configured it to take a shot every 5 minutes and 10 seconds. Around 15 shots were taken but in the final composition I had to give up some shots in the layers stack just to avoid congestion in the image. The layers were blended with Darken. Of course, after flattening the final image, some adjustments were done for the contrast and the glow, and also cleaning some spots. Should have cleaned my watch prior to this shoot! If you are wondering about the format - yes, the image was cropped from the sides and made into semi-square shape.

VI. Bingo, The Flamingo!

Out of boredom, and just two hours before the fast breaking, I've carried my camera and headed to The Free Zone. The Free Zone is a commercial zone, with a port, and usually so busy in regular days, and it is situated on, seemingly, an artificial island named Akkaz (عكاظ). It is a famous sports for flamingos. They say flamingos were immigrating birds and used to pass Kuwait on seasons, but now they are a permanent component in certain coastal lines here. I had no specific goal in my mind, just the idea that it will be the sunset soon, and the light quality is should be good for shooting, but I had no idea what to shoot in the first place!

Fly, Forrest! Fly!
1200mm f/13 1/500 sec, ISO 400.

I did take a lot of shoots (in hundreds) but I'm going to post 4 main images here as they are the ones that attracted me. I would still need to work more on the other at some time. The bulk of the images were not good in fact, and a lot were out of focus (specially for the flamingos) but it was, after all, a good trial for my teleconverters at work.
In the beginning I headed where I used to spot flamingos long time ago, behind the Mövenpick hotel in some narrow water intrusion into the land. I didn't find any flamingos, but some pigeons. It was a good practice anyway using my Tamron 70-300mm + Bower Teleconverter + Vivitar Teleconverter. I've discovered prior to this shoot on same day that Bower teleconverter records the focal length data in the EXIT but Vivitar does not - Vivitar's mainly handles the communication between the lens and the camera but does not record much information in the EXIF (that's why I thought that Vivitar teleconverter doesn't shift the f/2.8 for the Canon 100mm Macro. It does, but it doesn't record or communicate that).
It is indeed a hard task to stabilize the camera in that way; not a professional tele-lens and no screws at the bottom to make it stand on a monopod, and to make things even worse, the autofocus is stopped (but this is something I do know already). I had to work all the way by hands and focusing manually too.

One To The Last
280mm f/11 1/100 sec., ISO400.

We come to the flamingos now, after moving away from my previous spot. I had many shoots on these calm flamingos from the top of the cliff but the situation was shaky still. I've used a tripod then with my pan-head, which did stabilize a bit, but still with the dark viewfinder and the sun's beams falling on the LCD it was hard to judge the focus there. One of the tricks I've used was to take several fast shots while rotating the focusing ring in hope that one shoot will be sharp. I can't say it is a promising method though!

Π
280mm f/16 1/30 sec., ISO400.

And wherever I go there would be always abstract of course. Now, I don't know what is that; a pipe, or knot or whatever, it just did pronounce itself from the ground of the sabkha (swampy land) saying Here I am!. There were several abstract shots taken later from a nearby ground for some of those large shipping containers with various colors, but I have lot of focus issues to sort out, and probably I wouldn't be able to pick a good one after all. I was afraid to be spotted and chased out - who knows what lies in these containers!

Zwischen die Räuche
200mm f/5.6 1/160 sec., ISO100.

Why I named it in German? I Don't know. It just sounded to me it is better be in German. The shot was taken in my car using Canon EF 100mm Macro, attached to Bower teleconverter. It was hard to focus of course and keep the camera still, so I've rested the lens combination on the steering wheel first, when that didn't work out, I had to use some muscles and shoot dangling myself out of the window. After the heat and the sweat, I really didn't feel like stepping out of the car! Well, this post is long enough already as it is so I better save pictures from this session for later use!

VII. The Bookies

Source: Amazon
Well, I don't mean any races here, but simply the books I've been reading lately. Don't Believe Everything You Think, that was the title of the book, and I say, don't believe what they tell you about this book. It was such a boring book about skepticism and being a skeptic that I really regret having it now. In the beginning I thought it is a motivational book, or something that raises hopes inside you to cope with life and make you see life differently. However, it sounded later like if I was doing a practical joke to myself. I got bored before reaching the half. I do realize most of the aspects, and I don't believe everything in the media (which the book attacks), so frankly I don't find much benefit here.

Source: Amazon
On the other hand, I've started to read my newly acquired book: Taking Charge of Adult ADHD. Now, this book is giving me the shivers. I have to say that I'm indeed scared to do a real profiling to see if I have ADHD, but lot of the contents of the book do make sense and reflects much of my personality aspect (or should I say, my behavioral aspect). This said, I still need to do a professional check-up or profiling. I might have to look for a clinic, or a psychiatric that is, to do all of that - with affordable prices of course!

Source: Amazon
After finishing Syl Arena's book about Speedlites, I've started with George Barr's book about editing photos. So far, there are lot of tricks and workflow procedures that I do differently but might have yielded the same result after all. There are also some reflections and comments about images that the author worked on, and about the framing and composition. George Barr is mainly an abstract shooter as I can tell, and this is something I do like because this is what I've been doing mostly now. Might think of heading the other way and do portraits? I'm not sure. I still don't have the appetite of shooting people, except, when it is candid without subjects knowing that. Product photography can be a goal as well and I do consider it more than I do consider Portraiture.

Well, now, I doubt you've reached this point at the end of this blog post but in case you are reading these words, I do thank you indeed for your patience. You deserve a reward!
Right now, my mind is occupied with traveling and the procedures and bookings. Everything is almost ready - the place, the tickets, all what is needed so far is packing in time and signing up for a leave before that of course. I thought about it for a while and I thought it is better to delay the flight further, and instead of making it on September 30th, I would be, hopefully, flying on October 10th. Until that time comes in, I have many things to look after. Not a cheap vacation I have to say, even though I'm trying to make it so, but hey, why do we save?
... say, isn't it my birthday already!?


Thursday, August 2, 2012

Ahoy!

One weird week. Sad, terrifying, and weird. A mix of feelings that doesn't taste any better, but bitter. With this week beginning, on Monday specifically, we got the shocking news of the departure of a cousin in a car accident. He was 18. A memory glimpse passed through my mind, of all the times (even though short) when I had this boy in my lap.With all the sadness, there is a feeling of being lucky to be 32 (almost), and sad again to know such time passed, and sad again to know such a young fellow passed away, and terrifying to know death is lurking. Death, has no alarm clock.

I've finally finished what I was waiting for; the visa interview in the US embassy here. Easily done even with sort of a long wait. I just have to wait now to get my passport back (via DHL?). On the other hand, I didn't book anything yet; not a place, nor tickets. I better work little bit on this soon. Also, I need to plan and figure out how I'm going to move my camera and other stuff with me. It will be a heavy load for sure.

I. Cool me down:

Still struggling with long exposures, and realized now that the weather is one big challenge. With this heat (38oC~43oC at night), it doesn't matter if you take a Dark-Frame exposure and subtract it from your shot, the noise will remain a big issue still.

For those who don't know, a Dark-Frame exposure is an exposure that can be done by the camera before recording the data of the image and it is simply an exposure taken at the same time period of the original shot with the shutter shut, i.e. doubling the time of taking the exposure. This Dark-Frame exposure can be done separately by the photographer, simply by capping (closing) the lens and running the exposure and it will be saved as an image. In Photoshop, this Dark-Frame image is blended with the original shot in Difference blend to subtract the noise. I prefer this method because I can keep the image file for later uses when needed. One issue though, the Dark-Frame exposure must be taken around the same temperature.

Now, with my latest shot that took 33 minutes, I've realized that the Dark-Frame method won't do here, specially with such hot weather. However, I did some trials on cleaning the noise with a free software called RawTherapee.

33 minutes
Canon EF-S 18-55mm @30mm,
f/22, 33 min, ISO100.
Now, away from the technical talk about what RawTherapee did here, just don't be fooled for the smoothness of the image here. It is just minimized, hence the noise effect is not apparent (click to enlarge and yet it is relatively smooth). The exposure itself was dark, I guess I was fooled by the LCD, and I've totally forgotten to base my judgement on the histogram.
However, there are certain mistakes done here that I have to pay attention to next time. First of all, the rocks that were apparent in the beginning disappeared later because of the overwhelming tide. In such darkness, there would be no trace of them at all except of few dark spots beside the main rock (or crag?). Secondly, I should've counted for the advancing water, as I almost got my camera dipped! The advancing tide could have even shook the tripod slightly (even with its excessive weight). Thus, it is better next time to stay away as much as possible for the line of water and zoom the lens if possible.

RawTherapee played a great deal in reducing the noise after all and frankly I didn't mingle much in it because there is a conflicting interest. As much as I wanted it to reduce the noise in my RAW file, as much as I want to edit my RAW in ACR. RawTherapee has all the controls but they are not as flexible and user-friendly as ACR is.
Anyway, one particular option in RawTherapee that was unique, which is the ability to load the Dark-Frame file into it and it will work out the subtraction (even better than the Difference blend in Photoshop). Thus, I've uploaded the Dark-Frame which I did at 33 minutes as well but at home after coming back from the beach (in the balcony) and RawTherapee used this file to subtract the noise from the shot. Despite the relatively good results, there would be still some noise that were hard to remove with any removal plugin like NeatImage and Noise Ninja.
I've realized and remembered how the noise was a lesser issue (but still an issue) when I did a long exposure at the beach in one winter night. Thus, I've decided to take a different (and a serious) measure to reduce the effect of the heat on the sensor.

The Experiment:

Simply put, all what we need is to put down the temperature. This said, I've just got the light bulb upon my head glowing while wandering in ACE store (don't you love this place?). The idea struck as I wondered in the aisle of camping stuff (well, I was originally looking for bubble wrap, but who cares anyway) and remembered the stuff we used to put in our iceboxes when we used to leave for field trips with my work place staff; cooling gel.
Back home mom got some of those gel pads. made for medical uses, in the freezer and ready to be used. Directly after going back home I've decided to do something with those and see the effect, and I guess I wasn't disappointed. The only one thing left here is to put it into practice and see for real.
My experiment was simply to use those frozen gel pads on my camera to cool it down, and for comparison, I've ran the same long exposure of 33 minutes with the pads on.

100% zoom crop of the two slides (warm & cold)
Click to enlarge.

I think the result is astonishing. Just to avoid any wet drops on the camera that might come from the ice on the pad itself, I've wrapped the camera slightly with a plastic bag. Now, that was not the end of the story. As I was trying to make this image above for comparison, I was going to Assign the color space to sRGB (why would I use ProPhoto here?) and by coincidence I've picked Adobe 1998 space and the noise was reduced significantly too! However, sRGB noise profile was much like ProPhoto but with less saturation maybe?

Both slides are on Adobe 1998 space
sRGB slide was converted (not assigned) to keep the visual look as it is in sRGB originally

Anyway, seems this reduction in noise is only apparent or visual, as some pixels do change their color code but not really eliminated as it is the case with Dark-Frame subtraction. Now, why the noise in sRGB and ProPhoto are almost the same, yet Adobe 1998 is lesser apparently, is something beyond me for the time being.

Just to recall the color spaces and understand why it is a surprise for me, the sizes of the spaces are ordered as the following: sRGB < Adobe 1998 < ProPhoto; with ProPhoto giving more flexible adjustments and more vivid colors, as it is more forgiving. Logically, one would expect if ProPhoto is high in noise level, and Adobe space is lesser, then sRGB should be lesser too, but this is not the case apparently!

This experiment is done for now and only a real work is needed to celebrate it! But that means more work to be done in moving my stuff to and from the location. If only there is someone to help, or even cares for what I do...

II. Digging The Past:

Now with DxO Optics at hand, I've discovered new capabilities (far away from the simple Photoshop) and that sparked in me the urge to re-discover the past images, specially those from Ireland. Also, I've been visiting these images again to post them to my Flickr and share them in groups.

Cashel Rock Graveyard
Canon 15mm fisheye, f/2.8, 1/800 sec., ISO 100.
 Corrected with DxO Optics

The joy of working with DxO is to be able to correct those images taken with Canon lenses automatically (and also those taken with Tamron 70-300mm, with many others of course). However, doing all the adjustments in DxO is not that easy still because of some... I don't know what to call it but let's say complexity of design a bit. Reducing the Highlights, for example, is still an issue in DxO and cannot be done in a simple way, while in ACR it can be done simply with the Recovery slider.

Fields and Graves
Canon EF-S 18-55mm @34mm, f/4.5, 1/2000 sec., ISO 100, EV-3
Corrected with DxO Optics

Images like Fields and Graves were re-discovered as well, and despite the fact that they were taken with the simple 18-55mm lens, yet DxO Optics did correct the perspective slightly (and resulting in an image out of the usual aspect ratio a bit). Yet, as usual, not everything can be done in DxO, thus the files are saved into DNG and re-edited in Photoshop for more flexible editing.

Green Mile
Canon EF-S 18-55mm @18mm, f/22, 1 sec., ISO 100.
Corrected with DxO Optics

But shots like Green Mile were completely like new to me. I remember that day though and what I was trying to do, but I've never considered this shot for editing at all. Even though it was a bracketed shot, I've decided to take only one RAW file for editing here with DxO, and then with ACR, typically. I've dug out a lot of old photos (and sometimes I do think how did I dare to make this or that!) and now I also see that I need to clean out some space in those old hard disks!

III. Ahoy!:

I couldn't resist the temptations. I've finally placed some orders online and I'm waiting now for the arrival. Two new books (and yet I didn't finish those from the previous order last month), and some stuff from B&H.

Source: Amazon
As for the books, the first is another book by George Barr, and again, from RockyNook. My first encounter with George Barr was with his book Take Your Photography To The Next Level. A really nice book about aesthetics of photography (away a bit from the technicality of the work with the camera). This book now, seems like a mix between the technical and the aesthetic ventures.
Let's hope it wouldn't take me much time to finish the books that I'm reading still. I'm trying to dedicate more time to those: in the office my flash book (by Syl Arena) and before any nap in bed I'm reading Thomas Kida's book, about skepticism. If, only if, there is any travel outside for a vacation, most probably I would be taking one of those books (present or upcoming). I do believe that when reading a book it is important to keep a chain of thought by reading it till the end without stopping for a significant period of time.

Source: Amazon
The other book, now, is something not related to Photography at all. In fact, it is a book that George Barr (yes, again) advised me to read. Just a note, George Barr is a physician. Since I've been a follower of his blog, he did mention in one of his posts something about ADHD patients, thus I've decided to ask few questions about this case. He replied with some tips, and one of them is to read this book and compare my status to what is mentioned. Frankly, I didn't read the table of contents of the book (it is like I'm surprising myself here), but from the title it seems about giving tips to overcome the ADHD rather than a book of diagnosis. However, this is even better!
I'm not saying that I do have ADHD, however. I'm just not sure. I never did an official diagnosis with any professional in the field. Yet, I can't just deny the traits that I've been witnessing since I was in high school, and were a major abyss for my bad grades (even in college times). The inability to focus, and the (later discovered) daydreaming trend that can't be stopped easily and sweeps through the mind; all of this got to be happening for some reason, and there is something I need to know, and overcome. Yes, there is the Maladaptive Daydreaming (MD) even though it is not yet announced to be an official disorder, but referring to the most known case I believe ADHD comes closer to the symptoms I'm talking about and would be better to work on this for now.


Source: B&H
Now, to the fun part! Far away from books and the boring stuff (pardon me, books I like aren't boring to me anyway). I consider this order, somehow, to be my own birthday gift to myself. Well, it is in August but I can celebrate earlier anyway, can't I? I've placed an order for a set of few simple stuff (wish if they were simple in prices as well).
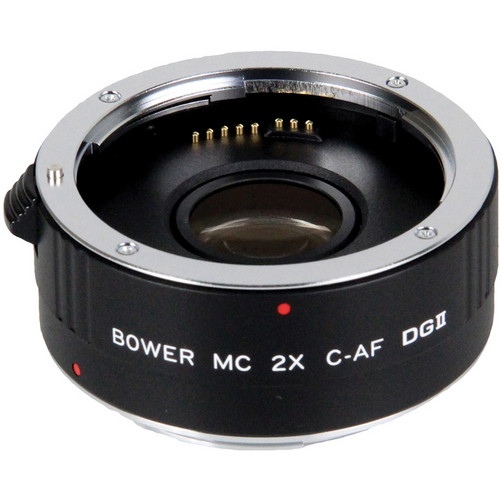
However, one item is another teleconverter: Bower 2x DGII Teleconverter. Even though I do have one already, it would be nice to have another one and compare and maybe combine the two to work as a quadrupling set! Two were available, a 4-element lens and a 7-element one. I preferred to order the 4-element type (and it is relatively cheaper) even though as it is mentioned in the specs that the 7-element type is sharper. I thought that a lesser number of elements is better (and could even reduce the chromatic aberrations problems). Vivitar's 2x teleconverter did show a strong tendency for chromatic aberrations.


Source: B&H
My second item is the Delkin Devices Fat Gecko Gator Camera Mount, which I was reluctant to order for some time now. With the presence of a gorillapod (I call it spiderpod sometimes) at hand, I've thought this item won't be necessary, but after some trial now, I think it is better to have both. I'm eying some sturdy performance better than the gorillapod, as it failed me in some instances recently. Even though this vice takes up to 1.36kg (3lb), I think it would take up to 2kg (4.4lb) in practice. The camera body, alone with no lenses, is almost 1kg (2.2lb). Just hope I won't be disappointed here. But hey! it can be used for other purposes as well!


Source: B&H
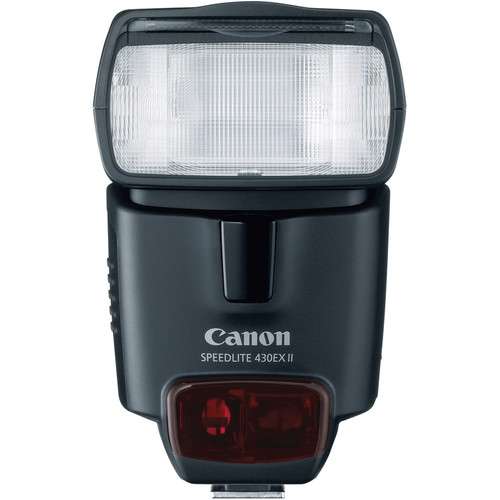
Now with the sweet stuff, my own real gift to myself. A little Canon 430EX II Speedlite to keep company with the big 580EX II Speedlite (well, not that big after the 600EX-RT). After reading Syl Arena's book (and still) my mouth got watering for more experiments and trials with Speedlites. Not aiming at portraiture yet, as it is a field that requires more than simply two Speedlites (plus the interaction with the subject). Yet, it will help in lot of occasions, like the High Speed venture. I'll try to come out with more experiments when I have it at hand. The 430EX II is generally cheaper than 580EX II (around half the price), and has a lesser guide number as well, yet I think it is a suitable choice for now because I'm thinking of using Speedlites in close distances in general and no need much light power. In fact, the opposite might be needed; a minimum power. According to the specs, minimum power (when working in manual mode) for 430EX II is 1/64, while it is 1/128 for the 580EX II - but they might be comparable because of the difference in the guide number after all.
Source: B&H
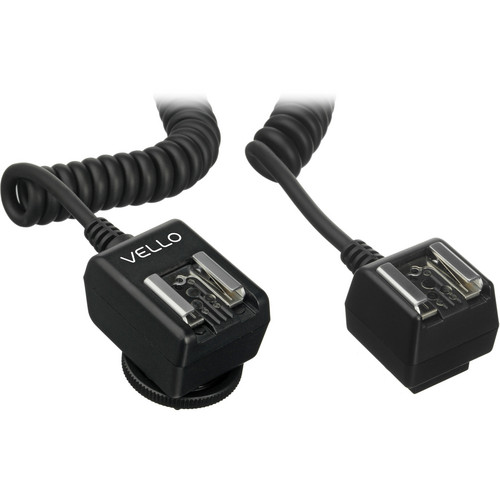
Further more, and to have more fun with my new (expected) toy, I've placed an order for Vello Universal Duo TTL Off-Camera Flash Cord (6.5'). The reason for the cable (for those of you who don't know yet) is that when it comes to E-TTL operations (let's say the automatic mode of the Speedlite) not all operations are transferable via wireless, and also for some aesthetic reasons, you might want to use your Speedlite as a master AND off-camera; something you can't do in wireless (because off the camera operations in wireless requires that your Speedlite must be in slave mode to be controlled). I'm lucky to have the Canon EOS 7D because the pop-flash (in camera flash) can work as a master for wireless operations.
All I have to do now is to sit, and wait. In hope I can get it ASAP. This seems the only joy I can get so far...

Now on the side of conlangs (and remember the main reason for having this blog is Ayvarith conlang itself!), I still didn't plan my next move yet. I'm supposed to work with Geltani though and design the phonetic scheme and maybe a syllabic system to spell out names, but with the occupations of the mind right now I can't be bothered to work with this right now and I'd rather work with my camera for the time being. However, that doesn't mean I'm forgetting about my dear conlangs! After all, I need to get busy as much as my body allows me to. As Edison said once: As a cure for worries, work is better than beer. Yes.


Thursday, July 12, 2012

Force x Force

Exhaustive week. Not a single day passes without having to go out of work and back to my work again, and sometimes doing this twice or thrice, beside the work-related work, like preparing the samples and changing the samples for measurements. I've even napped in the office by the end of one day which made me leave late that day! There is a time crisis.

Source: B&H
However, I've finally got my shipment from B&H and still trying out my new 5" LCD portable monitor, and yet I have to try out the polarizing gel. The monitor alone was a problem and I think it will get somehow a bad review from my side, as the plastic is shaky and the cable was hard to get (and I lost 10 K.D for getting the wrong cable), while the hotshoe mount can be attached to the monitor, but not to the hotshoe!

All week I was trying to force myself to record more vocalization for Alexander's story. I'm close to the end, yet I do feel so down and so tired that I've skipped some days without recording anything. Anyway, there had been a large gap since the last time: from 2016 to 2736. With this now, I think only 10 verses are left. With a pace of 6 verses a day, this should be finished in two days!!!


By Force:

An interesting article by one of my favorite photographers, George Barr, did describe a lot of the mental process that I (and maybe most of the photographers) indulge in when I go out trying to shoot something. By coincidence on that very day as well, I was out in such a bad dusty weather trying to catch something... anything. I was just pushing to do anything with my camera, and it was indeed like some sort of a puzzle or a hunt - and processing the image itself was a puzzle itself too.

Dusty Zen
Canon 100mm f/2.8 macro. 1/5000, ISO500.

Pardon the high ISO, as it shouldn't be there in fact. I've simply forgotten that from my last session (which I've totally forgotten what was it!). The above shot was a test shot in the beginning, but then I've realized it is the one to be adjusted. The conditions were sort of harsh on the beach when the image was taken: staggering wind, dust in the air, and my intestines didn't stop giving me hard time.
The puzzle in the process is yet to come, when we try to turn a "boring" image in terms of color, into something interesting, beside some interesting framing. Just for a comparison, you can check the following before-after image:


The framing (cropping) after all was a problem since I didn't know how to give nice edges to the cropped image. However, when I shot this image my concentration was on the sand on the top of the rock (which settled down despite the harsh wind on the beach!). The major adjustments were done by means of a "trick" that I call the LAB method. It is an old method that I've used before, but not so often, specifically for a picture from Failaka island when, suddenly, the dust occupied the island despite the good weather in the morning as we set sail on the ferry from the main land.


It was a great time and great waves striking the rocks back then! However, what is the LAB trick?
  • First the image would be in RGB mode (regardless of the color space or the depth).
  • The image is then converted into LAB mode.
  • In the channels of the LAB, channel A is picked and the EYE icon is turned on for the main (first) channel to see the effects of our adjustments.
  • While channel A is picked, increase the contrast and/or the brightest to whatever level needed (and it can be done in various ways).
  • Same procedure is done to channel B.
  • Channel L can be adjusted in same way, and it can be used to sharpen the image, or reduce the noise as well.
  • When all is finished, convert back again into RGB mode.

Now, some people argue that this conversion from and into RGB will cause some loss in data (and I believe this is natural anyway in any conversion or any transfer of data) but I'm not sure how this loss occurs or what does it affect. Yet, the results can be promising for reviving an image!

After shooting this image, I've changed the lens (yes, in that weather, and it's dangerous) and tried to set and pose in some way to shoot another image of the rocks, however, the situation then proved to be a disaster. The shoot ran for HDR, but at home, even the HDR technique did not rescue the image and the blown highlights coming from the sun beams.

Ansin (there)

After the many problems in this image (tilted horizon, blown highlights, framing...etc) I've decided to crop with no respect to the original aspect ratio. The result is a small image after all, and not applicable for submission.
Because the lens was my 18-55mm, with minimum f/4, the desired shallow depth was not perfect for me. For this reason, I've resorted to the Lens Blur effect and blending down with a layer mask. Sharpening was done by NIK, and again with Noise Ninja. Some cloning was a must, when I've discovered some trash in between the rocks!

Books:


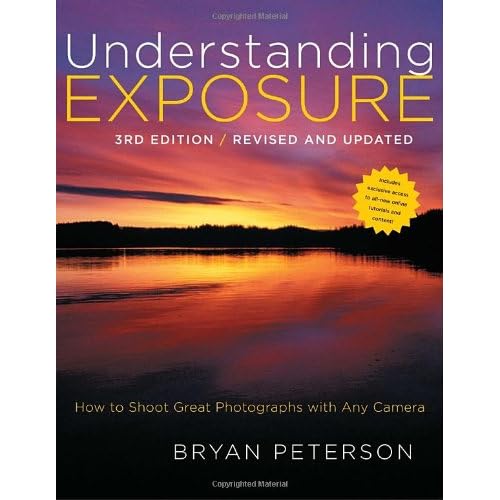
I have now some list of books to finish; a fresh delivery from Amazon.  I'm not sure how long it will take me to finish them but I hope all is over by August already. I do have plans to run after by September but I'm keeping it all to myself right now. I've started out with the Exposure book for now, as I think it is an important topic even though I do have a not-so-bad idea about all the exposure measurements, and so far, the book looks interesting indeed (with lot of fancy images too). Another book awaits about using Speedlites, and another which I try to read before going to bed concerning some psychology topics. I think I do need that a lot for now.

So much is going on in my mind. More than what's happening in my own life right now but nevertheless, it is a headache on all levels. I can't wait to have a vacation. Just slowly, my mind is retaining some of its ability to collect words and phrases, and I ended up writing Teal Eyes. Why or what made me write this piece, this is something I'd like to keep to myself for the time being. But it was a real hard work to squeeze my brain. Something went wrong inside this mind; maybe it is the too much business of thoughts that made it dull. I do miss writing poetry... it feels like being left out...


Thursday, June 21, 2012

Freeze!

It has been a busy week. So busy that I've totally forgot about doing my vocalization chores for the time being, in hope that I will continue by next week. On the other hand, Google Sites service is still not working and I can't upload files to it anymore.

There is a slight work here and there but it sure kept me busy during the week, and I had to stop fasting for few days just to cope with the sleepless schedule. I can't resist the afternoon's nap while fasting.
I've been in a workshop to train a bit on the usage of Canon's Speedlites. The work is still on, and I've got some results (I will show later).
I've been working as well on finalizing my Job Request paper with my teacher and I think it is final now and ready to be used. Maybe it is time now to move on with marketing or chasing customers as my teacher put it. But I think I need some work to be done with my portfolio and need to make it ready somehow. My teacher suggested to print it out like a magazine. My teacher is the main inspiration and the source of encouragement for me for the time being - as he is in the professional field already and does the guiding with encouraging words. He says not many photographers here that do what I do, if any. Made me feel unique.

Also, I'm trying to work more with 3D images for the time being, just for fun and to put something in a new email collection. I can't think of many good subjects, but I'm doing some experiments with my Rokinon 8mm fisheye lens, which proved to be hard to adjust for 3D (anaglyph) imaging; even harder than Canon's 15mm fisheye lens which worked at some scenes. This is mainly because of the divergence and the distortion at the edges which makes a slight movement to the center of the lens being magnified and exaggerated on the edges and causing a large distance to overlap - hence resulting in a ghosting effect.

3D Sculpture
Rokinon 8mm fisheye.
Notice the difference between the Red and Cyan in the center of the image and the edges of the image.

Adding to the hardships using Rokinon's lens, there is also the fact that I'm not sure yet how to make a small different angle (holding the camera by hand) to make a slight difference in the view. For this reason, I decided to move or strife my whole body without moving the camera away from my eye and shoot several shots at different stops of the body. Later at home I would check and decide which best fits.
Another lens that proved be working fine and good with this trend of 3D imaging is my relatively-new Canon 100mm macro lens (which can be used as a telephoto lens as well). I've used it here with a subject that I've taken before with my Tamron 70-300mm, but this time, of course, with  a lesser zoom. I've attached my Vivitar 2x teleconverter to expand the focal length beyond the original 100mm.

3D Gazebo
Canon 100mm macro.

Concentrating on the gazebo itself will reveal the effect. However, the buildings at the back had some strange "block" structure with this 3D processing, which I've failed to understand, but I guess it doesn't effect the beauty of the 3D in the gazebo itself. The main key, as I believe, to have a good anaglyph is to have a nice background and a foreground, and the 3D process is naturally aimed for the foreground like the image above.

Now, I'm dragging my tools here and there whenever possible just to capture something, specially for this 3D trend. Ironically though, I've been bringing my camera to my work place and I've ended up doing more abstract work with no 3D processing in mind. Even though I did take a lot of shots around the place but I think I'm satisfied about two of them only.

Verschlossen (Locked)

Banded
Verschlossen; despite the simplicity of this image, but the work on it was not that easy. The lockers, which lie in some storage room in my work place, were so close to the camera in a narrow space, and that sparked in me the desire to use Rokinon 8mm fisheye lens once again. After setting up the camera and the tripod I've spent a significant time trying to make the vertical lines in the center of the lens as straight as possible without any inclination, but seems my tripod is deficit somehow. However, with DxO optics it was possible to flatten and correct the deficiency to a reasonable degree. While capturing the image itself, I had to put on the timer to 10 seconds, and move away from the camera to the other end of the room, to avoid my own reflection on the metallic doors.

Banded is another story of hardships. In case you're wondering, the shot is for the lower part the wall in my office. My eyes caught the weird splash (or patch) on the lower portion of the wall. That inspired me to make a simple abstract shot combining this patch, with three different colors in general composed in layers (grey which is a wire; brown and white). To take such a shot is not easy; I have to lower the camera down as much as possible to the ground level, and this is to make the look as straight to the eye as possible. To do this, I had to take out the central column in my tripod and flip it upside down (just like I did once with a bathroom panorama); it was quite an exhaustive work with adjusting the legs and expanding them accordingly, and to work carefully with the weight of the camera and lens. Even though the previous shots were taken in brackets, but after all, only one RAW shot was adjusted and processed.

Depicting the view of a cockroach

Back to my workshop with the flashes. On Monday we've conducted the first practical work with high speed photography. However, the work was not as stable as it would have been done with a sound trigger, and also because of the lack of tripods from my part and the shaky hands, all of that contributed to the hardships of taking such images. Timing the shot was another issue. As we helped each other in shooting the scene, timing was a big issue.

Dipping
Pouring
Liquid Metal
The critical issue in all of these images is that, unlike my usual situation, there were more than one flash unit in the scene to be used, thus lighting the scene was not an issue (of course they had to be fixed in proper locations and at a certain power). My flash was set as a master and another two were fixed on special flash tripods as slaves, and their positions were changed frequently and accordingly. The main aim was to develop some sort of sense of a workflow, I presume.
The background provided, however, was not completely black, and with flash pulses it tended to turn bright and sometimes grey somehow. Thus, after getting back home and uploading the images, I had to work with the Curves adjustment layers to set the black point (by the black dropper/picker) and that made the foreground more pronounced. I have to say though that this technique doesn't work in all conditions.
I've found myself, again, using Noise Ninja more than NeatImage in cleaning and sharpening the images here. I think the power lies in the fact that Noise Ninja profiles different areas of the image instead of one block from the image, as it is in NeatImage. However, NeatImage still has its virtues with a ready-made profiles for sharpening at different levels, and those are quite useful for not messing up the sharpness too much. Also, NeatImage as a stand-alone software which can be used to do a batch cleaning when needed. Noise Ninja, with me, is only a plugin in Photoshop (I didn't check if there is a stand-alone version). Most of the images above were taken at 1/1000 of a second. The hardest part was to focus and remain stable pointing the camera to the bowl. With a tripod (and a remote) it would have been a single man's job!

Now, it is time to think more about the upcoming days and business trends, if any. I'm not sure where to start, but I still do think that I need more leisure time with myself to free my mind of many things. This said, I'm missing the joy of doing some panorama, somewhere...