Here we are; a new year. I won't be talking about resolutions here as, in fact, the new year thing is not widely separated and the concept of New Year's resolutions is just something weird for most of the people here - needless to say that we grow up without really considering it something special that a solar year passed and a new one began.
I can't say my beginnings of this year were good, but I really couldn't care lesser about my bad luck, or the troublesome conflicts with other people around me, specifically at work. This, by now, became like a daily dish for me.
One of my great sorrows for the past week is that I wasn't able to go out at night during the long "weekend" which consisted of 4 days and shoot at night. Mainly because not much scenes were available, and some of the locations that I've used to visit for some solitude and silences, were bugged by annoying people and their trash. Luckily, I did some of my homework the week before and did shoot something at night.
From the early beginning of that night, it was a helpless endeavor trying to find out something to do and not to sleep that early in a such winter night. My first pick was a location that I used to visit years back, and specifically at such time of the year (and even did a panorama there deep in low tide time). This time, however, the situation had changed. People (specifically the annoying type) were still roaming the place. I tried my best to stay away from the rest and do my own business.
I have to say that the main reason for visiting old location is some inspiring kick that got to me when I viewed some old images (specially those I've made into 3D anaglyph images) of a broken shade on the beach. Back then, I didn't have the fisheye lenses that I do have now, specially the Rokinon 8mm. Thus, I've decided to re-discover the area and this shade specifically with my Rokinon because, simply, the geometrical patterns were inspiring as they are.
As I settled down in the place, over the soft sand, I was faced with two main problems: a) setting up the tripod on a soft ground, and b) the flare from the harsh lights of the restaurant at my back. In the final image, Ausstrahl you can still see some traces of the flare even after the crop. One of the problems with fisheye lenses like Rokinon, with a large field of view, it is the hardship to use a flag to block other light sources that cause the flare; simply because there is a big chance that the flag would get into the frame, and when moved out of the frame it does not technically block anything!
On the soft sands it took me some time to settle and to take some test shots with ISO12800 to judge my composition. I've decided then to go with long exposure brackets; something that became a favorite activity at night exposures. Can't remember the exact timing but it ranged from about 8 minutes down to around 30 seconds. Almost at the end of the exposures, some guy was peeking from the top of the concrete wall behind me and started to make comments. His comments weren't bad or vulgar, but they were simply nosy. Thus, when I felt the situation being like that, I didn't stay longer and picked my stuff and left the place.
Leaving the first location, I still had the urge to work a bit more, thus I've visited Soog Sharg dock place where I made some shots several times previously. This time, it was relatively quite (as the time was nearing dawn by then). Even though I did take several shots with different times thinking of bracketing and merging into HDR when I finish, but at the end I only picked the first shot that took me 4 minutes. The rest was a play in the RAW editor (DxO in this case) to fix the shadows and highlights as much as possible, along with the distortion but not to the extreme flattened look. That night, however, wasn't the last activity for me in 2013!
As I've mentioned before, I've got a new car just before the end of 2013. A Pajero. I really like driving it and it was a great help with the rains that hammered over Kuwait this week. I'm grateful.
The day I picked to shoot my new car was cloudy and prior to some light rains back then, but with HDR rendering I was able to show details in the clouds above. For such an elevated car, it was hard to pick up a proper angle to shoot form a lower level, unlike my previous car, Seat.
I've taken several shots as well from various angles. However, no need to put them here as they are just regular ones. The main interest for me now is to do a panorama from inside like I did with Seat. I've managed to check the rear and I've almost settled with my mental process on how to setup the gear inside - but I do need a proper place to work (for some long time) and it should have proper light level. Let's not forget that I must wash the car prior to my work!
There is one old panorama taken from inside of Seat, which I've done in the parking lot of my work place, but now with my sickness of this place, I've neglected the idea of heading there and shoot a panorama.
In the past 2 weeks I've picked up a new hobby. Shooting at the sun. Well, it can be classified as astrophotography, but the case with me is that I'm not completely within the reach of astrophotography; but my main interest is the sun, and the moon of course.
This main interest was sparked (again) in fact when I was surfing B&H website to find what was new for me back then, the mirror lenses. With some little research and study, it seems that those lenses are in fact just small telescopes to be attached to the camera (with the help of some adapters too). This even sparked in me the desire to, maybe one day, get my own telescope and try some astrophotography - but we would need REAL good locations for such hobby, and the urban areas where I live and roam are, of course, not suitable for such task.
My first trial to shoot at the sun was with my relatively-new Sigma 70-300mm. As I used to do with the moon, with my Tamron back then, I've attached two x2 teleconverters to raise the focal length to 1200mm. Using the two teleconverters can be awkward in normal conditions because the light quality becomes lower, but with the sun, we would still need some filters to block the harsh light, and here comes the welding glass (green) to do the role.
The welding glass provides around 11.7 stops which was enough to look at the sun thru the LiveView LCD at the back. They say, usually, if it is safe for your eyes, then it is safe for your camera when it comes to shooting at the sun, and this is what I've done in fact. Focusing, however, was a bit troublesome; typical for such a long focal length and a shaky system. I think I do need a collar to hold the lenses to the tripod like how it is done with typical large telephoto lenses.
I did another trial few days later but this time the harsh spots from the system itself did vanish, and I'm not sure why! Maybe it has something to do with the focus itself. When focusing at a subject like this I usually zoom the LiveView to the edge of the sun disk and try to make it out as sharp as possible visually (which is not always a good solution). With two teleconverters (and f-number exceeding f/2.8 in multitudes!), the AF function is simply idle. Just to note here that the image were corrected for colors later of course. In Sonne II, the spots (or flare?) are more obvious than in Sonne I. The best has yet to come though...
My third trial with the sun was done differently. I've used the IR filter instead of the welding glass. The thing about the IR filter is that I can't technically measure the number of stops it reduces, because mainly it is intended to block visible spectrum and pass the IR band of the spectrum - this is the main goal for producing it, and using it! Thus, with this uncertainty in my mind, I kept some ND filters at hand just in case I do need to reduce the light even further. Just to notice, my IR filter thread is 58mm and my Sigma's thread is 62mm, thus I had to use a step-down adapter between the two which causes a bit of vignetting at the edges, but here it's not really important.
The light level, however, was easily controlled then by the shutter speed and the aperture (which was kept at maximum) and reducing the ISO too (back to 100!). All that was done as I was watching the LiveView. Not so surprising, focusing using the IR filter was much easier and I could achieve a relatively sharper edge focus. This is understandable since the welding glass is bulky and it technically hangs in front of the lens, while is IR filter is screwed in. What I'm not sure of though, does the IR radiation has any part in any of that? Meaning, does the IR radiation come into focus and NOT the harsh disk of the sun itself? Logic says that I've been focusing with the help of the IR band since I'm using an IR filter - but who knows! However, with Sonne III I was even luckier to find several spots at the center of the sun. Adding to that, the original IR shot did have some "halo" around the disk, unlike the dull image done with the welding glass. Seems to me that it is all a good practice for now before, one day, getting my hand on a mirror lens or even a telescope.
My arsenal of books is about to finish, but that's going slowly for the time being. Two interesting books (somewhat) are on the list for now. The first is a discussion of Gaston Bachelard's (1884-1962) philosophy. In fact, despite the title of the book, I thought it would be a direct impact on the matter of the arts, but it turned out to be a highly deep and sophisticated discussion for various themes, and generally for the relation between science and art. I had to stop when I reached around quarter of the book or even lesser than that because, simply, I could not comprehend a single word from the text. Thus, I've just decided to put it aside for later and start reading the second book on the list. The second book, The Philosophy of Art, is more clear in its aspects about art and the philosophy related to it. I've just began reading it though and I need to see what comes next; at least the talk is clearer and I'm able to follow the ideas so far. I'm not expected though some tips about how to criticize a work of art or the likeness of that, but at least I might develop my own sense and evaluation of art in order to see future work with a philosophical eye, and not simply with the visual attraction.
Aside from the cultural venue, I've been suffering a lot of downs with no ups. Mom's condition is not getting any better (though stable), and in my work place things are getting on my nerves more and more. In fact, my work right now is the last thing I do care about. The mediocre, if not poor, treatment from the administrative people in my work place makes me question the value of my dignity and respect relative to those people. It's not the first time to think of seriously leaving that work place and be on my own doing my own job and the things I like - but it is better to be with moonlighting; that is working with a stable job and a side job until the situation becomes concrete on the side job. I didn't start this yet even and makes me wonder what to do next. What angers me the most is to realize that I've spent 6 years in this college to get a scientific degree, to be controlled then by a bunch of monkeys that barely know how to do algebra and simply got no considerations for our simplest rights.
The situation is vague. I'm simply living each day to its extent and trying hard not to think of tomorrow. It's hard to neglect that because of the hammered mind, an expectation for a new trouble arises with every morning I turn my opened for the daylight. My heart is tired.
I can't say my beginnings of this year were good, but I really couldn't care lesser about my bad luck, or the troublesome conflicts with other people around me, specifically at work. This, by now, became like a daily dish for me.
One of my great sorrows for the past week is that I wasn't able to go out at night during the long "weekend" which consisted of 4 days and shoot at night. Mainly because not much scenes were available, and some of the locations that I've used to visit for some solitude and silences, were bugged by annoying people and their trash. Luckily, I did some of my homework the week before and did shoot something at night.
Blaue Nacht
From the early beginning of that night, it was a helpless endeavor trying to find out something to do and not to sleep that early in a such winter night. My first pick was a location that I used to visit years back, and specifically at such time of the year (and even did a panorama there deep in low tide time). This time, however, the situation had changed. People (specifically the annoying type) were still roaming the place. I tried my best to stay away from the rest and do my own business.
 |
| Ausstrahl Rokinon 8mm fisheye, f/11, HDR. |
I have to say that the main reason for visiting old location is some inspiring kick that got to me when I viewed some old images (specially those I've made into 3D anaglyph images) of a broken shade on the beach. Back then, I didn't have the fisheye lenses that I do have now, specially the Rokinon 8mm. Thus, I've decided to re-discover the area and this shade specifically with my Rokinon because, simply, the geometrical patterns were inspiring as they are.
As I settled down in the place, over the soft sand, I was faced with two main problems: a) setting up the tripod on a soft ground, and b) the flare from the harsh lights of the restaurant at my back. In the final image, Ausstrahl you can still see some traces of the flare even after the crop. One of the problems with fisheye lenses like Rokinon, with a large field of view, it is the hardship to use a flag to block other light sources that cause the flare; simply because there is a big chance that the flag would get into the frame, and when moved out of the frame it does not technically block anything!
On the soft sands it took me some time to settle and to take some test shots with ISO12800 to judge my composition. I've decided then to go with long exposure brackets; something that became a favorite activity at night exposures. Can't remember the exact timing but it ranged from about 8 minutes down to around 30 seconds. Almost at the end of the exposures, some guy was peeking from the top of the concrete wall behind me and started to make comments. His comments weren't bad or vulgar, but they were simply nosy. Thus, when I felt the situation being like that, I didn't stay longer and picked my stuff and left the place.
 |
| Altar Rokinon 8mm fisheye, f/8, 4m, ISO100. |
Leaving the first location, I still had the urge to work a bit more, thus I've visited Soog Sharg dock place where I made some shots several times previously. This time, it was relatively quite (as the time was nearing dawn by then). Even though I did take several shots with different times thinking of bracketing and merging into HDR when I finish, but at the end I only picked the first shot that took me 4 minutes. The rest was a play in the RAW editor (DxO in this case) to fix the shadows and highlights as much as possible, along with the distortion but not to the extreme flattened look. That night, however, wasn't the last activity for me in 2013!
Pajero
As I've mentioned before, I've got a new car just before the end of 2013. A Pajero. I really like driving it and it was a great help with the rains that hammered over Kuwait this week. I'm grateful.
 |
| Pajero 2014 |
The day I picked to shoot my new car was cloudy and prior to some light rains back then, but with HDR rendering I was able to show details in the clouds above. For such an elevated car, it was hard to pick up a proper angle to shoot form a lower level, unlike my previous car, Seat.
I've taken several shots as well from various angles. However, no need to put them here as they are just regular ones. The main interest for me now is to do a panorama from inside like I did with Seat. I've managed to check the rear and I've almost settled with my mental process on how to setup the gear inside - but I do need a proper place to work (for some long time) and it should have proper light level. Let's not forget that I must wash the car prior to my work!
There is one old panorama taken from inside of Seat, which I've done in the parking lot of my work place, but now with my sickness of this place, I've neglected the idea of heading there and shoot a panorama.
Sonne
In the past 2 weeks I've picked up a new hobby. Shooting at the sun. Well, it can be classified as astrophotography, but the case with me is that I'm not completely within the reach of astrophotography; but my main interest is the sun, and the moon of course.
This main interest was sparked (again) in fact when I was surfing B&H website to find what was new for me back then, the mirror lenses. With some little research and study, it seems that those lenses are in fact just small telescopes to be attached to the camera (with the help of some adapters too). This even sparked in me the desire to, maybe one day, get my own telescope and try some astrophotography - but we would need REAL good locations for such hobby, and the urban areas where I live and roam are, of course, not suitable for such task.
 |
| Sonne I Red arrows point to noise bits from the system itself. Blue arrows point to features on the sun itself. |
My first trial to shoot at the sun was with my relatively-new Sigma 70-300mm. As I used to do with the moon, with my Tamron back then, I've attached two x2 teleconverters to raise the focal length to 1200mm. Using the two teleconverters can be awkward in normal conditions because the light quality becomes lower, but with the sun, we would still need some filters to block the harsh light, and here comes the welding glass (green) to do the role.
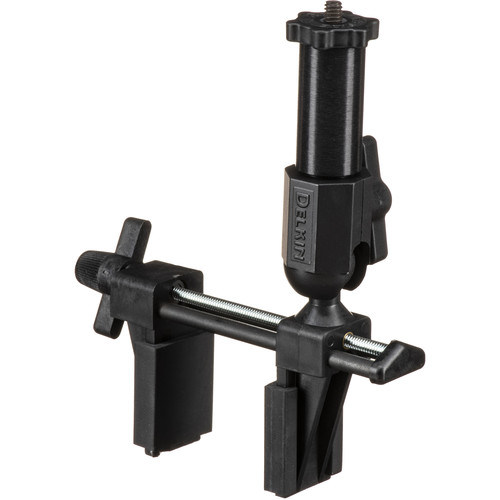
The welding glass provides around 11.7 stops which was enough to look at the sun thru the LiveView LCD at the back. They say, usually, if it is safe for your eyes, then it is safe for your camera when it comes to shooting at the sun, and this is what I've done in fact. Focusing, however, was a bit troublesome; typical for such a long focal length and a shaky system. I think I do need a collar to hold the lenses to the tripod like how it is done with typical large telephoto lenses.
 |
| Sonne II |
I did another trial few days later but this time the harsh spots from the system itself did vanish, and I'm not sure why! Maybe it has something to do with the focus itself. When focusing at a subject like this I usually zoom the LiveView to the edge of the sun disk and try to make it out as sharp as possible visually (which is not always a good solution). With two teleconverters (and f-number exceeding f/2.8 in multitudes!), the AF function is simply idle. Just to note here that the image were corrected for colors later of course. In Sonne II, the spots (or flare?) are more obvious than in Sonne I. The best has yet to come though...
 |
| Sonne III |
My third trial with the sun was done differently. I've used the IR filter instead of the welding glass. The thing about the IR filter is that I can't technically measure the number of stops it reduces, because mainly it is intended to block visible spectrum and pass the IR band of the spectrum - this is the main goal for producing it, and using it! Thus, with this uncertainty in my mind, I kept some ND filters at hand just in case I do need to reduce the light even further. Just to notice, my IR filter thread is 58mm and my Sigma's thread is 62mm, thus I had to use a step-down adapter between the two which causes a bit of vignetting at the edges, but here it's not really important.
 |
| Sonne III Original IR shot. |
The f-Problem
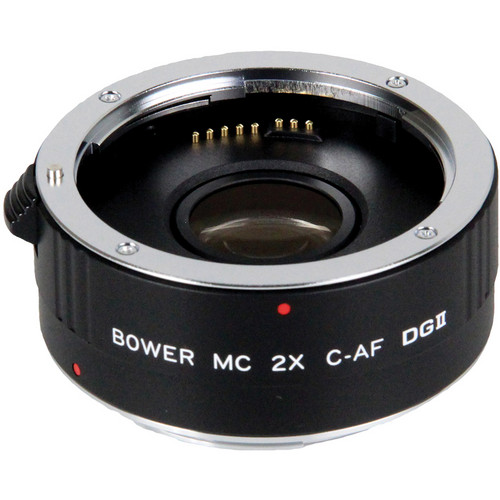
One of the problems that accompany using a teleconverter is the fact that not all information might be recorded in the EXIF of the image file, or even communicated with the camera itself. In my case, my Bower x2 teleconverter would communicate such information, but the Vivitar x2 teleconverter does not communicate any of such information with the camera. Thus, the camera would show f/22 for example, but in reality the f-number is supposedly larger than f/22; after all, the f-number is a ratio.
When shooting at the sun with my two x2 teleconverters, the recorded f-number was f/64. I thought, if someone would try to track the information of the shot to try and do something similar, the consequences might be not "pleasant". Also, I have to think about the future use if I want to mention such information with my images, like in this blog for example, and definitely such information would be misleading. All in all, there must be some accuracy in the information represented with the images. Sigma's maximum f-number is f/22, and it is recorded as f/64 when using the two x2 teleconverter, and this value comes from the Bower teleconverter alone.
Hitting mathematics, let's see what does that mean. That is, having f/64 with two x2 teleconverters and the lens zoomed to 300mm. First of all, let's get the diameter of the aperture here without teleconverters:
N=f/D;
Where N is the f-number, f is the focal length, and D is the diameter. Simple algebra, and we get the equation of the diameter as:
D=f/N;
Thus, in normal conditions with 300mm focal length and maximum f-number of f/22 (as in the Sigma 70-300mm lens), the diameter should be: 300/22 = 13.636mm.
Now, the teleconverters are just magnifiers and do not have any aperture control. In return, then, the diameter doesn't change with the addition of teleconverters, but the focal length does. With two x2 converters, the focal length is theoretically expanded to 1200mm! (300 x2 x2). Now, if we supposed that the f-number is indeed f/64, and the diameter of the aperture is not changed, what would the focal length be in that case? Again, simple algebra would give the equation as: f=ND. Meaning, the focal length is: 64x13.636 =872.727mm. A wrong answer of course.
Using the above equations again to find the correct f-number, it would be: 1200/13.636 = 88. It is worthy to note that in the specs of such teleconverters, it is mentioned already that they double the f-number, but the problem here lies a bit in the mathematics involved, because f-numbers are not based on the rule of stops of 2n, but rather on 2n/2. I find the method of finding the diameter is more "direct" if I can call it so!
This item of info, though simple, I believe it would play some role in critical times when calculating the required exposure becomes essential and finding the correct f-number would be a must at such times, along with other uses.
Finale
 |
| Gaston Bachelard The Aesthetics of The Image Ghada Al-Imam, PhD. |
 |
| Husain Ali, PhD. The Philosophy of Art A New Vision |
Aside from the cultural venue, I've been suffering a lot of downs with no ups. Mom's condition is not getting any better (though stable), and in my work place things are getting on my nerves more and more. In fact, my work right now is the last thing I do care about. The mediocre, if not poor, treatment from the administrative people in my work place makes me question the value of my dignity and respect relative to those people. It's not the first time to think of seriously leaving that work place and be on my own doing my own job and the things I like - but it is better to be with moonlighting; that is working with a stable job and a side job until the situation becomes concrete on the side job. I didn't start this yet even and makes me wonder what to do next. What angers me the most is to realize that I've spent 6 years in this college to get a scientific degree, to be controlled then by a bunch of monkeys that barely know how to do algebra and simply got no considerations for our simplest rights.
The situation is vague. I'm simply living each day to its extent and trying hard not to think of tomorrow. It's hard to neglect that because of the hammered mind, an expectation for a new trouble arises with every morning I turn my opened for the daylight. My heart is tired.