One weird week. Sad, terrifying, and weird. A mix of feelings that doesn't taste any better, but bitter. With this week beginning, on Monday specifically, we got the shocking news of the departure of a cousin in a car accident. He was 18. A memory glimpse passed through my mind, of all the times (even though short) when I had this boy in my lap.With all the sadness, there is a feeling of being lucky to be 32 (almost), and sad again to know such time passed, and sad again to know such a young fellow passed away, and terrifying to know death is lurking. Death, has no alarm clock.
I've finally finished what I was waiting for; the visa interview in the US embassy here. Easily done even with sort of a long wait. I just have to wait now to get my passport back (via DHL?). On the other hand, I didn't book anything yet; not a place, nor tickets. I better work little bit on this soon. Also, I need to plan and figure out how I'm going to move my camera and other stuff with me. It will be a heavy load for sure.
Still struggling with long exposures, and realized now that the weather is one big challenge. With this heat (38oC~43oC at night), it doesn't matter if you take a Dark-Frame exposure and subtract it from your shot, the noise will remain a big issue still.
Now, with my latest shot that took 33 minutes, I've realized that the Dark-Frame method won't do here, specially with such hot weather. However, I did some trials on cleaning the noise with a free software called RawTherapee.
Now, away from the technical talk about what RawTherapee did here, just don't be fooled for the smoothness of the image here. It is just minimized, hence the noise effect is not apparent (click to enlarge and yet it is relatively smooth). The exposure itself was dark, I guess I was fooled by the LCD, and I've totally forgotten to base my judgement on the histogram.
However, there are certain mistakes done here that I have to pay attention to next time. First of all, the rocks that were apparent in the beginning disappeared later because of the overwhelming tide. In such darkness, there would be no trace of them at all except of few dark spots beside the main rock (or crag?). Secondly, I should've counted for the advancing water, as I almost got my camera dipped! The advancing tide could have even shook the tripod slightly (even with its excessive weight). Thus, it is better next time to stay away as much as possible for the line of water and zoom the lens if possible.
RawTherapee played a great deal in reducing the noise after all and frankly I didn't mingle much in it because there is a conflicting interest. As much as I wanted it to reduce the noise in my RAW file, as much as I want to edit my RAW in ACR. RawTherapee has all the controls but they are not as flexible and user-friendly as ACR is.
Anyway, one particular option in RawTherapee that was unique, which is the ability to load the Dark-Frame file into it and it will work out the subtraction (even better than the Difference blend in Photoshop). Thus, I've uploaded the Dark-Frame which I did at 33 minutes as well but at home after coming back from the beach (in the balcony) and RawTherapee used this file to subtract the noise from the shot. Despite the relatively good results, there would be still some noise that were hard to remove with any removal plugin like NeatImage and Noise Ninja.
I've realized and remembered how the noise was a lesser issue (but still an issue) when I did a long exposure at the beach in one winter night. Thus, I've decided to take a different (and a serious) measure to reduce the effect of the heat on the sensor.
Simply put, all what we need is to put down the temperature. This said, I've just got the light bulb upon my head glowing while wandering in ACE store (don't you love this place?). The idea struck as I wondered in the aisle of camping stuff (well, I was originally looking for bubble wrap, but who cares anyway) and remembered the stuff we used to put in our iceboxes when we used to leave for field trips with my work place staff; cooling gel.
Back home mom got some of those gel pads. made for medical uses, in the freezer and ready to be used. Directly after going back home I've decided to do something with those and see the effect, and I guess I wasn't disappointed. The only one thing left here is to put it into practice and see for real.
My experiment was simply to use those frozen gel pads on my camera to cool it down, and for comparison, I've ran the same long exposure of 33 minutes with the pads on.
I think the result is astonishing. Just to avoid any wet drops on the camera that might come from the ice on the pad itself, I've wrapped the camera slightly with a plastic bag. Now, that was not the end of the story. As I was trying to make this image above for comparison, I was going to Assign the color space to sRGB (why would I use ProPhoto here?) and by coincidence I've picked Adobe 1998 space and the noise was reduced significantly too! However, sRGB noise profile was much like ProPhoto but with less saturation maybe?
Anyway, seems this reduction in noise is only apparent or visual, as some pixels do change their color code but not really eliminated as it is the case with Dark-Frame subtraction. Now, why the noise in sRGB and ProPhoto are almost the same, yet Adobe 1998 is lesser apparently, is something beyond me for the time being.
This experiment is done for now and only a real work is needed to celebrate it! But that means more work to be done in moving my stuff to and from the location. If only there is someone to help, or even cares for what I do...
Now with DxO Optics at hand, I've discovered new capabilities (far away from the simple Photoshop) and that sparked in me the urge to re-discover the past images, specially those from Ireland. Also, I've been visiting these images again to post them to my Flickr and share them in groups.
The joy of working with DxO is to be able to correct those images taken with Canon lenses automatically (and also those taken with Tamron 70-300mm, with many others of course). However, doing all the adjustments in DxO is not that easy still because of some... I don't know what to call it but let's say complexity of design a bit. Reducing the Highlights, for example, is still an issue in DxO and cannot be done in a simple way, while in ACR it can be done simply with the Recovery slider.
Images like Fields and Graves were re-discovered as well, and despite the fact that they were taken with the simple 18-55mm lens, yet DxO Optics did correct the perspective slightly (and resulting in an image out of the usual aspect ratio a bit). Yet, as usual, not everything can be done in DxO, thus the files are saved into DNG and re-edited in Photoshop for more flexible editing.
But shots like Green Mile were completely like new to me. I remember that day though and what I was trying to do, but I've never considered this shot for editing at all. Even though it was a bracketed shot, I've decided to take only one RAW file for editing here with DxO, and then with ACR, typically. I've dug out a lot of old photos (and sometimes I do think how did I dare to make this or that!) and now I also see that I need to clean out some space in those old hard disks!
I couldn't resist the temptations. I've finally placed some orders online and I'm waiting now for the arrival. Two new books (and yet I didn't finish those from the previous order last month), and some stuff from B&H.
As for the books, the first is another book by George Barr, and again, from RockyNook. My first encounter with George Barr was with his book Take Your Photography To The Next Level. A really nice book about aesthetics of photography (away a bit from the technicality of the work with the camera). This book now, seems like a mix between the technical and the aesthetic ventures.
Let's hope it wouldn't take me much time to finish the books that I'm reading still. I'm trying to dedicate more time to those: in the office my flash book (by Syl Arena) and before any nap in bed I'm reading Thomas Kida's book, about skepticism. If, only if, there is any travel outside for a vacation, most probably I would be taking one of those books (present or upcoming). I do believe that when reading a book it is important to keep a chain of thought by reading it till the end without stopping for a significant period of time.
The other book, now, is something not related to Photography at all. In fact, it is a book that George Barr (yes, again) advised me to read. Just a note, George Barr is a physician. Since I've been a follower of his blog, he did mention in one of his posts something about ADHD patients, thus I've decided to ask few questions about this case. He replied with some tips, and one of them is to read this book and compare my status to what is mentioned. Frankly, I didn't read the table of contents of the book (it is like I'm surprising myself here), but from the title it seems about giving tips to overcome the ADHD rather than a book of diagnosis. However, this is even better!
I'm not saying that I do have ADHD, however. I'm just not sure. I never did an official diagnosis with any professional in the field. Yet, I can't just deny the traits that I've been witnessing since I was in high school, and were a major abyss for my bad grades (even in college times). The inability to focus, and the (later discovered) daydreaming trend that can't be stopped easily and sweeps through the mind; all of this got to be happening for some reason, and there is something I need to know, and overcome. Yes, there is the Maladaptive Daydreaming (MD) even though it is not yet announced to be an official disorder, but referring to the most known case I believe ADHD comes closer to the symptoms I'm talking about and would be better to work on this for now.
Now, to the fun part! Far away from books and the boring stuff (pardon me, books I like aren't boring to me anyway). I consider this order, somehow, to be my own birthday gift to myself. Well, it is in August but I can celebrate earlier anyway, can't I? I've placed an order for a set of few simple stuff (wish if they were simple in prices as well).
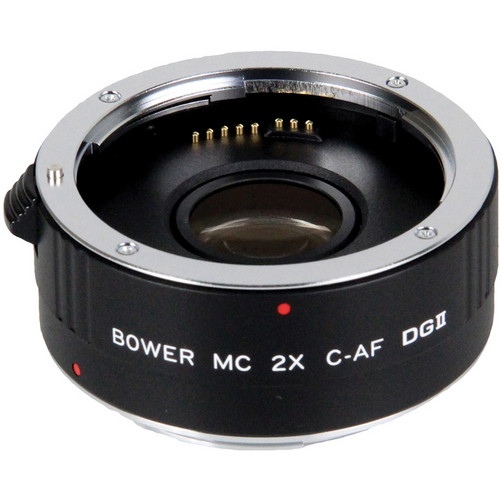
However, one item is another teleconverter: Bower 2x DGII Teleconverter. Even though I do have one already, it would be nice to have another one and compare and maybe combine the two to work as a quadrupling set! Two were available, a 4-element lens and a 7-element one. I preferred to order the 4-element type (and it is relatively cheaper) even though as it is mentioned in the specs that the 7-element type is sharper. I thought that a lesser number of elements is better (and could even reduce the chromatic aberrations problems). Vivitar's 2x teleconverter did show a strong tendency for chromatic aberrations.
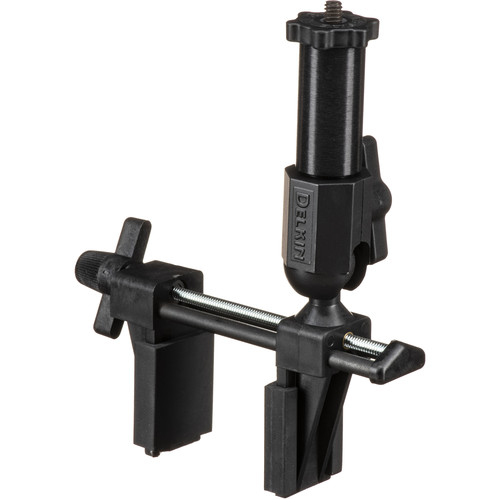
My second item is the Delkin Devices Fat Gecko Gator Camera Mount, which I was reluctant to order for some time now. With the presence of a gorillapod (I call it spiderpod sometimes) at hand, I've thought this item won't be necessary, but after some trial now, I think it is better to have both. I'm eying some sturdy performance better than the gorillapod, as it failed me in some instances recently. Even though this vice takes up to 1.36kg (3lb), I think it would take up to 2kg (4.4lb) in practice. The camera body, alone with no lenses, is almost 1kg (2.2lb). Just hope I won't be disappointed here. But hey! it can be used for other purposes as well!
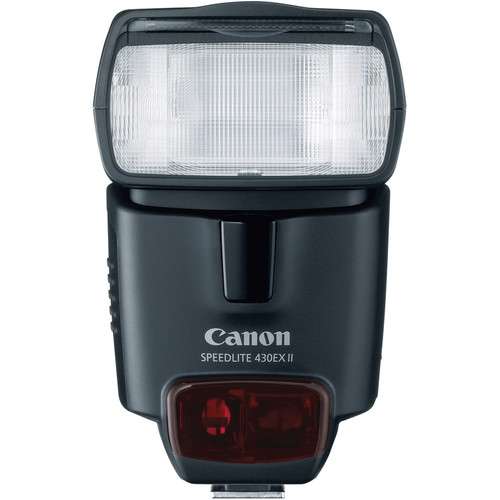
Now with the sweet stuff, my own real gift to myself. A little Canon 430EX II Speedlite to keep company with the big 580EX II Speedlite (well, not that big after the 600EX-RT). After reading Syl Arena's book (and still) my mouth got watering for more experiments and trials with Speedlites. Not aiming at portraiture yet, as it is a field that requires more than simply two Speedlites (plus the interaction with the subject). Yet, it will help in lot of occasions, like the High Speed venture. I'll try to come out with more experiments when I have it at hand. The 430EX II is generally cheaper than 580EX II (around half the price), and has a lesser guide number as well, yet I think it is a suitable choice for now because I'm thinking of using Speedlites in close distances in general and no need much light power. In fact, the opposite might be needed; a minimum power. According to the specs, minimum power (when working in manual mode) for 430EX II is 1/64, while it is 1/128 for the 580EX II - but they might be comparable because of the difference in the guide number after all.
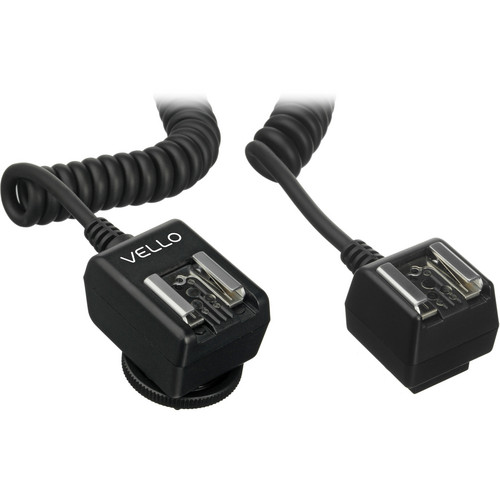
Further more, and to have more fun with my new (expected) toy, I've placed an order for Vello Universal Duo TTL Off-Camera Flash Cord (6.5'). The reason for the cable (for those of you who don't know yet) is that when it comes to E-TTL operations (let's say the automatic mode of the Speedlite) not all operations are transferable via wireless, and also for some aesthetic reasons, you might want to use your Speedlite as a master AND off-camera; something you can't do in wireless (because off the camera operations in wireless requires that your Speedlite must be in slave mode to be controlled). I'm lucky to have the Canon EOS 7D because the pop-flash (in camera flash) can work as a master for wireless operations.
All I have to do now is to sit, and wait. In hope I can get it ASAP. This seems the only joy I can get so far...
Now on the side of conlangs (and remember the main reason for having this blog is Ayvarith conlang itself!), I still didn't plan my next move yet. I'm supposed to work with Geltani though and design the phonetic scheme and maybe a syllabic system to spell out names, but with the occupations of the mind right now I can't be bothered to work with this right now and I'd rather work with my camera for the time being. However, that doesn't mean I'm forgetting about my dear conlangs! After all, I need to get busy as much as my body allows me to. As Edison said once: As a cure for worries, work is better than beer. Yes.
I've finally finished what I was waiting for; the visa interview in the US embassy here. Easily done even with sort of a long wait. I just have to wait now to get my passport back (via DHL?). On the other hand, I didn't book anything yet; not a place, nor tickets. I better work little bit on this soon. Also, I need to plan and figure out how I'm going to move my camera and other stuff with me. It will be a heavy load for sure.
I. Cool me down:
Still struggling with long exposures, and realized now that the weather is one big challenge. With this heat (38oC~43oC at night), it doesn't matter if you take a Dark-Frame exposure and subtract it from your shot, the noise will remain a big issue still.
For those who don't know, a Dark-Frame exposure is an exposure that can be done by the camera before recording the data of the image and it is simply an exposure taken at the same time period of the original shot with the shutter shut, i.e. doubling the time of taking the exposure. This Dark-Frame exposure can be done separately by the photographer, simply by capping (closing) the lens and running the exposure and it will be saved as an image. In Photoshop, this Dark-Frame image is blended with the original shot in Difference blend to subtract the noise. I prefer this method because I can keep the image file for later uses when needed. One issue though, the Dark-Frame exposure must be taken around the same temperature.
Now, with my latest shot that took 33 minutes, I've realized that the Dark-Frame method won't do here, specially with such hot weather. However, I did some trials on cleaning the noise with a free software called RawTherapee.
 |
| 33 minutes Canon EF-S 18-55mm @30mm, f/22, 33 min, ISO100. |
However, there are certain mistakes done here that I have to pay attention to next time. First of all, the rocks that were apparent in the beginning disappeared later because of the overwhelming tide. In such darkness, there would be no trace of them at all except of few dark spots beside the main rock (or crag?). Secondly, I should've counted for the advancing water, as I almost got my camera dipped! The advancing tide could have even shook the tripod slightly (even with its excessive weight). Thus, it is better next time to stay away as much as possible for the line of water and zoom the lens if possible.
RawTherapee played a great deal in reducing the noise after all and frankly I didn't mingle much in it because there is a conflicting interest. As much as I wanted it to reduce the noise in my RAW file, as much as I want to edit my RAW in ACR. RawTherapee has all the controls but they are not as flexible and user-friendly as ACR is.
Anyway, one particular option in RawTherapee that was unique, which is the ability to load the Dark-Frame file into it and it will work out the subtraction (even better than the Difference blend in Photoshop). Thus, I've uploaded the Dark-Frame which I did at 33 minutes as well but at home after coming back from the beach (in the balcony) and RawTherapee used this file to subtract the noise from the shot. Despite the relatively good results, there would be still some noise that were hard to remove with any removal plugin like NeatImage and Noise Ninja.
I've realized and remembered how the noise was a lesser issue (but still an issue) when I did a long exposure at the beach in one winter night. Thus, I've decided to take a different (and a serious) measure to reduce the effect of the heat on the sensor.
The Experiment:
Simply put, all what we need is to put down the temperature. This said, I've just got the light bulb upon my head glowing while wandering in ACE store (don't you love this place?). The idea struck as I wondered in the aisle of camping stuff (well, I was originally looking for bubble wrap, but who cares anyway) and remembered the stuff we used to put in our iceboxes when we used to leave for field trips with my work place staff; cooling gel.
Back home mom got some of those gel pads. made for medical uses, in the freezer and ready to be used. Directly after going back home I've decided to do something with those and see the effect, and I guess I wasn't disappointed. The only one thing left here is to put it into practice and see for real.
My experiment was simply to use those frozen gel pads on my camera to cool it down, and for comparison, I've ran the same long exposure of 33 minutes with the pads on.
 |
| 100% zoom crop of the two slides (warm & cold) Click to enlarge. |
I think the result is astonishing. Just to avoid any wet drops on the camera that might come from the ice on the pad itself, I've wrapped the camera slightly with a plastic bag. Now, that was not the end of the story. As I was trying to make this image above for comparison, I was going to Assign the color space to sRGB (why would I use ProPhoto here?) and by coincidence I've picked Adobe 1998 space and the noise was reduced significantly too! However, sRGB noise profile was much like ProPhoto but with less saturation maybe?
 |
| Both slides are on Adobe 1998 space sRGB slide was converted (not assigned) to keep the visual look as it is in sRGB originally |
Anyway, seems this reduction in noise is only apparent or visual, as some pixels do change their color code but not really eliminated as it is the case with Dark-Frame subtraction. Now, why the noise in sRGB and ProPhoto are almost the same, yet Adobe 1998 is lesser apparently, is something beyond me for the time being.
Just to recall the color spaces and understand why it is a surprise for me, the sizes of the spaces are ordered as the following: sRGB < Adobe 1998 < ProPhoto; with ProPhoto giving more flexible adjustments and more vivid colors, as it is more forgiving. Logically, one would expect if ProPhoto is high in noise level, and Adobe space is lesser, then sRGB should be lesser too, but this is not the case apparently!
This experiment is done for now and only a real work is needed to celebrate it! But that means more work to be done in moving my stuff to and from the location. If only there is someone to help, or even cares for what I do...
II. Digging The Past:
Now with DxO Optics at hand, I've discovered new capabilities (far away from the simple Photoshop) and that sparked in me the urge to re-discover the past images, specially those from Ireland. Also, I've been visiting these images again to post them to my Flickr and share them in groups.
 |
| Cashel Rock Graveyard Canon 15mm fisheye, f/2.8, 1/800 sec., ISO 100. Corrected with DxO Optics |
The joy of working with DxO is to be able to correct those images taken with Canon lenses automatically (and also those taken with Tamron 70-300mm, with many others of course). However, doing all the adjustments in DxO is not that easy still because of some... I don't know what to call it but let's say complexity of design a bit. Reducing the Highlights, for example, is still an issue in DxO and cannot be done in a simple way, while in ACR it can be done simply with the Recovery slider.
 |
| Fields and Graves Canon EF-S 18-55mm @34mm, f/4.5, 1/2000 sec., ISO 100, EV-3 Corrected with DxO Optics |
Images like Fields and Graves were re-discovered as well, and despite the fact that they were taken with the simple 18-55mm lens, yet DxO Optics did correct the perspective slightly (and resulting in an image out of the usual aspect ratio a bit). Yet, as usual, not everything can be done in DxO, thus the files are saved into DNG and re-edited in Photoshop for more flexible editing.
 |
| Green Mile Canon EF-S 18-55mm @18mm, f/22, 1 sec., ISO 100. Corrected with DxO Optics |
But shots like Green Mile were completely like new to me. I remember that day though and what I was trying to do, but I've never considered this shot for editing at all. Even though it was a bracketed shot, I've decided to take only one RAW file for editing here with DxO, and then with ACR, typically. I've dug out a lot of old photos (and sometimes I do think how did I dare to make this or that!) and now I also see that I need to clean out some space in those old hard disks!
III. Ahoy!:
I couldn't resist the temptations. I've finally placed some orders online and I'm waiting now for the arrival. Two new books (and yet I didn't finish those from the previous order last month), and some stuff from B&H.
 |
| Source: Amazon |
Let's hope it wouldn't take me much time to finish the books that I'm reading still. I'm trying to dedicate more time to those: in the office my flash book (by Syl Arena) and before any nap in bed I'm reading Thomas Kida's book, about skepticism. If, only if, there is any travel outside for a vacation, most probably I would be taking one of those books (present or upcoming). I do believe that when reading a book it is important to keep a chain of thought by reading it till the end without stopping for a significant period of time.
 |
| Source: Amazon |
I'm not saying that I do have ADHD, however. I'm just not sure. I never did an official diagnosis with any professional in the field. Yet, I can't just deny the traits that I've been witnessing since I was in high school, and were a major abyss for my bad grades (even in college times). The inability to focus, and the (later discovered) daydreaming trend that can't be stopped easily and sweeps through the mind; all of this got to be happening for some reason, and there is something I need to know, and overcome. Yes, there is the Maladaptive Daydreaming (MD) even though it is not yet announced to be an official disorder, but referring to the most known case I believe ADHD comes closer to the symptoms I'm talking about and would be better to work on this for now.
 |
| Source: B&H |
However, one item is another teleconverter: Bower 2x DGII Teleconverter. Even though I do have one already, it would be nice to have another one and compare and maybe combine the two to work as a quadrupling set! Two were available, a 4-element lens and a 7-element one. I preferred to order the 4-element type (and it is relatively cheaper) even though as it is mentioned in the specs that the 7-element type is sharper. I thought that a lesser number of elements is better (and could even reduce the chromatic aberrations problems). Vivitar's 2x teleconverter did show a strong tendency for chromatic aberrations.
 |
| Source: B&H |
 |
| Source: B&H |
 |
| Source: B&H |
All I have to do now is to sit, and wait. In hope I can get it ASAP. This seems the only joy I can get so far...
Now on the side of conlangs (and remember the main reason for having this blog is Ayvarith conlang itself!), I still didn't plan my next move yet. I'm supposed to work with Geltani though and design the phonetic scheme and maybe a syllabic system to spell out names, but with the occupations of the mind right now I can't be bothered to work with this right now and I'd rather work with my camera for the time being. However, that doesn't mean I'm forgetting about my dear conlangs! After all, I need to get busy as much as my body allows me to. As Edison said once: As a cure for worries, work is better than beer. Yes.


