Showing posts with label vello. Show all posts

Thursday, July 6, 2017

Micron…

Here I am, back after a little vacation away from this blog for the Eid event (and actually not having time to type it down!). I've been spending Eid sleeping most of the time as I'm trying to fix my sleeping time, but I did some work with my camera and I will talk about some of it in this post. Moreover, I did receive my shipments and I'm trying to find an opportunity to try them out. Anyway, I might keep the talk about these stuff for another post, as most of them are actually accessories and spare parts.

Murder of Colors

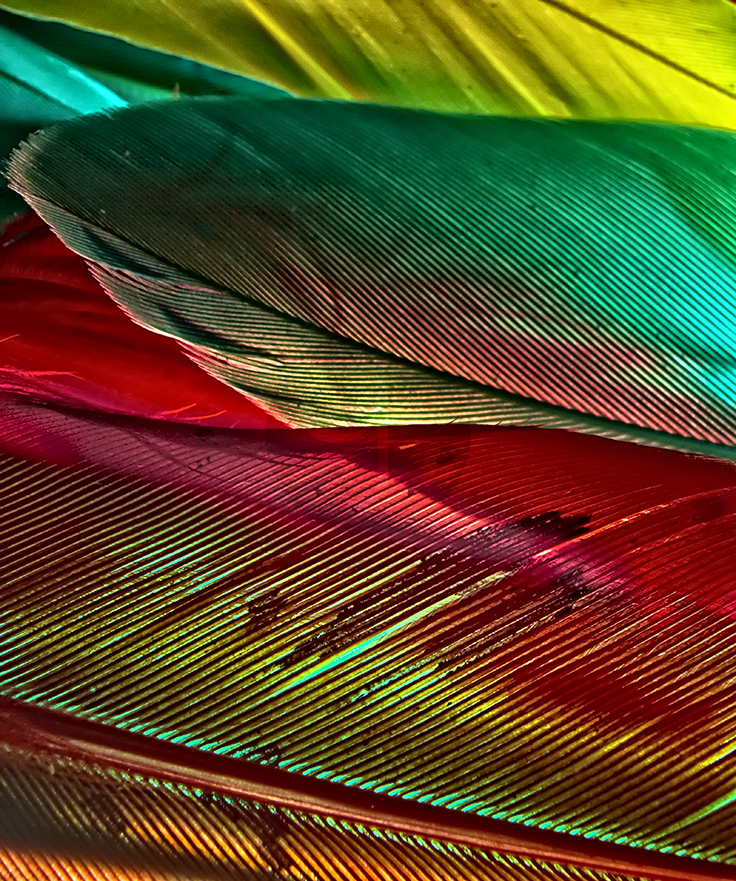
This is the title of a little series I've made, again, with colored feathers as a part of June project with the group which was themed "Abstract." Initially, the idea was to take a shot for some feathers, set randomly, from below with a wide angle lens, in hope that the distortion would serve me here to create an interesting attraction. However, many difficulties occurred, specially with the method of lighting with the speedlites, and after trying many times, I had to give up the idea and do a typical abstract approach as my mind is usually set to go: Macro.

Murder of Colors I
Voigtländer 20mm (R), f/22,
250-1, ISO100.
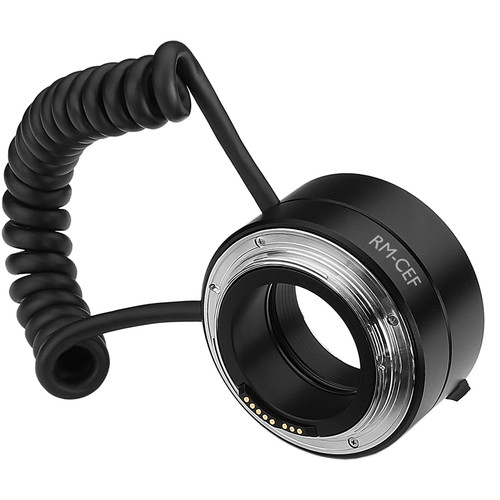
Changing to macro required a change of in the setting of course, so I placed the speedlites below the set (feathers were sprinkled randomly on a plastic or acrylic sheet) while I shoot them from above using the wireless function in my Canon EOS 7D to control speedlites via infrared. As it is not a matter of HSS, then infrared function can be used with comfort (HSS is not active when controlling flashes via wireless, unless with a special trigger). In this series, I moved from using the usual extension tubes with whatever lens, to reversing the lens with my Vello Macrofier. This method is a saver indeed, as it doesn't add more weight to the camera (which I'm going to shoot with by hand and no tripod), and apparently it does not have all the complications that accompany extension tubes when it comes to the focal plane placement and whether or not the focusing point would be in front of the lens or behind it (which deems it impossible).

Murder of Colors II
Voigtländer 20mm (R), f/22,
250-1, ISO100.
I was set to use Voigtländer 20mm lens on reverse here, as according to my calculations (which I've found out they were wrong later) that it would give a magnification of 2.5X, while using 50mm lens would give about 1X. I needed something extra here to avoid the typical zooming level that I've used previously in most of my abstracts. Also, to get some extra details out of the lines in the feathers. In this series which consists of merely 3 shots (after sorting them out), I think I prefer Murder of Colors I the most, as it has this glow and vibrant coloration, and some strange color cast from one feather onto another (mainly on the yellow feather).

Murder of Colors III
Voigtländer 20mm (R), f/22,
250-1, ISO100.
Unfortunately though, I didn't document this simple set for Murder of Colors, and at the moment, I've just realized that there is a whole different series done with feathers which I've totally forgot about despite being uploaded to stock sites already (and accepted by most)! Anyway, I might try to post about that series later. Seems that my busy schedule (or let's say me getting myself busy schedule) made some gaps in my memory! However, I'm happy for one thing, which is finally having an exact calculation method to estimate the magnification level, but that did not come by while working on Murder of Colors series, but rather later, as I was working with my microscope!


Reverse Magnification

Vello Macrofier
Source: B&H
I talked about how I was wrong with some of my calculations regarding the magnification when using Lens Reversing method. Generally speaking, it is supposed to be just like the calculations done with Coupling Lenses technique, where two lenses are connected in reverse to each other and onto the camera; In this method, the magnification is measured by finding the ratio between first lens (attached to camera) and the reversed lens. I could not really find a concrete formula for magnification by reversing the lens directly onto the camera, but I presumed that the focal length should be 50mm or around that, as it is the "normal" focal length. By that, the magnification is to be calculated as 50/FL, where FL is the reversed lens focal length.
However, as I'm working with my old microscope, I got my interest back again and I started searching again, and all I could find is actually practical method to measure the magnification by shooting rulers and finding the ratio between millimeters in the image and the actual width of the sensor. Doing that practically with a ruler did break my believe about the ratio of 50/FL stated above, and I started to look for the source of that difference, as the magnification ratio with a reversed Voigtländer 20mm which is supposed to be about 2.5X, proved to be higher than that (around 3.2X!).
This made me investigate the specs of my camera again and trying to find the true distance between sensor and the mount (a.k.a. flange focal distance), and to my surprise, it was indeed not 50mm as I was thinking, but 44mm. Yet, this didn't explain the results and I just realized the fact that the Vello Macrofier does add some distance further away from the sensor and it should be added (which was about 20mm). By this, the total distance away from the sensor becomes: 44mm + 20mm = 64mm. Thus, doing the magnification ratio again with this value: 64mm / 20mm (for Voigtländer lens) that would yield 3.2X indeed as measured practically with a ruler (values had been approximated of course and rounded to one decimal place).

The flange place for DSLR (top) and
Mirrorless (bottom) indicated by Red.
Source: Wikipedia
With this result I'm more likely to rely on reversing the lens for my macro shots more than using tubes or lenses coupling, or even using my 100mm macro lens. Even though using a dedicated macro lens has its own benefits of course and its quality. Nevertheless, reversing the lens with Vello Macrofier makes the job easier (specially that it offers an aperture control) and better focusing distance than with extension tubes. To elaborate further, again with Voigtländer 20mm lens, as per calculations, using extension tubes to gain a proper 2X magnification or a bit more with this lens, would yield a focusing point behind the lens front (which is impossible); While using reverse lens method, this enables me to get 3.2X with proper focusing distance (in millimeters of course) in front of the lens. Also, I can add filters (UV at least) to the lens front when in reverse just to increase the distance to the sensor (which I did already and gained about 3.7X). There is a whole new world to be discovered with this method, which made me think of having a specially made hood for my Rokinon 8mm fisheye lens to enable fitting adapters to the front of the lens. If this worked right, then I might be able to gain 8X just like a breeze!

Micro-Macro

Well, the upper part to explain the reverse lens magnification was ignited by this ongoing project of shooting objects under the microscope. I have this microscope since I was 14, and instead of leaving it to collect some dust, I've decided to put it to use with my camera, specially after surfing the net and finding new methods to shoot through the microscope without using a special mount and adapter. Mostly, a point-and-shoot cameras are used for this task (or webcam sometimes) but all I have here is two DSLRs with LOT of possibilities.

My set for shooting through my old microscope.
Using two 12W LEDs to light the set properly.
Well, the hardest part was (and still) making the set ready. My microscope is an old one with one eyepiece protruding upward and even though I can tilt the microscope but I have to keep it standing as it is because the samples I make are usually, well, not professional ones and can easily slide down. Here comes the hard part, with setting the camera (and rail) on the top of the eyepiece, and the small tea table did not make things go easier either. It's a matter of weight lifting and sometimes balancing the tripod with the lateral arm on top or it would fall over. Nevertheless, I made it with many samples and triggered me to do another research for better ways to stack focus my images (a single image won't do here).

Lamina

The beginning was with some of the colored feathers that I've already used many times for my abstract. There are many problems that are already there before I even think of shooting through the microscope. However, I'm not intending on producing Book-Quality images after all (otherwise, I do have a friend to help me with that). As can be seen in Lamina, which was shot from a red feather, such single shots do not bear much depth of field. Thus, there was a call for focus stacking, and this time by changing the focus in the microscope itself, not moving the camera and rail combination.

Hair Bulb

Typically, I would think of Photoshop as the main tool to focus stack my shots, but again, I've realized that however smooth I'd go with the focus, Photoshop would still give out some bad blends as can be seen in Hair Bulb. This shot was is probably one of the fewest that I did with 40X objective on this microscope (and thus reaching total magnification of about 1280X). Zooming so deep sometimes makes a loss of some good details, as well as it is hard to light even with external sources such as two LED bulbs. These discrepancies made me aware of the fact that Photoshop, and like the case with panorama stitching, is not the best solution for the task at hand. And again I go looking for other solutions.

Hair Bulb (Enfuse)
 
I've found many software dedicated to focus stacking and most of them were to be purchased, at the end I've found one freeware which is actually dedicated to blend HDR images, but according to some tutorials I've found, it can be used for focus stacking successfully: EnfuseGUI (the man deserves some donation there!). In the tutorials they use Hugin (another freeware for panorama stitching) to align images, but I've found that it is a command-line thing and needs quite a patience here! Thus, just for aligning my images, I used Photoshop back again (and cropping some excesses). No need to go to the details of the process here, but the results of using Enfuse can be seen on Hair Bulb (Enfuse), where the blend had been much better. I was not lucky all the time though, and most of the time with other stacks, I have to stack on stages (blending portions and then sub-portions, then sub-sub-portions... etc) which takes some time but the results are far more fit than what Photoshop could do. Did Adobe fix such issues in new editions of Photoshop? I really don't know, as I'm using CS5 and got no plans to go beyond that for the time being.

A Study of 20 Fils
"K"
320X
One of the struggles of focus stacking with microscope images is to achieve some 3D-ish look when shooting various specimens. Using external light sources got me the advantage of viewing metallic opaque objects, such as coins, specifically this 20 Fils which I did inspect long time ago by in-camera macro methods  (using lens coupling) and reached about 17X power. The story is different now and I'm able to few the metallic texture up and close! However, there is always the annoyance of artifacts from this old microscope but the fun lingers on. To this moment of typing this post there are still more work going on with some coins which I might post later.
As I've stated before, the fact that I'm using a lens on reverse enables me to add filters to the lens' front and consequently this would also increase the magnification ratio a bit because the distance to the sensor is stretched few millimeters. But to my own experience now, I have to say that having super magnification is not always what you want or need, simply because it might obscure details!

Banana Peel
320X

With filters, seems like I'm having different worlds to discover; Something I'm working on still. Probably the most astonishing view I had so far is that one with Banana Peel which was my first target to use infrared filter (B+W 092, threshold: 650nm). Things were dark and hard to see at first, and I had to raise the ISO to max just to navigate through, but I put it down when I saw something that captured my eyes…

Banana Peel under Infrared

The image you see above is of course the final product of focus stacking and infrared processing, as well as channel swapping. However, these marks were glowing in my LiveView while the rest of the peel (same peel posted above that) was dark while using this filter. I showed my friend this image and told him the story but we both were astonished and could not find a reason for this. The thing is, doing infrared shots for other materials did not yield such result!

Grape Skin (IR)
320X

Grape Skin (Normal)

I think this matter needs more picture taking to find if this thing is really significant for bananas only or there was something wrong with the microscope or my camera! However, I'll keep looking further for more samples to do. Despite being a tiresome job to do with this microscope and the heavy cumbersome gear that I have to deal with, it is still a good source of muse, specially with the arrival of my new H-alpha filter from Lumicon, which I'm dying to use (artistically and scientifically, if I can call it so!).

Finale

I guess this post is long enough as it is now and no need to talk about my new acquired stuff. This is beside not trying them out yet and having any thoughts about them. The Summer is scorching my head as usual and with me back to work after a long vacation during Ramadhan doesn't make things better for either mood or body, but I'm trying to muse myself with the camera and the new stuff. July project with the group is also ongoing right now and somewhat adds a bit of burden to my time which I want to dedicate further to my new toys and activities. Everyone, Everywhere I look, talks about traveling, I guess this is natural since it is Summer, a typical season, but it makes me drool and my mind is busy calculating to see and plan for some vacation outside, before I commit a murder or something. Anyway, my traveling is typically after the busy season, to have some "quiet" time. Yet, my mind is not set yet on a specific destination, nor I'm sure about my budget. Meanwhile, my only companion seems to be my headphone, and the heat…


Stock photography by Taher AlShemaly at Alamy

Thursday, August 6, 2015

Toys Toys Toys!

Here are they! My new toys and gear! Well, forgot to mention anything about them in previous posts but I will dedicate this post to them. Up until this moment I'm trying to find some time to test what I got here and write a review for them on B&H website. However, this week has been hectic for many things (and believe it or not some of that because of work despite the dormant summer season). Add to that, a turmoil at home because of renovation work that I just can't swallow.

Toys!

Now, to the business. All in all, beside the toys there is a side order of 2 books but I'll keep those for later down. Most of the items were actually from the wish list I've stored on B&H website and I've just realized that I was just "window shopping" for more than a year without thinking of upgrading anything in my arsenal of "toys!" Most probably it is all related to the downgrading financial situation worldwide.

Source: B&H
Anyway, first things first. A camera and lenses case or bag, from Think Tank. This item was on my wishlist for 2 years or even more! Now it is the time to get I thought, specially with the deteriorating conditions of my own bag right now. It has lot of pockets and the main inner body can adjusted to many positions to fit even a bazooka lens (sarcastic term for telephoto lenses; sorry photographers' joke). I can even fit my Rokinon barrel (mirror) 800mm lens in it instead of leaving out as I used to do before. The bag is supposedly made to accelerate your airport experience (a hassle every photographer might have encountered already). However, with many metallic stuff and batteries inside, I'm not quite sure if this will work with the increased security issues worldwide now. The best thing here even is that I could attach my tripod and I don't have carry it by hand... finally!

Source: B&H
One of the interesting items here, and I mean "very" interesting, is what I've discovered on B&H as I was surfing looking for some other items. A UV filter. Usually when "UV filter" is mentioned, people would think of that yellowish filter that enhances the colors of the scene by blocking the bluish UV haze. This one is completely different and acts like a cold mirror in the case of infrared: allows UV and blocks visible light. This is a completely new field to me and I still need to discover and try. One thing for sure though, Long Exposure. It does require film or converted sensor as well just like in the case of infrared photography, but the sources here can be different. One of the interesting facts here is that flash tubes (e.g. speedlites) can be used for UV photography but some protective layers must be removed (hence it would be a good idea to get a cheap flash and adjust it). Till the moment of writing this, I've tried the filter only once in the outside in my workplace just to test the length of the exposure and I have to say... it's long!

Source: B&H
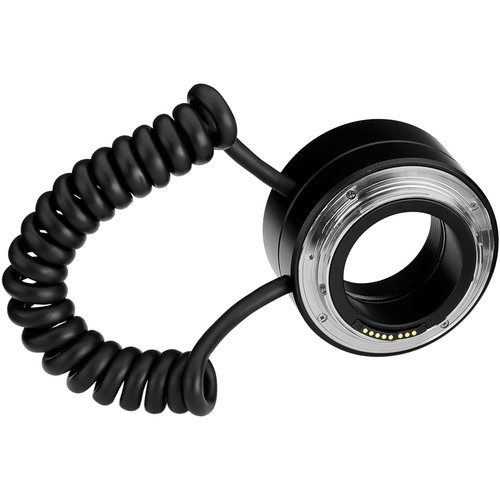
Then we arrive at the next major toy! The Microfier from Vello. It is relatively cheaper than reversing rings from other brands and it offers the essential control over the lens when it is reversed and mounted on the camera for macro photography. It does offer somehow a greater magnification level more than extension tubes (by calculations) specially when used with 18-55mm kit lens (the smaller the length, the greater the magnification). There is still the issue of the closest focusing distance which I didn't experience or read about yet. However, I did take a simple shot for my fingerprint which does look good (with high ISO here though). Left to say that it comes with several mounting rings to accommodate for the various diameters for lenses.

My fingerprint taken with Microfier.


Now, the rest of the toys are simple accessories, and some of them are really needed though, specially as a replacement!
Source: B&H
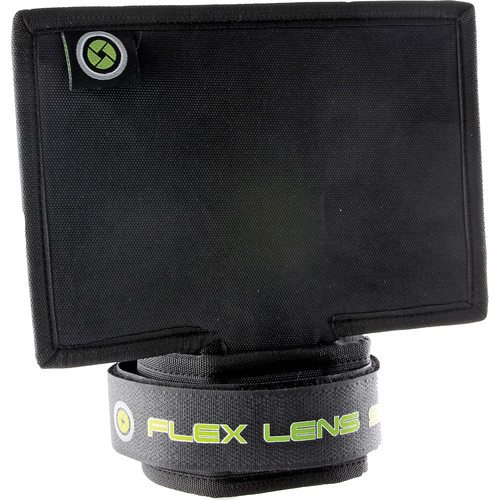
First, we have here the Flex Lens Shade I guess the name says it all. Anyway, one can also argue that even lens hoods don't do the job perfectly in blocking the light flare (in the description of this item by the manufacturer, they state it can be attached to hoods themselves!). Anyway, this is not only for daytime photography, but also for nighttime to block the remnants of street lights. However, the real test would be with fisheye lenses and their excessive field of view (specially the Rokinon 8mm that I own). Seems a night shooting session is due, despite the horrible weather!

Source: B&H
The next in line is something I needed as a replacement. A step-down ring to fit a small filter on a large lens diameter (58mm onto 62mm). The comedy here is in the fact that I've only found one store which sells those here in Kuwait, and for my fantastic luck, they don't have this particular size. Please note the sarcasm when I said "fantastic." This ring though is better than the one I've lost already since it is made from aluminum alloy and not plastic. I've ordered 2 rings just in case!

Source: B&H
The last item in this list is just some Manfrotto 1/4' screws to keep as spare parts. I've kept this time in my wishlist for a long time, specifically when I noticed one of the screws in my Manfrotto VR-head was missing (and during that time I was using a spare screw from Manfrotto macro rail head). However, I did find that missing screw later on! But nevertheless, it would be a good idea to keep some of those available whenever needed for such "disasters!"

Büche

I don't know why I used a German subtitle for this section, but oh well. I didn't read photography books in such a long time I guess, and still I do have a queue of Arabic books that I need to go through still. I'm planning to stop reading a novel in Arabic in bedtime and replace it with one of the photography books I've recently ordered.

Source: Amazon
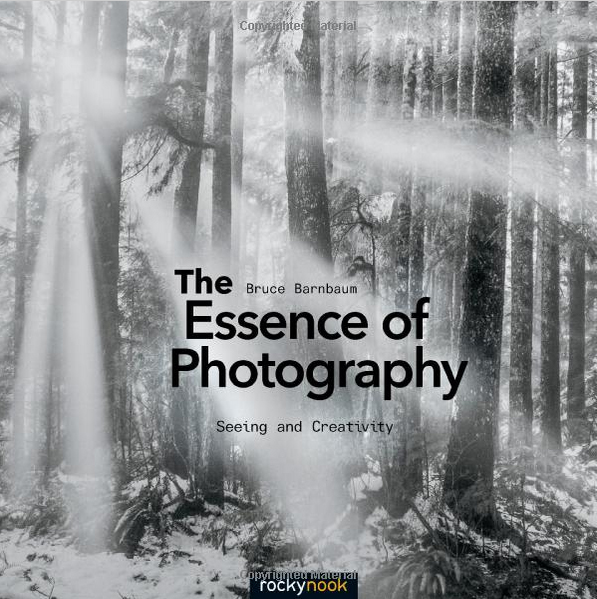
The first book on the list is by Bruce Barnbaum. This is the second book I have from him. The previous one was The Art of Photography; a very intellectual approach beside a long and detailed technical description for the chemical processes done for films development. It was/is such an amazing book and I thought this is the time to rejuvenate my eyes and vision in photography after such a dormant period. Thus, I'm hoping that The Essence of Photography would be like its predecessor. It is not only about the information in a book that one would stick to it, but also to the style of writing and the order and organization of the book itself that one might lose him- or herself reading it.

Source: Amazon
 The second book is supposedly about the art of using flashes (speedlites) in a creative way. I had other books about flash photography, specifically those by Syl Arena, but this one seems different in essence, since it discusses ways and methods instead of the technical aspects as it was in Syl's books. I will keep this book for later reading. I think I will be taking one of them anyway with me when I travel... I need something to pass the time with from time to time.

Finale

Things are done and ready, almost, for my travel. All what is left is... the visa! After completing my papers, I've set an appointment to "submit" the papers and complete the procedures - I heard an interview is involved. So, we'll see by next Monday, August 10th. Good thing that Mom has no dialysis session on this day. Because of all this hassle my ongoing Geltani documents are on hold, again. I just can't wait till I start my vacation and off the country. One thing though I do wish for... a specific someone to be with me on the way…

Thursday, January 30, 2014

Official...

Surprises (or should I say Semi-Surprises) still have a plenty for me to show, and it is yet still the first month of the year.
It is official now. I've been diagnosed with Retinitis Pigmentosa by a specialist, after checking all the results of the tests I've done in the past 2 months: Field of View (FV), OCT, and ERG. I'm not sure how did he really read my results without a close-up inspection to my eyes, but he depended, as it seems, on the ERG test result which I've done last Thursday. I'm not sure what's the next step, but anyway the doctor said that he cannot make up for how severe it is. When he asked if I do suffer of anything, I simply replied what with what I feel and what I've seen: Nothing.
Anyway, more about that probably later. I'm somehow happy for this past week for a number of reasons which I'll be talking about below.

A World of Pajero

I've finally had a chance to do a panorama for my new car; Pajero 2014. The panorama wasn't any easier than the one done with my old car, Seat, despite the relatively wider space inside. This is mainly relative to the size of the tripod and the bulky nature of the panorama tools I need to use. This in fact sparked me to think seriously about finding some alternatives somehow.

Pajero 2014

Even though I've stated before that I'm not going to use the parking lot in my work place because I'm disgusted of that place, but anyway I've come up with a solution just to avoid suspicions. That day, however, I had to wash the car and make sure it's clean of dust and I had to remove all the plastic sheets covering the seats (as in any new car). After doing my fingerprint scanning to leave work, I've went to the back of the parking lot as if I was leaving but instead of leaving I just parked there in somewhat isolated spot. The total process (settling and shooting and packing at the end) took me around one hour and a half. During this time there were employees who did pass in front of me and I somehow managed to escape some of them, while HDR technique and merging did the rest of eliminating some of the moving objects that appeared out of control!
The panorama was mainly formed by 3 rows like in normal panoramas with one or two shots for the zenith (but didn't use it later). As for the nadir, it is already a hassle in a regular panorama so imagine shooting this inside a car! I did try, however, to dangle the tripod with the camera and the carrier from the back of the Pajero, but the shots taken were not to be considered "serious"!

A World of Pajero

However, even though it is not a full panorama, the set of images were enough to do some twisting in the projection style as can be seen in A World of Pajero. I think what really helped me here very well in accentuating the colors is using a proper white balance to start with, and this was achieved by using my new Vello white balance disc. From that point, changing colors and vibrancy of colors is, relatively, an easier task.
Even though Pajero 2014 was tone-mapped using Photomatix, yet I find that tone-mapping A World of Pajero using Photoshop CS5 did the job perfectly and with relatively more flexibility than in Photomatix. With the new controls that Adobe provided for tone-mapping HDR images, I think this is becoming a serious candidate and a powerful tool for tone-mapping HDR slides.
I've already printed the flat panorama and prepared it (and signed it) to give it as a gift to the sales person who managed my papers for this car in the nearest opportunity; probably when I go for the first service after 1,500km is passed. This is in a part, can be said to be a "self promoting" somehow, or let's say a free ad. Since I suck at socializing, probably such acts would do me a favor "socially." We'll see about that later...

Nächtlich

Now, there was an idea that I've been trying to do for several weeks but I would always lay lazy or exhausted, or simply the weather and timing wouldn't allow me to. This past week though I had to force myself to work despite some health issues. Seems that the coughing syrup worked on making me drowsy in the first night of the weekend, thus I couldn't do much at night, but the second night I had to push myself despite the persistent coughing. Even though I headed to the location late after midnight, I've encountered some annoying "youngsters" who were not of this country. I somehow got pissed off because at the only time I could be there I must bear with such people. Even though I tried to work silently without paying any attention, I've decided to go back to my car and watch the please until they leave - they seemed to be under drugs or high because of something!

Die Kuwaitische Mitternacht

Guess I've forgot to mention that the destination is the Soog Sharg pier (or dock?) which was a favorite location in the past weeks for long exposures with my Rokinon 8mm fisheye lens. This time, however, the measures are different; I'm doing  panorama and to ensure that the luminance is coherent for the HDR merging later, I have to take 3 bracketed shots, and to ensure that the total time for each shot does not exceed 30 seconds, there is no escape from raising the ISO. Even though it's not something new here but my previous record was to work with a panorama in ISO800. This time, however, it had to be ISO1000! This will have gruesome consequences later on...

Planeta Mitternacht

One of the gruesome consequences of such panorama under such ISO is, naturally, the hardships with the cleaning process and, with highly distorted projections like in Planeta Mitternacht, the noise level becomes even uglier. To clean the image, then, means you must lose details. Thus, so far, these images are for display only and printing them is not something to think of in the current time - unless I find some other workflow to work with these images.

Gravitation

Obviously, the noise level is harsh in shadow areas. There is a noise layer as well in bright areas like the blue sky for example, but they are not as harsh and "ugly" as those in the shadow areas. Probably, I needed even more time for such exposures to expose the shadows properly! But to do this, I would have, properly, spent 2 hours if not more, shooting this panorama.

Schrein Am Meer
The worst to suffer from the noise.

Working at the pier in fact was not even any easier physically than my previous panoramas done back in 2012 on the seashore. Because of the bulky planks and the gaps in between them, clumsiness in movement which I've been known for was NOT allowed! Any loose clutch or grip on any of the tools I've been using (to screw, unscrew...etc) is definitely not an option, and walking must be done carefully in such darkness because my feet can easily trip in between the planks.

Working with these panoramas now did in fact spark some desire within me to work with older panoramas, specially those from Ireland of 2010, from Co. Tipperary. Under the light of the new vision and the new techniques I've learned so far, probably I could make out something different from these old pieces!

Helios

Source: B&H
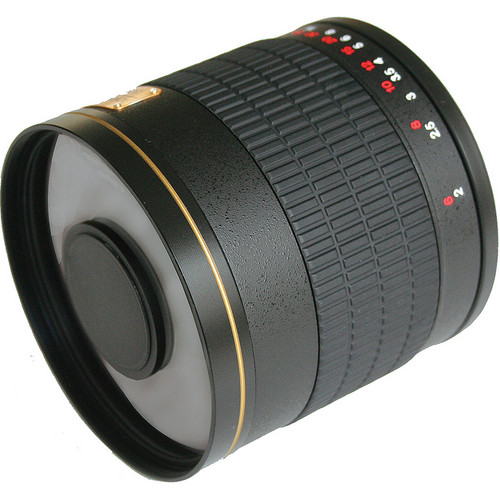
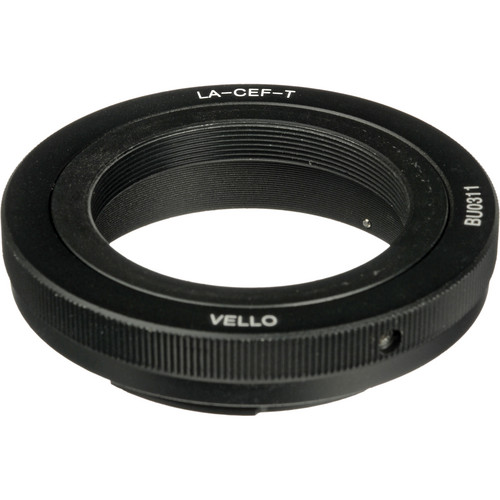
I've finally received my shipment here and I had the chance to do a simple test for my new lens, the Rokinon 800mm f/8 Mirror Lens (a.k.a. reflex lens). To use it, I have to connect it to a t-mount adapter specified for EOS system. I was lucky that Vello's T-Mount Adapter comes with a small booklet that gives some idea about connecting the camera to a telescope and other optical devices which gives me some simple guidance of what to expect in the future if I need to do more with my camera.
Source: B&H
I've ordered also a Cokin ring adapter to fix my welding glass in front of the lens (which has a diameter of 105mm), but for some reason the ring came a little! Hence, it is hard to completely fit it into the lens but it did some job after all - even though the situation might be shaky. The other hardship here is the fact that I'm not using a zoom lens, but a "prime" lens. Previously, I used to zoom out to find the object and then zoom into the object (be it the sun or the moon or anything else). Here, though, I have to find my way the hard way, and with this shaky tripod system. Things get even harder with adding teleconverters and raising the focal length up to 3200mm! Anyway, I was able to give it a try.

Sonntag
Rokinon 800mm Mirror lens, f/8, 800-1sec, ISO100.

To add to my "good" luck (and please note the sarcasm), since I got the new lens, I didn't have a good chance to shoot the sun nor the moon because of the clouds and few rains. I did have a single opportunity to shoot at the sun with welding glass, but it seems that the nature (and thickness) of the welding glass is a main reason for defocusing. The shaky system probably makes it harder for me to concentrate my eyes and focus properly (and everything is done manually) but it apparent that focusing with the welding glass is harder. As I'm typing this, I'm waiting for my chance to shoot, this time trying my ND filters (and I do need to use a stack of them). Not sure though if they will fit and cover the diameter of the lens. Another option would be to use the gel filters sheet which I still have, and let them down in front of the lens with the help of the Cokin ring. Just some ideas that I need time to test further. These issues, however, are nothing compared to be having a good and dependable tripod right now which made me think seriously of getting a new one from here.

Finale

Now it is probably the time to slow down and do as much as possible in the same time. Despite the fact that I'm officially diagnosed for retinitis pigmentosa (RP) right now, I'm just trying to chill and cool down my nerves and go on with my life without putting much weight on my own notifications about my own sight.
I had some ideas before in fact about what if I was a sculptor; probably I can make a monument somehow to commemorate RP and its patients.But since I'm a photographer (or let's say trying to be still), maybe then I can show and do something on the same line? What can I do as a memorabilia for this?

I do have some ideas in my pocket right now, but to do them, some effort is needed, specially if I'm working alone and trying to take shots on my own for my own self. I do have some other ideas not related to RP as well and all is scribbled down on sticky notes. Just need the proper "timing" to work with them.

Maybe I can imagine RP to be an inflicted photography style somehow. I'm not sure how this is possible but probably with some thought and philosophy and meditation, I would be able to reach a solution for how to work around RP, and show it in my work.

I'm not sure what I'm awaiting in this life for the time being. My exhausted mind and body are really urging for a vacation somehow but it's unclear how or when. The only thing that I can do for the time being, is just look for some time to sleep, as much as I can...


Thursday, December 19, 2013

Zu Studieren...

Let's see. A week that started with a semi-disaster, after the escape of the maid from the house. Now, we (or me) have to do much of the house work as much as possible to keep Mom rested as much as possible. It is hard as it is WITH the presence of a maid, as Mom tries to keep active and simply denies her ailments.
On the other hand, I've done all the paperwork and payments to get the new car. I think I will take a shot for it and maybe even a panorama from the inside. It's too early for this talk anyway!
Because of this busy schedule either in daytime or after working hours I didn't even have much time to do anything with my camera except for a simple study and a simple shot. Even that simple shot is not worthy (so far) for publishing, specially after discovering that my leg is in the image by mistake!! (common mistake in fisheye shots!).


Comparison and Study
As I've mentioned last week that I've done some experiment to check and make an idea of the effects of some light modifiers after receiving my new shipment of Impact Syl Arena Strobros On-Camera Flash Light-Modifier Kit.

Source: B&H
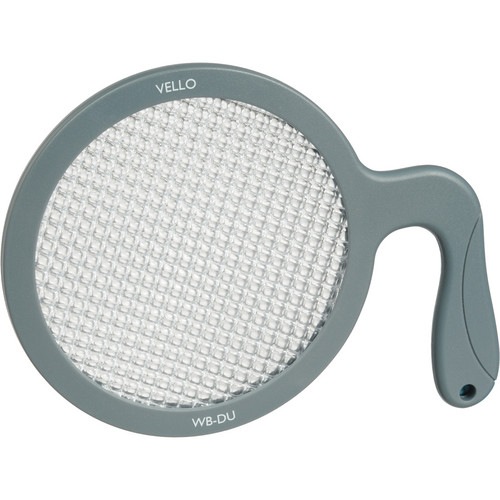
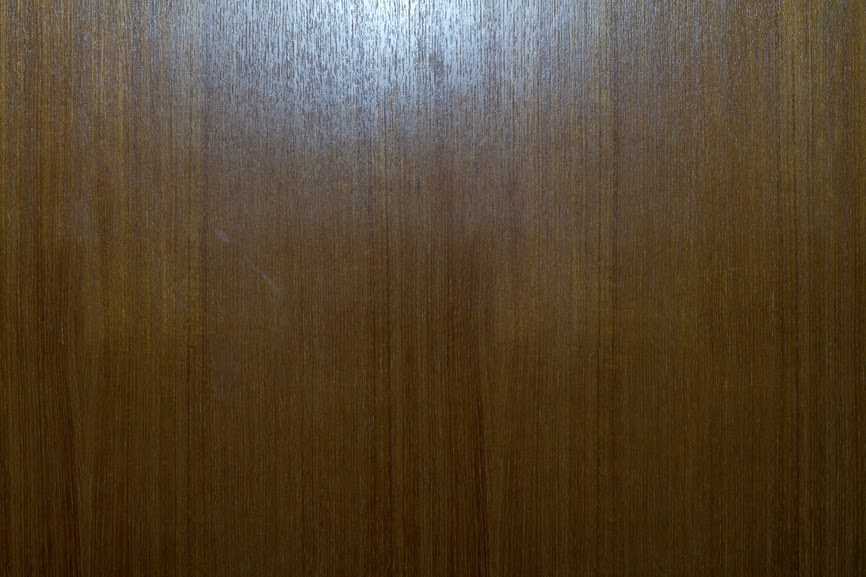
Initially, I've done the test with my 580EXII Speedlite against my green wall. After checking the results of such test, I've decided to do the test again, and this time against my wooden door because it has a clear texture and it is better to judge the effect that way. I've also added the RoundFlash modifier to the list for a general comparison. But first, I'll post an original image with plain 580EXII in use. It's worthy to mention that the distance from the front of the lens to the door was kept at around 1 meter (~3.3ft) and f/8. The shutter speed and the power of the speedlite were subjects to change to adjust the level of the light. To ensure a neutral white balance with natural colors as much as possible I've used the Vello Universal White Balance Handheld Disc and shot with the speedlite naturally and used that image in Custom WB settings. In the following set of images, it would be better to click and enlarge the picture to have a better view.

Plain 580EXII
Canon EF 50mm, f/8, 320-1sec, ISO100.

Notice how the center of the light strike is closer to the top edge with flare and gradually fading in all directions. I don't know though why it is not exactly at the center of the top edge!

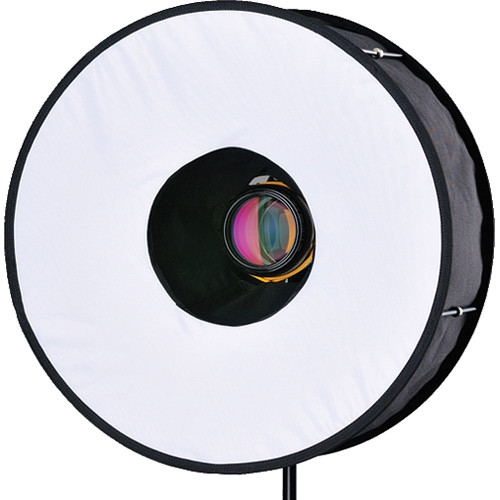
RoundFlash
RoundFlash shot

Source: B&H
In the RoundFlash shot here, I've used the High-Speed mode for the 580EXII to kill the ambient light and also to decrease the flare on the wood. Strangely, and probably it is a property in the High-Speed mode, the light became more bluish despite fixing the WB by Custom WB settings.
As you can notice, the light accumulated in the center of the shot and gradually spread to the corner, but the graduation is short and blends to darkness like it's vignetting. One of the main problems with the RoundFlash modifier is that the lens should have some length to fit properly in the center. My Canon EF 50mm f/1.4 USM lens was not long enough and initially had problems to fit it in between the strings in the middle of the modifier.
At such level, and 1 meter away from the target, the spotlight of the Speedlite falls almost perfectly in the center (even though in the plain shot it was not!). A good point to consider when shooting portraiture and macro; in fact, RoundFlash was made as a cheap substitution for the expensive ring flash used in typical macro shot. One bad point about it though, it is bulky and I wonder how fit it is for macro shots. You must have some long lenses to keep away from the target (if it was a sensitive one as an insect for example) and to have the lens fit firmly in the center of the modifier. Concentrating the light in the center, and in such amount, would somehow mean harsh shadows for the subject if it was used for portraiture shots I believe.

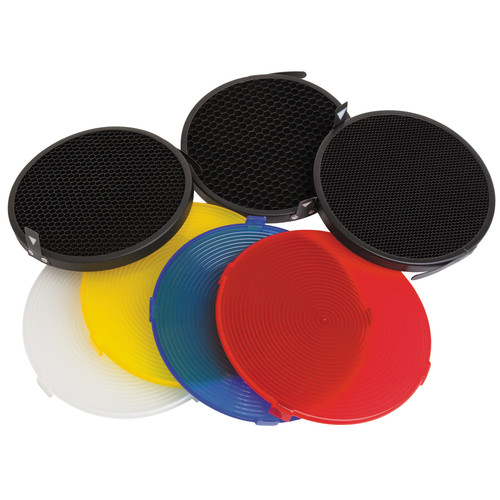
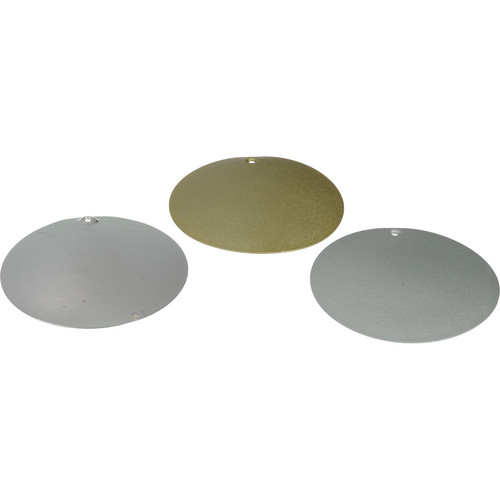
Beauty Dish, Golden Plate, and Diffuser
Beauty Dish + Golden Plate + Diffuser

Source: B&H
Source: B&H
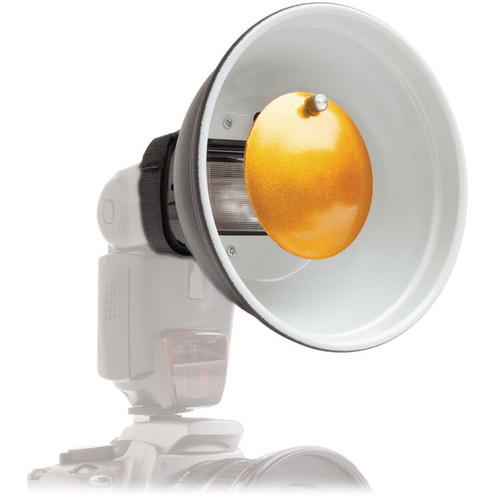
Then comes the beauty dish, which is a well-known modifier in the fashion world and fashion photography. Technically though, I've never (so far) used it for portraiture or anything else but this test as you can see here. Along with the kit, some specific diffusers and grids to fit the beauty dish are available, thus I've decided to check the effect of the diffuser (the white disc in the image), as the other discs are simply colored diffusers and probably wouldn't help me if it casts a color on the reddish-brown wood. I also didn't check the effect of the grids because their effect is known - simply to concentrate the light into a narrower angle.
Back to the light show now.As it is noticed, the flare of the shot is on the top level above the center and closer to the edge but the size of the flare is relatively small (compared to the RoundFlash and the plain shot). The color of course is changed a bit because of the golden plate inside the beauty dish which made it a bit of greenish hue more than bluish hue. The graduation of the flare is faint (and appears first as if it is cut abruptly). This light attitude makes me think of the usage of the beauty dish; it must be used with some angle even though it is (here with this kit) considered an "on-camera" speedlite modifier. Otherwise, if it was used directly to hit the subject, it would cast a harsh shadow on the spot where it falls. Well, unless a dark background was in use which would hide such shadow maybe!

Beauty Dish, and Golden Plate
Beauty Dish + Golden Plate

I see that when the diffuser is removed there is, virtually, not a big deal of difference in the location of the falling light according to the frame, or to the graduation in the light level. Probably the diffuser provided a greater expansion in the periphery of the falling light, and probably this difference would be more apparent if the power of the light was increased (by the speedlite, by the aperture, or by slowing down the shutter). Could be a subject for further testing.

Beauty Dish, and Silver Plate
Beauty Dish + Silver Plate

Source: B&H
The next plate in the queue was the silver plate to be fixed in the center of the beauty dish. As it's predecessor, the silver plate doesn't seem to change much except for the color of course where it accentuates the blue tint of the speedlite. Usually, with gel filters fitted upon the speedlite, a balance between the ambient light temperature (or color) and the speedlite temperature is sought in that way, and consequently, the white balance is controlled more properly. Here, however, the story is a bit different when using the plates and a speedlite which emits a tinted blue light. Makes me wonder now about the possibilities (and the creative process) of blending gel filters on the speedlite with those colored plates in the beauty dish. The results got to be crazy!

Beauty Dish, and Mirror Plate
Beauty Dish + Mirror Plate

It might appear as completely black frame, but in fact there is a faint light. This result, however, was a complete surprise for me as I was expecting more reflectance from the mirror plate. The mirror plate (which comes in a concave shape) has two sides: polished (convex) and unpolished (concave) surfaces. Other plates don't have polished surface like a mirror. Anyway, according to the settings I've noticed, the concave part must be facing the speedlite. The light here was very faint. I would increase power to make a clear note of how the graduation or feathering of the light goes, but it's enough for me now to see and compare with other settings of other plates. Seems that the mirror plate feathers and scatters the light emitted from the speedlite so much that it only makes a faint tracing of light in the frame. Leaves me with the question: How would that appear in a wide-angle lens?

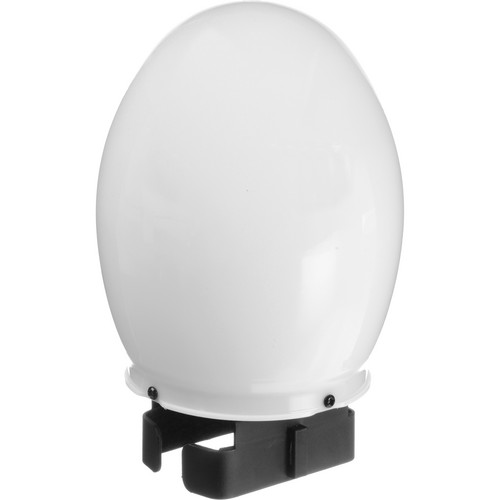
Bulb Diffuser
Source: B&H
The next modifier is one that I've seen photographers use it a lot, either directly or indirectly. However, the usage of the Bulb Diffuser might be known to many but that didn't keep me still without testing it here. It is a diffuser after all and dedicated for smoothing and feathering the light in a pleasant way. Anyway, because the bulb shape emits lights in all directions almost, and because the typical setting as shown in the guide that the speedlite must be pointed up, I've decided to do my own testing with various tilting angles of the speedlite.

Bulb Diffuser, speedlite pointing up.

On the first trial here with the typical setting: Speedlite pointing up. As it can be seen above, the feathering is nice and smooth going all the way down from the top with little flare on the top edge. Remember that we are using the Canon EF 50mm lens here, meaning that with a little extension in the focal length, more than 50mm, we can be left with the feathering alone without the flare on the top edge of the frame. A good point to memorize I suppose!

Bulb Diffuser, speedlite at 45o.

After trying the typical position, I've tilted the speedlite head down by 45o. This position looks good despite the relatively large flare on the top of the frame (which as I stated above would be avoidable by using a longer focal length). The graduation or feathering is slow making the luminance almost (not completely) homogenous across the frame. Probably this would be a favorite position when doing portraiture (with a little raise in the speedlite level or longer focal length).

Bulb Diffuser, speedlite at 90o.

Finally, we have the 90o position which in fact almost replicates the plain shot of the speedlite without any modifier. Yet, however, in the plain shot above you can notice the black edges like vignetting effect, but here with the bulb diffuser, the edges are also illuminated and almost no vignetting can be found. This makes me think of using the speedlite with other modifiers from Rogue collection which I got before in order to maximize the spread of the light circle and yet give an act as if the speedlite is unmodified originally! Needs a bit more of trial and error.

There are a number of other modifiers along with the kit but I didn't test them because, simply, their effect is known; like the snoot (with grids) and grids for the beauty dish. In addition, a new set of gel filters and a velcro band arrived with the kit but I didn't use them yet, as they are similar to other sets I had already. I need to practice my "speedliting" as much as possible now.

Finale
It feels like my life has been monotonous right now. The only way to break out the routine and the duties of the everyday living seems to be paying close attention to details around me in a trial to amuse my brain in things that usually I don't think of. There are books still on the queue but they are not photography or archaeology books, so my progress in digesting these books is slow. I'm praying for some vacation again, but a real one, out of this country. I'm feeling sick of my (unappreciative) work place, as well as of the majority of people around me. Such a dream seems far a bit for now.
Now, I'm waiting for every weekend like a treasure seeker, and hoping that I can do some night photography in each weekend. Is it worthy to try to be unique already?


Thursday, December 5, 2013

Es Ist Winter...

What am I? A question that persisted all this week. I'm not sure how to answer it, but to answer this, I have to do some photography. Some more photography, as much as possible. It's winter, with fresh air that would help me clear my mind.
I've been running some errands and will schedule for ERG (Electroretinography) examination. It makes me awry and worrisome. I've read a bit about the test and how it is done and I do feel scared a bit of the way it is done, and annoyed. However, it is something that must be done in addition to the previously-done OCT and Visual Field tests.
I've gave up hope about my (old) car and seems it won't be fixed any time soon. After fixing the computer or chip was fixed, the mechanic said that the car would turn on, but can't be moved as the car doesn't response to the accelertion paddle. I've decided now to get a new car and even if my car gets fixed, probably I would give it up. It will be another drop of money and budget but for something very critical. I didn't decide yet what make of car yet, but it's not a big deal for now.
The nights of winter are lovely and chilling. Fresh air, quiet atmosphere, and sparkles of light. It's a shame though that I can't go out to do some photography every night (and this is one more reason to think of a vacation in winter only), but there is a beginning for everything...

Linien des Lichts
I've talked last week about my desire to go out and shoot, specially at night. This is a must for me in winter time. Winter, is the best season to shoot for many reasons, and for me, it's enough to talk about the temperature. Being cold and out alone in solitude is far better for me than being boiled at night when the soil gives the heat back after a hellish day, like those in summer!

My first trials here were not good but they are a start and I did spend some time reflecting on the results. I was wishing for a cloudy night to do some clouds' movement with long exposures. The target was the dock at Soog Sharg.

Nox Infinita
Rokinon 8mm fisheye, f/8, 4m20s, ISO100.

At the moment I've stepped out of home, I've realized that there are no clouds in the sky to help me. However, it happens that clouds can accumulate on the shores, or specific shores rather than others. I had to try after all. When I reached the place (and it was after 3 A.M.), I've found it busy with some fishermen or just "picnic" takers. I hesitated because I was (and always am) not ready for interference and annoyances, specially from security guys. Thank God, none of that happened. Back to the image now.
I've realized later that the location wasn't good. The fisheye lens did a good job in eliminating the presence of people far from my location, but the light sources made a harsh flare. Such flare might even be hard or impossible to avoid because the sources lie in front of the camera directly I suppose. The f/8 made the effect drastic as well. That, however, didn't stop me from making some few adjustments to Nox Infinita later on, at least to make the color blend nicely with some good contrast. One thing though I wish I've done back then; is to raise the level of the camera which was less than one meter high above the ground (< 3ft).

Unendlicher Nacht
Rokinon 8mm fisheye, f/8, 4m20s, ISO100.

While working with Nox Infinita back home after that night, I suddenly got the urge to transfer the image to B&W. I had some feelings that it would be a nice and a mysterious scene when in B&W (and probably more communicative than the color version); and thus, Unendlicher Nacht was born.
The work with Unendlicher Nacht was harder than I thought in fact. The matter was not a simple matter of adding Black and White layer in Photoshop, or simply changing to Grayscale. Not even as simple as desaturating the image. I had to spend some time changing the tones to reach my own satisfaction with this image. Amazingly, the lines of the stars (or planets) in the sky in the B&W version are clearer and more visible than they are in the colored version. These lines I will talk about later.

Back to the location, I've thought that since there are no clouds to record, the situation and the image was boring already. Since I've brought my LED light with me, I've decided to try and do an experiment with light painting.

Comparison
Left to right: Normal, writing "Allah" in Arabic, then writing TJ.
Click to Enlarge

My trials are awkward of course because light painting requires special arrangements first. I should have wore black clothes to avoid reflecting light back to the camera. I didn't flip the images when post-processing because they are not serious shooting trials. Another lesson I've learned in these trials, is the importance to time the writing with switching off the light. As you can see from the two examples above, the writing looks more like doodling because the LED was not switched off in between letters.
Back now to the lines in the sky formed by the stars or planets at that location. I have to say it was all discovered by a coincidence, because in fact, I've never thought that such place with relative abundance of light resources would allow the camera to capture any glimpse of the skylines. Let's take a closer look...

Click to Enlarge
Original image: Rokinon 8mm fisheye, f/8, 80sec, ISO400.

In the previous shot I've increased the ISO just to reduce the time to around 80sec, but in comparison, the histogram between those taken at ISO100 and those taken at ISO400 are almost the same; probably the only difference in this case is the length of the lines formed at ISO100 (because it takes 4 minutes and 20 seconds to perform the exposure then). At this point, I do see some hope in this location despite the (usually) inadequate conditions like those light sources and the fear of flare in the image. Add to that, of course, the movement of the active people in this place at 3 A.M.! This tiny discovery about this location, and finding out that B&W rendering do somehow help on accentuating the lines in the sky, makes me eager to do some experiments in the coming days if possible - but this time deeper inside.

Scattered Mind

Source: Amazon
We had the annual book fair last week and I barely had a chance to go there and get some books. I didn't roam the place and barely visited three corridors of the fair with composed (I guess) most of the Lebanese sector. Most the books I bought this year were from Lebanese publishers. However, I was somehow disappointed because not much innovation is involved. The books are mostly in Arabic, but most of them are translations from foreign books. One would say this is good for people who are not good in English (or French, or even Russian for example) but with me, it doesn't matter. One of the books I'm reading now is How to Think like Leonardo Da Vinci in Arabic (originally by Michael Gelb). However, it is important to read with some critical thinking present. I have to say a lot of the methods and notes written in this book are already done by me naturally (and some of them for unknown reason); Just consider this blog for example where I jot down my thoughts about some stuff in my life (but not much about my emotions like the book states). Moreover, the book seems to give a sense that the western methodology and culture is the base for the rising of a community and its "wake". This is some point that I critically don't agree with, not because I'm from the opposite side of the world, but because I follow up with history and many arousals did exist before the European renaissance. In fact, the European renaissance is the last in the chain so far (and to seal this arousal in culture and science, we had the two world wars with all their push to technology and industrialization) and as life progresses, we are surely to see another link to its chain (as the Chinese are already on the rise). This fact makes me consider Leonardo as a tool rather than an example. Yes, there are many things to be learned in his methodology, but not everything in his methodology should be learned, specially that Leonardo did work under the framework of the European culture back then with all its consequences and shadows over many fields like architecture and music. It seems, to me, the book is mainly dedicated to European audience more than to a universal audience, and this is one negative point in the translation movement. Arab translators seem to be translating without really knowing or understanding the contents of the context in between their hands - it is merely a process to milk money in any possible way. I did even find out many orthographical mistakes in the Arabic context and I didn't reach half of the book yet!

Source: B&H
Anyway, away with Leonardo for now and let's bring more toys into play. In fact, I was hesitating and asking myself if I should do this order now or not. After all, I guess we all have our crazy "momentos". Thus, I had to place a new order at B&H for some stuff that I'm going to list here. The first, and the most important item too, is the Sigma lens of 70-300mm which should replace my broken Tamron. It costs a bit more than the cheap Tamron, but it has an OS system, or Image Stabilizer (IS). It has some good reviews so let's see how it will act. Let's hope I fight the urge to do extreme macro tricks with this one! Good thing that the filter thread is like Tamron's; Ø=62mm. Meaning I can use Cokin's adapter ring already with it for filters. Unlike Tamron though, this telephoto lens, doesn't have a macro mode, which I deem not necessary by now actually.

Source: B&H
Then, I've decided to add a macro rail after the many failures I had while doing extreme macro shots lately and I though this item is a must by now. Compared to other items of the same category, this one rail from Manfrotto is considered cheap! It says that it can be up to 8kg (17.7lb)! Quite good! Ironically though, I should get a new tripod to my collection as well since I do feel my old-by-now heavy tripod is getting chipped and awkward to control by time. However, a tripod can be probably taken from shops around here instead of ordering from outside with the rest even though I'm sure the quality won't be a match.

Source: B&H
Next on the list is another kit for light modifiers. The Impact Syl Arena Strobros On-Camera Flash Light-Modifier Kit is named after one of my favorite authors about Speedlites, Syl Arena. I'm not sure what's the difference between this Impact kit and the other "original" kit, but bearing the name of Syl Arena sounded like it is a recommendation from the author himself! Anyway, I've been struggling for some time with a single set of modifiers and I've realized that I need more modifiers when I work with 2 speedlites. My Rogue kit which I already have, bear a single entity of each modifiers. Thus, in case I decided to use 2 snoots on the two speedlites, for example, then that would be a problem and I have to work around it. Now, it should be no problem I guess!

Source: B&H
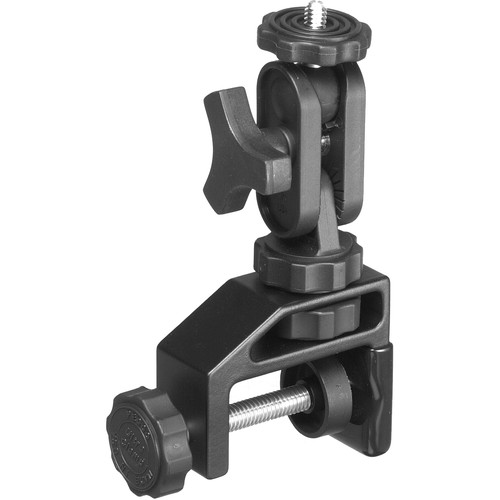
One of the ironic thing here is that I've ordered a new camera mount to replace the (crap) Delkin camera vice mount which became dismantled piece by piece with the first or second use. The ironic thing is, once I've placed this order, my brother managed to fix the Delkin vice. Anyway, I'm not sure how good the Delkin vice mount would be after the fixes, so two mounts are better than one. I didn't try the Delkin after the repair until now as I'm typing these words. The Pedco Ultra Clamp Assembly with 1/4"-20 Screw here has a high rating from users on B&H, but I came not to consider much of that. Delkin has a high profile as well and I AM the only one who wrote a negative review about it! Let's wait for its arrival and see how it will manage heavy weights.

Source: B&H
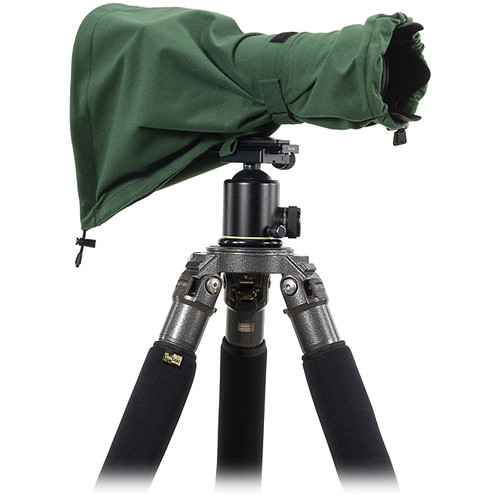
 I've always thought of doing shots in strange weather conditions. Well, not strange, but I mean under conditions that usually people try to avoid. For this reason I've longed for having one of those coats for camera systems. The LensCoat RainCoat RS (Rain Sleeve) (Medium, Green) would help me with this from now on, hopefully. I remember one time I had to spend few minutes in the rain waiting for my long exposure to finish. Ordering this sleeve, though, doesn't mean I'm looking for troubles specifically! But it is just something useful and good to have with you in winter specifically.


Source: B&H
Finally on the list, I've placed an order for Vello Universal White Balance Handheld Disc. I've felt that I need such a tool specifically when working at night time in locations that bear lot of lights of different types. It does indeed make a difference when trying to fix all that in post-processing. The disc here is handheld and I think it is what I need - it doesn't screw to the lens like other WB tools available and it is up to 95mm in diameter. Thus, I can use it with many lenses now and in the future without worrying about the filter thread on the lens itself. The thing I'm not sure of yet though is whether I should take a shot of the disc with the same ISO as my original exposure or not. In my camera (EOS 7D) all I need is to take a shot of the body that I want it to be a reference for the WB, and then use it by Custom WB function. Does the ISO make a difference? Theoretically, it should not. We'll see!

Finale
Books, tools, camera, lenses and even artificial languages... where am I and what I'm doing? It's a weird feeling inside me; it's like hope and despair entwined together. There are lot of things I want to do, yet, something is stopping me. Well, beside the physical condition that is. At work now, more issues are awaiting and I must tend to them, beside doing my own business with the eye-checkups and Mom dialysis schedule. As much as I want to keep feeling strong, yet I can't neglect that feeling inside me; a feeling of betrayal somehow. Like someone had been left all alone by life, despite all the good things that I've been trying to achieve to others. I wonder if this is what they call midlife crisis.

Now, with my ideas for getting new toys, and new car as well, I do hope that my mind is taken off a bit from such melancholic thoughts for some time and get busy with other creative projects. With my new car (if I get to purchase it any time soon), I would be free to go to Failaka island some time, at least for few hours if possible. On the other hand, and because of the retinitis pigmentosa possibilities, I've decided to dig out for solutions for my brother, sister and me personally. I'm so sick of life right now in fact that I'm challenging it not because I like living it - there is nothing much for me here, but merely because I hate it, and if it was a man I would have strangled it to death. Thus, I want to do everything I can and RP won't stop me right now. I want to keep looking and doing everything I can do and reach with my ideas. One step at a time... and all alone.