Showing posts with label focus stacking. Show all posts

Thursday, July 6, 2017

Micron…

Here I am, back after a little vacation away from this blog for the Eid event (and actually not having time to type it down!). I've been spending Eid sleeping most of the time as I'm trying to fix my sleeping time, but I did some work with my camera and I will talk about some of it in this post. Moreover, I did receive my shipments and I'm trying to find an opportunity to try them out. Anyway, I might keep the talk about these stuff for another post, as most of them are actually accessories and spare parts.

Murder of Colors

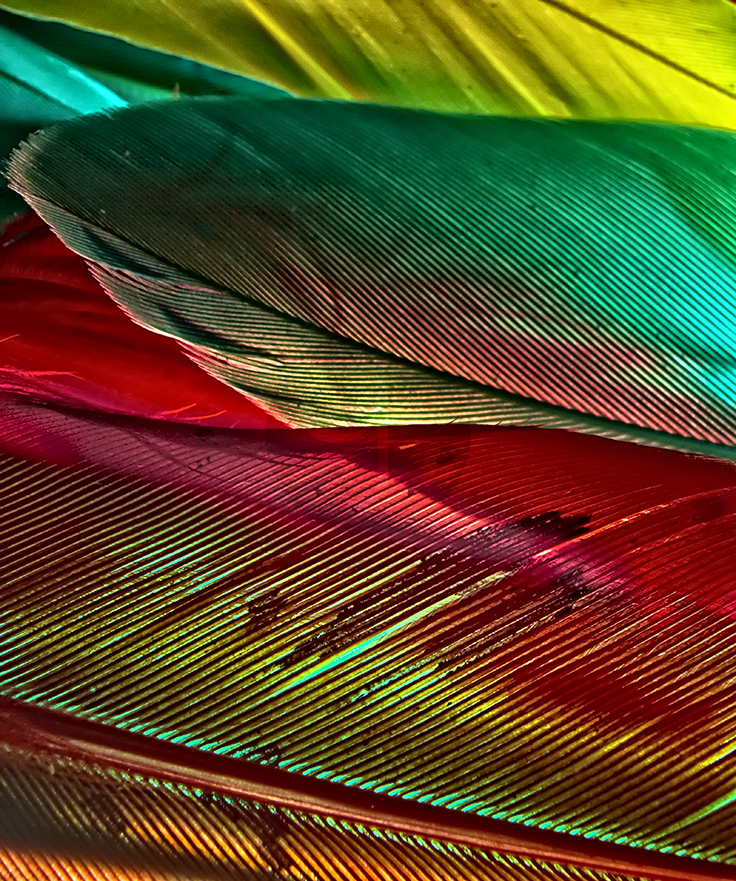
This is the title of a little series I've made, again, with colored feathers as a part of June project with the group which was themed "Abstract." Initially, the idea was to take a shot for some feathers, set randomly, from below with a wide angle lens, in hope that the distortion would serve me here to create an interesting attraction. However, many difficulties occurred, specially with the method of lighting with the speedlites, and after trying many times, I had to give up the idea and do a typical abstract approach as my mind is usually set to go: Macro.

Murder of Colors I
Voigtländer 20mm (R), f/22,
250-1, ISO100.
Changing to macro required a change of in the setting of course, so I placed the speedlites below the set (feathers were sprinkled randomly on a plastic or acrylic sheet) while I shoot them from above using the wireless function in my Canon EOS 7D to control speedlites via infrared. As it is not a matter of HSS, then infrared function can be used with comfort (HSS is not active when controlling flashes via wireless, unless with a special trigger). In this series, I moved from using the usual extension tubes with whatever lens, to reversing the lens with my Vello Macrofier. This method is a saver indeed, as it doesn't add more weight to the camera (which I'm going to shoot with by hand and no tripod), and apparently it does not have all the complications that accompany extension tubes when it comes to the focal plane placement and whether or not the focusing point would be in front of the lens or behind it (which deems it impossible).

Murder of Colors II
Voigtländer 20mm (R), f/22,
250-1, ISO100.
I was set to use Voigtländer 20mm lens on reverse here, as according to my calculations (which I've found out they were wrong later) that it would give a magnification of 2.5X, while using 50mm lens would give about 1X. I needed something extra here to avoid the typical zooming level that I've used previously in most of my abstracts. Also, to get some extra details out of the lines in the feathers. In this series which consists of merely 3 shots (after sorting them out), I think I prefer Murder of Colors I the most, as it has this glow and vibrant coloration, and some strange color cast from one feather onto another (mainly on the yellow feather).

Murder of Colors III
Voigtländer 20mm (R), f/22,
250-1, ISO100.
Unfortunately though, I didn't document this simple set for Murder of Colors, and at the moment, I've just realized that there is a whole different series done with feathers which I've totally forgot about despite being uploaded to stock sites already (and accepted by most)! Anyway, I might try to post about that series later. Seems that my busy schedule (or let's say me getting myself busy schedule) made some gaps in my memory! However, I'm happy for one thing, which is finally having an exact calculation method to estimate the magnification level, but that did not come by while working on Murder of Colors series, but rather later, as I was working with my microscope!


Reverse Magnification

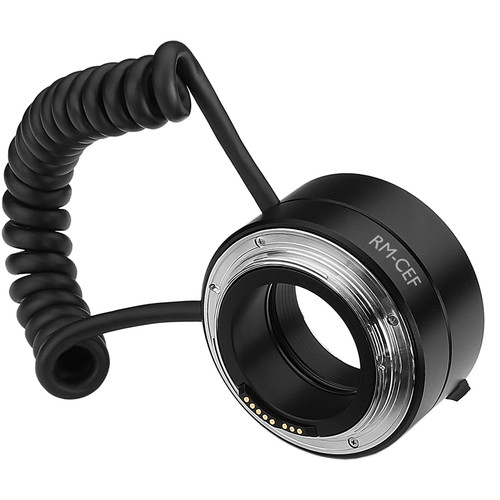
Vello Macrofier
Source: B&H
I talked about how I was wrong with some of my calculations regarding the magnification when using Lens Reversing method. Generally speaking, it is supposed to be just like the calculations done with Coupling Lenses technique, where two lenses are connected in reverse to each other and onto the camera; In this method, the magnification is measured by finding the ratio between first lens (attached to camera) and the reversed lens. I could not really find a concrete formula for magnification by reversing the lens directly onto the camera, but I presumed that the focal length should be 50mm or around that, as it is the "normal" focal length. By that, the magnification is to be calculated as 50/FL, where FL is the reversed lens focal length.
However, as I'm working with my old microscope, I got my interest back again and I started searching again, and all I could find is actually practical method to measure the magnification by shooting rulers and finding the ratio between millimeters in the image and the actual width of the sensor. Doing that practically with a ruler did break my believe about the ratio of 50/FL stated above, and I started to look for the source of that difference, as the magnification ratio with a reversed Voigtländer 20mm which is supposed to be about 2.5X, proved to be higher than that (around 3.2X!).
This made me investigate the specs of my camera again and trying to find the true distance between sensor and the mount (a.k.a. flange focal distance), and to my surprise, it was indeed not 50mm as I was thinking, but 44mm. Yet, this didn't explain the results and I just realized the fact that the Vello Macrofier does add some distance further away from the sensor and it should be added (which was about 20mm). By this, the total distance away from the sensor becomes: 44mm + 20mm = 64mm. Thus, doing the magnification ratio again with this value: 64mm / 20mm (for Voigtländer lens) that would yield 3.2X indeed as measured practically with a ruler (values had been approximated of course and rounded to one decimal place).

The flange place for DSLR (top) and
Mirrorless (bottom) indicated by Red.
Source: Wikipedia
With this result I'm more likely to rely on reversing the lens for my macro shots more than using tubes or lenses coupling, or even using my 100mm macro lens. Even though using a dedicated macro lens has its own benefits of course and its quality. Nevertheless, reversing the lens with Vello Macrofier makes the job easier (specially that it offers an aperture control) and better focusing distance than with extension tubes. To elaborate further, again with Voigtländer 20mm lens, as per calculations, using extension tubes to gain a proper 2X magnification or a bit more with this lens, would yield a focusing point behind the lens front (which is impossible); While using reverse lens method, this enables me to get 3.2X with proper focusing distance (in millimeters of course) in front of the lens. Also, I can add filters (UV at least) to the lens front when in reverse just to increase the distance to the sensor (which I did already and gained about 3.7X). There is a whole new world to be discovered with this method, which made me think of having a specially made hood for my Rokinon 8mm fisheye lens to enable fitting adapters to the front of the lens. If this worked right, then I might be able to gain 8X just like a breeze!

Micro-Macro

Well, the upper part to explain the reverse lens magnification was ignited by this ongoing project of shooting objects under the microscope. I have this microscope since I was 14, and instead of leaving it to collect some dust, I've decided to put it to use with my camera, specially after surfing the net and finding new methods to shoot through the microscope without using a special mount and adapter. Mostly, a point-and-shoot cameras are used for this task (or webcam sometimes) but all I have here is two DSLRs with LOT of possibilities.

My set for shooting through my old microscope.
Using two 12W LEDs to light the set properly.
Well, the hardest part was (and still) making the set ready. My microscope is an old one with one eyepiece protruding upward and even though I can tilt the microscope but I have to keep it standing as it is because the samples I make are usually, well, not professional ones and can easily slide down. Here comes the hard part, with setting the camera (and rail) on the top of the eyepiece, and the small tea table did not make things go easier either. It's a matter of weight lifting and sometimes balancing the tripod with the lateral arm on top or it would fall over. Nevertheless, I made it with many samples and triggered me to do another research for better ways to stack focus my images (a single image won't do here).

Lamina

The beginning was with some of the colored feathers that I've already used many times for my abstract. There are many problems that are already there before I even think of shooting through the microscope. However, I'm not intending on producing Book-Quality images after all (otherwise, I do have a friend to help me with that). As can be seen in Lamina, which was shot from a red feather, such single shots do not bear much depth of field. Thus, there was a call for focus stacking, and this time by changing the focus in the microscope itself, not moving the camera and rail combination.

Hair Bulb

Typically, I would think of Photoshop as the main tool to focus stack my shots, but again, I've realized that however smooth I'd go with the focus, Photoshop would still give out some bad blends as can be seen in Hair Bulb. This shot was is probably one of the fewest that I did with 40X objective on this microscope (and thus reaching total magnification of about 1280X). Zooming so deep sometimes makes a loss of some good details, as well as it is hard to light even with external sources such as two LED bulbs. These discrepancies made me aware of the fact that Photoshop, and like the case with panorama stitching, is not the best solution for the task at hand. And again I go looking for other solutions.

Hair Bulb (Enfuse)
 
I've found many software dedicated to focus stacking and most of them were to be purchased, at the end I've found one freeware which is actually dedicated to blend HDR images, but according to some tutorials I've found, it can be used for focus stacking successfully: EnfuseGUI (the man deserves some donation there!). In the tutorials they use Hugin (another freeware for panorama stitching) to align images, but I've found that it is a command-line thing and needs quite a patience here! Thus, just for aligning my images, I used Photoshop back again (and cropping some excesses). No need to go to the details of the process here, but the results of using Enfuse can be seen on Hair Bulb (Enfuse), where the blend had been much better. I was not lucky all the time though, and most of the time with other stacks, I have to stack on stages (blending portions and then sub-portions, then sub-sub-portions... etc) which takes some time but the results are far more fit than what Photoshop could do. Did Adobe fix such issues in new editions of Photoshop? I really don't know, as I'm using CS5 and got no plans to go beyond that for the time being.

A Study of 20 Fils
"K"
320X
One of the struggles of focus stacking with microscope images is to achieve some 3D-ish look when shooting various specimens. Using external light sources got me the advantage of viewing metallic opaque objects, such as coins, specifically this 20 Fils which I did inspect long time ago by in-camera macro methods  (using lens coupling) and reached about 17X power. The story is different now and I'm able to few the metallic texture up and close! However, there is always the annoyance of artifacts from this old microscope but the fun lingers on. To this moment of typing this post there are still more work going on with some coins which I might post later.
As I've stated before, the fact that I'm using a lens on reverse enables me to add filters to the lens' front and consequently this would also increase the magnification ratio a bit because the distance to the sensor is stretched few millimeters. But to my own experience now, I have to say that having super magnification is not always what you want or need, simply because it might obscure details!

Banana Peel
320X

With filters, seems like I'm having different worlds to discover; Something I'm working on still. Probably the most astonishing view I had so far is that one with Banana Peel which was my first target to use infrared filter (B+W 092, threshold: 650nm). Things were dark and hard to see at first, and I had to raise the ISO to max just to navigate through, but I put it down when I saw something that captured my eyes…

Banana Peel under Infrared

The image you see above is of course the final product of focus stacking and infrared processing, as well as channel swapping. However, these marks were glowing in my LiveView while the rest of the peel (same peel posted above that) was dark while using this filter. I showed my friend this image and told him the story but we both were astonished and could not find a reason for this. The thing is, doing infrared shots for other materials did not yield such result!

Grape Skin (IR)
320X

Grape Skin (Normal)

I think this matter needs more picture taking to find if this thing is really significant for bananas only or there was something wrong with the microscope or my camera! However, I'll keep looking further for more samples to do. Despite being a tiresome job to do with this microscope and the heavy cumbersome gear that I have to deal with, it is still a good source of muse, specially with the arrival of my new H-alpha filter from Lumicon, which I'm dying to use (artistically and scientifically, if I can call it so!).

Finale

I guess this post is long enough as it is now and no need to talk about my new acquired stuff. This is beside not trying them out yet and having any thoughts about them. The Summer is scorching my head as usual and with me back to work after a long vacation during Ramadhan doesn't make things better for either mood or body, but I'm trying to muse myself with the camera and the new stuff. July project with the group is also ongoing right now and somewhat adds a bit of burden to my time which I want to dedicate further to my new toys and activities. Everyone, Everywhere I look, talks about traveling, I guess this is natural since it is Summer, a typical season, but it makes me drool and my mind is busy calculating to see and plan for some vacation outside, before I commit a murder or something. Anyway, my traveling is typically after the busy season, to have some "quiet" time. Yet, my mind is not set yet on a specific destination, nor I'm sure about my budget. Meanwhile, my only companion seems to be my headphone, and the heat…


Stock photography by Taher AlShemaly at Alamy

Thursday, August 25, 2011

Cerebrum Mysticum...

A mystic week of some sort. I've suddenly felt the urge to go on and read about mystics and occult. Well, I did have the urge for some time in my life and such things are really normal to strike in my head now and then, but this time I'm thinking of doing more to it into photography.
Now it is the time of the last week in Ramadhan and sort of the time is clogged (specially with my disturbed sleeping pattern) with many things to do. I'm also planning to register in a photography class for beginners after Ramadhan directly, by September 6th. Yes, for beginners. No matter how or what I did before or what advance level I might be in, it is always good to look back at small things that you did not know before. Despite my work so far, I still think I need to learn more about the basics of the camera and exposure. After that class I might take other levels as well (more expensive of course) but we'll see about that later on.

At work seems more busy days are coming on the way with new phases in our "little" experiment taking place now, thus I have to check that I need to type this blog entries as early as possible to be posted in time! Well, which means, in return, that I might have lesser contents to put in here. That is if... anyone cares anyway :)

Because of the disturbance this week, I couldn't put my mind into reciting the 4th chapter of Alexander's story. Well, I'll be frank. I was lazy and playing a game I like. Hope that doesn't count as a sin! But hopefully the engine will get to work by next week or so and more recordings on the way.
The lack of work on my Ayvarith projects, however, poured something on the other side. Ive finally had the mind (and courage) to write something down. But this time, since staring on the notepad on my monitor was not enough to gush out words, I referred to my old method; a paper and pencil/pen. I had the words for some time now but I didn't pin them down until I faced the pen and paper in my office, after working on that experiment. I called it No Superman.I've submitted this one to some websites, and in one website actually, some user notified me asking how did I write such a thing! Well, Thanks! I really don't think I'm good at all. It's just a gush of feelings to a certain matter that makes you spill it out.

I. Mysticis:
Seems my night on the roof last week under the full moon made me literally lunatic, or maybe inspired? Call it whatever you want to, it is just a weird feeling of seeking opportunities to take photos of anything in rhyme of Mystics. I will get back to that panorama taken from the roof after a while.
One of the first ideas to do something mystic kicked in when I finished reading the holy book.

Chapter of Mary (19)

There is a little story behind every aspect of this image. First of all, it was taken with a fisheye lens and hence, even with a high f-number I realized I might not be able to grab everything into sharp focus; so it was a call for focus stacking. However, I had a problem with the shadows' cast on the book itself thus, I had to turn off the light and use only one source of lighting (the usual old desktop lamp with power-saving light!).
I've fixed the WB value by using the custom K-value in camera. Since the power-saving light is bluish and I wanted to add a sense of antiquity to the book, I had to exaggerate a bit with the color temperature (K-value) and probably pushed it to something lesser a bit than 10,000K! Anyway, while working with these photos (taken with bracketed exposure for HDR merge) there was another story. Because when I was testing the different WBs before the final approach, I've realized that Tungsten makes some interesting hue, by turning the book blue and the red lines in it were glowing hard; so eye-capturing, but later on I had to give up this idea in favor of Daylight WB when I started to merge into HDR (you can change the WB before starting to merge into HDR in Photomatix).
Now, all the HDR slides, after merging, refer to different focus points. In total they were about 5, with each slide bringing a certain area of the open book into focus. I had a little problem merging first because I didn't use the alignment in Photoshop (I thought it's not needed because everything was relatively stable) but then, seems I was wrong and I used to correct for the broken lines. I made 3 versions of the HDR slides changing the WB from Daylight to Fluorescent to Tungsten BEFORE merging into HDR, but seems the desired look in my mind was in Daylight (the other WBs made some weird noise and hot pixels occurring here and there).
Maybe keeping the front portion of the book, where the title of the Surah lies, and blurring the background (the other page) was a nice effect, but because the name of John (first word in first line in second page) sounded a bit important to the whole story of the picture, I've decided to include it into a focus-stacking method as well. Cropping and rotating the image (it was originally in landscape orientation) was done later on after tone-mapping (Photomatix of course) and adjusting in Photoshop.
This was one trend of mystic (and I mean mystic not as mysterious only but also on a spiritual level) and in fact I was doing more work before that with long exposures (since I became a bit obsessed with the idea). Maybe working with clocks is not a mystic thing but the concept of time and using time was always an issue in my life (and probably of many around the world), hence, we can consider it a mystic concept of our lives, as we try hardly to catch upon life. More about it to come later.
Left to say one thing. The image above was rejected by Bigstockphoto because of some "copyrighted material" issues. Seriously? I'm going to ask God for a permission to take a photo of the holy book? Sorry dudes, that doesn't make sense...

II. A Treasure of Perspectives:
Since having a night with a full moon is not something you be able to catch every day, sorry, every night I mean, I've decided to mangle and go through the panorama again and again trying to extract more perspectives, and in return, more meanings from every picture I could make out of this (spherical) panorama. The first version, however, was a typical little planet form (posted previously):

The Lonely Planet

Well, I guess the name tells it all. I liked the effect myself and I went on trying to extract more from this panorama by changing the perspective. One of these changes makes up for almost a landscape orientation (or let's say a full-frame) image but with simple difference: everything is twirled.

Over There

It is not a panorama, but it is extracted from a full spherical panorama itself. After setting the stitching projection to "little planet" in PTGui, I started to play around with angles of Pitch and Roll trying to discover more perspectives. Until I've finally arrived to this angle which resembles the full moon at the end, in the horizon, like calling as it is a light at the end of a tunnel. A spark of hope in the middle of the night. I didn't mind the distortion in the surrounding structures, as I was reliant on the moon to grab the sights more than the surrounding structures. However, they do add some surrealism if you are up to that!
Before, I've stated that in long exposures at night, sometimes the stars that do not appear to the naked eye can be recorded, and they are here in this panorama, but they are usually erased with cleaning the noise and doing other techniques to smooth out the sky. Here, however, I decided to pick (some) stars and exaggerate their sparkle by using the regular brush in Photoshop. After all, I added some Photo Filter adjustment layer to put on a reddish wash on the whole scene to break its severe blue shade. Hmm, I think it adds a bit to the mysticity.
A vertical panorama was done as well, naturally (but I didn't think of it first!) and here I needed to move the central point to make some interesting perspective, of two skies, up and down. I didn't experience though how it would look if the skies met in the middle!

The Underworld


But I was taken more by the tunnel view for this panorama, which many people liked on MostPhotos...

To Another Universe

This perspective specifically was just an experiment to test how good it is to do a Twirl effect like in those Sci-Fi stuff. The problem with the Twirl effect is that it might smudge too much and not achieving the proper look I'm aiming for, and, you have to work in 8bit format, since it is disabled in Photoshop in 16bit format. In other words, you have to step down a bit with color's resolution.
The original work was stitched with 4000x4000 pixels. Usually I go for 8000x8000, which requires a lot of processing power and time. Since I was thinking it might be a failing experience after all, there is really no need to aim high and 4000x4000 is just enough.
The looks at the time of tone-mapping this tunnel-view was totally different and dull, despite the fact that the HDR slides were merged using ProPhoto color space. However, after tone-mapping and opening the image in Photoshop (which I've fixed on ProPhoto as a default color space) the image appeared as you see it above with cyan patches around the ground. Comparing the two looks, the Adobe 1998 and the ProPhoto, I thought the ProPhoto space is more adequate to the mystic and sci-fi look I'm seeking, and this is what you see above.
The twirl effect was done to the image on a separate layer and I made it carefully in a small amount to add curves but not diffuse the image totally. A twirl alone is not enough as a good effect and this is the reason why I made it on a separate layer, so that I can retain the position of the moon in the horizon back to its place by using layer masks (to erase the twirled moon and put on the original moon back in its position from the lower layer). The name is obvious I presume; did it take you to another universe!?

III. Tick Tocks and Blinks:
As I've stated earlier, I was (and still) obsessed a bit with the idea of long exposures, time, and, clocks. This obsession raises up from my interest to see things, slow things specifically, run fast. How would it be to take a long exposure of a moving snail, or a turtle, of a long night sleep...etc? Maybe my interest in night photography lead me to this point now, but however, it is not something new really. I've already created an image of a little long exposure before (and unfortunately rejected from major stock sites).

Busy Life

Maybe the above image was one of the best I've did so far. In fact, and because I used my Tamron lens raised up high above the watch, I didn't use here any ND filters to control the time. I don't have an adapter to fit my Cokins. However, this effect after all was not done by long exposure alone, but I had to take several shots over a period of around 6 minutes and then blend them together in Photoshop in layers (using Soft Light blend).
Same concept was done but with a more time-stretching aspect this time, taking shots at an interval of around 3 minutes and some few seconds for one of my watches. This time I've faced a problem with the proper WB, as I wanted to add some more luster to the golden patches in the watch itself but then there was a problem of being "over-average" with that effect.

Mixed-Up Schedule

The WB was fixed as the RAW files were opened in Photoshop and the effects were synchronized with all the slides. The reason for setting the time to 3 minutes AND few seconds is that I didn't want the seconds hand to end up in or around the same place with every shot taken at exactly 3 minutes, so I had to add few seconds (something like 10 or 15 seconds) to the interval between every two shots to give more chances of finding the seconds hand somewhere else, other than the previous position. Each image, in fact, was itself some sort of a long exposure (my room was partially dark) extending from 15 to 30 seconds each.


Still though, I didn't quite achieve the effect that I want, that is recording the seconds hand going over in a full circle around the clock face. Tried this already with my wall clock for which the seconds hand ticks continuously non-stopping in every second, but it goes smoothly all over the clock face. With the help of some ND filters, I've managed to get a long exposure of one hour. Despite the weird reddish shades that occurred in the final image (which might be related to the change in the sun's angle outside, because sun rays still pass with my curtains off, but I'm not sure yet), however it was not a big deal to fix the image and make it look normal, but it was a big issue with the noise. Anyway the image didn't achieve exactly the desired look I'm seeking.

Hurry Up!

The Median method was a companion all through the cleaning process (along with cloning to remove the brand mark, otherwise it won't be accepted in stock sites!). However, the small circle inside is formed by the seconds hand, but the seconds hand is larger than this and should, probably, made a bigger trace. Same thing for the minutes hand which appears blurred between 3 and 4. This is natural since the light is introduced (with the help of ND filters) slowly into the camera and to register the final movement just before the close of the shutter, the minutes (and seconds) hand will be in a certain place. The shutter then closes finalizing the image and the hands' movement all the way were not recorded except in a few portion of the clock face. In other words, to record the movement of the minutes hand across the full clock face, then we need an exposure time more than one hour. This will make things harder to do indeed.
The look of the blurry movement and the stable background of the clock face cannot be compensated by taking photos in intervals and layering them with a blend. The blur has its own taste and feel. I'm trying to find any website (official that is) related to the manufacturers of these watches and clocks just to seek my luck in asking for a permission to put an image of their products for sale. It is not possible to clone out the brand mark all the time!

That was the ticking part of this final portion. Comes then the blinking part. Just for fun I was running with my camera in the house taking pictures of my niece playing around (and getting on my nerves as well) when I decided then to take pictures of my brother's eye. This little experiment made me believe more than not ever overexposure is a bad thing and not every "bad" image is really bad. The image got accepted in some sites and rejected from some stock sites (for model release aspects). I have to give credit to my brother though because the poses (or looks) were his ideas in fact.


Photographer in The Eye

In case you wonder about the name, it is because my reflection is there, inside the pupil. This is one of my favorites, and it is not a tone-mapped HDR at all. Simply taken with a flash unit mounted on my camera and zooming into the eye with my EF-S 18-55mm Canon lens. Some adjustments were done later on of course in the RAW editor. The thing is, I didn't plan it. I merely took the image to see the details of the iris later on, but the whole image just happened to be awesome for me. More sharpening added a grunge look, which somehow might be not good looking for other images and concepts. See, overexposure is not a bad idea at all, to limits. I've printed this image on a white photo paper, which probably if mounted on a white wall (and erasing a bit of the edges in the image itself) would be an awesome effect on the wall! Surprise your fellows with an eye popping out of the wall!
The other two images were also done with the same lens but without flash, and the pose was also suggested by my brother. They are interesting, but don't beat the one above I believe.

Enlighten
looking at the ceiling.

The interesting thing about "Enlighten", beside the reflection in the eye, is the sharp eyelash line and eyebrow. I added even more sharpening (with noise cleaning) and also some change in saturation and hue to pop out the eye in between a dark skin (his skin isn't that dark really!).

Psycho
"Psycho" on the other hand was a good concept in color, but two reasons made me convert it into Black and White and try to increase the contrast from there to give a tougher feeling. The first reason is simply the idea of  a psycho, which I believe is represented better in Black and White instead of color. Remember that Black and White images tend to make the viewer concentrate on the concept and the composition instead of the color gradients in the image. The other reason was that a bluish streak around the eyes that I didn't know exactly how to remove properly, so along with the first reason I thought it is better to have the whole thing in Black and White. Maybe I should have done some skin smoothing (Median method again). Well, it might intensify the effect of a Psycho with such a skin!


Almost, this is what I have been doing this week. I'm still looking forward for more experiments to do but I need some planning. I took some photos for some instruments and devices in my work place, but I don't think I'm allowed to put those here. However, I think they are sort of boring, except for geeks of course!
T.G.I.T. Finally a day when I can't complain about my sleepless night, nor I have to wake up so early....


Wednesday, August 25, 2010

New Watches!!!

So tired, and sleepless. I barely spent 3 hours in bed before coming to work but I didn't sleep at all in those. Frequent awakening, and I can swear I've heard voices in or near my head, I just don't know. I heard a child. I'm pretty sure it is not something normal at a time like 4:00 a.m. or even earlier than that. Now at work, I can't even have a nap even though I'm extremely exhausted. Something is messing with my mind and not putting it on ease. I'm trying to revive myself a bit with some classical music. These overtures do really have a blood-bumping effect at times!

I was, and still, so upset about this damn watch which is not to be fixed at all. After getting it back from the shop by Monday at 10:30 a.m., the next morning, Tuesday at 6:45 a.m., the dial fell down in my hand again, simply like that, in less than one day! I got so upset which made me go to the nearest shop and buy me 2 watches from some money I got from my sister as a gift.
My aim was really for one watch, which costed around 40KD, but I liked another one, which was cheap. I liked it simply because of its simplicity! It has a luster indeed. I've decided to take the two then, and keep one (the cheap) for regular use, and the expensive one for going out at nights only.

Back home, I reckoned that this might be a good opportunity to try out some "product photogaphy" with myself. But I have to admit things were done in a haste specially that I was planning to go to bed earlier (which didn't happen), and with problems in plug points to help me settle the lights around my home-made softbox. I made a real fuss! Anyway, it went along, and I shall explain things below.

Version one. RAW processing.

Well first of all, what I like about this watch is the convex lens and the simple design that makes everything clear like a crystal. Before catching this one, I already had made several trials with my telephoto and then my normal lens and so on until I got into a reasonable distance with my camera. Many settings for the light was fixed around the softbox (mainly 3 desk lamps with tornado-like energy saving bulbs, cool daylight). Finally, the settings that I thought was appropriate the most is this one here in Version one. Two lamps on the sides and the larger third one was sit on the edge of the softbox directly hitting the face of the watch. In the beginning there was a reflection of the bulb on the watch face, and hence I decided to use the camera's built-in flash to increase the luminance and overcome the reflection of the lamp. One thing here was missing though. The luster of the outside frame. In fact my desire for this luster or sparkle was the #1 reason to choose a small aperture (f22), but because I didn't pay much attention for the reflection and concentrating mainly on the watch face, I've completely forgot about it.

After this trial (and some others), I've decided to go as well for an HDR version in the same position. My idea was to reduce the light reflection a bit from the face if possible to make it more reasonable, or in other words, controlling the light and luminnance more if I can. Alas, my Photoshop and Photomatix gave me hard time with some weird erratic shapes showing on the display that made my mission uneasy at all and I had to resort to other methods, but finally, the tone-mapping was done in an uneasy way in Photomatix.

Version two. HDR tone-mapping.

I had a go with my fisheye lens as well but it was not that good at all specially for use wit a softbox. Mainly because of spacial problems in the place and I would need to get closer than what I used to be with my 18-55mm lens. However, I don't consider it a big deal since my first aim originally for buying a fisheye lens is to achieve suitable panoramas. Well, with a full-frame camera it would be awesome and I can get a panorama done in simply a flick of a finger!
Now I've finished with this watch, it's time for the real baby. This time, I didn't waste time and I went directly with HDR shooting (and probably I will consider single RAW files processing). This time, it was HDR shooting on 3 phrases. This is mainly because in such a close distance, it was hard to catch the full depth of the scene, and I planned to go on with focus stacking. With my problems in Photomatix now and these erratic shapes blocking my view, I created 3 HDR files in OpenEXR format in a batch process altogether.
After checking each EXR file, I've stacked them together but the blend option didn't work and simply gave an error (not a RAMs error this time but something in the software itself!). For this reason I had to go on and save each file as a PSD in 32bit format in hope that the stack blending would work, and it did indeed!

Second watch (final).

I faced some problems in the beginning with some weird noise showing up when blended together, and also manual tone-mapping was not a good option and I didn't want to resort back to photomatix again because its useless with the current problem. Also, I realized that the bluish hue caused by the lights generally and specifically by the WB settings (fluorescent) was not a good choice for this time of watch which has a golden hue in it. It's better to show the golden bands as more golden I presume, isn't it?
Finally, to overcome all, I've planned my own tone-mapping myself with adjustment layers and adjusting the exposure in specific areas, the sort of like dodging and burning in regular workflows. Then I added an adjustment layer to change the general hue into something "goldish" looking and more reflexive I believe to the real colors of the watch. However, after the final image was saved, I've added just tiny bit of cooling effect, just because I was afraid of "color bleeds" within the golden range. Color bleeds are when you have a specific color going so saturated and would look abnormal in an image. This cooling effect also helped with clearing the glass of the watch little bit instead of the heavy yellow hue that it had already.
I don't think I will be able to submit these images to any stock sites even if I removed the brand names anyway. As far as I know, the shape and the design of such products are also registered. Well, it was a good trial I believe and I might give it a try again tonight and this time I'll try my best to pay more attention to details.