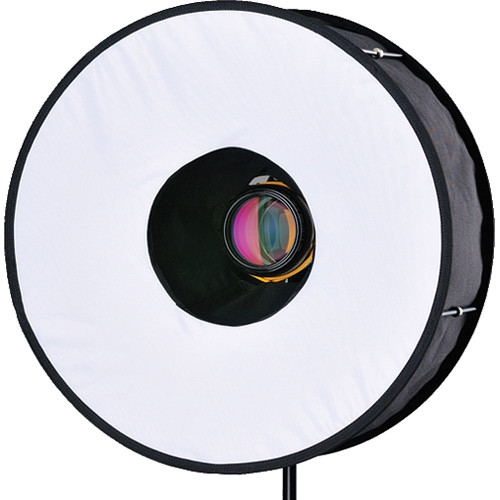
It's my first blog post after my birthday (or second, if I count the previous one which was posted AFTER my birthday, automatically!), and guess what? I've gone pleasant gift from an online friend (and I'm very thankful for her for such a mindful gift!). In this post, I've decided to give some review of this gift. Not to criticize of course, but it is for any fellow photographer reading this and might find this useful.
I will present here some simple experiments I've done so far with this tool and hopefully anyone reading this would find them useful.
General View
So, this Slow Dolphin light box is, well, a… light box! (Duh!). Sometimes also we might call such light boxes as "tents". Before I go on and review this product please bear in mind that I didn't go through the products line for Slow Dolphin, so maybe what I will be saying here is already available in other products of theirs, but this is just my impression about this light box alone.

Now, the product comes folded and in a fabric bag for easy carrying, and it spreads up as a cube as shown, and it comes with a number of backgrounds. So far, I've tried 3 of them, and I thought at first that all of them are plastic sheets (or PVC as mentioned in the leaflet) but turned out some of these backgrounds are actually paper-made.
The cube or box is black from the outside, with a circular hole on top which can be opened and closed (and can be used for shooting from the top if needed). The inside is lined with shining silver sheets with bits of velcro on the sides (to attach a diffuser sheet to soften the lights from the ring light at the top). I thought of taking a picture but I think it's not worth it anyway, things will ravel hopefully as I talk with the test shots I've made. Also, inside the box and on the upper edge on the back, there is a rubber band stretching from side to side which is ought to hold the background sheets from the top when placed in.
The box as mentioned already has a ring light on top. Actually, to be precise, 2 ring lights; A large one and a small one, and lighting them is controllable by a switch that is attached to the power cable (just like bedside lamps). One can light both rings or one of them, and also control their luminosity.
The power cord is somewhat tricky here. I would say it is a double-edged sword. The cord is actually a USB cord, and probably it is common now to use such heads (for saving energy and other flexibility issues) but where I live, such sockets are not quite common yet (they exist but not common). Thus, to solve the problem here, I've used my mobile's charger plug to attach the USB head of the light box and plug it to power outlet.
G-Shock
So, I'm skipping here my initial shots using my mobile phone which I did right away with this product. Controlling things with the mobile phone are kind of tricky for me and I really hate it, but I just needed something to post on Facebook anyway!Thus, my real test was to be done with a "real" camera (yes, old one but still real you know). As a target, I've picked one watch (which ironically was a gift as well from 2 years ago or more, from a friend and I could never wear it!).
 |
| Settings for shooting the G-Shock watch. |
The light box was prepared first with the black background placed inside, and it covers the background and the ground or the bottom portion of the box. The bend in the corner of the sheet was highly reflective and I'm not sure really if it intended to be so (later on, this somewhat proved to be problematic). Anyway, for my subject here, the watch, I've wrapped it with a fishing line and pushes the line through the opening on the top of the box and held it firmly to the edge of the box with the help of a paper clip, and thus the watch was hanging in the air. Shaky situation, but with a gentle touch, the watch would be stable enough for a quick shot. The lighting inside the box was bright enough to allow a quick shutter speed which ensured a stable image after all. You can see here also the diffusing sheet attached up in the box held firmly with velcro, and it has a circular opening as well to allow for shooting through the box opening or, like in my case here, pass the fishing line through.
In the set as well, you might notice some pieces of paper at the bottom and a mirror (just outside the box on the left), and these were my extra props to add more control to the light. It took me a while to settle down with these, as I was actually using the mirror to reflect the light at the bottom under the watch, but then I've realized that a simple paper sheet would do the job, and I've used the mirror on the side to cast some light on the face of the watch (even though I should've used a polarizer here to have a clearer face).
 |
| G-Shock Canon EF 50mm f/1.4 USM @f/2.5, 400⁻¹s, ISO100. |
Been a while since I've posted an image on this blog with all the shooting parameters! But here you go. Shooting with Canon EF 50m f/1.4 allowed me some freedom here with increasing the shutter speed without having to push the ISO higher a bit. I had to adjust the aperture though to get a proper depth of field as f/1.4, the lowest depth and widest aperture in this lens, can give somewhat a fuzzy look.
Working with this lens was problematic somewhat despite the flexibility in the aperture, because I had to get far off from the watch and the box. Tried to fix the situation with some extension tubes, but nothing worked, so I had to get back as much as possible. The image seen here, G-Shock, is actually a cropped final shot.
I've picked a black background on purpose here as I wanted to separate blacks (which is quite a hard process and in fact involves a lot of editing work rather than on-set work). The remnants of the fishing line were removed in Photoshop of course and here we go; a watch hanging in mid-air. I had to use some dodge and burn to lighten some areas of the watch (specially the face and sides). One might ask why not use a slower shutter speed or raise the ISO to get a brighter shot; Well, this is mainly because of the background which is highly reflective despite being black, so I had to keep my exposure value low, and fixing that in Photoshop would be somewhat tedious. Also, my original idea do require some dark sense of the whole thing to add an element of mystery. Such mood would require a low-key shot but here as it can be seen, I'm depending only on lights from the top which reflect from all directions inside the box, and nothing else. So, a low-key here is out of the question.
Madly Red
My next test was to be done with my favorite coffee mug (I think I've had it for more than 20 years now). In this test, I didn't take a shot for the setting unfortunately, but hopefully I will explain what I did here by comparing two shots put together.
 |
| Mug Shot Canon EF 50mm f/1.4 USM @f/2.5m, 25⁻¹s, ISO100. |
As can be seen here, I've picked a red background for this shoot, since the mug is also red, just as was the case with G-Shock. In this shoot, I can't quite recall if I've used the diffusing sheet on the top or not, but it wouldn't make any big difference since the red background here is actually a matte paper sheet and not plastic. It did "diffuse" the light coming from the top still though and at large a band of light can be seen behind the mug. This is even after reduction and post-processing in Photoshop. I think the problem here lies with the depth of the box itself as the distance should be greater to hide the bend in the background from the shot. Since the ring light is at the center of box at the top, I'm assuming it is designed so that the product should also be lying at the center at the bottom, and thus I don't think putting the product further more forward is the way to go here.
The two shots in Mug Shot here are for comparison between adding a "contour" to the subject (left) and without anything (right). The contour here is usually a black body added on the sides (or if the background is black, it can be white sides) and it is usually done with glass objects or any polished surface. Here though, I do have a red surface so not quite the ideal surface to show the contour clearly, but nevertheless, it is clear that it makes a difference compared to the right shot, and it made the mug more defined. The problem here though was in adding the black sides, as I used the black sheet that came with the product and placed it under the red sheet after a struggle. It was still shaky and some part of it was protruding into the shot, so I had to put it down by placing some objects (and cropping the image after all).
During this shoot I've also tried to use a speedlite in some way but the space was quite small and in fact placing the speedlite on the top didn't make much difference except for the fact that my shutter speed had been faster, but not much change in the quality of the light (or should I say the mood of the light); so using a speedlite or the LED ring light within the box kind of yielded the same result. Out of fun, I've also shot bracketed shots to merge as HDR and tone-map. I felt like doing some crazy HDR stuff as I didn't do something like that in a long time. I call it "creativity venting".

Royal
My third test came about with another black object, and a black background. Having learned about some of the difficulties already with the past 2 tests, I've tried to fix or go around these issues with my third test with this black perfume bottle (which I think was a gift as well!).
 |
| The (final) shooting set for "Royal" |
Here, as can be seen above, I've tried to place 2 thin foam pieces on the sides to add contour to this black body. The right one specifically was quite essential to light the face of the bottle (the bottle was turned a bit facing right as can be seen). Meanwhile, I've tried to go around the bend in the background sheet but pulling it a bit forward and placing the bottle even off-center and closer to the front of the box. Alas, that didn't do much to hide the reflections at the back. However, I've taken several shots with such reflections that might add to the mood after all. Also, I came about with the idea of combining several shots since such a thing is actually a usual and practical thing to do in product photography as I've seen in some YouTube videos before (no arguments here about the ethics because we are just combining images of different lighting, and this is not cheating!).
 |
| Royal (1) Canon EF 50mm f/1.4 USM @f/1.4, 60⁻¹s, ISO100. |
I've made a mistake here when I didn't care much about putting the foam pieces straight vertically and closer to the bottle (in some way). The side of the bottle as can be seen in Royal (1) is not lighted completely to the bottom, but the reflections of the foam boards look fair on the cap. Here in Royal (1) you can see the "halos" in the background caused by the reflections of the light from the ring light. Diffusing the light with the diffusing sheet didn't change a whole lot really. Here also, I was using a polarizer which I hoped that it would enhance the reflection of the bottle on the black sheet but it didn't do much here, but it was quite remarkable in blocking other areas of light as I rotated the filter, and from there I got the other idea of combining several shots (not in HDR, but manually combining several shots of different lights).
 |
| Royal (2) Canon EF 50m f/1.4 USM @f/1.4, 60⁻¹s, ISO100. |
Thus, after taking 3 or 4 different shots of different polarized light component, I went on merging them (with other enhancements of course). Personally, I do like Royal (2) more but some people do prefer Royal (1) looks; For this reason, as I was saying, these reflections in the background off the black sheet might be a desirable thing. But what if they are not? I guess here, there is no escaping doing a composite while editing the shots. I think I've missed illuminating the right side of the bottle in Royal (2) so this is something to bear in mind as well when doing such a work of composing. Yet though, in all conditions, i couldn't get the reflections of the bottle off the sheet to appear, however I rotated the polarizer.
The Peel
So, at this point, many ideas had been crossing my mind on how to expand my usage for this light box (despite its relative small size). Like one idea came to my mind is using it as a set for high-speed photography, but seeing how it worked out with speedlites in Madly Red above, I've omitted this idea from my head completely. So, I had to think of something milder, somehow. The idea came about while I was looking at my "collection" of walnut shells! Why not make a peel effect out of one; I didn't do such project in a long time now. Before I go on with this test or shoot, there was one essential "hurdle" to tackle first. The rotation.
 |
| The rotating part of SPH-303 |
For starters, I've figured maybe I could use the rotating base of my panoramic head (Manfrotto SPH-303); After all, this usage was actually proposed in the original instruction manual of the head. However, the base proved to be hard to move as it required a grip on the lower part of the base while rotating the top part. I tried oiling the base, but yet it was quite firm and could not be easily rotated. Even though I did such "peeling effect" before for various objects, and using this base, but the base was always placed on a tripod, and I was thinking that I would use the 5° interval to be very precise; Such short intervals are used when composing Object Panorama which are typically used for viewing products in 3D almost on some websites. However, my aim here was different as I'm doing peeling. I thought maybe my usual stitching program(s) would somewhat have it easy with such short interval of shots to align and stitch the images together. i tried that before and failed, and well, proved to be a fail now too when I've done this test!
 |
| CamRanger MP-360 Motorized pan head |
After the fail with the rotating base, I thought of using an item that I purchased long time ago and almost NEVER used it; The CamRanger MP-360 Motorized Pan Head. I've purchased this item in hope to do some astrophotography of some sort with it but turned out that the head could be tilted only 15° up and down and it was just impractical for my own good. Anyway, I thought of giving it a try and see if it can help with the situation here.
It is a bulky item and occupied a considerable space inside the Slow Dolphin light box, but I thought it could be worthy because it has a remote and could be rotated for 360 degrees. Moreover, it has a scale to gauge the rotation angle. However, all of that disappeared into thin air; Turned out that it needs a tripod as well to stabilize the base and be able to rotate properly, as the surface of the light box was too smooth. Moreover, the cable of the remote and the scale that shows the angle would rotate along, making the situation cumbersome further. Thus, I had to put it aside and improvise something else.
 |
| The final setting for shooting the walnut peel. |
The shooting was such an exhaustive process as everything was done manually; Looking through the top, rotating carefully, and shooting (using the camera wireless remote). I think the whole process (and the breaks in between for every 90°) lasted for more than 1 hour. During the shoot, it was apparent that the walnut would drift to the right side so I would have to pull it back to the center and I just hoped for the best when it is time to stitch the images together. Also, because of the size of the phone, and because the rotation was not precisely around the center, the phone would nudge against the bend of the sheet (which I needed to add to keep the background white instead of silver here).
 |
| Walnut Peel (1) |
After the shoot, the first step was to edit all of the RAW files and make minor adjustments to the contrast and exposure or brightness, and then covert all files to JPEG. I was almost sure of the failure of automatic stitching but I gave it a try anyway, and well, it failed! So, it was time to do the manual work and to stitch about 72+ images manually in Photoshop, using layer masks. As I've stated before, I've done such projects before but not for that number of shots. The work was exhaustive and took more than a day (actually more than 2 days) and proved at some point to problematic (specially memory-wise). As for the final result, Walnut Peel (1), I've cropped the final outcome from the top and bottom to remove some parts that were not capable of being aligned. This lengthy process actually convinced me that working with such a high number of images was not really a good idea, at all!
 |
| Walnut Peel (2) |
Thus, I had another go with the blending but this time I picked a fewer number of shots from the set, almost for every 30°, and tried to blend them together. Still, I've faced some problems, but relatively, it was much faster and better than the first trial with more than 72 images to work with. Here, in Walnut Peel (2), I've kept the topmost part of the shell and tried to blend it with the rest of the image. I think from now on, it would be wise to work with fewer images in such projects. Worth noting here that I usually do "peeling" shooting using a tripod and some platform and the rotating head sometimes, using either speedlite(s) or ambient light to do the shooting, but never done it in a closed space (semi-closed actually) like this light box before.
In the process of reviewing the images, as I've stated before, the walnut started to drift away from the center and even though I've used f/16 to ensure a proper depth of field, but yet this drift caused some images to have some out-of-focus parts. It is true that macro lenses are quite sensitive to distances but I think the distance of the drift here was not quite problematic, and using f/16 (I thought) should have been sufficient to ensure a good depth of field all across the shoot. I'm starting to doubt this lens really, specially with few images having over-exposure and needed to be fixed before converting to JPEG. I'm not sure what caused such over-exposure while working in completely manual mood, with fixed f-number and fixed shutter speed, but this is not the first time that this lens specifically caused such anomalies. Which makes me think of having another macro lens or maybe next time I better be working with my 50mm lens and extension tubes to avoid such anomalies. Anyway, I'm not a heavy macro shooter so such matter can wait for now.
Conclusions
So, before I head to write down my own points about Slow Dolphin's light box, I would like to note, again, that I'm not sure about the line of products the Slow Dolphin provides. Maybe some of the points that I will mention here have been already dealt with in another line of products from Slow Dolphin.
So, firstly, we have the issue of the bent sheets here which can some times provide unwanted reflections (yet they can be desirable as I witnessed). Thus, in between the two opinions, there might be something out there to compromise. Adding to that, since the reflections are mostly produced at the bend of the sheet, so maybe the depth of the box has to be increase to allow for a more gentle curve for the sheet.
In relation to the first point mentioned already, some props could be useful with such box, like some platform to raise the product for example (to avoid having the bend of the background in the shot), or something to provide reflections of the product since the provided sheets don't quite give strong reflection (as seen in Royal above). It is true that such items might be (most of the time) provided by third-party, but it would be nice to have a wholesome package here with essentials and basics for product photography. I would add to the list of props here as well, some capabilities or tools to enable hanging of jewelry and other items; Those can definitely be handy. As for a rotation prop, well, I've seen such products online somewhere but I'm not sure if these would quite essential for product photography but I think it would be wholesome in some way to complete the set, probably.
The box is designed to be self-sufficient, with its own LED ring light and it's opaque. However, usually tents or light box like that do have translucent sides to allow for external light uses. The ring light does a nice job, yet though some flexibility issues might arise here if the photographer has other ideas (e.g. shooting with lights from the side for more low-key feel). Having one source of light in one direction is somewhat limiting for the creative endeavor in general. I believe with velcro, things can be managed in switching between opaque and translucent sides (maybe?). Or, on the other hand, more LED lights can be provided for directional light when needed, with a control for switching them on and off.
I believe that Slow Dolphin do provide variety of sizes of such light box, but one thing that a photographer has to bear in mind here is that the product to be photographed should be in proper proportion to the size of the light box. Here for example, as seen above in Madly Red, the mug was somewhat bulky and the diffusing sheet over the ring light wouldn't do much to soften the shadows of the mug at the bottom, mainly because of the distance between the light source and the object. To properly apply diffusing, there should be some distance between the light source and the diffusing material, as well as between the outlet and the object in general; That way we can have soft diffused shadows of the object. Actually, this is one of the reasons also that makes translucent sides and using outside light sources a good idea. I guess though using a white or a black background would reduce such problems after all (if desired).
So, this is my humble review and experimentation with this marvelous (and dear) gift which I've received for my birthday! I hope this review is out there to help someone about going about shooting some products. The flexibility of this item is surely admired and I think I will do more experimentation with some products to shoot, hopefully. Thanks galore to the sender :) ; it is something that surely put a smile on my face more than anything else around me :)