Showing posts with label car. Show all posts

Thursday, April 20, 2017

InfraVideo…

After having a vacation from almost everything for one week, I think it is time to pin down this blog, even though it is hard for me because things had been drastic a bit lately and my mood is in great swing lately. However, I'm trying to work on some stuff and I will try to post about some of my thoughts here. I wasn't going to type it but it is due after leaving it for a week!

Meanwhile I'm working on various things, mainly videos. It's just getting interesting with me exploring various filters and recording videos from my car as I used to do in the old days (with my small car back then). I'm working on that slowly and I've learned bits of videography already, but sure not like a professional anyway; I still don't have a shotgun mic even! But before delving into these videos, I've prepared a video some time ago for a hypercube (a.k.a. tesseract, 4D Cube) toy which I've created using playing straws.


The object is made by interlacing 2 cubes of straws and then connecting the corners, which was not to be done without bending the straws making what it looked like circles when viewed from the sides. I've created another model but it was not successful like this unfortunately, where 2 cubes are fit one inside the other, but again because of the bending in connectors between corners, the view was not "organized" so to say. Meanwhile, I'm trying to build a model of a hypercube using wooden pieces and some kind of glue (tried Tack-It already but didn't work properly). I'm planning to use such models for future photographic missions if possible. I might find inspiration there.

On the other hand, I got back to my habit of doing videos while driving but this time using filters to see the general look. surprisingly, fitting the tripod inside my Pajero is harder than fitting it into my small Seat before, probably because of the differences in design. My first trial was with B+W 092 infrared filter which has a threshold of about 650nm (or it might be 700nm). Such filter is supposed to let some color in when processing the images.


I'm showing here the video without audio track (meh, useless!). Luckily, the camera didn't flip with the tripod inside the car as I was roaming around. Hope you enjoy the marvelous views of how cars and trucks act like marbles thrown randomly on the floor! One of the concepts I've learned online about videography is that you must keep things in manual (to be more professional). However, in this video above, I've let things be automatic. I've used Voigtländer 20mm lens here which is semi-manual, thus I'm not sure if the aperture did change during the recording. Anyway, shutter speed and ISO are surely to be changing depending on the lighting conditions in front of the lens. I've increased the EV to +1 to be on the safe side while recording but I ended up reducing the brightness and adjusting the contrast because of that when editing the video in Photoshop (yes, Photoshop). I was dedicated though to record a video without any automated process, and I'm not sure if this rule would really be applied or could be applied to special video recording like this one under infrared filter (or UV). Anyway, I did it!


To shoot this video though, I had to change the settings for the tripod as well just because I changed the filter, since the filter is a gel filter which is placed at the back of my Canon EF 15mm fisheye lens, and thus I had to re-fold the tripod in such a way to get the camera to the front more to concentrate the view on the windshield as much as possible.
The filter in the second video is Kodak's infrared gel filter with threshold of 1000nm. You might notice how it looks more like a night vision video clip, but it was really shot in morning time. In this video, I've used complete manual settings and I had to make a compromise. The smaller version of the video here might look "clear" somehow and smooth, but the original had a significant noise level apparent while watching, since I was using ISO 4000. I had to reduce the f-number down to f/5.6 or less while fixing the shutter speed to 1/50s. I wanted to shoot at f/8 or f/11 to ensure the depth of field but that was out of question. The shutter speed here is related to the FPS rate which I've picked at 24fps, and according to some rules of thumb from the literature around the internet, the shutter speed should be equal to: 1/(2 x fps). But this point is actually sparking my interest and I want to try slower shutter speeds if possible to see how the video would look! However, probably these rules of thumb in the literature are more confined to normal video shooting and not for such conditions with special filters applied! There are a number of points I've noticed in this video though which I didn't really see in the previous video shot with B+W 092 infrared filter of 650nm threshold:
  • Some trees are bright and some are dark, so I think some plants were reflecting IR indeed and some were absorbing IR, the despite the general lack of sunshine!
  • Some car lights (brakes or signaling) were brighter than they are in reality! While some signaling from some cars didn't show up in the recording at all! I think this is related to the IR issued in each bulb type, maybe?
Away from the noise level which is somewhat annoying for me, I think the results were fascinating actually; to see a real difference in the light levels and light receptions between a video in IR and reality!
In the process, I've realized that whatever color space the camera is set to, the video is in fact recorded in sRGB. When loaded into Photoshop, it will adapt to the default working color space of Photoshop (which I set to ProPhoto) but the rendering of the video would not be "fit" if I can call it so. The colors would be so saturated and working around that is a tedious task (if it can be fixed anyway), and thus working with infrared videos I have the habit now to convert everything to sRGB first. The vivacity of the colors are not pretty much required anyway as much as it is so when working with HDR slides and tone-mapping in regular images, as I usually do!

Finale

I'm passing through some weird timing here as I'm slowing down the pace of my work with the camera (excluding the videos). I had to withdraw from the project of April within the group. After getting sick and getting slow recovery (some coughing remain though) my body and mind are not functioning well together. Despite the relative easiness or commonality of the topic for April's project (shadows and reflections), yet my mind could not come up with a good idea to perform or try.
with Ramadhan getting closer, it seems more likely I'm going to sacrifice some days from my leaves balance, and take a leave during the month or most of it after experiencing it last year with summer semester rolling in and record heat struck back then. I'm not ready to experience this at all. I'm not sure that I will be able to travel anyway but I was hoping for to more days in my balance instead of spending some right now. I have to pick the starting and ending dates still which I cannot decide and settle with yet.
I'm feeling detached, and working on detaching myself further in fact. I need to get back to my activity before. I think being a member in a group is slowing me down for the time being. When I see the number of experiments with my camera in the years before and after joining the group, I clearly see that I had more experimental work done before. Not to say they are good pictures, but I used to work, and work... I was in mood to work with my camera, as well as other projects, like my Ayvarith and other conlangs. As I'm reading more books about Arabic phonology and language to get more educated about my own native tongue, I get even more eager to work with conlangs, but yet I have to find the time for them…


Stock photography by Taher AlShemaly at Alamy

Thursday, December 26, 2013

Macromatic...

Here we are, another week passed, with a special twist of Christmas, of which we don't celebrate in fact. In this week, I was somehow busy with paperwork and going back and fro to finish some business related to my car, and by the evening I'm left exhausted (and mostly with a headache). Thus, I couldn't do much either with my photography projects or with my Geltani project.
I've finally got my new car; a Pajero. I'm used to drive salon cars and this is my first time to drive a somewhat elevated car; I mean like owning one and drive it daily. In the meantime, I don't think I'm getting rid of my old car, because apparently Mom's flexibility and movement won't give her much when riding a big car like a pajero. The plan for now is to drive her to the dialysis with my old Seat while in other days and doing other chores with my new pajero.
I do have my plans for this new car of course, other than just driving! But I need time to think things through and to get myself more used to its dimensions. I really wanted to shoot the car in a cloudy day to have some long exposure but the sky had been clear for days now. Hopefully, the opportunity will come soon.

The Lava Bloom

Source: B&H
Source: B&H
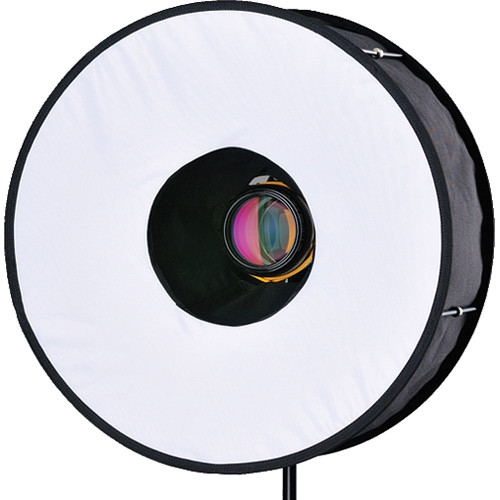
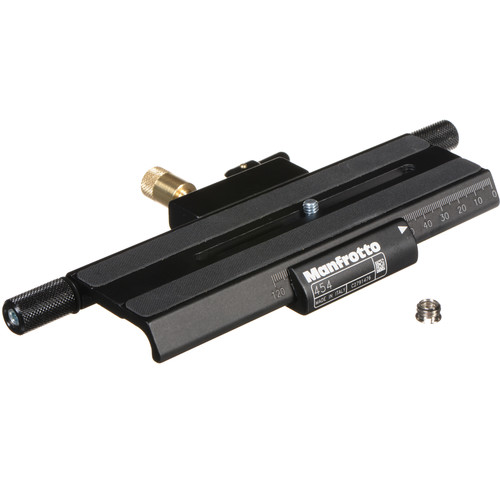
In a simple experiment just to test my Manfrotto macro rail, I've tried to shoot some flowers in the flower bed in the yard that have been planted few weeks back. Initially, I thought that this is an opportunity as well to try out the RoundFlash for macro shooting. Later on, however, this proved difficult, and to really use it for such a purpose you'd need to elevate the tripod higher from the ground and make sure there are no barriers between the camera and RoundFlash set, and the subject. However, I've tried to use the RoundFlash with 580EX II connected but in wireless mode but it wasn't practical because receiving the signals from the camera body can be cumbersome. A cable is better fitted for this task while moving the RoundFlash. After trying several shots, I've discarded the RoundFlash and worked with the speedlite alone. After sorting out the images I've came out with 3 shots only that I "somehow" like - not completely though.

Lava Bloom I
Lava Bloom II
Lava Bloom III
The settings for these shots were almost not changed using Canon EF 50mm lens with addition of 68mm of extension tubes. The speedlite direction and distance were changed between shots (in a manner that I don't quite remember right now). As you can see the 3 sorted out shots are cropped as the leftmost parts of the images were somehow (almost always) blown out a bit and to reduce the dramatic edit in the RAW stage, I've decided to crop it and to serve the composition in a better way (despite the random folds). I've just realized after all this cropping and editing that one particular feature seems to be at the center of image, not abiding to the rule of thirds. I'm not sure yet how to feel about this; is this a weak point in the image (regardless of the overall aesthetics), or it is an unconscious break from the rules?
By experience, I've realized that the most interesting lighting for macro shots, specially floral ones, it is when the light strikes from the side to give some dramatic sense of the scene and accentuate the features of the bloom further. Anyway, in this particular incidence, it seems other direct or close to the top directions were fit as well - and probably the color of the bloom helped me a lot with the vision I had later about this bloom being as a lava! In any case, at such level of macro, experimenting is always a key feature, specially if not using a ring flash.
Trials to render one of these shots into Black and White wasn't successful as the tones appeared somehow "monotonous" and didn't provide that striking contrast that I was seeking. This is understandable, since the tones are closely related (Reds to Yellows), and separating them by black and white rendering is hard if the original hue gap isn't wide enough.

The hue spectrum. Notice the blue circle and the distance between the yellows and the reds (connected through orange).

After these trials I've tried my luck with extreme macro (reversing lenses) and using teleconverters, along with the RoundFlash again, but to no avail.

Forgotten

Source: B&H
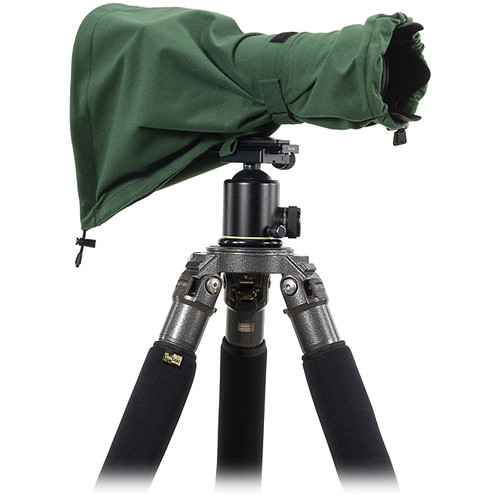
Two weeks ago, when it was somehow raining a bit now and then, I've decided to do some outdoor activity and this is mainly just to test my new LensCoat. I've simply forgot to post about this experience last week. I got the chance during a weekend morning, when I've decided to head to a place I'm quite used to since I've done lot of shots there before. The challenge, however, was to drag my stuff to that spot and settle and mount my camera while the rain is hammering (though it wasn't a heavy rain after all). I've found it plausible to just fit the camera and cover it with the coat and then change the lens (if not already mounted on camera) from under the cover; which might need a bit of practice if your movement is clumsy as mine!

Denkmal für Freiheit
Rokinon 8mm, f/8 (?), 0.8sec, ISO100.

Ironically, I was the one without a cover under the rain! The situation was awkward as I was trying to use the calculator as well under this rain to estimate the needed exposure. Not only that, but I've even disconnected the Rokinon lens and tried to fix gel filters on its back with my old method of attaching the gels to the back of the lens. I think I've added 8 stops. I had to move fast (and cover the camera mount fast too). It is not something I do not advise anyone to do, but it gave me a lesson on how to really prepare if you have a real goal in mind!. Anyway, the preparation here is out of question was it was just to "use" my new LensCoat.
Anyway, I've tried long exposure here but, despite the nice clouds formation, didn't produce much nice results, and this is natural in fact because the clouds shouldn't be so massive if you want to create and observe concrete lines in your image after a long exposure. After all, I've picked a single shot image and worked through it with some processing. The noise level wasn't cozy, thus I resort to the old trick of blurring a bit and isolated the background from the foreground by lens blur, beside cropping.
This image in particular, beside others taken with Rokinon 8mm fisheye lens, revived in me the dream of having some sort of a profile for this lens to be used in DxO to correct (or de-fish) the image. I've been checking for some methods to create such profiles, and some of them involve some really large prints, which is something out of my hand for the time being. I'm still looking for alternatives though.

Eigen

It has been a trend in the past few weeks, and because of the dormant activity with my camera lately, to visit some of the older images (and specially old panoramas) to do some kind of a perspective change by editing the images in a different way; mainly by doing a selective discoloration, or what some call it color splash.
Probably the color splash is a phenomenon that occurred and is a product of the younger generations and the modern photo-sharing websites. As they say, the cool imagery. However, nevertheless, it is something worth a stand from the artistic point of view I believe. I didn't study arts myself but at the end I have a mind, and I have emotions. I think I can relate to some aspects of such effects to the images.

Coelus Ignes

The concept of selective coloring or color splash is not new to me in fact since I've done it before for some panoramas, but this time the perspective is different. I'm looking at it as a possible venting. Meaning, the colors of one image might not be flexible with your vision, or maybe the composition is not quite what you have desired for the image, then a color splash might be an option to enhance the visual impact of the image. I've excluded here the black and white option because the black and white, even though it is an option indeed, but it would depend heavily on the composition and the visual arrangement in your image. There are no colors, so the only way to attract the viewer in a black and white image is the composition in the first place, then comes the tonalities.

Planeta Victoria Verde
Orbis Fidei (II)
When it comes to choices as to which color or range of colors to pick for such task, I find the matter is a bit philosophical in nature. Just a bit, not much! As I went through many images from my past, I've found it plausible in more than one image to select more than one color to show while leaving the rest black and white. I've asked myself, what rules here? Probably I can put it down in points:
  • The color can be the most important color in the scene. The most expressive color in the scene. As an example, in Coelus Ignes above, despite all the "nice" features in the image, like the lights and shadows and the wooden beams and the distortion, I've found myself compelled to show and accentuate the reddish sky (and here I've tinted the black and white with little blue). The same goes for Planeta Victoria Verde.
  • The color can be important to show a certain feature in the scene because that feature is in that specific color. For example, in Orbis Fidei (II), the main feature of the ringed strips on the ground was the popping part of the image. However, because the rings were yellow and the image has a wide range of yellows originally, I've decided to show this feature specifically by showing the blue instead. 
  • Even though a color splash scene can be composed of more than one color, yet I do think that showing one color ONLY is more powerful than two ore more.
  • The question is, how firm is the relation between the composition, and the color splash? Would I really give an image with somewhat bad composition a push by sorting to color splash? The initial answer in my mind says "no". Composition is of utmost importance even in a color splash - but who knows!

From the thoughts pinned above, it seems that panoramas (specially those with symmetrical attitude somewhat) are a good target for color splashes.

Irish Home VII (II)

Finale

Right. Still there are books on the queue line waiting for me, and there is a Geltani project that I didn't touch for some time now, with me being busy with my life. How much I do wish if I just can change everything in my life in one night and a morning. Now with a new car at hand, I have to bear in mind the future expenses as I have to pay the installments for this car which renders me with a lesser amount of money every month, after deduction.
Meanwhile, all the mental work with the macro photography and even fisheye lenses, made my brain somehow active with mathematics again as I try to calculate and find some solutions or imagine some solutions for future usage of these lenses. In fact, I'm thinking of an experiment already as I'm typing these words. Also, let's hope for more night time photography as my last week's outing was not so promising and I really felt it not appealing to write about in here this week. Probably I'll give it a mention at some other time.
I find the real question deep inside me is, all this busy mind work, is it enough to really make me forget my worries and my personal problems? I'd say the answer is 50-50. Yet, it's really hard for me now to give even more than this activity already. My life pace and my physical conditions are giving me a real push downwards.

Now with the new year coming, I'm having plans to go to Failaka, and this time with my new car if possible. The schedule of the ferry for the days left of December aren't good at all, so I hope by 2014 the conditions are better. Just to do this simple trip I do have to arrange stuff with Mom concerning her medicine.
We don't celebrate Christmas here, nor New Year's, but some people do ask me now and then, what's your resolution for the new year. I'd like to say, simply, not to be lonely anymore, but I know this will be a failure already - regardless of how optimistic, or pessimistic person I am.

For those who celebrate it, I say Merry Christmas, and a Happy New Year


Thursday, December 19, 2013

Zu Studieren...

Let's see. A week that started with a semi-disaster, after the escape of the maid from the house. Now, we (or me) have to do much of the house work as much as possible to keep Mom rested as much as possible. It is hard as it is WITH the presence of a maid, as Mom tries to keep active and simply denies her ailments.
On the other hand, I've done all the paperwork and payments to get the new car. I think I will take a shot for it and maybe even a panorama from the inside. It's too early for this talk anyway!
Because of this busy schedule either in daytime or after working hours I didn't even have much time to do anything with my camera except for a simple study and a simple shot. Even that simple shot is not worthy (so far) for publishing, specially after discovering that my leg is in the image by mistake!! (common mistake in fisheye shots!).


Comparison and Study
As I've mentioned last week that I've done some experiment to check and make an idea of the effects of some light modifiers after receiving my new shipment of Impact Syl Arena Strobros On-Camera Flash Light-Modifier Kit.

Source: B&H
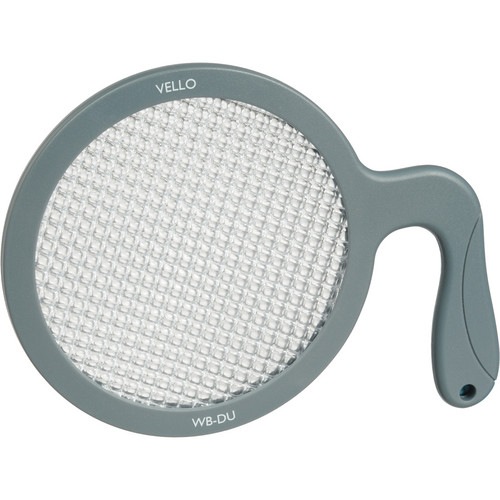
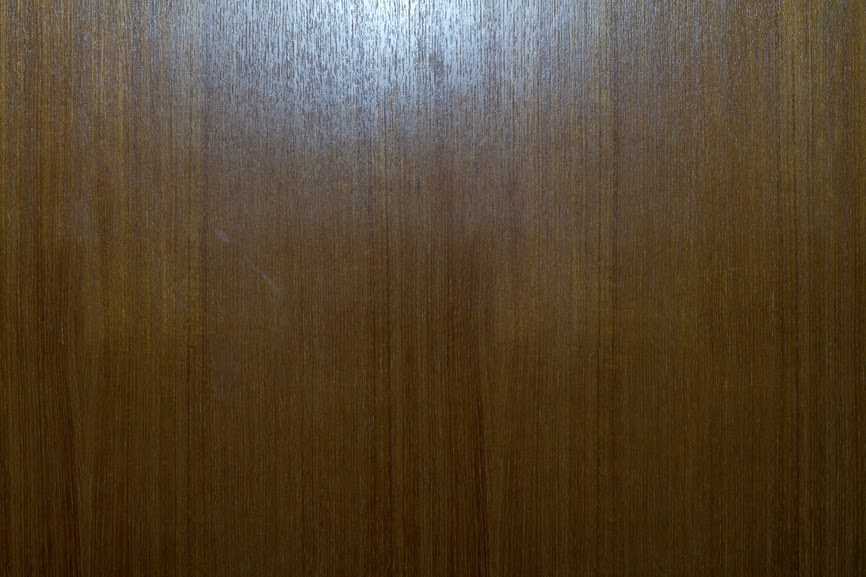
Initially, I've done the test with my 580EXII Speedlite against my green wall. After checking the results of such test, I've decided to do the test again, and this time against my wooden door because it has a clear texture and it is better to judge the effect that way. I've also added the RoundFlash modifier to the list for a general comparison. But first, I'll post an original image with plain 580EXII in use. It's worthy to mention that the distance from the front of the lens to the door was kept at around 1 meter (~3.3ft) and f/8. The shutter speed and the power of the speedlite were subjects to change to adjust the level of the light. To ensure a neutral white balance with natural colors as much as possible I've used the Vello Universal White Balance Handheld Disc and shot with the speedlite naturally and used that image in Custom WB settings. In the following set of images, it would be better to click and enlarge the picture to have a better view.

Plain 580EXII
Canon EF 50mm, f/8, 320-1sec, ISO100.

Notice how the center of the light strike is closer to the top edge with flare and gradually fading in all directions. I don't know though why it is not exactly at the center of the top edge!

RoundFlash
RoundFlash shot

Source: B&H
In the RoundFlash shot here, I've used the High-Speed mode for the 580EXII to kill the ambient light and also to decrease the flare on the wood. Strangely, and probably it is a property in the High-Speed mode, the light became more bluish despite fixing the WB by Custom WB settings.
As you can notice, the light accumulated in the center of the shot and gradually spread to the corner, but the graduation is short and blends to darkness like it's vignetting. One of the main problems with the RoundFlash modifier is that the lens should have some length to fit properly in the center. My Canon EF 50mm f/1.4 USM lens was not long enough and initially had problems to fit it in between the strings in the middle of the modifier.
At such level, and 1 meter away from the target, the spotlight of the Speedlite falls almost perfectly in the center (even though in the plain shot it was not!). A good point to consider when shooting portraiture and macro; in fact, RoundFlash was made as a cheap substitution for the expensive ring flash used in typical macro shot. One bad point about it though, it is bulky and I wonder how fit it is for macro shots. You must have some long lenses to keep away from the target (if it was a sensitive one as an insect for example) and to have the lens fit firmly in the center of the modifier. Concentrating the light in the center, and in such amount, would somehow mean harsh shadows for the subject if it was used for portraiture shots I believe.

Beauty Dish, Golden Plate, and Diffuser
Beauty Dish + Golden Plate + Diffuser

Source: B&H
Source: B&H
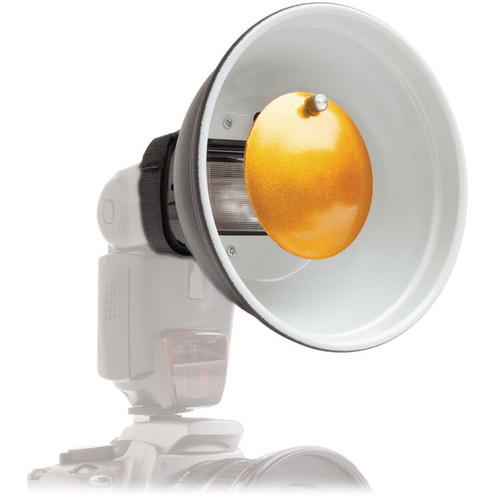
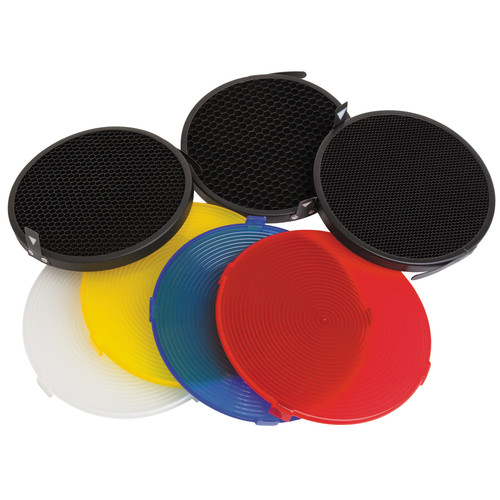
Then comes the beauty dish, which is a well-known modifier in the fashion world and fashion photography. Technically though, I've never (so far) used it for portraiture or anything else but this test as you can see here. Along with the kit, some specific diffusers and grids to fit the beauty dish are available, thus I've decided to check the effect of the diffuser (the white disc in the image), as the other discs are simply colored diffusers and probably wouldn't help me if it casts a color on the reddish-brown wood. I also didn't check the effect of the grids because their effect is known - simply to concentrate the light into a narrower angle.
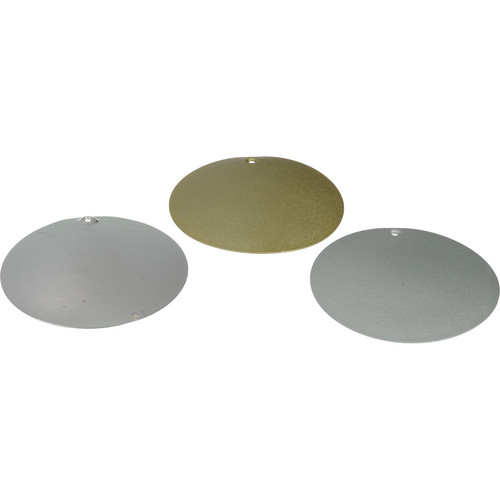
Back to the light show now.As it is noticed, the flare of the shot is on the top level above the center and closer to the edge but the size of the flare is relatively small (compared to the RoundFlash and the plain shot). The color of course is changed a bit because of the golden plate inside the beauty dish which made it a bit of greenish hue more than bluish hue. The graduation of the flare is faint (and appears first as if it is cut abruptly). This light attitude makes me think of the usage of the beauty dish; it must be used with some angle even though it is (here with this kit) considered an "on-camera" speedlite modifier. Otherwise, if it was used directly to hit the subject, it would cast a harsh shadow on the spot where it falls. Well, unless a dark background was in use which would hide such shadow maybe!

Beauty Dish, and Golden Plate
Beauty Dish + Golden Plate

I see that when the diffuser is removed there is, virtually, not a big deal of difference in the location of the falling light according to the frame, or to the graduation in the light level. Probably the diffuser provided a greater expansion in the periphery of the falling light, and probably this difference would be more apparent if the power of the light was increased (by the speedlite, by the aperture, or by slowing down the shutter). Could be a subject for further testing.

Beauty Dish, and Silver Plate
Beauty Dish + Silver Plate

Source: B&H
The next plate in the queue was the silver plate to be fixed in the center of the beauty dish. As it's predecessor, the silver plate doesn't seem to change much except for the color of course where it accentuates the blue tint of the speedlite. Usually, with gel filters fitted upon the speedlite, a balance between the ambient light temperature (or color) and the speedlite temperature is sought in that way, and consequently, the white balance is controlled more properly. Here, however, the story is a bit different when using the plates and a speedlite which emits a tinted blue light. Makes me wonder now about the possibilities (and the creative process) of blending gel filters on the speedlite with those colored plates in the beauty dish. The results got to be crazy!

Beauty Dish, and Mirror Plate
Beauty Dish + Mirror Plate

It might appear as completely black frame, but in fact there is a faint light. This result, however, was a complete surprise for me as I was expecting more reflectance from the mirror plate. The mirror plate (which comes in a concave shape) has two sides: polished (convex) and unpolished (concave) surfaces. Other plates don't have polished surface like a mirror. Anyway, according to the settings I've noticed, the concave part must be facing the speedlite. The light here was very faint. I would increase power to make a clear note of how the graduation or feathering of the light goes, but it's enough for me now to see and compare with other settings of other plates. Seems that the mirror plate feathers and scatters the light emitted from the speedlite so much that it only makes a faint tracing of light in the frame. Leaves me with the question: How would that appear in a wide-angle lens?

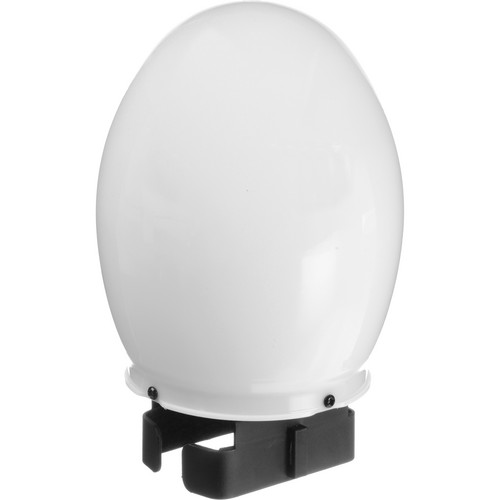
Bulb Diffuser
Source: B&H
The next modifier is one that I've seen photographers use it a lot, either directly or indirectly. However, the usage of the Bulb Diffuser might be known to many but that didn't keep me still without testing it here. It is a diffuser after all and dedicated for smoothing and feathering the light in a pleasant way. Anyway, because the bulb shape emits lights in all directions almost, and because the typical setting as shown in the guide that the speedlite must be pointed up, I've decided to do my own testing with various tilting angles of the speedlite.

Bulb Diffuser, speedlite pointing up.

On the first trial here with the typical setting: Speedlite pointing up. As it can be seen above, the feathering is nice and smooth going all the way down from the top with little flare on the top edge. Remember that we are using the Canon EF 50mm lens here, meaning that with a little extension in the focal length, more than 50mm, we can be left with the feathering alone without the flare on the top edge of the frame. A good point to memorize I suppose!

Bulb Diffuser, speedlite at 45o.

After trying the typical position, I've tilted the speedlite head down by 45o. This position looks good despite the relatively large flare on the top of the frame (which as I stated above would be avoidable by using a longer focal length). The graduation or feathering is slow making the luminance almost (not completely) homogenous across the frame. Probably this would be a favorite position when doing portraiture (with a little raise in the speedlite level or longer focal length).

Bulb Diffuser, speedlite at 90o.

Finally, we have the 90o position which in fact almost replicates the plain shot of the speedlite without any modifier. Yet, however, in the plain shot above you can notice the black edges like vignetting effect, but here with the bulb diffuser, the edges are also illuminated and almost no vignetting can be found. This makes me think of using the speedlite with other modifiers from Rogue collection which I got before in order to maximize the spread of the light circle and yet give an act as if the speedlite is unmodified originally! Needs a bit more of trial and error.

There are a number of other modifiers along with the kit but I didn't test them because, simply, their effect is known; like the snoot (with grids) and grids for the beauty dish. In addition, a new set of gel filters and a velcro band arrived with the kit but I didn't use them yet, as they are similar to other sets I had already. I need to practice my "speedliting" as much as possible now.

Finale
It feels like my life has been monotonous right now. The only way to break out the routine and the duties of the everyday living seems to be paying close attention to details around me in a trial to amuse my brain in things that usually I don't think of. There are books still on the queue but they are not photography or archaeology books, so my progress in digesting these books is slow. I'm praying for some vacation again, but a real one, out of this country. I'm feeling sick of my (unappreciative) work place, as well as of the majority of people around me. Such a dream seems far a bit for now.
Now, I'm waiting for every weekend like a treasure seeker, and hoping that I can do some night photography in each weekend. Is it worthy to try to be unique already?


Thursday, December 12, 2013

Rokinonian...

Such a weird week. Not so weird if I can compare it to my luck with things anyway. By the beginning of this week almost, I've spent some time roaming over places of car dealers to find a brand new car and this time I would prefer it to be an elevated car to give me a better view of the road (and help me carry things around in the future). Ironically, that same day, the garage phoned me to tell me that my (beloved) Seat is finished with and I can take it now. All in all, it's going to cost me a hole in my pocket. Even though I like driving my small car, but I have to give it away in any way possible because of the problems with the spare parts that are hard to find for this car!
Anyhow, I'm starting some sort of a program to try and go out and do some night photography every weekend if possible. Night photography in winter is synonymous to long exposures of course but that doesn't mean it would be a single exposure of course.

Guten Mitternacht
After the initial trial last week for some night photography on the dock of Soog Sharg, I've pushed myself (despite my tired body) to go again and do some shots after some planning for some angles, and luckily, there were clouds this time!

Sessiz
Rokinon 8mm fisheye, f/5.6, ISO100.

In the beginning I've placed the camera with my Rokinon fisheye lens in some corner and pointed it toward the sea in order to capture some curvy image. The exposure was long (around 4 minutes), but it was too long that the lines of the clouds movement were so blurred and almost featureless. Add to that, some fishermen were moving here and there in front of the light source which made things worse. Still considering working around these problems though.
Next, however, I've placed the camera almost in the middle of the roofed end of the dock and pointed it west toward the sky and a portion of the city. After some tests with ISO12800 to check my location and measure the required exposure later with ISO100, I've realized that capturing a single exposure with all the details is impossible in this area. It would be either a blown out city and light wooden beams, or black beams and suitable city lights. Thus, I've decided to go with a little adventure in a sequence of long exposures, starting from 4 minutes exposures and then going down 1 stop each time until reaching 3 seconds: 4m, 2m, 1m, 30s, 15s, 7s, and 3s. A total of 7 exposures that were later combined together into HDR to produce Sessiz.  I was afraid that the movement of the clouds here would vanish so I made sure that when merging into HDR with Photomatix, I've turned the option of Ghost Removal off. The White Balance here was set to Fluorescent but I did make some tests before merging just to check the general appearance of the sky, because usually in such situation I would prefer the Tungsten WB, yet in this instance like in Sessiz I've decided to have a soft appearance and Fluorescent WB helped very well. Adding to that some processing that had to be done to fix and reduce some issues like the saturation of the Reds tones and increasing the tones of the Greens.

The name Sessiz means "Silent" or "Without sound" in Turkish. This name is a reflection of my feelings at that moment (but I don't know why I picked Turkish specifically, probably just for the sound of it!). Despite the harsh wind blowing and the coldness, and the fishermen around, that moment specifically was majestic. Silent, and quiet, giving me a tranquil (and a chilling) feeling deep inside. Exactly why I like winter and night photography combined.

Solitude
Rokinon 8mm fisheye, f/5.6, ISO100.

Then after Sessiz I thought of creating a symmetrical shot of some sort by pointing (and moving the camera) to face the bridge or the dock itself with all the light sources on it. This time though, there was no escape shooting the fishermen, and again with multiple exposures. Like in the previous trial, 7 exposures were taken by some problems with the white point and the flare of the lights that made me merge only 3 exposures instead of all of the seven. Here though I consider myself lucky somehow because one fisherman was closer to me and the rest were far away and that somehow gave out a reflection and a sense of Solitude, from the rest of the fishermen and from the city itself with all its colors and light. Maybe a still image would have served me better for the meaning of this shot but of course I couldn't ask the man to stop still to do 7 exposures! Anyway, probably one can argue that the movement of this fisherman specifically adds some dynamic element to the image instead of being static.

Sessiz (B&W)

I couldn't resist the urge to convert some of those night images into Black and White because, typically, night images into Black and White add to the element of mystery; either for the unknown, or for fear of something. Converting Sessiz to Black and White also helped me with some noise and hot pixels (random red dots) in the scene, and some noise in the shadows because of merging into HDR; such stuff are a normal occurrence in both, HDR slides and night shots. The results of that night really pushed my enthusiasm forward for more activity and, hopefully, more complicated shots in terms of composition at least, if not technique. But maybe in the near future I have to change my location and do long exposures elsewhere if possible.

Exposure
The exposure I mean here is not the typical photographic term, but exposure to the public. I've received an email last week stating that one or more of my pictures that I've submitted before for some contest (and didn't qualify to the finals) were all exhibited in a street art project organized by the contest's organizers themselves: Al Nowair Group.

Collage

I've visited the place in the weekend one morning so that not much people would be around. The exhibition was divided into two parts around the Marina Crescent mall. One part was made by the word "FOCUS" and the other one was made into the shape of the word Focus in Arabic, Rakkiz [ركّز]. This is the main title and goal of the group; to focus on the beautiful things in life. I roamed the place taking pictures of my own images (and unfortunately couldn't take a selfie) and probably I won't be exaggerating if I say that my images could be the most repeated ones in the whole exhibition, specially the shot I've named Eigen (but whose name I've changed to Unique upon submission to the contest).

Eigen

In the Collage as well, you can see that I've taken a general shot for the exhibition with my Rokinon fisheye lens and in fact I was planning to do a long exposure as the clouds were awesome, but unfortunately for me, the wind was blowing and placing the ND gels into the backside of the Rokinon was a risky task and I simply got frustrated and left the place! Probably it is time to look for another solution for this problem other than putting gels at the back of such lens.

This event made me think again about contest. It was a nice exposure somehow (even though my name was not mentioned on the images) even though I didn't qualify. If there would be contests in that manner probably I would join in because the end result isn't important after all!

Nadirography


Source: B&H
 Probably I should coin this term? I do like it in fact... Nadir-o-graphy. Taking pictures pointing downward. Now, after receiving my last shipment from B&H, I've tried to try out the new equipments, and specifically here the Pedco Ultra Clamp Assembly with 1/4"-20 Screw for such nadir shots. The situation is scary, I have to admit. Hanging your camera into some ceiling that is more than 2 meters (~6.6ft) above the ground is not something easy to do, or to look at even, but I've tried 2 successful shots so far.

At work, busy with no work...
Rokinon 8mm fisheye, f/11, 30-1sec, ISO400.

The first trial was set in the office (all shots in fact were taken few hours before writing this blog!). I've brought my camera to work and just one hour before my working hours are over, I've decided to bring it and hang it with the Pedco clamp onto the A/C opening. The table surface here was GRACEFUL to carry my body weight without breaking! Also, it is much easier to move on top of it than moving on a ladder as I later did in my own room.

My room = My mind
PS. This IS my room. Nothing was deliberately changed.
Rokinon 8mm fisheye, f/11, 0.4sec, ISO400.

In my room I had to use a heavy ladder to reach the ceiling (and remove one of the CFL lights to put the clamp in its place). The good thing about Pedco here is that it has several joints and several degrees of freedom making mounting the camera and pointing and screwing the clamp at any body relatively an easier matter; quite the opposite to Delkin mount clamp which was so simple, and weakly built.
In both of the shots above I had to use the lightmeter, and also 3 bracketed shots were taken with 1-stop difference just to make sure that a proper exposure is achieved - but at the end no HDR was made, and only a RAW file was edited. Here also, I tried to make use of the hyperfocal distance concept but I'd say I'm still training myself on this and the real test would be using that concept at night photography with my Rokinon.

Finale
Before writing my finale for this week, I was about to post bits about the new light modifiers that I've purchased lately, but anyway, probably this post is long enough as it is. I think I will do more testing till next week's post.
Now, with my ERG examination been scheduled to January 23rd, 2014, I think I have to forget about it little bit for now and try to do as much as possible with my camera and other projects. On hold as well, is the Geltani project, which I've sacrificed its time for the sake of the new books, and the camera.
Talking about emotions had been a hard task lately, even to myself alone. The mind is floating in an endless sea of thoughts and the only way to revive it is to have few moments of ecstasy with daydreaming and practical thinking. I try to amuse myself with mathematics from time to time, or simply thinking of those who already suffer from vision loss like my brother and how to help them (and try to push myself more into studying lenses in that direction). There are always moments when the heart jumps out for something special, but my intuition taught me to always keep a low profile when it comes to happiness. Such a pessimistic look, and to change it, I'm trying to swim against an oceanic tide. The least I could do probably is to try and surround myself with beauty in any form; after all, it is one of Leonardo's advices. But where is beauty.... ?

Natasha


Thursday, November 21, 2013

Macro++

That was some amount of rains that we received this week! It's just amazing, but sad in the same time because I couldn't do much with it. I'm not driving my car, and didn't do any photography in such weather (and it would be better to have weather-proof protection stuff). My car was supposed to get fixed this week as the garage called me and said the chip they need arrived from outside and needed my permission and my agreement for the price to work on. According to them, they said 1 or 2 days will suffice. But with such rains, I didn't get any calls yet. Probably the rains are the reason for this. I can't believe I will see this car again. I'm growing sick driving other cars.

Macro Plus
I've been continuing my work with trials to do macro shots (or extra macro I should say). The work wasn't much of a success in fact for many factors. It made re-think my approach to do the whole thing really.

The System!
Click to Enlarge
As you can see on the left, the system is truly cumbersome. Long set of lenses and extensions, portable monitor, (shaky) tripod and lateral arm, with weights (dumbbell weights) added inside a sack to keep the arm and tripod balanced. I didn't make a glass surface for the macro experiments but I've been using the glass door that fell from the cabinet (the one in the picture). Sorry about the image quality as the image was taken with my mobile. I kind of suck at such images!
For the purpose of lighting I've bought two somewhat powerful LED torches or flashlights that got about 24 LEDs on one surface, plus 3 or 4 on the side in case a narrow beam is required. I think I might need to add a mirror.

Leaf

One of the shots done with the system shown above is a shot for the surface of a small leaf. As you can see above, the image is out of focus. Focusing is one of the big issues here and this is why such system as the one above is a cumbersome technique. According to some websites (they are a lot you just have to Google around) the magnification factor can be found by: Focal Length (1) / Focal Length (2), that is, the ratio of the focal lengths of the two reversed lenses, where (1) is for the lens attached to the camera, and (2) is for the reversed lens.
Hence, it is logical to attach the longest focal length possible to the camera, and the smallest focal length possible in reverse. I think I will use the notation "FL1/FL2" when it comes to image descriptions later. In my case, the largest focal length I could achieve is using the (broken) Tamron lens at 300mm plus two teleconverters, yielding 1200mm in total. The smallest focal length that can be attached in reverse is 18mm (with my old 18-55mm), and the result would be 1200mm/18mm, equals to 66.66X or approximately 67X! Meaning an object would be magnified 67 times its original size! Unfortunately, this was just a theory and in practice, working with such tools isn't plausible at all and can hardly do any good. Thus, I've neglected this approach for the time being and started to do it in other ways, like using the Canon EF 100mm macro lens in reverse with the 50mm lens.

Shaving Razor

Onion Peel
One of the issues that I was investigating is the placement of the teleconverters and the extension tube before the first lens (or the primary lens, attached to the camera). In some websites, they emphasize the placement of the extension tubes in between the converters and the lens. However, practically, seems the situation is the same in terms of magnification power, but probably it works better with the teleconverters attached in between the tubes and the lens. Maybe it is just a coincidence that it worked that way with me anyway, as most of the images here like the Shaving Razor and Onion Peel were all taken with such configuration. Later on, however, I started to use that system without reversing the lens, but simply using the 100mm macro lens with extension tubes and teleconverters.
The light direction was drastic for some shots, specially for translucent objects. Again, No lens reversing this time but I did have hard time focusing. The shake took its toll on the shoot.

Comparison

The leaf shot above is taken once with LED lights below the glass plate, and once on the sides of the leaf. One of the somewhat awkward features for using LED lighting is the bluish streak. The Automatic WB setting wasn't enough to correct the colors but it was (somehow) corrected in post-processing. Anyway, it is obvious that the look changes drastically with the change of light direction, like if it s a 3D object. Personally, I do prefer the lighting on the sides. However, this might not possible all the time, as the set of lenses can get to the subject so close that leaves no room for the light on the sides, the lighting from below is the only solution.

Beard
Canon EF 50mm+36mm extension tube,
f/22, 40-1sec, ISO400.
RoundFlash
Source: B&H
Along with it, I've decided to do some test for the RoundFlash. This time, it's not an extra macro shot but a simple one with my 50mm and 36mm tube. This simple trial did indeed show me how the length of the lens (not the focal length but the physical length) and the closest focusing distance do play a role when using this flash add-on. I think the optimal use would be for a lens that does not protrude much outside the limits of the RoundFlash and if the subject is considerably far from the RoundFlash to allow the light to fill it properly. Here with my beard experiment, the distance was so close (and literally part of my chin was inside the RoundFlash!) because of the extension tube, and that caused a bit of smooth light and shadows (but with the help of relatively high ISO as well). The RoundFlash seems promising but I'm sure it's not a complete replacement for the typical ring flash, and for that I did place several items in my B&H wishlist which are both, expensive and cheap.

Thoughts
With this work with some macro ventures, I've somehow formulated some ideas and thoughts that might lead my work in the future:
  • Practically, using extension tubes alone is enough to get a magnified and well viewed image. I think I was obsessed with the idea of turning my camera and lenses into a microscope and I didn't look at the validity of such practice and how it would reflect on my artistic side.
  • I've been using a remote cable with a delay, plus the 10sec timer in the camera itself, and yet seems the images do have a shake. Probably it is because of the mirror (even though I do use the LiveView mode to hold the mirror), and the mirror lock-up mode doesn't work with the remote cable and Bulb mode (as some of these exposures took a minute to achieve). There must be a way to reduce this shake at least if not stop it.#
  • Because touching the system with so much lenses together does produce a horrendous shake on the macro level, probably it is better to move the plate or the surface and keep the system stable as much as possible; and this is exactly how a microscope works! This, however, requires some mechanism work!
  • I do own an old microscope. Is it possible to implement that system into my camera and lenses? It is easy to talk about afocal system when it comes to astrophotography or bird watching; but on a macro level? I'm not sure if this is even possible.
  • Aesthetically: what do I want? It is obvious in such field, most of the shots would be scientific-like or simply abstract. Now if it is an abstract, arranging the lines and the edges of the frame is of a prime importance. The possibility of such arrangement, though, is yet to be questioned and experienced practically.
These are some of my thoughts so far about macro (or extreme macro) shooting, and more work has to be done soon and yet I have to discover some good subjects to shoot at!

Nostalgia
Among the other things that I try to do to keep me busy, there are some photos that I've decided to turn into something else. simply by converting them to B&W. Probably I was looking for some venting for my feelings specially that most of these images are those taken while traveling. I guess it is a case of nostalgia, for some days that can't be repeated, not in the meantime at least, to say.

Ghostly Room (B&W)
The Victorian B&B, Staten Island, NYC.

Thornbrook House B&B (Re-Visited)
Cashel, Co. Tipperary, Ireland.

Re-visiting old photos and converting them into B&W can be fruitful in a new set of images, specially in a time where my activities are hitting low. However, the trend is always to convert color images to B&W (for various reasons and not merely just to change the feel), but would there be a trend of changing B&W photos into colored ones? I'm not talking about the technique of coloring the old photos and movies, like those documentaries done for WWI and WWII, but I'm talking about digital photography and RAW files. I remember one time I've created 2 albums for a set of photos from Ireland, in which one was colored and the other was B&W for the same set of images, but probably I've done that without thinking deeply into that matter back then. Initially, what I think, is that coloring that B&W images adds almost nothing, since the B&W gains strength in its composition in the first place, and in the tonalities involved second. The introduction of colors into images that are already strong and fine-looking in B&W seems to be breaking the harmony and should be avoided, unless there is some good reason to do this! Generally speaking though, the B&W style seems to be the proper representation for nostalgia after all.

Geltani
This project has been on hold for weeks. Anyway, I've started to work a bit more right now and I've almost finished the set of leading parts of the syllables. What's required now is to polish this set, and try more grammar and more sentences. Initially, the order is supposedly to be S.O.V., mimicking the Turkish grammar. On the other hand, there are still some details that should be worked out. I have to check how to make a simple introductory page for Geltani to represented on Omniglot, in case it is to be accepted. Moreover, the syllables to write foreign words and names into Geltani has to be checked out again since it seems that I've made up some mistakes before.

Finale
Currently, it seems that I'm under pressure to do the most I can do with my camera, just before my eyes get bitter sooner or later. Next Monday will be the day of my appointment to do some tests. I'm still waiting for my car as I see some hope that it will be fixed soon according to the garage's statement. All this time, they were waiting for the spare part to be delivered from outside, as it is cheaper than the local vendor. As soon as I get MY car, I have to plan for a trip to Failaka island. Such weather is not to be missed on the island!

Source: Amazon
I've mentioned before that doing a panorama with my new IR gel filter is on the list of things to be done. However, this can't be done right now easily after the wave of rains that we received this week, and needless to say that I do need some "nice" location, to say the least. Yes, I can do it at home, but I'm bored of this place already. On the other hand, I'm planning to put Allison Earnest's book into practice by implementing her ideas and methodology. The book is quite good and systematic in its approach. Probably it doesn't give much details concerning calculations and evaluations of light levels, but it does provide great deal about sculpting light and how to approach a project. My work though would be using my two speedlites with some of the light modifiers I have already. The difference is, with studio lights, you can use modeling light to properly position the light and check the expected shadows location before the actual shot is taken. However, with speedlites, the modeling is limited to the pilot button which casts a fast light strike into the scene. Thus, understanding the power of the speedlite is critical. I guess I will be starting with simple objects around the house.
Finally, this leaves me with my own self at the end. With all these projects in my mind and these trials to push myself to be active by force, all seems but just a trial to escape from my own feelings about life and my own self. I think I'm in a status where I'm not sure if I should embrace loneliness, or curse it. Even a loveless marriage didn't work out with me to leave this house. It does sound more like being in a jail rather than a home. Even a prisoner might have someone to talk to, to share thoughts with,  to have hopes with - yet, I don't see this coming my way at all. It's simply a dead heart walking...


Thursday, October 3, 2013

Blank...

Long time ago, I've stated that a vacation is not a vacation if you don't travel out of Kuwait. This week specifically, life demonstrated for me (again) why is that.
I couldn't do much with my own projects the passing week. My car is still not working and that kind of put me up with hard times. The problem that I thought was simple got complicated and the car won't start all. I'm waiting for the electrician and his solutions in hope. During this time, I'm using my brother's car and I really hate to drive it. I just use it for necessities. This situation makes me drop my plans for visiting Failaka island as I planned prior to the vacation. No car, no photography; the perfect vacation...

Bubble I
Canon EF 50mm + Extension tube, f/4, 25-1sec, ISO500.

I've taken 2 images before I start my vacation, specifically at work. I wasn't going to post them actually but since there is not much for this week, I'm putting them here. These two images were hard to take because they are macro shots (with extension tubes rather than 100mm macro lens) and without a tripod. The actual process took actually 2 days, one day to notice the texture (on the inner side of my hibiscus mug), and the next to take the picture! Probably this is not how the contemplative photography is supposed to work as I'm currently reading, but I guess some details for such abstracts are nice - somehow gives me some confidence that I do still have an open eye for details!

Bubble II
Canon EF 50mm + Extension tube, f/4, 25-1sec, ISO500.

On the other hand, I've decided to place an order for some stuff despite the squeeze in my financial situation because of the car. In fact, I was more pushed to place such an order because of the family. Some of them needed some stuff from outside and I thought it is the time to place an order for the time being.

Source: Amazon
My first order is on Amazon for some new books (finally). My habit was to order 3 books, 2 of which are photography-related. However, this time I've ordered only 2 books beside many other stuff for the family members here. The first book is The Wild Side of Photography by Cyril Harnischmacher. I own another book for the same author dedicated to tabletop photography. This book, with quick inspection to random pages and the table of contents, would hopefully give me some insight into some tricks - ticks in the sense of special effects or probably simple solutions for some problems.

Source: Amazon
The second book is dedicated to Product Photography. It might sound a bit like tabletop photography but probably I would find more advices dedicated about commercial aspects of such photography and more information about light formations and settings. I thought maybe I should check out this field a bit in depth (specially after the Coffee Contest that was sponsored by the group). In here, it is one of the common fields of photography that people would ask about (with some gains) beside Portraiture Photography.

Source: B&H
Away from Amazon, I've ordered some items from B&H stores (typically). Even though my wishlist contains a long sequence of lenses as I'm dedicated to have some new wide angle lens with flat perception other than the highly distorted fisheye lenses that I already own. However, I think I didn't make up my mind yet about such lens, beside the narrow budget for the time being. Thus, it was better to delay such an order. Instead, I've placed an order for the RoundFlash which is a product that would help in macro as well as in portraiture. It might act as a beauty dish; a common accessory for portraiture lovers. I just hope it fits my speedlites. This cheap solution came to me like a gift in a time I was thinking of having a ring-flash to help me with my macro shots. Concerned about the high prices for such flashes, I've started to look up cheaper solutions or DIY methods, when I received a newsletter from B&H containing this product. I'm having my hopes up, let's hope my hope won't be without hopes... wha?

Source: B&H
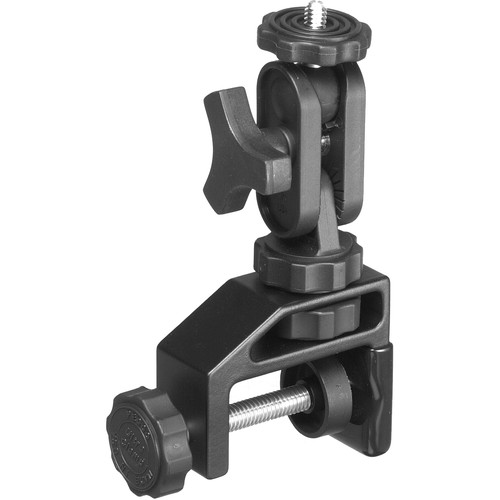
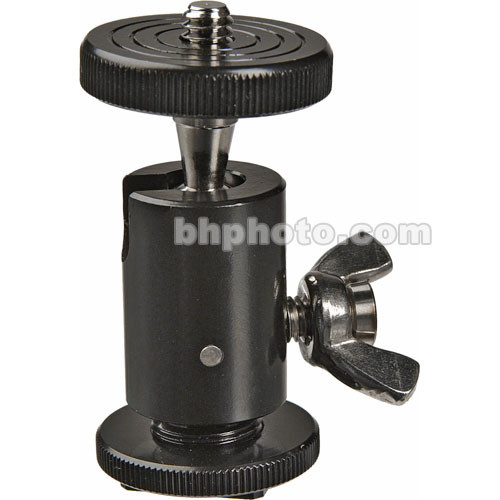
The next toy on the list is the Tote Vision HS-1 Hot Shoe Mount for Tote Vision LCD Monitors. A small gadget just to place my portable monitor on the top of the camera (in the Hot Shoe). This is generally to help me in situations where I need to shoot myself, but that doesn't mean it doesn't help in other situations. This simple gadget would give me a great relief from using one extra tripod or monopod just to hold the portable monitor, or holding the monitor by hands while shooting at critical angles.

Finally on the list is the Kodak 3 x 3" #87B Opaque Infrared Wratten Gel Filter. I'm not sure if the size would suitable for cutting, but anyway I'm having plans to apply this to my fisheye lenses; specially the Canon 15mm because it is the one I use commonly for panoramas. There were many varieties of IR gels with codes like 87B and 87C and I'm not sure what's the difference between them. Most probably the difference is in the range of wavelengths after which waves are allowed through the filter (i.e. the threshold); but how to know this from the code is beyond me and even if I knew, I wouldn't know which one is the best for my own uses! So, let's see how it feels to do a panorama on infrared. I'm pretty sure the exposure times will be exaggerated in a ridiculous way!

Now all I have to do is wait for this delivery and pray for some good luck to "enjoy" my vacation, or whatever remained of it...