Showing posts with label voigtlander. Show all posts

Thursday, December 12, 2019

Djinn…

Officially winter! We already got some rains here and I'm trying to enjoy as much as I can out of it because I know in some months from now, it will be so damn dry and "cooking".
Anyway, I didn't post anything here for about 2 weeks (or 3? I didn't count!) for some... legitimate reasons I'd say: A new panorama!

Djinn

Just before I get into the story, I'd like to explain the word Djinn to those who don't know it or never heard of it. Djinn (Arabic: جِن) according to the Islamic literature and belief, are creatures created even before the creation of Adam and Eve and they inhabit and dwell Earth and even space. They are created of fire and unseen by humans (except to few, saying that from experience). So, in some sense they are equivalent to what the Westerners would call Demons. Also, they can be either good or bad, they have different faiths and beliefs, as well as living in tribes and social classes of their own, just like humans.
So, I hope this introduction fascinated you a bit to read on, as I think the technical stuff coming along this post might be a bit boring! Since I didn't touch my panorama gear for quite some time now (mainly because I didn't travel nor I'm part of any group that does activities here and there). Thus, I had to look for alternatives; Ideas, mainly to be done in my periphery: Car, home, work... etc. It took the idea some time to "cook" in my head and I was kind of slow and sluggish in preparing my gear (typical), and the target was one of the rooms in my house where typically guests use, in case we get to have any sleeping over.
Now, the keywords for the work or the general idea revolves around: Magic, black, dark aspect or darkness, and maybe a touch of some horror and fear? Since I don't have models (as usual) I had to think about it thoroughly because the task is not easy here as the idea started to take shape in my head. I will be shooting myself, in various locations within the room, while it is dark and definitely needs a somewhat longer exposure (not good for stable poses!). Anyway, things (unwillingly) went on two trials and for this reason I didn't post last week, because the plan was to have this material ready by then but, unfortunately, the first trial failed drastically and I had to re-do the whole work in a different manner and a different setting.

جِنْ (Djinn)
Click to enlarge


Voigtländer Color Skopar 20mm f/3.5
Lumicon H-Alpha (Night Sky) filter.
Try #1: The first try was done  with my modified Canon EOS 7D and Voigtländer 20mm lens, fitted with the Night Sky filter (i.e. H-alpha filter) which is, partially, an infrared filter actually, allowing a band of Reds. I've tested this filter against my B+W 092 Infrared (threshold: 650nm~690nm) filter and compared the results (in-camera, using Custom WB). Comparing the blue tones specifically, I've decided to go with the Night Sky filter instead, this is beside providing a tiny bit of shorter exposure time. Working with 20mm instead of my usual Canon EF 15mm fisheye lens meant, of course, shooting more slides or angles, and that means forgetting about doing any HDR work here because the load would be simply RIDICULOUS. Now, using 20mm introduced another problem here is the need to change the usual orientation while shooting. So, instead of starting at 0o for the tilt, I've actually used -15o instead. This is just to include the whole stool with my body in the separate shots that I would need to do later to merge with the panorama while stitching (having myself in two shots to be stitched together is next to impossible; It must be one shot including my whole body). Another problem is the misalignment of many slides, and the empty spaces that added to the chaos (the computer was unable to connect these slides nor I was able to do so manually because of the featureless spaces). After 2 weeks, or so, of working on stitching this panorama, I've realized that this thing is beyond repair and I must re-do the whole thing, and probably drop out some of my requirements for this panorama, like using an infrared filter, and just shoot in the usual manner.

Canon EF 15mm f/2.8 fisheye
Try #2: So, after the failed attempt, I've switched back to my 15mm lens and this time I thought of some trick to compensate for these empty spaces; I've simply stuck some electric tape on various sections of the wall just to aid the computer later on to stitch these images - and just to show you my luck, the idea did work really but the tape was some bad quality and almost fell down, so I had to work fast! Anyway, testing the White Balance before the shoot, I've realized that this is almost equivalent to infrared shooting with my modified Canon EOS 7D, because the room is dark and the major light source is to be from the candles (which issue infrared of course). I banged my head at that moment; How come I didn't think of this before instead of all the hassle with my first trial?! Of course there should be remnants of the visible spectrum but that was not a problem specially after calibrating the white balance in-camera. The scene already turned to be an infrared-like. With this, it was like shooting a normal panorama and I had the power to do bracketing for HDR merging and tone-mapping, which I did. *sigh* Just like the old days!

Process: Processing the images was typical: Load the files, run Photomatix to merge the brackets, and then start with the stitch. It was essential here to calibrate the white balace in-camera before the shoot, otherwise the HDR merging and adjusting the colors would have turned to be a "wedding party of wild elephants" - Sorry, the best I could find to express my thoughts here.
However, while merging the bracketed images to create HDR slides as usual, I've made a mistake which I didn't discover until I tried to stitch the panorama for the first time. The mistake was enabling the Remove Ghosting with Detection level set to High. I'm not sure what I was thinking but in a nutshell, the computer created a movement where there were none in fact, and that PRODUCED ghosting! So, the situation was like the old advice of turning off the image stabilization on your lens when your camera is actually stable on a tripod because that would trick the lens and creates a movement. This is exactly what happened, but digitally this time. So, I had to re-merge the bracketed image in Photomatix again and this time putting the detection level on Normal. I've activated this option in the first place just "in case," specially that we have candles here and there might be moving shadows that would make the stitching harder a bit.
That was concerning the merging process but there was still a side work that had to be done and that is preparing those slides of me (specially those involving my reflection in the mirror) but no need to go on with this - it was just a simple masking process. But all had to be done in HDR mode of course with HDR slides.

Effects of using High detection level for ghosting removal on Photomatix.
Click to enlarge


One slide with tape cuts.
Click to enlarge
Stitching: As for the stitching process, it was typical to try to stitch the HDR slides first right away, but as usual, it failed. I remember in old times, this didn't happen much. Anyway, what can I say here; The image was indeed dark and I've intended for it to be so. Thus, I followed the typical procedure of tone-mapping the HDR slides using Photomatix again, and trying to get the best details from each slide. Of course the process is automated; I just pick the darkest slide possible to work with and save the settings then apply that to all. From these tone-mapped images I would create a model, and base the stitching of the HDR slides on this model. Lot of details here, but anyway the thing was not out of troubles, as usual. The tape trick did work to some extent but still needed some help or let's say a "push" from my side so I had to add some manual control points to match between the slides. Actually this problem happens all the time with or without sharp details between the slides for various reasons. All these tapes on the wall would be cloned out of course when the panorama is stitched completely. The final stitched panorama still had some stitching errors which I couldn't fix before stitching so working on that in Photoshop was inevitable. The thing is that I have to do these fixes every single time I create a new projection out of the same panorama; So, it will be such a slow process after all.

Finale

Well, this was the "short" story of this panorama, and I'm still having some more ideas at the back of my head, cooking and waiting to be served when I get the power and time. Beside that though, I'm still working on other projections of this same panorama here. I didn't want to put all the eggs in one basket so I might post about these in 2 weeks time from now; If they are ready though.
Now, it is time to think about some other panorama to do, beside the other ideas at the back of my head of course. The past few weeks were kind of hard, mentally. I was literally waiting for weekends just to sleep as much as I can (and even skipping my socializing with the family around some games like I used to every weekend). I'm trying to re-discover myself here, in some ways, but seems the process is taking longer than I participated. There is a talk about change in the horizon, things going to be better, the hardships years are over... yet I don't really see any of that in the horizon from my side. The travel that I've participated for 4 or 5 years now is still an idea that I could not make a reality. Would it be soon? We'll see. I'm planning for a little vacation by the first week of the new year, but I'm still not sure if I would be able to because I need to make sure that I won't be needed in my workplace. Boy, I'm going to sleep for real, and who knows, I might head out to shoot at night like I used to in the past years…

Thursday, February 8, 2018

Selfies Go Leor…

Well, seems my stalemate is still going on with my Scopa project on hold for the lack of resources (well, models). I'm trying to work on other projects as much as possible, but with the back of rush hours and schools, I'm literally drained out of power every time I'm back home from work and now I need to cope with afternoons naps mechanisms! Yet, this is not the only frustrating thing to deal with, more to come later below.

Schizophrenia

This is one of the ideas I've probably put in a list in my last post. Some idea to reflect the inner struggle, and I was turning around this idea in my head some time before even discovering that I'm an INFP-T type according to some tests. Yet, looking at it at some specific angle, it does look like reflecting on one side of that personality type. Anyway, I preferred to call it Schizophrenia

Schizophrenia

The blending work with this work was not a big deal and somehow done quickly (compared to what I used to do with the peeling effect). However, there are a number of mistakes that I've realized after finishing this work, and even after doing my final touches to this little project. But let's first see some aspects of "behind the scene:"

  • Four speedlites were used here: Two reflecting from a cardboard below and two bounced off the ceiling. This system is often called the Clam shell lighting.
  • To kill the ambient light as much as possible, I needed to use HSS mode to go over the sync speed (shot at 1/400s), at f/8 with ISO 160.
  • Technically, my brother is the photographer but since I'm the one who directed everything and all he has to do is press the button, I think I have to say it's my own work ^_^ - Anyway, he is still having a problem with focusing properly!
  • Shot using Voigtländer 20mm with B+W 092 Infrared filter. I definitely had to work with infrared here since it provides quite and interesting contrast and looks (and not just turning my eyes blue!).
  • I had to satisfy myself in the beginning with the background, which I wished for to be completely black (and black substances are hard to work with in infrared as well).
After finishing with all the work with the camera, it was the time then for processing the images. It was here essentially that I've found out about my mistakes but it would be hard to go back and re-do the whole thing, but let it be a lesson to learn from. 

  • Initially, I wanted to show each face on its own, but then I've found myself attaching the eyes together as it looked more proper and smoother in transition in blend between the different faces. This issued the problem with the expressions: facial expressions are not clear for the lack of the eye compliment.
  • Among the faces, where I tried to mimic fear, anger, sadness, and absence of mind, I've found myself forgetting about one of the basic expressions: Happiness and smiling.
  • Using a wide-angle lens was a grave mistake. I was aiming at cropping the images from the beginning and this is why I used a wide-angle lens (to have more space to cut). However, looking at it now, probably I should have used my 50mm lens for this project. The final finish is actually such a small image that would be barely suitable to be printed on A4 size!
  • Despite using ISO 160 which is proved to be my native ISO, yet the noise frequency was somehow higher than the usual unlike the tests I've done! Could it be because of the sensor being overheating? Not sure.
The background here had to be done in a special process, since I wanted to add a dark atmosphere to the scene. I used Lens Blur for the background and added some vignetting to the whole scene as well. The eyes, specifically, needed some push in exposure as well so I dodged them a little to let them shine. This little work now in fact gives me further ideas to think about doing later on as well. Maybe I could have done something extra to this same project, like taking more images and find a way to merge them, with more mouths and more eyes - but then it wouldn't be much about Schizophrenia probably!

Che

I've been fascinated for some time by the portrait done for Che Guevara (the portrait, not the person). I've been dubbing this type or form of art or effect as a Seal Effect, as it resembles somehow the shape of the wax seal when stamped. However, I'm not aware if there is any good name for this, and probably I should just called it the Che Effect! In my previous post, I've posted a selfie which I've edited in a similar way somehow. I'm aware though that Che's portrait is most probably a work of art, meaning not a manipulation for some photograph of him; I'm not really not sure. Anyway, I tried my best with that selfie of mine to mimic the effect with whatever tools I have available for me in PS. 
Selfie Seal
Generally speaking, I think this effect would do better if the selfie is shot with one flash or speedlite; In other words, one-directional light. Techniques like the Low-Key would do better here. It's all about the play of light and shadows, and the dramatic look. However, this is just my own notes about it, and in fact I've tried to work with another selfie (part of the Schizophrenia project above) which was lit on two sides instead of one, and I still did get some reasonable final result as will be shown in few.

Original selfie, which was in fact a
screen capture rather than a saved
file from the original shot!
The Ghost
 I've taken this selfie and with some clicks and effects I've ended up with the desired result. I've found myself forced to use excessive sharpening as well before doing the whole work to provide some enough grains to be merged later as black areas of some sort. Anyway, after finishing the image, I felt there was something missing. Without much feeling about it, I've got into the Liquify command in Photoshop and just started splashing things randomly and the result was something more of... a Ghost peeking at me. Doing such work with my selfies does in fact inspire me to do more ideas with myself, since it's hard to find anyone willing to work with me, even for few minutes. Some suggested to hire a model, which it possible of course. However, under the current circumstances and finances, it is better to be off away from this option for the time being, and needless to say, I do not consider myself a professional portrait photographer and not even someone who has a keen interest in this subject. It is just random ideas kicking in and out of my head and I feel myself compelled to do them. What is amazing about this last work, The Ghost, it did in fact kick in some desire for poetry back and without knowing it I was there typing a poem. Though random probably with scattered feelings, but it was something to be done.

The Ghost.
-
There he was,
and there he is.
A gazing figure,
an apprentice.
-
Pale in horror,
a figure of shame.
Terror, he served me,
by terror, him I tame.
-
Friendly Ghost,
and black is the color.
Timidly a Ghost,
fierce in angst and valor.
-
Opposites rhyme,
only in his caress.
Touching my heart,
set me in abyss.
-
Awful, how he looks,
such a beauty in misery.
Gazer I was upon that,
Alas, in that mirror,
That Ghost was just me.

The poem was also posted on Writing.com, which I didn't use in a long time now. There is a great urge to go back to writing, specially after reading how my typical INFP-T personality would act and react, which I find 95% of it is correct indeed. That personality report did give me some confidence which I was lacking, and restored my image of myself to myself, after believing that I was abnormal in some aspects. But this is who I am indeed...

Finale

There is an increasing feeling of leaving everything and just isolate myself, there in my room, and preferably doing nothing. I'm literally getting tired of everything. As for my Scopa project which I need to finish, and it should be finished with because some people are waiting for the results, I'm so tired for chasing after some people to shoot for this project. Re-doing any shot is a catastrophic aftermath as well, if there is any need be. This rest might include blogging as well; I have to admit that blogging does indeed put some stress on me to finish it in time. Probably I would invest all that time in shooting photos and sleeping! If only I don't have to go to work anyway...
One of the disasters that I've found out lately, as I'm planning to do my Retinitis Pigmentosa Month project, is the fact that in this country NO blind stick or cane is to be found any where by any vendor!!! I was advised to call major pharmacies for some private hospitals and clinics to check with them, but seeing how things did go with some major companies of medical supplies here, I'm not optimistic that I would be able to find any. I have now 2 options, and as we say in Arabic: "The sweetest of them is bitter." Option one, is to mimic the looks of the cane or maybe use a regular cane instead. Second option, is to change my whole idea for this project and try to find some other idea to implement which requires no cane. I'm inclined to pick the second option but I have to think quick. Not sure if brainstorming would do here either. Can you imagine a country with no blind-canes around?! I can, of course, order these, but I really have no time to waste waiting for such a shipment, so I've neglected this idea. However, I might indeed order such a cane in some other time as I find it interesting to train myself using it. After all, I'm a person with some eye disease, and not sure when all that is visual simply stops working for me…


Stock photography by Taher AlShemaly at Alamy

Thursday, August 24, 2017

Post-Morten…

Well, I barely have any time to type this blog post, but after stopping for a week for mourning I think it is due right now even though I don't have much material to be posted here. The mourning is still going on though and many hearts have it as a heavy burden to see such a great man who created a big portion of Kuwait's history to pass away in a quick whim of destiny. May he rest in peace.
Not much have been going on in fact, except some trials now with my August project about books so I'm going to talk a bit about it here, and a little bit about some idea that I'm still working on.

Leabhair

As the month is going on, I'm still working with ideas for this project, and frankly, I'm not satisfied yet about any of these ideas, but I'm trying.

"Creativity"
Voigtländer 20mm (R), f/11, 30s, ISO200.

My first trial was, typically, with a macro approach as can be seen in "Creativity" where I used Bruce Barnbaum's book, The Art of Photography, p.301, as my subject where this word exists in a paragraph. I was not sure what I was thinking, but my mind called me for an extreme macro just like the days when I used to shoot into my microscope some weeks ago. Here, with the camera dangling vertically over the book, I shot various segments of the word (which was extremely magnified at about 3.17X by using Voigtländer 20mm on reverse). My aim here was to create a collage like I did before with Killing Evil, but the circumstances and the fact that I'm zooming to 3X+ and the camera is stable on a lateral arm (while the book is hard to be moved around with ease), all that made it difficult to take various segments easily and randomly, and forced me to take the shots in a sequence and finally overlapping them to make one whole word. The only clue which I've added later to note various segments is the difference in gamma level, while the skew at the end of the word might be a clue as well. I couldn't use speedlites here so I raised the ISO and had to bear with the long exposure for 30 seconds!

Killing Evil
All in all, the idea of shooting a word in a book, as I think, do not resemble the real idea of the project about the importance books. It is merely a word, an element, inside a book - but not a book. Thus, the search did not end yet about something to shoot for this project. In fact, concerning this same word and this same book, I do have another idea to apply just yet, but without magnification up to that level. But I kept myself busy with other things lately that I didn't get the chance to shoot this.
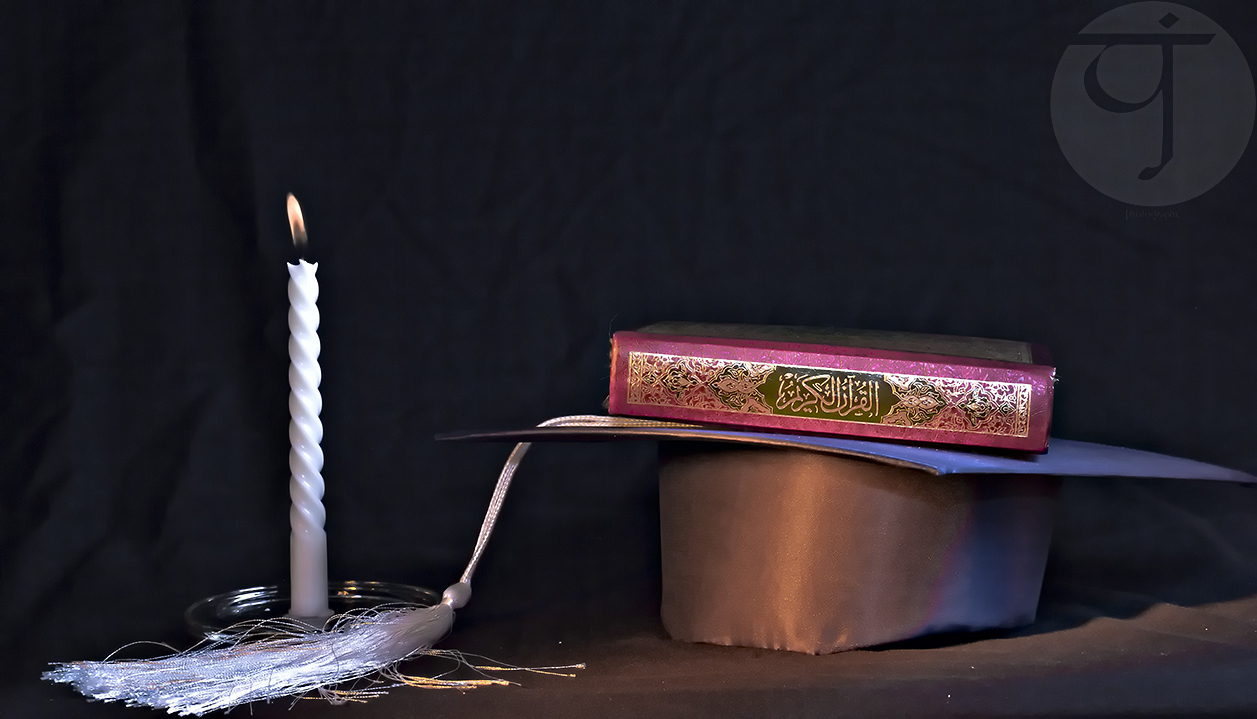
Meanwhile, with the help of my brother, I got to shape a new idea out of scratch fed with some background "legend." And I say legend as I don't really know how accurate such news are (specially in this part of the world), but before explaining this "legend" let me first introduce the image.

وفوق كل ذي علم عليم
{and over every lord of knowledge He is more knowing.} (Quran: 12/76).
Canon EF 50mm, f/11, 1000-1, ISO250.

The legend says: At the time when Muslims ruled Andalusia, pupils who studied various arts and crafts come to the end of their studies with some ceremony or oath-taking, for which they invented the graduation cap as we know it today with a flat top, to place the holy book (Quran) on top while taking the oath and to apply the verse (and over every lord of knowledge He is more knowing: 12/76) from Quran. Anyway, I'm not sure about this story, but it was a spark in my mind to do this image.
Since I needed to kill the ambient light, as well as for the candle's light, I had to go on with the HSS mode (High-speed) to do this shot and compromise with the aperture a bit. Even though f/11 has a good depth of field for such small scene, but I like to always keep it on the safe side and push the f-number a bit further. However, I had to step back here and stop at f/11. One more reason to increase the f-number here is the desire to create a spark or a burst around the candle's flame, but that didn't happen! The real setback though was the need to place a dark yellow gel on the speedlite, and that alone takes 2.5 stops away from the power (as noted on the gel itself). Thus, even with full power, there was a need for some extra light, and at that point I've decided to use two other speedlites with no gels; that explains that mix in colors in the image above. Moreover, I've resorted to use the flash extender which I didn't put to practical use before this time in hope that I would give some strength to the pulse; which it did but slightly. I had to get my speedlite as close as possible to the set. It is evident from all these setbacks and problems that there is no escape but to raise the ISO as minimum as it could be (and I did have my struggle with the noise when processing the image above).
On the other hand, my brother had some remarks about the image and suggested some changes which I'm willing to try out as soon as possible (already did before typing this but the results weren't good). Here are some of his suggestions:
  1. Wait for the candle to melt down further, which is something I've done already.
  2. Shoot the set with the light from the candle alone. Tried that, but didn't really work, and the candle itself has a weak flame. 
  3. Get things closer together.
  4. Change perspective and move up further (i.e. shooting looking down to the set).
These are the major notes he made and I'm still trying to apply them (using Voigtländer 20mm lens instead of Canon EF 50mm) but still it didn't work out in a good way. Probably changing the lens was not a good idea after all and I would have to get back to 50mm. I'm envisioning the usage of my pinhole cover to shoot this set as well but I'll keep that for later.

Finale

As these words are going on, I'm pushing my way alone this time trying to get or grant a permission to shoot at a special place: A theater where a mural for the deceased artist was painted there with the opening of this theater after renovation (which now bears his name in gratitude to his services to the comedy and arts in general in this country). So far, official channels seem blocked and no one is giving a listening ear, so I'm resorting to some connections in hope that I will get this grant to shoot some ideas there. I'm doing this work solely alone without any help from anyone, as I'm trying to find a name for me somewhere out there rather than being dependent on my group.
Meanwhile, it seems that I'm giving myself a break from the group again and this time it might be for good indeed. I'll try to keep my activities minimum. There are more important things that still bug my mind, e.g. travel and creating ideas. I'm working on the latter, but not sure about the former. I'm getting nervous here... panic attacks had been frequent lately with insomnia. I need some good relaxation time before I lose my mind, and myself as well.


Stock photography by Taher AlShemaly at Alamy

Thursday, April 20, 2017

InfraVideo…

After having a vacation from almost everything for one week, I think it is time to pin down this blog, even though it is hard for me because things had been drastic a bit lately and my mood is in great swing lately. However, I'm trying to work on some stuff and I will try to post about some of my thoughts here. I wasn't going to type it but it is due after leaving it for a week!

Meanwhile I'm working on various things, mainly videos. It's just getting interesting with me exploring various filters and recording videos from my car as I used to do in the old days (with my small car back then). I'm working on that slowly and I've learned bits of videography already, but sure not like a professional anyway; I still don't have a shotgun mic even! But before delving into these videos, I've prepared a video some time ago for a hypercube (a.k.a. tesseract, 4D Cube) toy which I've created using playing straws.


The object is made by interlacing 2 cubes of straws and then connecting the corners, which was not to be done without bending the straws making what it looked like circles when viewed from the sides. I've created another model but it was not successful like this unfortunately, where 2 cubes are fit one inside the other, but again because of the bending in connectors between corners, the view was not "organized" so to say. Meanwhile, I'm trying to build a model of a hypercube using wooden pieces and some kind of glue (tried Tack-It already but didn't work properly). I'm planning to use such models for future photographic missions if possible. I might find inspiration there.

On the other hand, I got back to my habit of doing videos while driving but this time using filters to see the general look. surprisingly, fitting the tripod inside my Pajero is harder than fitting it into my small Seat before, probably because of the differences in design. My first trial was with B+W 092 infrared filter which has a threshold of about 650nm (or it might be 700nm). Such filter is supposed to let some color in when processing the images.


I'm showing here the video without audio track (meh, useless!). Luckily, the camera didn't flip with the tripod inside the car as I was roaming around. Hope you enjoy the marvelous views of how cars and trucks act like marbles thrown randomly on the floor! One of the concepts I've learned online about videography is that you must keep things in manual (to be more professional). However, in this video above, I've let things be automatic. I've used Voigtländer 20mm lens here which is semi-manual, thus I'm not sure if the aperture did change during the recording. Anyway, shutter speed and ISO are surely to be changing depending on the lighting conditions in front of the lens. I've increased the EV to +1 to be on the safe side while recording but I ended up reducing the brightness and adjusting the contrast because of that when editing the video in Photoshop (yes, Photoshop). I was dedicated though to record a video without any automated process, and I'm not sure if this rule would really be applied or could be applied to special video recording like this one under infrared filter (or UV). Anyway, I did it!


To shoot this video though, I had to change the settings for the tripod as well just because I changed the filter, since the filter is a gel filter which is placed at the back of my Canon EF 15mm fisheye lens, and thus I had to re-fold the tripod in such a way to get the camera to the front more to concentrate the view on the windshield as much as possible.
The filter in the second video is Kodak's infrared gel filter with threshold of 1000nm. You might notice how it looks more like a night vision video clip, but it was really shot in morning time. In this video, I've used complete manual settings and I had to make a compromise. The smaller version of the video here might look "clear" somehow and smooth, but the original had a significant noise level apparent while watching, since I was using ISO 4000. I had to reduce the f-number down to f/5.6 or less while fixing the shutter speed to 1/50s. I wanted to shoot at f/8 or f/11 to ensure the depth of field but that was out of question. The shutter speed here is related to the FPS rate which I've picked at 24fps, and according to some rules of thumb from the literature around the internet, the shutter speed should be equal to: 1/(2 x fps). But this point is actually sparking my interest and I want to try slower shutter speeds if possible to see how the video would look! However, probably these rules of thumb in the literature are more confined to normal video shooting and not for such conditions with special filters applied! There are a number of points I've noticed in this video though which I didn't really see in the previous video shot with B+W 092 infrared filter of 650nm threshold:
  • Some trees are bright and some are dark, so I think some plants were reflecting IR indeed and some were absorbing IR, the despite the general lack of sunshine!
  • Some car lights (brakes or signaling) were brighter than they are in reality! While some signaling from some cars didn't show up in the recording at all! I think this is related to the IR issued in each bulb type, maybe?
Away from the noise level which is somewhat annoying for me, I think the results were fascinating actually; to see a real difference in the light levels and light receptions between a video in IR and reality!
In the process, I've realized that whatever color space the camera is set to, the video is in fact recorded in sRGB. When loaded into Photoshop, it will adapt to the default working color space of Photoshop (which I set to ProPhoto) but the rendering of the video would not be "fit" if I can call it so. The colors would be so saturated and working around that is a tedious task (if it can be fixed anyway), and thus working with infrared videos I have the habit now to convert everything to sRGB first. The vivacity of the colors are not pretty much required anyway as much as it is so when working with HDR slides and tone-mapping in regular images, as I usually do!

Finale

I'm passing through some weird timing here as I'm slowing down the pace of my work with the camera (excluding the videos). I had to withdraw from the project of April within the group. After getting sick and getting slow recovery (some coughing remain though) my body and mind are not functioning well together. Despite the relative easiness or commonality of the topic for April's project (shadows and reflections), yet my mind could not come up with a good idea to perform or try.
with Ramadhan getting closer, it seems more likely I'm going to sacrifice some days from my leaves balance, and take a leave during the month or most of it after experiencing it last year with summer semester rolling in and record heat struck back then. I'm not ready to experience this at all. I'm not sure that I will be able to travel anyway but I was hoping for to more days in my balance instead of spending some right now. I have to pick the starting and ending dates still which I cannot decide and settle with yet.
I'm feeling detached, and working on detaching myself further in fact. I need to get back to my activity before. I think being a member in a group is slowing me down for the time being. When I see the number of experiments with my camera in the years before and after joining the group, I clearly see that I had more experimental work done before. Not to say they are good pictures, but I used to work, and work... I was in mood to work with my camera, as well as other projects, like my Ayvarith and other conlangs. As I'm reading more books about Arabic phonology and language to get more educated about my own native tongue, I get even more eager to work with conlangs, but yet I have to find the time for them…


Stock photography by Taher AlShemaly at Alamy

Thursday, April 21, 2016

Ultra-Success…

Some good news for this week though short, as I was coping with sleeplessness and the wrecking sleeping pattern. I've been trying my best to do some chores that I've planned for myself, though I had to skip shooting the Monodrama event this year (and other members in the group had to cancel as well later on). Summer is coming, so I better plan some indoors activity for the time being.

Childhood Memories

Last week, on Tuesday specifically, a new exhibition was inaugurated for the work of Mohammed Sheikh Al-Faresi; An artist who used to present a TV show in 1980s about arts, and which I was quite fond of. Visiting this exhibition was important for me, even though I didn't pay much attention to artwork in other fields other than photography, as it was part of my childhood memories.
My favorite artwork in the exhibiition
His artwork is essentially based on Arabic calligraphy, entwined with other elements, majorly geometrical shapes. Some of these paintings did have 3D feel to it. I've found myself attracted to the black theme in general, and red comes next. Probably, typically, Arabic calligraphy is done with these 2 colors mostly.  However, in his artwork here, the calligraphy is a merge of random letters with no concrete words or sentence.
In my journey here, and allow me to call it a Journey Into My Childhood Memories,  I tried to document paintings that captured my attention the most, and in fact all the artwork here was appealing, but I was looking for something that was special to me. I also tried to capture some paintings from different angles in hope that I would combine them to make 3D images later on. I did also take a general video clip from the whole set of paintings in the exhibition.
My companion in this journey was the relatively-new Voigtländer 20mm lens, which has no auto-focus function. That was problematic a bit for my work specially when shooting video with my Canon EOS 7D. Never shot a video with a manual lens before, well not that long that is. However, the quality might be off a bit because of a slight out-of-focus render; I tried my best to focus on a single point manually and then walk as I take a video and keep my distance almost constant. Up till the moment of writing this passage, I'm still not finished with processing these shots, for reasons that I will explain below. My schedule was fully booked with tasks, meetings, naps, and testing.

A journey through the exhibition.


Ultra

After testing my Voigtländer 20mm f/3.5 lens for doing a simple panorama last week, it was time to do a "real" panorama processing. Even though I was deprived of sleep that day, but I decided to head out after work while the sun was still high up and planned in a haste to do a panorama using this lens, my converted camera, and my UV-pass filter. The first location that occurred to me was the coast line; a spot which I've done a nocturnal panorama before (and eventually later on, got published in a luxurious coffee table book).

UV Columnae

Namely, this would be my first ultraviolet panorama ever! Despite some problems, things went smoothly, but it gave me some idea about what to expect and what to watch for next time I work with ultraviolet filter. Being in a haste, you can see that the panorama was not perfectly centered. Yet, I'm still trying out some other projections and style; just trying to digging for time. Anyway, some notes about this process are:

  1. The stitch was fair, despite the broken lines. Those broken lines or stitching errors, however, were not related to parallax-error, but rather to the fact that shadows were moving at that time of the day (the shooting process took some time), and some control points were not possible to generate between some slides. That caused broken and bent lines which were hard to adjust and would require more working time to fix properly.
  2. Focusing: Voigtländer lens has no marker for infrared focusing, there typically no lens (as far as I know) has a marker for UV focusing. This is important since we are shooting at beams out of the visible range of the spectrum, in which lenses are usually made and calibrated. I used here the hyperfocus principle as if I was shooting regular light (at f/11) and the sharpness seems fair. However, I have to read more about focusing in UV photography.
  3. As it was a test, I used Av mode to set the exposure automatically (while I fix the aperture). I worked without LiveView (because it would stop the metering mechanism), while setting my metering to Evaluative; I thought this would be the most proper for the situation we have here where light and shade are intermixed. However, that imposed great discrepancies in the exposure value between slides (and HDR technique is out of question). This suggests that next time a deliberate in-camera metering for various areas and averaging the exposure manually while using the manual mode is more like it, to avoid these averaging problems. 
  4. In digital processing the RAW files before stitching, I've used the Infrared profile already installed in my ACR to adjust the white balance for these Ultraviolet shots (pointing to green foliage and copying the change to all slides). However, I'm not sure if this is the right way to do it or there is some concrete and systematic way to set the white balance. Again, have to read further!
  5. This said, Voigtländer's usage for panorama making will be limited to this case; using UV filter. Yet, I need to test my Kodak gel filter with the converted camera to get a feel of how things would look like.

This said, I still need to test my converted camera in panoramas without even using any filter. Images taken that way would also cast some unexpected tints to the scene. Dropping HDR into the formula, and everything will be complicated. Yet, for the time being, I do not think of using HDR techniques when using filters on lenses. It's a dream to be delayed until time permits for slow motion again!

Finale

These were the two major event this week, and the rest was spent processing and trying to find time to sleep. There is a plan to go to Dubai by May with the group to attend a specific exhibition. Thus, I might not post much here until I get back home. Meanwhile, I'm busy organizing whatever I can with the group, and I'm thinking of doing some documentation to the situation there. I have to say that I'm pushing myself to do this, as my budget is under pressure in the current time.
I'm trying hard here to invest my weekend in working with my camera but seems I can't do this anymore. I have a strong urge to leave this house, but still unable to do so without proper means, and capabilities. The only thing that makes me calm down is playing games and playing music as loud as possible. Hard times are passing, and my self identity is at stake. Not sure how I'm going to snooze my worries or panic attacks, but it is apparent that I need some long rest. Yet, no vision for a possible vacation in the air this year…

Thursday, April 14, 2016

Quickie Testing…

This is a quick wrap as I couldn't do much with my camera or anything else, for many reasons. Anyway, I was capable to do one or two tests with my gear, so I decided to put them up here for this week.
I was waiting for a good opportunity to test Voigtländer 20mm lens for panoramas, but time didn't help me out and couldn't really search for a good location to work in. Thus, I've decided to test the panorama in a simple procedure in the guest room at home (which has been recently my operation room!).

Screen capture for the stitched panorama

I have made specific points here, and there are some advantages and disadvantages as it seems. I'll try to list them here in points:
  1. The panorama is a simple 360o, thus it might not be quite accurate for judgement but it gave good indicator I believe.
  2. There was no need to adjust or re-calibrate the VR-head to do this panorama, which is a good point!
  3. However, there was a need to adjust the rotation amount, to 24o instead of 30o. That means a single full rotation will take 15 shots instead of 12 as I used to have it. 
  4. Consequently, for the change of the field of view and the change in the angle of rotation per one shot, the total amount of shots to complete one spherical panorama will be: 15x5 (excluding zenith and nadir points) = 75 shots, compared to 36 shots with Canon EF 15mm fisheye lens. Needless to say, these numbers are multiplied by 3 in case of HDR.

For these points, the procedure includes good and bad points. It is good that I don't have to re-calibrate, but it is bad that I need to change the angles of rotation which will increase the number of shots (and working time) significantly. Thinking about it now, it seems that using the Voigtländer 20mm lens would be significant for panoramas only when the matter comes to using UV-pass filter; simply because I have no UV-pass gel filter to fit my Canon 15mm fisheye lens. The matter of infrared is also a fluctuating one, since I do have 2 infrared filters: one fits Canon 15mm fisheye (gel), and one to fit Voigtländer 20mm (circular), and each one has a specific threshold.
Coming to mention IR filters, I was yet to do another check with my converted camera. I had the chance to pick my gear to work, and voila, when I decided to do that, the sun got blocked out with some clouds. However, it wasn't a big problem, except for the UV photography; just a bit.

UV-Star
Canon EF 100mm macro, f/10, ¼ sec, ISO200.

Ultraviolet photography proved more problematic than I thought, unlike IR photography. However, shooting with a converted camera make it a lot easier. As it can be seen above in UV-Star, the exposure is merely 1/4 of a second, which is quite "long" in terms of handheld shots (I was using a tripod here). That is with rising ISO to 200. On a regular camera, the exposure time could easily be 5 minutes with ISO as high as 800. Anyway, other shots taken that day with UV-pass filter were shaky because of the breeze shaking the stems. One of the problems that one might face when doing UV photography is the fact that some lenses (if not most) are sprayed with a specific coating to reduce UV in order to enhance the image quality; a good feature gone bad! Anyway, I believe with a good sun, the exposure could easily be faster than just 1/4 second at the same ISO. The matter of UV photography is expandable further if we were to discuss artificial lighting and strobes, but let's not come to that right now!

InfraBlossom
Canon EF 100mm macro, f/9, 30-1sec, ISO100.

Later, I decided to try my B+W IR filter, which has a threshold of 650nm. This threshold means it is considerably a weak filter in terms of IR range, since it allowed some Red spectrum to pass as well. However, on a regular camera with the settings mentioned for InfraBlossom, the exposure time could easily be up to 1 minute if not more. Checking how InfraBlossom processing turned, it seems that such filter is exactly what one would need to do portraiture in infrared photography in general. Anyway, I can't have a final say until I get to test my other infrared filter; a gel filter from Kodak with threshold of 1000nm. This filter is so opaque and on a regular camera and a sunny day, a single exposure under ISO100 can easily reach 10 minutes in time.

InfraMore
Almost under the same conditions as InfraBlossom, but with f/8, the exposure for this shot was 9 minutes, on a regular camera and a sunny day. In comparison, InfraBlossom, would have been taken in 10 minutes at f/9 and a sunny day on a regular camera, when using the same gel infrared filter.

Anyway, I still need to test the gel filter (of 1000nm threshold) on my converted camera. Unfortunately, the only way to do this is with my Canon 15mm fisheye (or Rokinon 8mm fisheye with some improvising). The test is required for my eyes to see for myself the difference in color rendering and processing between 650nm and 1000nm thresholds. On regular cameras, the comparison is already made: with 650nm filter, the image after processing can regain close colors to reality, while with 1000nm filter, the image after processing can be quite bluish after processing.

Finale

This is it for now, and I still have some more going on in the current time. Preparations and events that I'm planning to role in, despite my decision previously of being dormant and have some breath. Yet, the group's activity can be quite pressing. 
On the list is testing a real full panorama using UV filter on Voigtländer 20mm, and in a sunny day. Not sure where the location should be, but most probably it would be at work if I can spare some time.
My schedules and sleeping patters are on shift now that I'm starting to fast, and probably it won't be long till I have to stop the fast for the month of Rajab. But it is a good try, and a money savior! However, my tiresome body wouldn't allow me to do much during the day and it would be late at night (after the nap) to work with such projects. Anyway, I'm going to try further, as much as I can.

Thursday, March 31, 2016

Staidéar…

Two weeks with barely anything to write about. I was busy with many things, starting from games that I MUST play to lens testing that I MUST work on. I tried to prepare also for writing an Arabic article about lens testing for my other blog, but unfortunately things were not done in time. Thus, all is delayed.
They were stressful 2 weeks in fact, with contests and photos and home issues. I feel drained already and not sure how I'm going on with my everyday life. Anyway, I've finally made a lens test, which I cannot say it is a perfect one but I tried hard at least. My main aim was to test and compare between 2 lenses, the almost-new to my collection, Voigtländer 20mm f/3.5 lens, and my old (trusted for panoramas) Canon EF 15mm f/2.8 fisheye lens. However, I've completed my tests as much as possible with most of the prime lenses I have: 8mm, 50mm, and 100mm. These tests are not the end of the story as I have to do more with the former two to check out further, mainly, the possibility of doing a panorama without doing further calibration for the VR-head (which is calibrated specifically for Canon EOS 7D + Canon EF 15mm f/2.8 fisheye lens).

For the following tests, I've used a simple chart provided in B&H website. However, I'm not sure how to extract more information from these charts but they were enough for my uses right now, like checking for chromatic aberrations and for the "sweet spot" in apertures range, and probably I would check out for any possibilities to measure the amount of distortion and correction needed (using DxO; but I doubt it's possible). Checking for vignetting is also possible as explained in the main text, but seems all my tests were prone to some error of some kind, and hence testing for vignetting is not assured. Mainly, it was lit from one side (and I preferred working in daytime since the sun beams seep through the door at this time and the exposure times are shortened significantly). According to the text, the chart must be printed on glossy paper (probably for increasing contrast), and that proved problematic with my lighting conditions as there were several harsh reflections off the chart and using speedlites was out of question (would complicate things further). However, the majority of the images taken seem to have proper balanced lighting anyway (with exception to the Rokinon 8mm fisheye lens).

The chart in use. I've printed it on A0 size, even though according to the text it is printed on a smaller size. Both sizes, however, are smaller than the real image size (when printed as it is that is).


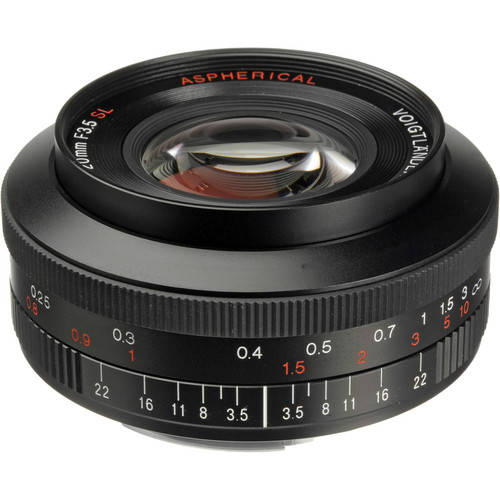
Voigtländer 20mm f/3.5


Source: B&H
 The lens is not a fisheye lens, thus it has a rectified perspective (though not absolutely flat). The only wide angle lens I have which gives such a perspective is the very old and out-of-date kit lens, Canon EF-S 18-55mm. The lens is semi-manual, if I can call it so; meaning it is generally manual with no Auto-focus function, but it does apply some communication with the camera. One can simply turn the focusing ring slowly while pressing the shutter button half way and wait for the beep to confirm the focus. However, I've realized that it is a good practice to re-check the LiveView for the sharpness of the lines and fine-tune the focus.
To make things systematic a bit, I've divided my work to two parts: inspecting the center circle for maximum sharpness and best setting chromatic aberrations (mostly it is the same as the aperture of the sharpest image), and the second part is to do the same with the corners. Most of the time, the aperture that provides the sharpest image at the center does so as well to the corners; at least in my case here, but I don't think this is a general rule. More complicated charts (look for ISO 12233) would provide more information, specifically on the resolution power of the lens. Not sure this is possible in the chart above. In the following strip, the change in sharpness of the center circle is shown with varying the aperture. The view is supposed to be an original 100% crop, so please allow some time to load. I was mainly interested in the very central point of the circle where all these triangles meet:

Click the image for a high resolution version


Well, now to results! Upon inspecting the center of the chart, it looks that the range between f/7.1 and f/10 got the sharpest lines (that is, it is the "sweet spot"). Most probably f/8 would be the best, but since the lowest f-number here is f/3.5, I was going in full stops from that point up to f/22, and thus shots were made at f/7.1 and f/10 (instead of the more typical stops of f/8 and f/11). The amount of chromatic aberrations at the center are more or less linked to the same range of apertures. The chromatic aberrations are there at all apertures, but they "look" lesser at this range of apertures.

As for the corners, the results are around the same in fact. Checking the corners is essential since in optical design, the majority of calculations and considerations are done about the center region of the lens mostly, and hence checking the center of the chart and the corners for comparison is a must. However, with this lens I didn't find much difference in the values of sharpness.

Canon EF 15mm f/2.8 Fisheye

Source: The Digital Picture
This is my usual and typical lens for panoramas and I rarely do use it in any other situations, for when I need a really wide angle, I would then switch to my humble Rokinon. This said, it doesn't mean I wouldn't pick it for specific situations anyway. This lens is stopped and not issued anymore from Canon which somehow put me in some troubles now and then when I try to find some specific information about it. Anyway it is still the darling which I prefer for panoramas (and the VR-head is calibrated according to its combination with Canon EOS 7D). The lens has a slot at the back for gel filters. Unlike the Voigtländer lens, it does support AF function, even though it has a slow mechanism. Anyway, with a wide angle, why the hurry! Of course as a fisheye lens, the distortion is, normally, not rectified. This of course makes it a challenge to fit the chart into the view, thus portions of the wall were included in the shots. In the same manner like the previous lens, I've focused automatically, then manually to check the sharpness, and then took shots at full stops of aperture (starting from f/2.8 and ending with f/22).

Click the image for a high resolution version

As for this center, I was fluctuating between f/8 and f/11 as the sharpest, but looking further to the center, I see that the center is less condensed with f/8, which I think it signifies that f/8 is the sweet spot for this lens. However, upon inspecting the corners, the story was a bit different, and I'm hoping that this difference is significant and not caused by a human error from my side.

Click the image for a high resolution version

Inspecting one of the corners here, I've realized that f/8 was not the sharpest but it was f/11. This means we have a difference in terms of sharpness in the various parts of the image. I think this might be considered normal since we are speaking of a fisheye lens which exhibits some distortion. But this observation is really significant when I bear in mind that I used to do panoramas all that time without realizing this fact. Could it be that such fact is the reason behind many failures of stitching in the past? Not sure…
In terms of the chromatic aberrations, it is the same all over and specially at the corners and edges, where it doesn't seem to change at all with the change in aperture; the red and cyan bands around the edges of lines are the same. The image can be sharp (visually), yet it does show aberrations.

Conclusions

From my humble observation, and I know I did make some mistakes in shooting the chart, but it seems that each lens has its advantage and disadvantage, specifically when compared having panorama-making in mind. For example, we can see that the Voigtländer 20mm f/3.5 lens has an almost unified focus from center to the corners when it comes to the sweet spot. On the other hand, the Canon EF 15mm f/2.8 fisheye lens does change in sharpness from center to corner; Where the center is sharpest at f/8 and the corners are sharpest at f/11. Probably we are talking here about the focus shift phenomenon, in which the focusing plane is shifted as the aperture changes and that would require a slight change in the focusing distance.
Chromatic aberrations are apparent in both lenses. However, they are typically more at the edges rather than the center. In my observations, I've noticed that despite displaying chromatic aberrations at most apertures, the distance or the width of the aberrational bands are quite thicker in Canon's lens while being thinner in Voigtländer's lens. This would supposedly mean and easy treatment (digitally) for such a problem in the future for the Voigtländer's lens more than it is for the Canon's. For a fisheye lens, though, this is quite normal I believe, as the distortion at the edges of the frame would naturally be accompanied by such aberrations in high contrast situations.
As for vignetting, my test was quite simple: increasing the contrast for the image. However, no significant vignetting occurred in any lens, at any aperture value. This is probably quite normal since my camera (Canon EOS 7D) has a cropped frame. I think vignetting would be more apparent with full-frame cameras.
One main factor (divided into small factors) which I didn't get the chance to study yet at this point, is the capability of Voigtländer's lens to be adapted for panorama work without the need for re-calibration for the VR-head. Meanwhile, the Canon EF 15 fisheye lens, with its slot at the back for gel filters, is capable of carrying my Kodak gel filter of 1000nm threshold. I can fit my other circular IR filter on the Voigtländer's lens (with some step-up ring), but the threshold is only 650nm; meaning some Red spectrum would seep through still. In both cases the art is possible. An extra point for Voigtländer's lens is the fact that I do own also a UV-pass filter which I can fit it to this lens and do panoramas in UV for the first time (and yet I don't have a UV gel filter). All that work with filters is planned to be with my new converted camera of course (also Canon EOS 7D) and not the regular camera anymore. Another advantage for Canon's which must be pinned out, is the fact that it has a "red dot" to define the focus under infrared influence; Something that Voigtländer's lacks. The critical factor here is finding the no-parallax point for the Voigtländer's lens and see if re-calibration is needed or not. If a re-calibration is due, probably it won't be worth it, but I'll try.
Doing this does encourage me somehow to print the more elaborate and complicated ISO 12233 chart, with which I can do measurement for the resolution power of the lens (in simple terms, it is the power of the lens to differentiate between two closely-spaced lines).  But I don't think this idea will be applicable in the near future.

Finale

Even though I'm having my break from the camera yet I'm working still with the camera(s). Ironic, isn't it? I wish if I can even work further with other projects floating around like the the Geltani, but I'm trying hard to concentrate on one thing at a time. Though I was planning for a long break somewhat, yet it seems I'm much obliged to join the group in another "adventure" for shooting theater performances. This made me think as it would be a good chance to put my converted camera into practice and see how it would act in a dark atmosphere like the one usually offered by theater performances.
This busy schedule after all does not provide a protection from harsh mood swings now and then or simply rolling back with flashes of memories with a simple trigger; could be as silly as a sign on the road. Anyway, now I will be busy writing some articles for the group, and also writing an Arabic illustration for how to test lenses for my other blog, and till then, I'm not sure I would be able to post here soon…