Showing posts with label beach. Show all posts

Thursday, June 12, 2014

Zu Teilen...

A week marked with laziness and blown mind because of the heat. I'm seriously having issues regarding my workplace; I started to reduce my "respect" to it, as if there is any already anyway. I'm skipping some days to do what I consider a more important job for me, regarding this blog, photography, and do some studies regarding my conlangs and phonology. Not sure how long this status would last, but in such summer and heat, and such disrespect for the admins who barely know what is science, which for, I spent 6 years of my life in this college - it is hard to tell if I can regain any respect back.
In the meantime, I'm on the path of doing some new set of experiments with my camera but yet I'm not ready to put on the pictures here; till the moment of typing this there are no shots yet! But hopefully something would be ready for the next week. However, I did a little tutorial for tone splitting which you can read below under Split It!, if you like this technique!

Crescent Beach

It was back in April when I worked with this panorama on the beach at night, in a place that I commonly call The Secret Spot. This panorama, which was majorly done by continuous long exposures ranging from 2 to 4 minutes, and took around 2 hours to be done - it was done in several formats and projections. Except of one which I suddenly remembered!

Mare Lunare

The forgotten projection was the Globe or Circular projection of the same panorama. I seldom use this projection to show panoramas because of the limited view, and hence, the limited creativity aspect that can be controlled with such projection. The projection is circular mainly and the background is transparent (if saved in a file format that supports it). Because of this circular shape, some features might look cut instead of being highly distorted. However, I decided to take a chance at it, specially that this is one of the last panoramas done before the advent of summer. Sorry, I mean hell.

Crescent Beach

Once achieved, it was really hard to pick up a suitable angle. Moreover, it was apparent that a crescent shape would form but there was a dilemma should it be made out by the sand or the sky. After changing the aspect (in terms of rotations) I've finally decided that I should make it with the sand portion of the panorama. In editing the panorama later, I've worked with many layers to remove color casts, increase contrast, and most importantly, brighten the sand portion of the image and suppress the luster of the sky just a bit to pronounce the crescent more. The formation of the crescent though wasn't quite good enough because of the connection between its ends on the far right. I think I've made a mistake in making the sand crescent here look directly to the right (i.e. in a right angle). Probably something twisted and tilted a bit would give more dynamic view and interaction with the eyes. Anyway, it is an experience, and hopefully the impression and knowledge shall be memorized for future work!

Split It!

As you may now know (if you are a follower), I've been working on converting some images to B&W and also using Tone Splitting specifically. Tone splitting provides a new taste and flavor to the B&W; Maybe I can call it the next level of tinting a B&W image.
For those who know nothing about it already, Split Tones, or Tone Splitting, is a technique to divide the highlights and the shadows to two different colors. Even though the technique, theoretically, can be applied to any images, but it is more apparent and more resilient in the arena of B&W images rather than colored ones.
Usually this is done in RAW editing phase, but sometimes we do need to edit a JPG file, thus I had to work out some way to split the tones "manually" if so to say. This method might not be as accurate as editing directly in RAW, but it accomplishes the look somewhat. I'll describe it below.

I. Open the image file (in Photoshop of course). Here, I will presume it is a colored image already. I'll be dealing with one of my old images: Harmonie.
Harmonie

II. You can duplicate the background layer to feel safe (Ctrl+J) or you can work directly on this layer. The choice is yours. However, we add then a Black and White adjustment layer by clicking button (1) and picking (2) from the menu. The tones are then adjusted to taste (3), but pay attention to the details and how the highlights and shadows are connected!
Click to Enlarge

III. Then we add a Threshold layer to split the highlights and shadows of the image. Click the button again (4), and pick (5) for the list, and adjust the tones to taste (6). Again, pay attention to the highlights and shadows here. I suppose there should be a balance between the two at this stage but it is after all a matter of taste.
Click to Enlarge
 
 IV. As the layer Threshold 1 is highlighted, press Ctrl+Alt+Shift+E (altogether!). This will merge all the layers in a new layer on the top (7), then turn off Threshold 1 (8) by clicking the eye icon beside it.
Click to Enlarge

V. While the new layer is still highlighted (i.e. selected), Press Ctrl+A (Select All), then Ctrl+C (Copy), and then Ctrl+D (Remove Selection). Now, the new merged layer should be stored in the memory (to paste it in the next step).

VI. We, again, add and adjustment layer (9), and this time we pick the Photo Filter adjustment layer (10). After the layer is placed on top as usual, turn off the previous layer (11). While holding Alt, click on the layer mask of the Photo Filter layer (12) and the page turns white. Press Ctrl+V to paste the image we copied earlier in step 5. After pasting make sure you press Ctrl+D to remove the selection. Now pick a color in any way you wish and tone it as you like (13) - this should be controlling the highlights. It might be a good idea to keep Preserve Luminosity option checked.
Click to Enlarge

VII. After finishing setting the color and its level in the previous step, directly duplicate this layer by pressing Ctrl+J (14), and then directly press Ctrl+I (15) to reverse the colors of the layer mask. This is, now, the shadows controller. Now set a new color and its tone (16). If the dialog didn't appear, just double click the icon of the layer (i.e. the one beside the eye icon).
Click to Enlarge

At this point, the main process is over. The rest is experimenting with the colors chosen for highlights and shadows, and their strengths. Some extra stuff can be done are:
1. Adding Vibrance adjustment layer to increase the vibrancy of the colors.
2. Adding Contrast adjustment layer to increase (or decrease contrast).
3. Do a slight Gaussian Blur to the layer masks of the Photo Filter adjustment layers; and the amount is dependent on the image size of course. This is to soften the edges where the two tones of highlights and shadows make a contact. The blur is better be of the same magnitude for both layer masks.

Just another halfie.
Tones split between blue
(highlights) and
yellow (shadows).
The balance here is shifted
to the shadows more, making
the blue tint of the image in the
highlights not directly visible.
These are just some suggestions. Generally, I've been using the concept of "complimentary colors" in doing split toning jobs to my images; that is use one color for highlight and use its complimentary color for the shadows (e.g. yellow-blue). However, this is, of course, not a rule. But a good and logical way to start. It would be useful to know (and memorize) the circle of colors!
All in all, even with split tones, it might look like a work of tinting a B&W image sometimes, specially when the weight of tinting shifts to one side (i.e. to highlights more than shadows or vice versa) in an obvious way. For example, Just another halfie on the left was split-toned (in RAW format) between Blue/Yellow*. Yet, to achieve the look that I really liked, the balance was shifted towards shadows more than highlights making the image look generally yellow, but with a slight tint of blue on the skin which can be hard to notice for some eyes; this is noticeable only when the blue is removed and the skin becomes "white" - only then, the difference to the eyes would be clear. When I did this experiment, it was obvious how important is to add a highlight tint (specially a tint from the complimentary color) even if it was hard to notice easily by the eyes. Even a slight amount of complimentary color into the image, whether in shadows or highlights, can produce a pleasant contrast that gives some more strength to the image. I had the advantage here to suppress the green background by toning the Green tones down; I think I was lucky for not wearing green that day!
Beside using complimentary colors in split toning, sometimes I do get the idea of the major colors in the image itself; this is if it was majorly ruled by two major colors.

Orbis Fidei
Original Panorama.
Majorly dominatedby yellow and blue.

Orbis Fidei
After splitting tones using Yellows for highlights,
and blues (cyan) for shadows.

Here comes another reason why manual tone splitting can be useful. Panoramas are not RAW files to be edited in RAW and their tones can't be split there. Thus, manual work is due (whether with high resolution TIFFs or regular JPGs). I'm still digging in the past panoramas to find those which are suitable for such technique.

*It is a convention, to myself, when mentioning colors of tone splitting, to mention the color of the highlights first, then of the shadows.

Finale

Time is ticking, and I've finally finished the bulk of the work with the Irish Visa. What is left now is the other half of the bulk! That is a proper photo for the application, and a 6-month record from my bank (to prove I can support myself there). I'm planning on leaving around the end of September. Though 3 months are ahead, but I have to hurry up with these tasks and send my documents (I think to the embassy in Abu Dhabi now) because such procedures might take 8 weeks as they stated; i.e. 2 months!

I have recently received a surprising phone call from an interior designer which quite swept me through in surprise - could this really be a start of a business trend? I'm not quite sure what is the next step, as the other side asked to arrange a meeting, which would probably fall within Ramadhan. The mention of panoramas, as he stated, gave him more ideas than he was thinking of. Anyway, I've left organizing a meeting for him to schedule and I just have to sit and wait I guess. If this could happen for real, I might have some sort of condolences regarding the despicable workplace I'm dipped in.
As for now, I'll just sit and watch my life, and work with my camera as much as possible. My dreams, myself, and I... with my camera... is all what is left for me here...


Thursday, May 8, 2014

Secret Spot...

QTVR ahead. Give some time to load and be sure you install QuickTime to view it

My vacation is over, and I'm already dying to start a new one. The summer is hovering over making it harder to breath even at some point. Fasting is putting my down a bit; it's the month of Rajab and like the previous 3 years, I usually start fasting in this month, and if I can, I would add the next month, Sha`ban, to it. Then comes Ramadhan. However tiresome I might get, Ramadhan will always get me down further even though the working hours are shortened.
Anyway, today I'm going to talk a bit about a special place that I planned to shoot in for a year or more even but never had the chance till few weeks back.

Secret Spot

This is not completely a secret spot, but I like to call it so because it is somehow deep and isolate. It is a piece of land from the beach isolated from the rest of the urban features around it with an artificial cliff of rocks. In high tide time, the water level gets really high that it is almost impossible to stand there and work for a long time (even though I did that already in fact!).

Das Licht Der Dunkelheims
The secret spot is not far from this location fair straight and down.

As stated in the image caption, that location isn't far from there. First of all, I paid a visit to the place with my regular intentions to study the location and see what I can do with it. This simple visit paid well with my Rokinon 8mm fisheye lens!

Washing Shore
Rokinon 8mm fisheye, f/8, HDR, ISO100.

My single shot there back that night, Washing Shore, seemed to get the attention of the viewers. I planned it in such a way to make a curvy line leading the viewer from the bottom right corner to the top portion of the image in a curve. Two bad parts here though:
  • The building on the left, which seems to weaken the image for me.
  • The noise and processing later on.
 Because of the temperature, the noise was unavoidable with this HDR image done completely with long exposures (ranging from 8 minutes down to 30 seconds). The final result was some complicated smoothed and sharpened details all over the place, with some banding in the sky (after using Hue/Saturation adjustment layers and Selective Color adjustment layers). I'm still not sure how suitable this would be for printing but I won't be sacrificing money for the time being just for experimentation! 
The most terrifying aspect here was, not surprisingly though, the white balance. I admit; it was my mistake to not use the white balance disk to fix the white balance properly before shooting. I had to relay on many layer masks to adjust the colors in one place rather the others and so on which made it a lengthy work and process.

Seeing how things turned around for this single shot, I've decided to head the week after with somewhat an adventure mood. It's not easy for me to be in that mood, I tell ya! But first things first; I had to check the low tide timing and I was lucky to get it accordingly for the weekend after midnight. The hardest step though was to get down through this rocky slope, which might be an easy task for a sportsman, but not for me, specially in the darkness. Retinitis Pigmentosa hits severely in the darkness.

Mare Lunare

The work began when my feet hit the ground. It wasn't easy as I didn't carry my LED lights and only my bulky flashlight. Also, setting up the tripod and the bulky VR-head on such soft sand was troublesome and did consume a considerable time. I've found out also that the VR-head needed some tightening in some positions as some screws were getting lose! Pretty dangerous working conditions if you ask me - imagine losing one of those small screws in such soft sand!

The Hanging Cliff
(Hour Glass)
The work was done completely using the Bulb mode, and took around two hours. Yes, and all of that was done without having a book to read during these long exposures; which ranged from 2 to 4 minutes. Believe me if I say, going around the tripod in such soft sand is not an easy task, and needless to say that walking around must be done carefully so that the level of the tripod doesn't change while shooting the panorama.
Things went smoothly, but very lengthy (and at some point, pretty boring I have to say!). The rewards were as you can see in Mare Lunare and The Hanging Cliff (Hour Glass), and more to come in few. In somewhat a strange turn of events, the Nadir point wasn't that easy to merge into the panorama but that was fixed in a hurry with some cloning. In fact I had to do some cloning in each panorama projection I've made so far.
Processing-wise, there was a lot to do; really a lot to do. This is because every single RAW file (total 41) in this panorama was checked for the histogram to ensure it's alright histogram-wise at least and no cut in highlights or shadows. All the files were converted to TIFF and the stitching process started from there. The final result in each projection needed also lot of work in Photoshop because the colors needed to be emphasized; the pure output was simply dull with not much strong contrast. Probably you've already noticed the green water surface in the panoramas. To do this, I had to use some layer masks and plenty of delicate work in selecting the water surface only. This is because without any change in the color of the water, one would deem it all as one with the sky. The water itself looked faintly green and hardly noticeable, thus the color cast was increased using Hue/Saturation adjustment layer.

Skyscope

Probably my favorite projection of all, is the tunnel view projection; Skyscope. The texture of the sand acted naturally as a guideline somewhat to the center of the image. Here, specifically, I didn't change the water color cast to make it merge with the sky a bit and form semi-circle. I think adding a third color to this combination of yellow and blue (and bit of magenta is already in the clouds) would make things diverse in a bad way.I've tried, as well, to create a slight twirl in the outside rim of the image to make a feeling of something sucking into the depth of the image (and to do this you have to work in 8bit format rather than 16bit), but the process got complicated and I decided not to waste more time with this.

Planeta Litus

The planet projection of this panorama wasn't much dynamic like its cousin Skyscope, except for some faint clouds lines which somehow acted as field lines around some planet. In case you were wondering about the long white line in all of the panoramas above, this is just a light trail and flare from the lamp posts as it seems. 

Schwimmend am Höll

The last projection in the series is a wide-view projection, Schwimmend am Höll, which appeared to me as a floating island in a surreal view with a sky that seemed like burning in flames. Originally, I've stitched this panorama in a large format (11,000 pixels wide) in order to be cropped later into a suitable size. However, after looking at it for few minutes, it did appear to me as if the sides were essential despite the featureless space there. I think without such space, the look won't be that of a floating island balancing itself on a tip of a hill... am I exaggerating here? Ah well.
Ironically, all of these panoramas were refused from some stock website for "too much processing" - probably these people never heard of something called panoramas ever, and processing is the core of panoramas. Anyway, at the end of my work, the sun was starting to cut out through the horizon and the atmosphere began splashing with violet hues, and I didn't want to miss that chance...

Good Morning Kuwait (VIII)
Rokinon 8mm fisheye, f/8(?), HDR, ISO100.

The exposures ranged from 2 minutes and down for one stop each time till 1 second. This was somehow essential because of the city lights and balancing the atmosphere with these lights is somehow impossible with a single exposure. The final image had strong artifacts caused by chromatic aberrations (one thing that I really hate about Rokinon 8mm in such situations) - but after a tedious work in Photoshop I did somehow reduce the effect of these colored lines at the edges of the buildings.

QTVR

With this hard work that lasted for two hours, it would be a shame not to do a QTVR for this place, specially that the nadir point was relatively easy to fix.


If you look to the top above (zenith point), you will notice some strange mark in the sky, and the truth I'm not sure what is this either. However, as I didn't really use a zenith slide in the panorama (even though I did take it), probably this mark is the result of cloning the gap in the original flat spherical panorama, which is Mare Lunare. The gap was so small to even think of adding the zenith slide to the whole panorama (and cause a mess to the whole set!).

Delays

I keep telling myself that I will be facing my projects soon but I'm not sure how much soon is soon in my own timing. There is Geltani, and IPA check up for Arabic (which is pretty important for me). In the meantime, the nearest thing I could think of right now is at least to try and translate UDHR (Universal Declaration of Human Rights), which is usually used with most languages on Omniglot (both constructed and natural). With that, I would probably do a voice recording to see and examine closely how the (new) conlang of Geltani does sound; needless to say, it is a real test for the transliteration system (or codification so to say) that is to be used or transcribing this conlang as well. Time management is one major leak in my personal life, which is full of leaks already...
On the other hand I've been testing some sounds of Arabic and trying to figure out precisely where my tongue resides in some of them and how the air articulates in and out of my mouth. Well, been acting (more) as a maniac while doing this while driving or being alone in the office. Still I didn't catch the whole concept completely in fact. The major difficulty resides in two letters: [ض] and [ظ], which, sometimes, are both transliterated as "Z" from the fact that many "dialects" of Arabic today do so. The IPA version provided in Omniglot seems to be on the same trend and hence, it's not convincing for me as an Arabic speaker - Yes, I don't speak the standard Arabic in my everyday life, but it is the supposedly lingua franca between all Arabs, and yet, it is the formal and the prestigious form of Arabic for letters, communications, and the media. My other blog is in standard Arabic as well and I cannot ever imagine myself writing something to the public in one dialect of Arabic, and say this is Arabic.

Finale

One book is off my list now. The Extraordinary Everyday Photography by Brenda Tharp and Jed Manwaring is somehow just another version of another book I had before; The Contemplative Photography. It is in fact a mix between contemplative aspects and technical aspects about the camera and some tips and tricks to do some shots. Never the less, I did like reading it, and specially the last few chapters which are related to dusk and dawn, and night photography.
Source: Amazon
Source: Amazon
Source: Amazon
The book on the queue line is Optics and Optical Instruments, which looks from the few pages I've read so far - looks that it is a students' book; and this is good! Exactly what I was looking for. My previous reading about lenses and their design made me somehow in a status of stalemate; I couldn't comprehend much of what was there, specially the mathematics involved. It is an engineering book of the advanced type which requires some background. However, Optics and Optical Instruments might look old from the shape of the graphics in it (obviously handwritten) but so far so good with the body of text. But that doesn't mean consuming the context is going to be an easy task, specially without someone forcing me to "study" so to say.
Away from books, I've been carrying a load; a load of emotions and responsibilities. Probably more of the former than the latter. I'm taking it seriously in my mind now to spend a vacation, a real one, abroad. Ireland for a third time is in my mind as well. Not sure when exactly but the usual timing would be between September and October if I can. I have to settle things down first, and inform everyone about my plans so they would prepare to take care of Mom. My mind is fluctuating between a new location or visiting the first location I've been to back in 2009. I think the latter is my choice for now, because I have better equipments now, and I don't want to miss the beauty of Lough Corrib (Loch Coirib).
I'm starting to feel numb to almost everyone now. Asking myself, why should I care...

Thursday, May 1, 2014

Nacht der Langzeitbelichtungen...

Well, now we are back to the rhythm after two posts about my trip to Failaka; despite the fact that I'm still processing some of the images taken there. But probably the bulk of the images that I really enjoyed taking were already done... till I discover something new though. The B&W processing and tone-splitting sound promising but I do need more time with my images. In the meantime, I'm trying to settle down with time ripples as I'm torn in between two blogs, both of which would require an early preparation to be posted in time. Probably my future posts in this blog would be short (be happy!).

Nacht der Langzeitbelichtungen

I hope dear reader won't consider the title offensive*. It's just a title that reflects what I've been doing since I got back from Failaka island two weeks ago. I'm trying to do the best I can before the weather gets warmer (than this already); long exposures at night time.

Sky and Earth
Rokinon 8mm fisheye, f/8(?), 3.5m, ISO100.

My beginnings were shaky. Despite the fact that the low tide timing was perfect for me, because I wanted to go deeper into the sea shelf (the area which is covered in high tide time), yet, the tide was not low enough. To add to my problems, the beach area was not "silent" at 3:30 a.m.!
My first exposure, Sky and Earth, which was for around 4 minutes, came out blank. Not literally blank but out of features. I was hoping to go deeper into the sea shelf specifically to capture more rocks in the foreground, but it wasn't the case here.

Luminatus
Rokinon 8mm fisheye,
f/8(?), HDR, ISO100.
As you can see, because of the time that lapsed when these images, Sky and Earth and Luminatus, were taken, I've completely forgot what was the aperture used back then in this manual lens; but I doubt I've gone further than f/8 (hence "f/8(?)" in the caption). Luminatus, in particular, was shot about 180 degrees to the other side on the shore, away from the first shot Sky and Earth. Now, I have to admit I don't like both shots, but I did shoot after all. I didn't want to go back with empty hands after struggling to the beach at 3 a.m. that day! Some people commented that they like the transition in the horizon line in Sky and Earth, and I might like it a bit because of its minimalistic approach to the seascape, yet, it's not much more than a play of colors; in fact this is all what I depended on here to make this image work a bit. Otherwise, it is one big fail. Luminatus on the other hand was a fail still but with some liking from my side because of the spot-like effect that surrounds the buildings. This is mainly caused by the lights of the buildings themselves which caused a halo effect somehow. The HDR technique (gathered from long exposures) helped a lot here in controlling the range of the halo, but then some work in Photoshop was required. My night was over then and I had to go back to my car on the soft sands, carrying the load!

Extraterrestrial
Rokinon 8mm fisheye, f/8(?), 8m, ISO100.

The night after was a bit more promising but I have to admit here as well, I didn't expect the results. One of the major differences between an amateur and a professional photographer is the expectation of the final outcome before the work is done. The timing isn't really what I was hoping for because it was close to dawn, and the exposure time, when calculated in the regular way as I usually do, must be shortened than the real calculations; This is because the sun is on rising even though slowly, but it does affect the outcome significantly (in some trials before, the exposure time would be one minute short than calculated to get a proper exposure, or at least a proper histogram distribution).
In theory, when doing long exposure for moving clouds, a cloudy day in fact is not good - this is because the movement would not be so obvious in the sky. The movement won't be noticeable unless there is some spacing in between the clouds. In the meantime, I was thinking: Is it possible to record the movement of a hole in the clouds when a cloudy day? I think I got the answer in Extraterrestrial. I'm not a meteorologist, but it seemed that this place in the sky specifically was like a barrier for the clouds passing through it and hence the lines formed around this specific vacancy. The bright spot in the sky was probably the sun disk which, on location, was completely invisible to the naked eye. Probably this is one of the beauties of doing long exposures: to see the unseen!

Blauentraum
Rokinon 8mm fisheye,
f/8(?), HDR, ISO100.
Just before leaving the place, after observing how much light is shining on the land, I decided to do one last trial, this time for HDR bracketing (and if I remember correctly it was also a series of long exposures). As you may have noticed  in Blauentraum and Extraterrestrial already, I've been using the Fluorescent WB excessively for such time of the day (along with dusk time too). In processing the HDR, I didn't try to do any magic here, but simply eliminate as much as possible the ground of the beach while darkening the sky a bit. The guide line here is not strong, and the only thing I would rely on in this image is the hues and blend of colors. Otherwise, I wouldn't submit this to be judged in a contest!
The coming weeks after that did (and will) witness more long exposure trials but I'll keep these images for later...

* In case the reader is not aware what it means; the title means "night of long exposures"; parallel to the Night of Long Knives (Nacht der Langen Messer), which was a name given to a  series of political murders in the beginnings of the Nazi regime.


Finale

Source: Amazon
 New books now arrived, and I've already started reading it. The new book is a contemplative book somewhat (just like another book I had before) but in a different style somewhat. I do have some list of books that I'm reading already for bedtime (an Agatha Christie novel in Arabic in fact) and at work I'm somewhat busy doing work related to this blog and the other blog, thus reading this book is a challenge for me now. The best I could do for now is to read in between when taking breaks, or when I wait for my fingerprint time before leaving work. The other books are related to Archaeology and principles of optics which I'm also dying to read. The latter specifically looks an old edition; I really didn't check it out! But it doesn't matter as long it gives some basics.

Source: Amazon
On the other hand, I've ordered another flash cable instead of my Vello cord which got broken after some accident. This one (from Pixel) though is cheaper than Vello's. I'm not sure why though, but it works fine and tested it for High-Speed mode on my 580EXII. If it is about the make, then I have to say the Vello is higher in price and yet couldn't stand the fall of a tripod; hence, it wouldn't make a difference for me I guess if I get a cheaper one. After all, I'm not using it excessively for the time being - but that doesn't mean it's not necessary!

This is it for now I guess. I'm not sure I want to talk about work here, because I'm trying to keep myself busy as much as possible just to forget the insults that I see daily in that place. The summer is coming, and the hell is starting to cook my body already. My only condolence is to see students finish off their semester as soon as possible to release some of the jam in this place.
Meanwhile, I do feel guilty though for not doing much work with my Geltani conlang. Two weeks of vacation and yet, I didn't touch it at all and concentrated all my time for photography; it's unfair I guess. Too many things to do, and one body to do them all...

Thursday, August 16, 2012

The Longest Long...

Caution! A long and a boring post ahead! Read (or try to read) at your own risk!

OK. Been off away from the blog for a week but that doesn't mean I was not working on it behind the curtains. There had been so much work to be done and, accordingly, so many troubles to overcome. I've (almost) dedicated one full week for my photographic experimentation, and I think I've came up with some results after all. I should thank Alexa Phillips for filling in!
Anyway, this is going to be some long post I suppose, so I'm typing this as early as possible; in other words, I'm still working with the same schedule but probably with more material at hand! Let's go!

I. Viva Al Beach - Again

Still coping with the heat and combing the beach for long exposures. It is an endless struggle as it seems, but this time I got my weapons out. I've brought some cooling pads to wrap the camera with and work on reducing the noise caused by the heat to the sensor. There was a major disappointment though to find out that the cool gel pads, even though were coming out of the freezer, they didn't keep their coolness long - 30 minutes of working on the camera and 5 minutes reaching the location in the first place - all of that was enough to leave the pads slightly cold instead of freezing cold. However, to some extent, there was some noticeable reduction, specially that the weather that night was cooler (that doesn't mean it's not hot!).

Cosmos
Rokinon 8mm f/11 8min ISO 100.
Corrected with DxO
The first trial took place after spending around 30 minutes (if not more) trying to fix the composition as much as possible in the pitched dark place. I had to point my flashlight (UK: torch) toward some stones in order to see and compose and focus as well. The exposure took 8 minutes here, mainly because I didn't go dramatic with my aperture as I usually do (with f/22). However, prior to that there were many test shots and histogram examination to see if I'm on the right track as well.
In that awkward position, and because the cooling pads were sort of hard to settle on the camera tightly (some breeze there was and I was afraid they'd fall down), it was (again) not a good time to use my portable monitor. The situation could have been more critical if I was to use my 18-55mm lens (used it later), which somehow has a shaky focusing ring and it could move easily. I've picked the time specifically for a regressing water tide instead of transgressing one; not only to keep it safe, but also to show more rocks in the foreground.
In the processing phase, regular distortion fixation took place (and I somehow started to like this elongated format as well; I wonder if it has a name). Later on though, I was reluctant whether should I crop the lower portion to keep the horizon line perfectly in the middle or not, but I've decided to leave it like that since some rocks at the bottom would be cut in not-so-nice way. The noise now were less, but that doesn't mean they are much lesser, but on the bright side, it means something is working here (but maybe also because the exposure time was not as long as 33 minutes like before!). We'll come to that later.

Traum
Canon Ef-S 18-55mm @34mm f/11 21min.
ISO 100
Coming to the beach at around 3:30 a.m. and just spending 8 minutes to take one picture was something, well, annoying. I didn't come all that way just to take one picture in such short time! So, I've decided to work as fast as I can and see for other perspectives to the location by changing lenses. I had my lenses in my vest pockets ready for the action: Rokinon 8mm, and EF-S 18-55mm.
Now, one thing I've totally forgot here and that was the time I've came in into the beach area. The sunrise was getting closer and I just didn't count for that in my long exposure planning. Initially, and according to my calculations, after framing and zooming properly for Traum, the exposure should take as much as 43 minutes! However, as I started the exposure and settled down by the beach reading a book under the flashlight light, I've recognized that the atmosphere is becoming brighter and I could almost see my way around with no need for a flashlight. Seeing that, I've ran to my camera and stopped the exposure directly at 21 minutes, and it was excessively bright already.
Back home, the processing became a bit funny because of using the Fluorescent WB. After trying to reduce the loss in the highlights (which was not completely successful as you can see), and after using some shadow enhancements like Fill Light, I've arrived at something that looks more like a radioactive material. The green line in the horizon provided some connection to the rest of the image as if making a note that "there is something in here!". With such surreal effect, I've found myself calling it Traum, a dream.

Lunatic Sea
Canon EF-S 18-55mm @18mm f/22 ISO 100.
HDR
After finishing with Traum the twilight already began and the atmosphere was lighted enough to see my way with no flashlights. I yet hated to leave just like that and kept on trying my best to form some composition in the middle of the rocks; and let's not talk about what happened to my feet. Yes, I was barefoot.
Working with Fluorescent WB is fun indeed. It adds magic. I think I will call it the Magical Blue WB. Unlike Cosmos I didn't want to add a heavy blue tint to the whole scene but a light one to emphasize the blue sky. After taking several shots and deciding to leave, I've noticed the clouds in the horizon; something I do rarely notice in summer here. Nope, not the time to leave yet.
It gives me melancholy though to know and remember that back then I didn't take my ND filters with me. I wanted to be as light as possible. With the light becoming abundant, NDs are required for long exposures, even those for 1 or 2 minutes! Anyway, I've just settled down and decided to bracket-shoot, and I thought let's see what the HDR hides for us then.
The irony here is that, instead of making dramatic light with the HDR capabilities, I've decided to smooth out the light giving in for a soft and smooth feeling. The color is adjusted while tone-mapping too by changing the Temperature slide in Photomatix. My strolling on the beach is not over, yet.

Hinter der Schatten
Rokinon 8mm f/11 15min.
ISO 100.
Then again, there was a time to head to the beach for another trial in another day. This time, instead of taking mom's cooling pads, I've got myself one of those cooling pads that are usually kept in iceboxes to keep it cool for longer time.
I was exhausted that night, thus I didn't stroll deep into the beach; you need a will power to cross the soft sands! However, I've found me a spot in front of the Pizza Hut, which is not ideal because of the strong backlight, which explains my long shadows in Hinter der Schatten, Behind The Shadows. Another reason was that the timing of the tide, which was advancing, and I was not in mood to get wet here; it is better to play it safe here, until I get more will power (and time) to work as I want.
In the beginning, I didn't find myself working easily here, mainly because there were some people having a picnic or simply fishing (yes, fishing), but I tried to shut my mind's window and act like if they were not there. One of the points of being far off on the sand on the beach is that you get that calm and peaceful solitude.
Some shots with ISO 12,800 (called ISO H on the 7D) to fix the framing as best as I could, knowing that my shadow along with the tripod's will do a cast in the final image, but heck, what I'm supposed to do? Pointing away you might say, but unfortunately, the city lights were around me and in portrait position this is the narrowest band of the sky and the sea I could have without lights in the background. On the right there was this family doing a picnic, and I'm sure they would get annoyed (in fact they left few minutes after my arrival).
However, beside the test shots in ISO H, I had to check the histogram carefully and not depend on the LCD for judging the brightness. I was metering the sky; one good thing about working with live-view, is the easiness to meter any zone in the view by moving a simple square across the scene and check the meter. I've realized that a good histogram (somehow) was not at 0EV, but at +3EV. From there, all the calculations began. Initially, the aperture was at f/8, but I've added one more stop and made it f/11 just to lengthen the time. Finally, it all yielded around 15 minutes.

100% crop of the original RAW,
at initial settings.
Click to enlarge.
We come to the noise now. The noise profile at 100% was much lesser than the usual. However, this exposure was for 15 minutes only and not as before, for 33 minutes. The weather was warm, but not as hot as it was 2 weeks ago when I did a 33 minutes exposure. I've attached the cooling pads to the back of the camera (by means of a rubber band), but I'm not sure yet that this has any real effect. I might as well study the camera's design to see if the sensor is really close to the back of the camera where the LCD lies, hence we can argue that the coldness of the pads would reach there eventually.
I'm happy with the result after all. I didn't dream of such low noise profile after all! But I better get concrete results in order to work efficiently, and with confidence as well.
The majority of the editing was done in DxO optics of course. I think I'm establishing a style already with these elongated images. They give more depth and a nice surreal effect. I've been filtering the noise in DxO and then in ACR, and sharpening even more with Noise Ninja; I was trying to pronounce the faint lines more. I picked this image for a contest within my group, and I did minimize it and sharpen it with NIK, and man, even the static stars got pronounced making a majestic look - but not to be posted here for now! It is a promising trial, and man I just can't wait for the winter to come!

II. Strobo-tique

Source: Amazon
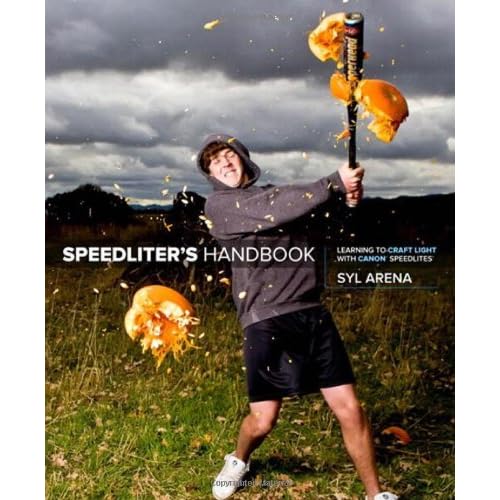
After reading Syl Arena's book and getting my new 430EX II I thought it might be the time to start playing around. This time, I wanted to do the hard stuff first - Stroboscopic lighting. As Syl put it, there is no way around it, except by trial and error. For two days, I was trying to record my hand's movement across a piece of paper, writing some phrase in Arabic.
Working out with two Speedlite units proved to be not an easy task after all. Good thing that you just have to set one to master and the other to slave, and everything to be controlled from the LCD - specially if you are working in E-TTL.  My first trial didn't work out, as I was literally trying to write down on the paper while the strobe is working on for a 20 second exposure in a completely dark room. You can see that it wasn't the great atmosphere to work. I gave up the first night. Then I thought, why the fuss?

Love Drunkards
Canon EF 100mm macro f/22 ISO 200

I thought then, if the whole thing is to record my hand movement, why should I write?! (Duh!). Thus, the next night, I've prepared the set again in my room with the phrase written and ready on paper, and within 10 seconds exposure, all I had to do is move my hands all over the phrase. As Syl put it "imagine you are doing a time-lapse photography in a single frame," this is all what the stroboscopic is about. In order to break the dullness of the white paper, I've set the WB to Flash, and gelled the two Speedlites with 1/2-CTO on the master, and 1/4-CTO on the slave. Some adjustments to the WB later was done when RAW file was edited. Probably one Speedlite was enough to add some drama lighting to the scene from one direction, but I thought it is better to lighten the shadows a bit with some light on the opposite end.
Just a final note about the phrase, it is a line from an old song (from 40s or 50s) sung by Um Kalthoom, a famous Egyptian singer. It translates as: Did the Love see drunkards, like us?

III. Save Me A Disaster!

Source: B&H
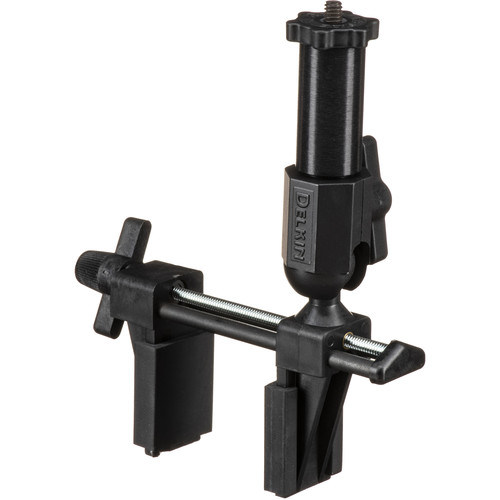
Over the course of two days, I had some hard time trying to achieve one idea that I've been thinking of for sometime, and for which I've ordered the Delkin vice.
If there is a definition for the word disaster, then it would be such a device. The best of it was the clutching hands where it did stick to my window glass firmly without breaking it (because of the rubber covering), and also the coldshoe that comes with it to attach a flash unit; I can use this shoe on various stands (with 1/4" thread). The knob controlling the ball head was hard to move and literally I was moving it with pliers just to ease it down or locking it up. I've decided to leave it locked and move the ballhead by force if possible just to adjust the camera orientation. Everything in the head was sort of loose!
I was trying to do this experiment in daytime in my work place, where I would attach my camera over the vice to the rear window and point it at the side mirror, and with an exposure of seconds I would move my car slowly. First day, after spending about an hour in the sun, I realized that to capture the side mirror I have to attach the camera on the opposite side of that side mirror (i.e. to take a picture of the right side mirror, I have to attach the camera on the left rear window), otherwise I would only see the body of the car at all times (however I move the side mirror). To achieve a longer exposure, I made use of the welding glass piece which provides me easily with 11.7 stops, and this time using big paper claps; easier and less shaky for the focus.

My camera after the disaster.
Ironically taken with my phone camera.
Click to enlarge
Second day, for my good luck (please note the sarcasm), some car parked in the space so I had to move my car a bit further away to be able to move freely for the experiment. However, the sun hit directly on the LCD, and it was hotter than the day before and to adjust the camera, I had to move the whole ballhead with force since it was tightened the day before by pliers. Finally since the camera was swinging easily with any slight shake, I've tightened it to the head firmly; and that's when troubles began.
As you can see in the picture on the right, when this experiment didn't work out, I've decided to take everything off. In the office when I started to remove everything, the screw from the ballhead got stuck in the camera, and no pliers would take it off. I even got some of the iron filings planted in my hand. After trying for more than one hour, I've finally took off to the nearest garage and used a vice to press hard on the screw while rotating my camera body and take it off easily. After coming back to the office, I've screwed the bolt to the ballhead back again tightly in hope it won't take off again!

Reflected Move
Canon EF 100mm macro f/2.8 20sec., ISO 200.

Didn't bring my old 350D,
so I had to shoot using my phone.
Click to enlarge
I've realized already in the two days course that a daytime for such an experiment won't do. I would need interesting lights and a darker atmosphere. A darker atmosphere would give me a longer exposure freely with no need for any filters. In the same day when my disaster with the camera happened, at night time, I've headed after dusk to some open space I've known for a long time in order to be free to move my car. After settling down and around 30 to 45 minutes of fixing the camera and checking the focus, I've finally managed to take Reflected Move. You can see the settings on the left, and pardon me for the quality as it is a phone camera.
Unfortunately, the text on the mirror and the frame of the mirror did shake little bit. In theory, since the engine shakes the car's body, and the camera is attached to the body, then the side mirror and the camera would shake at the same rate making the image relatively stable, and this was proved by testing shots prior to the final shot. Anyway, as I took the 20 seconds exposure and moving my car in a circle slowly, seems that the car's body shake as a whole (as it was moving on sand and not paved road) caused this little shake after all. Some sharpening took place to compensate a bit for this shake.

Stadt von Licht
Rokinon 8mm f/8 + teleconverter
HDR
After finishing from this experiment I couldn't resist the urge to shoot the surrounding buildings. Their lights (which were changing in color and going on and off) made a spectacular view, in a place that I don't recall any beauty in it.
Stadt von Licht, or City of Lights, was taken in a haste and I wasn't really careful for the composition. I made some few shots that showed my shadows with Rokinon 8mm fisheye lens, then it occurred to me: why not trying HDR but with a relatively longer exposure instead of automatic bracketing?
I've connected my teleconverter to the Rokinon 8mm, which means technically, the focal length right now is 16mm. I could've used Canon's 15mm here, but I didn't want to touch this for now since my mind was set to manual all the way. After doing some metering to the sky and the ground, I've taken 3 shots with the intervalometer at 13, 25 and 100 seconds. Apparently, each had a different luminance.
Merging the HDR and tone-mapping was done as usual; no magic. But the magic appeared later when I started to correct the image in DxO Optics. Away from the distortion corrections, I've re-discovered that color options in the software and my eye,directly, spotted the Fuji Velvia. Now, I didn't work with films ever and I didn't develop any at all, but from the books I've read, Velvia is known to be the choice for saturated colors. And this is exactly what I did get! The composition and the distortion fix is not something I do like, but I'm happy for the result here for two things: a) I did HDR using longer exposures; an experience I might need for later, and b) expanding my color horizons in DxO which will give me more options to render the colors.

IV. Get Me Outta Here!

Again, another one of those crazy moments just sparked as I was going in and out from my work place and been noticing something that I was completely blind to. The parking lot (or parking garage). After taking a note of it, I've planned my shoot carefully so that I won't be distracted by the security guys. Thank God that it is Ramadhan and people are mostly dizzy and got no mood to hassle with some photographer at 6:30 a.m.! Well, one of the benefits of fasting before Ramadhan for a month or more, everything looks so easy during Ramadhan itself!

Exit at Infinity
Canon EF 100mm Macro f/32 8 sec.
ISO 100.
Now, prior to the shoot, I've decided to work without a timer. This is just to silent the beeping to make less distraction, even though my location was relatively far away from the security stand post. I think I paid for this dearly.
I took several stands raising my tripod to about 2 meters off the ground (~6 ft) and getting it low, and using my 100mm and my Rokinon 8mm fisheye lenses. I was shooting with brackets for HDR merging later on, but in my mind I've already decided to convert it to B&W. This is mainly due to the composition, as the colors were not so important, nor they were pretty anyway (unless for a horror movie).

Infinitarium
Rokinon 8mm fisheye f/22 4 sec.
ISO 100
Corrected with DxO
The great disappointment was to find later that some of the images were shaken. Another disappointment is that, seems that there is a curse following me for being a left handed. However I fix my point of view and everything would seem alright, yet I would discover that I didn't center my tripod correctly. Unfortunately, such off-center orientation is delicate that only when editing the image it would be noticeable. This problem had been chasing me for a long while now, and I just don't know how to fix it. My eyes seem to be, simply, left-eyed!
Infinitarium, for example, was skewed after correcting many aspects of the image itself. The skew was to force the horizontal lines into place after correcting the horizon, and forcing the vertical lines to be parallel. It was hard to do the perspective correction, however, for Exit at Infinity but merely a tilt to fix some lines. Also, I ended up editing singular shots instead of doing HDRs. After doing on HDR slide, I've realized that there is no need for it and doing B&W from a single chosen shot is faster, and the HDR won't add much in fact. Some dodge and burn were required too.

Gerade
Anyway, I couldn't resist the colored version so I just prepared one just in case, for the Likes.
In the colored version there were many adjustment layers for fixing the colors, and strangely for some reason there was a green cast, so I just tried to reduce that if not eliminate it. Here also, I tried to frame the image properly, so I cropped (with respect to aspect ratio) stopping at the end of the black pipe on the right, and the red post on the left. I think framing was lousy a bit in the previous B&W versions.
I'm trying few of the tricks that I've encountered so far in George Barr's book that I'm reading currently (more about that below). One of his tricks was to reduce the noise (specially in the shadow areas after dodging) by doing a gentle Gaussian Blur. I did that trick as well to the colored version to around 1.2, and then followed with Noise Ninja filter, using the sharpening and the contrast sliders there to pronounce the edges. Not bad I would say. Print-wise though, I don't know how it would look!

Park Here!

A friend of mine as well suggested that I do a color splash; converting everything to B&W and keeping the blue only. I thought it is a good idea so here you go. I've just saved the file directly (from JPEG) without any dodging or burning. I like the light quality on the right and wish if the light would expand further to the left.
Notice how the lines in the middle on the signs, that separates EXIT and P do not coincide exactly; and that what pisses me off!

 V. Dark Hours

Same day I did the garage shots, I've decided to break the silence in the office with some work using my Speedlites. The target was my watch. It is not a new idea anyway; I've done it before, but in this instance, I was trying to put on some Speedlite touch just as a training.

Dark Hours
Canon EF 100mm Macro f/2.8 1/160 sec.
Series

After about one hour of trying different positions for the Speedlites and controlling the ambient light by increasing the shutter speed, I've realized that all what I need is only one Speedlite, and a reflective white surface (a piece of opaque white (glossy) paper; a calendar). I did produce some interesting patterns though with two Speedlites but I couldn't control the zones of lighting precisely. Finally, I've settled down with placing 580EX II behind the watch and connected via cord and bouncing the light off a white piece of paper placed in front of the watch.
It was a job for the Intervalometer again, as I configured it to take a shot every 5 minutes and 10 seconds. Around 15 shots were taken but in the final composition I had to give up some shots in the layers stack just to avoid congestion in the image. The layers were blended with Darken. Of course, after flattening the final image, some adjustments were done for the contrast and the glow, and also cleaning some spots. Should have cleaned my watch prior to this shoot! If you are wondering about the format - yes, the image was cropped from the sides and made into semi-square shape.

VI. Bingo, The Flamingo!

Out of boredom, and just two hours before the fast breaking, I've carried my camera and headed to The Free Zone. The Free Zone is a commercial zone, with a port, and usually so busy in regular days, and it is situated on, seemingly, an artificial island named Akkaz (عكاظ). It is a famous sports for flamingos. They say flamingos were immigrating birds and used to pass Kuwait on seasons, but now they are a permanent component in certain coastal lines here. I had no specific goal in my mind, just the idea that it will be the sunset soon, and the light quality is should be good for shooting, but I had no idea what to shoot in the first place!

Fly, Forrest! Fly!
1200mm f/13 1/500 sec, ISO 400.

I did take a lot of shoots (in hundreds) but I'm going to post 4 main images here as they are the ones that attracted me. I would still need to work more on the other at some time. The bulk of the images were not good in fact, and a lot were out of focus (specially for the flamingos) but it was, after all, a good trial for my teleconverters at work.
In the beginning I headed where I used to spot flamingos long time ago, behind the Mövenpick hotel in some narrow water intrusion into the land. I didn't find any flamingos, but some pigeons. It was a good practice anyway using my Tamron 70-300mm + Bower Teleconverter + Vivitar Teleconverter. I've discovered prior to this shoot on same day that Bower teleconverter records the focal length data in the EXIT but Vivitar does not - Vivitar's mainly handles the communication between the lens and the camera but does not record much information in the EXIF (that's why I thought that Vivitar teleconverter doesn't shift the f/2.8 for the Canon 100mm Macro. It does, but it doesn't record or communicate that).
It is indeed a hard task to stabilize the camera in that way; not a professional tele-lens and no screws at the bottom to make it stand on a monopod, and to make things even worse, the autofocus is stopped (but this is something I do know already). I had to work all the way by hands and focusing manually too.

One To The Last
280mm f/11 1/100 sec., ISO400.

We come to the flamingos now, after moving away from my previous spot. I had many shoots on these calm flamingos from the top of the cliff but the situation was shaky still. I've used a tripod then with my pan-head, which did stabilize a bit, but still with the dark viewfinder and the sun's beams falling on the LCD it was hard to judge the focus there. One of the tricks I've used was to take several fast shots while rotating the focusing ring in hope that one shoot will be sharp. I can't say it is a promising method though!

Π
280mm f/16 1/30 sec., ISO400.

And wherever I go there would be always abstract of course. Now, I don't know what is that; a pipe, or knot or whatever, it just did pronounce itself from the ground of the sabkha (swampy land) saying Here I am!. There were several abstract shots taken later from a nearby ground for some of those large shipping containers with various colors, but I have lot of focus issues to sort out, and probably I wouldn't be able to pick a good one after all. I was afraid to be spotted and chased out - who knows what lies in these containers!

Zwischen die Räuche
200mm f/5.6 1/160 sec., ISO100.

Why I named it in German? I Don't know. It just sounded to me it is better be in German. The shot was taken in my car using Canon EF 100mm Macro, attached to Bower teleconverter. It was hard to focus of course and keep the camera still, so I've rested the lens combination on the steering wheel first, when that didn't work out, I had to use some muscles and shoot dangling myself out of the window. After the heat and the sweat, I really didn't feel like stepping out of the car! Well, this post is long enough already as it is so I better save pictures from this session for later use!

VII. The Bookies

Source: Amazon
Well, I don't mean any races here, but simply the books I've been reading lately. Don't Believe Everything You Think, that was the title of the book, and I say, don't believe what they tell you about this book. It was such a boring book about skepticism and being a skeptic that I really regret having it now. In the beginning I thought it is a motivational book, or something that raises hopes inside you to cope with life and make you see life differently. However, it sounded later like if I was doing a practical joke to myself. I got bored before reaching the half. I do realize most of the aspects, and I don't believe everything in the media (which the book attacks), so frankly I don't find much benefit here.

Source: Amazon
On the other hand, I've started to read my newly acquired book: Taking Charge of Adult ADHD. Now, this book is giving me the shivers. I have to say that I'm indeed scared to do a real profiling to see if I have ADHD, but lot of the contents of the book do make sense and reflects much of my personality aspect (or should I say, my behavioral aspect). This said, I still need to do a professional check-up or profiling. I might have to look for a clinic, or a psychiatric that is, to do all of that - with affordable prices of course!

Source: Amazon
After finishing Syl Arena's book about Speedlites, I've started with George Barr's book about editing photos. So far, there are lot of tricks and workflow procedures that I do differently but might have yielded the same result after all. There are also some reflections and comments about images that the author worked on, and about the framing and composition. George Barr is mainly an abstract shooter as I can tell, and this is something I do like because this is what I've been doing mostly now. Might think of heading the other way and do portraits? I'm not sure. I still don't have the appetite of shooting people, except, when it is candid without subjects knowing that. Product photography can be a goal as well and I do consider it more than I do consider Portraiture.

Well, now, I doubt you've reached this point at the end of this blog post but in case you are reading these words, I do thank you indeed for your patience. You deserve a reward!
Right now, my mind is occupied with traveling and the procedures and bookings. Everything is almost ready - the place, the tickets, all what is needed so far is packing in time and signing up for a leave before that of course. I thought about it for a while and I thought it is better to delay the flight further, and instead of making it on September 30th, I would be, hopefully, flying on October 10th. Until that time comes in, I have many things to look after. Not a cheap vacation I have to say, even though I'm trying to make it so, but hey, why do we save?
... say, isn't it my birthday already!?