One third of Ramadhan is gone by now - and things are tightening on my schedules and life pace. I literally spend most of my time sleeping or trying to catch on my sleep; specifically at work! Even though I used to fast before Ramadhan already, Ramadhan becomes an issue. Always.
For this reason, I didn't have much to do with my camera, but I did some experiments eventually and some of them are still on going.
In the process of doing more studies with the tone splitting technique, I've re-visited a mode provided in Photoshop, along the RGB and CMYK; the Duotone mode.
This mode in fact provides several modes in it: Mono-, Duo-, Tri-, and Quadtone. Each mode provides a specific number of tones to be implied to the image and in that sense, it is a step further from tone splitting. Further more, for each tone, the control of the "amount" of the tone is a bit decisive.
There are some awkward features for this mode of course, like the fact that to convert the image into it, you have to pass by the Grayscale mode first. Thus, converting directly might hinder the user cuffed with the tone distribution before doing Duotone. Probably it would be better to use the Black and White adjustment layer first to control the tones and THEN convert to Grayscale mode - this is if it was necessary of course. It seems, however, that controlling the tones in this mode is actually a control of the levels of "ink" for printing this image itself. This is what I perceived when I did a little research online about this mode. This makes it harder to control, unlike the easy way to do it in the RAW editor or by laying out layers in a Photoshop process - because in this process or in the RAW Editor, the thing under control mainly is the distribution of the tone to highlights and shadows, and its intensity.
One of the interesting features as well is the Overprint Colors, which is somewhat like a control for how to interpret the merging of two tones together. Of course it's going to be a tedious task in case of Quadtone (4 tones) but it's worth the study to gain more perception of what related colors could do. This is a nice instance for using Colors Schemes, which are groups of related colors that can be found and deduced using many websites like ColorHexa and ColorHexCode. Such groups can be, for example, analogous colors, or tetradic colors. The other awkward feature here is that a file done in Duotone cannot be saved in a proper common format, like JPEG or even TIFF. It must be saved in one of Photoshop's own formats like: PSD, PSB, RAW and EPS. Note here that "RAW" is not the conventional camera RAW, but it's Photoshop's RAW format (which I don't exactly know how it works or what is it). EPS is a vector format, while PSD and PSB are the usual conventional Photoshop Document format. Here, Doppelganger, was done in Duotone using a color named Shamrock Green (Hex: #009E60) with Black. To save the image for displaying it here, I had to roll back the mode to RGB and save the image as JPEG. This, I think, produced some artifacts and banding (specially in the background in the blurred green plant area). Controlling the curves of tones for each tone of those was really a rough job to do with delicate observation to see where there are issues of banding and such. That was only for two tones, so imagine the work for a quad!
My sole work this week with the camera was to give it a try and do some commercial-like shooting for this piece of jewellery which I got for my niece for her coming birthday on the 23rd. The piece is silver-made and this put on a bit of dilemma on the choice of the white balance to work with.
Most of the people whom I asked did actually pick the bluish tint. However, one or two persons picked the adjusted or corrected form (i.e. Flash WB) because this shows and emphasizes the blue stone in the middle. They have their point of course. I decided to work with the blue tint but I've found myself working more with the adjusted level because it gives more luster to the metal work and it gives more shine (beside contrasting the blue stone of course).
In the beginning I was planning to take a picture of the whole earring, but then I realized that this approach would take up the fine details of the craft done to the silver itself. Thus, I moved on to using a telephoto lens, namely Sigma 70-300mm, with the help of extension tubes to allow me to stay close to the piece (closest focusing distance for this lens is around 1.5m, or around 5 ft). I admit, my work was pretty quick and filled with errors, like not cleaning the piece (you can see the blue stone being dusty little bit). The background is a black cloth (which I got back to do some scanography experiments) and from which I hung the earrings. This background is not suitable but I had nothing better to use; the texture was pretty annoying and could not be removed. A black metallic surface would probably be better.
The work of the speedlites (580EXII and 430EXII) was experimental, and at some point I used the on-camera flash as well to give a frontal light to shine on the blue stone specifically. Not bad I believe, but I didn't achieve still what I was aiming for: a gem sparkle. I think I had here a conflict of interests; a wide aperture to blur the background, while I do need a narrow aperture to achieve a sparkle effect. I gave up that idea anyway. Light from 580EXII was concentrated using a mesh on snoot, while 430EXII was reflected off a shiny surface (car windshield shade). When all was set, I decided to add some light from the front (and the position of the 580EXII with the snoot was changed repeatedly), this was done by the on-camera flash with a slight power. All work was done wirelessly; obviously I was lazy to use some wires here and there! After all, there was no need for it really - it would be essential if I wanted to go beyond the sync speed of 1/250 seconds. Only then, a cord to connect the speedlite and the camera is essential.
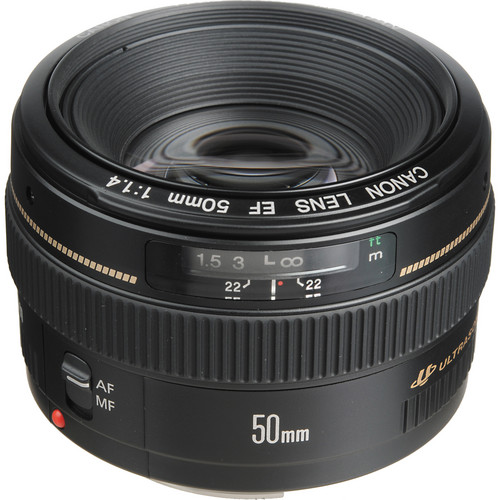
The interesting experiment was still to come. I decided to go extremely macro and placed 50mm lens with 20mm+36mm tubes. The significance here is that I managed to take 3 images in vertical order and then merge them like a panorama (in PTGui). I'm not sure if I can say it is a macro panorama for this though! Since it was just an experiment, I didn't take the whole jewellery piece into consideration but merely some portion mimicking an abstract sense and feel.
For some time, a software, namely PhotoAcute, is used to process several images to produce on high resolution image (beside other uses). Even though it is still a useful software, but in this process of taking several images with some distance and stitching them, the resolution of the overall image was boosted from 18MP (if we assumed the same framing) to around 26MP, and if I managed to take more shots, I believe it would be boosted more. The only problem with this method is the movement of the camera itself; If things are to be done in a proper manner, something should be automated here or systematized: either the camera movement, or the object itself. In my shot for Silver x Blue, the camera was moved slightly up and down with the use of the central column of the tripod; sluggish movement but did the job. If I was to take more precise images at such macro level, I would probably try to do it in a different way. The final image is composed of 3 shots, with 30 seconds each, and because no speedlites were used here, there was actually some slight green tint caused by the surrounding walls as it seems. Some editing reduced this tint and, again, despite adding a slight blue cast but with contrast and other edits and adjustments, the silver turned almost neutral like before. Glamor effect helped on showing some luster as well. All what is left, is to hope this shot is to be considered for addition into some stock websites!
I've been trying, for some time, to study the relation between the rule of thirds and the golden spiral concept in terms of the placement of the "power points" in each system. This is to help me with framing with the camera, which doesn't have a spiral system but only a regular grid and a rule of thirds grid (in its LiveView mode). The main point here is to find a basis for the difference between one power point in one system and the other.
I have to say that I've failed here so far, and probably I have to polish my geometrical concepts a bit; didn't use those much since college days! Anyway, there is one key difference between the two and for which I had to rely on some approximations, and that is: the golden spiral rule depends on a rectangle drawn with the golden ratio (given the symbol φ), while the rule of thirds as it is in the camera, based on the ratio of 3:2. I'm not sure yet what kind of results I'm trying to find out but I'm still working on it and hopefully I can share some thoughts about it!
I have here some appointments that I guess I have to skip. Clinics should really stop giving appointments in Ramadhan - the schedule is just unbelievable. I think I will re-schedule this appointment (supposedly to be on 13th) and I hope it won't clash with my travel to Ireland; otherwise, I have to cancel, again!
 My reading process is going slowly as well, and despite this book being small, it surely is rich in information! I'm glad I bought this book really. However, it needs some careful reading still to gain a firm understanding of how optics work. Too bad that I can't do the experiments mentioned practically myself, thus I have to depend solely on my imagination for this matter. There is a book about archaeology still waiting for me and, if I was lucky, might take it with me to Ireland to read at any point.
Everything is going slowly here. Needless to say how my life goes as well anyway. Dying to head to Ireland by every single passing day, where I can have some fresh air, and some clear mind and some more photos and nicer weather. The air is getting heavier to breathe here. I get a wave of panic from time to time but no obvious reason but simply like that. It's annoying. It's a killer.
For this reason, I didn't have much to do with my camera, but I did some experiments eventually and some of them are still on going.
Duo
In the process of doing more studies with the tone splitting technique, I've re-visited a mode provided in Photoshop, along the RGB and CMYK; the Duotone mode.
This mode in fact provides several modes in it: Mono-, Duo-, Tri-, and Quadtone. Each mode provides a specific number of tones to be implied to the image and in that sense, it is a step further from tone splitting. Further more, for each tone, the control of the "amount" of the tone is a bit decisive.
 |
| The Duotone mode window in Photoshop. Here, Quadtone is picked from the menu, allowing for 4 colors to be mixed. |
There are some awkward features for this mode of course, like the fact that to convert the image into it, you have to pass by the Grayscale mode first. Thus, converting directly might hinder the user cuffed with the tone distribution before doing Duotone. Probably it would be better to use the Black and White adjustment layer first to control the tones and THEN convert to Grayscale mode - this is if it was necessary of course. It seems, however, that controlling the tones in this mode is actually a control of the levels of "ink" for printing this image itself. This is what I perceived when I did a little research online about this mode. This makes it harder to control, unlike the easy way to do it in the RAW editor or by laying out layers in a Photoshop process - because in this process or in the RAW Editor, the thing under control mainly is the distribution of the tone to highlights and shadows, and its intensity.
 |
| Doppelganger Duotone: Shamrock Green, Black. |
Luster
My sole work this week with the camera was to give it a try and do some commercial-like shooting for this piece of jewellery which I got for my niece for her coming birthday on the 23rd. The piece is silver-made and this put on a bit of dilemma on the choice of the white balance to work with.
 |
| Right: Flash WB. Left: Fluorescent WB. |
Most of the people whom I asked did actually pick the bluish tint. However, one or two persons picked the adjusted or corrected form (i.e. Flash WB) because this shows and emphasizes the blue stone in the middle. They have their point of course. I decided to work with the blue tint but I've found myself working more with the adjusted level because it gives more luster to the metal work and it gives more shine (beside contrasting the blue stone of course).
 |
| Close Look Sigma 70-300mm @180mm, f/6.3, 250-1sec, ISO200. |
The work of the speedlites (580EXII and 430EXII) was experimental, and at some point I used the on-camera flash as well to give a frontal light to shine on the blue stone specifically. Not bad I believe, but I didn't achieve still what I was aiming for: a gem sparkle. I think I had here a conflict of interests; a wide aperture to blur the background, while I do need a narrow aperture to achieve a sparkle effect. I gave up that idea anyway. Light from 580EXII was concentrated using a mesh on snoot, while 430EXII was reflected off a shiny surface (car windshield shade). When all was set, I decided to add some light from the front (and the position of the 580EXII with the snoot was changed repeatedly), this was done by the on-camera flash with a slight power. All work was done wirelessly; obviously I was lazy to use some wires here and there! After all, there was no need for it really - it would be essential if I wanted to go beyond the sync speed of 1/250 seconds. Only then, a cord to connect the speedlite and the camera is essential.
 |
| Silver x Blue |
The interesting experiment was still to come. I decided to go extremely macro and placed 50mm lens with 20mm+36mm tubes. The significance here is that I managed to take 3 images in vertical order and then merge them like a panorama (in PTGui). I'm not sure if I can say it is a macro panorama for this though! Since it was just an experiment, I didn't take the whole jewellery piece into consideration but merely some portion mimicking an abstract sense and feel.
For some time, a software, namely PhotoAcute, is used to process several images to produce on high resolution image (beside other uses). Even though it is still a useful software, but in this process of taking several images with some distance and stitching them, the resolution of the overall image was boosted from 18MP (if we assumed the same framing) to around 26MP, and if I managed to take more shots, I believe it would be boosted more. The only problem with this method is the movement of the camera itself; If things are to be done in a proper manner, something should be automated here or systematized: either the camera movement, or the object itself. In my shot for Silver x Blue, the camera was moved slightly up and down with the use of the central column of the tripod; sluggish movement but did the job. If I was to take more precise images at such macro level, I would probably try to do it in a different way. The final image is composed of 3 shots, with 30 seconds each, and because no speedlites were used here, there was actually some slight green tint caused by the surrounding walls as it seems. Some editing reduced this tint and, again, despite adding a slight blue cast but with contrast and other edits and adjustments, the silver turned almost neutral like before. Glamor effect helped on showing some luster as well. All what is left, is to hope this shot is to be considered for addition into some stock websites!
Twirl
I've been trying, for some time, to study the relation between the rule of thirds and the golden spiral concept in terms of the placement of the "power points" in each system. This is to help me with framing with the camera, which doesn't have a spiral system but only a regular grid and a rule of thirds grid (in its LiveView mode). The main point here is to find a basis for the difference between one power point in one system and the other.
I have to say that I've failed here so far, and probably I have to polish my geometrical concepts a bit; didn't use those much since college days! Anyway, there is one key difference between the two and for which I had to rely on some approximations, and that is: the golden spiral rule depends on a rectangle drawn with the golden ratio (given the symbol φ), while the rule of thirds as it is in the camera, based on the ratio of 3:2. I'm not sure yet what kind of results I'm trying to find out but I'm still working on it and hopefully I can share some thoughts about it!
Finale
I have here some appointments that I guess I have to skip. Clinics should really stop giving appointments in Ramadhan - the schedule is just unbelievable. I think I will re-schedule this appointment (supposedly to be on 13th) and I hope it won't clash with my travel to Ireland; otherwise, I have to cancel, again!
Everything is going slowly here. Needless to say how my life goes as well anyway. Dying to head to Ireland by every single passing day, where I can have some fresh air, and some clear mind and some more photos and nicer weather. The air is getting heavier to breathe here. I get a wave of panic from time to time but no obvious reason but simply like that. It's annoying. It's a killer.