Showing posts with label HDR. Show all posts

Thursday, March 23, 2023

East We Go…

So, the weather is officially warm now. Nice still, but warm with some cold breeze. I don't think the window is open now for more strolling outside in early morning hours. In fact, I prefer to sleep longer now when I have nothing to do in the morning (i.e. tending to Mom before heading to the dialysis). I had some plans to take a panorama in some location but I'd need to do it in early morning hours (like, really early hours), but now it is difficult to do that somehow, besides, I'm still afraid of the surroundings (i.e. the people around that place).
Away from the weather fuss, this post is supposedly to talk about my second stroll for 2023 which took place in January, specifically January 14ᵗʰ, 2023, as I was trying to capture new "perspective" from my surroundings, with a Sigma 12-24mm lens.

Eastward We Go

At the moment of that stroll, it was my second time to use the Sigma 12-24mm for such "hunting" outside. This time I've decided to head eastward, as the previous stroll was westward (then southward) from home. The camera, of course, is my regular Canon EOS 7D and not the modified one, so no infrared or UV hunting here. However, as usual, I need to have some twist in the whole process, and that comes in with HDR rendering.

Green Lights

It was one foggy morning, just about a perfect day to shoot! However, I did have some problem when rendering such foggy mood in the image and actually I had to add it artificially on Green Lights. Even though it was really foggy, but it was coming and going and was concentrated on one side of the main road where Green Lights was shot and not the other side. The HDR technique, though, helped here to show some of the details in the sky and the clouds thereof. I would say this image could have been processed from the single RAW though if not for such details in the sky which stretched the dynamic range a bit.

جَنوب 2
(south 2)

Just opposite to Green Lights, the fog was concentrated a bit and the street light poles were still on (one of the rare times I'd call myself lucky!). I had a go with this scene and shot on several levels and zooming levels of the lens (and also, the flare filter was on the lens already since the last stroll). It was a good chance to test the flare of this filter. However, the flare wouldn't be so noticeable on small scale and one has to zoom in to check it out. But never mind. I really like the dark mood of the image here, which was greatly improved in tone-mapping the HDR; Honestly, in reality, it was brighter than this. I had to take several shots here on different levels and zooming just to make sure that the poles line up in some "proper" way (if I can call it so). Again, HDR saved the day with those details in the clouds. The title, South 2, is a recall for another shot taken some months before on that same road (but further away from this location) and looking southward as well. Actually the series was still ongoing with a third one, shot in this stroll as well, but I'll come to it later.

Spark

Crossing the road and going eastward still, I've gone into a neighborhood which I've visited many times before (I'm wondering now if there is anyone there who would have recognized my face already). I have to say though that there are some nice scenes and home facades in such neighborhoods, but as always, I don't like to step on anyone's toes in this area, even if it was an early morning and supposedly everyone is asleep!

The Portal

Nevertheless, I've decided to try my luck and shoot something quickly. One of the doors (and it seems to be for a section separate from the main house) caught my eyes with the plants decorating its surroundings. Since I had to work fast (and I was shooting in brackets still), there was some delay and shaky images (the light wasn't strong). Anyway, I've processed The Portal from one of the exposures (the darkest). Now, I did shoot Spark specifically as test for the filter on the lens and you can see the flare clearly here (enhance even more with HDR tone-mapping), but for The Portal, the shot was mainly aimed at the door specifically and I had to do it quickly. Thus, when I shot this, I didn't think of removing the cap or the hood that holds the filter on the lens and you can see the effect on the fluorescent lamp just above the door. This effect in fact is the one that inspired me with the title as it did feel like some kind of distortion in the time-space. Anyway, as a consequence as well for shooting in a hurry, the perspective needed to be "severely" fixed and thus a big portion of the image had to be cropped. When fixing the perspective, I've aimed mainly to make a perfect rectangle out of the door itself. The rest of the processes involved enhancing the contrast, color, and exposing more details out of the door itself.

اِنْبِلاج
(dawning)

Even though my camera was fixed on the bracketing mode, but I wouldn't necessarily process the image in HDR, as was the case with The Portal. However, with The Portal, the case was about a shaky image that somewhat forced me to use the most stable exposure in the bracketed series. Anyway, there were moments when I've picked one RAW file to process from the bracket specifically for some effect that I pictured in my mind as I was reviewing the images later on, and Dawning was one of such images. I can say that this one shot is probably one of my favorite in this stroll, if not from my collection in general. Well, I do have many favorites of course, and this is one of them, this is what I meant!
Now even the shot was dark in general and silhouette-like, but there is actually a bit of details in these shadows (probably won't be that clear in such a small size). I just love that flame-like light in the sky! The process here involved many touches here and there, like showing more details out of the sky (and using sharpening for that purpose even) and adding more blue to the image and somewhat keep a balance between the dark areas and the light areas (in a way to keep the image divided vertically somehow). How ironic that I didn't even try to merge this image in HDR still, not even for experimentation!

اِنْعِكاس
(reflection)

Then, there were moments when I had to sort things out using "fake" HDR; Meaning, HDR images created from a single RAW file instead of bracketed shots, as in Reflection. I could have done that as well in previous images (like The Portal) but I think I was hoping for so much out of this image because I don't usually take (or get the chance to take) shots of reflections. Anyway, the brackets made for this shot were shaky and I've found myself forced to create 3 TIFF images off the same RAW file, with changing the exposure value and then merging them together in HDR. The results were acceptable I guess. Actually, in this way, I got the chance to process the WB and some other color elements (and tone-splitting parameters) for the images individually and then merge them together as HDR which somehow can be considered one dimension of freedom added to the process, I suppose.

في الرَّوْض
(in the gardens)

Another failed HDR attempt here was In The Gardens (named in Arabic after a folk song). I shot this one in brackets but the images were shaky and only the dark exposure was taken quickly enough to be stable here. Thus, I had to process this one alone (and I didn't think of doing fake HDR here because I just loved the dark atmosphere after all). Many had to be done here though, like cropping, rotating, enhancing the touch of light. The main reason to rotate the image actually was to make the light source on the top, as it was on the left side originally. I also had to apply some editing "tricks" a bit to add faint rays that didn't exist originally in the image. Anyway, I've tried to be reasonable here and not to exaggerate these beams. The image overall was tinted with a golden shade (my favorite, which I use also for the headers on this blog, #FFD700).

Displaced

Keeping moving eastward, I've reached the parallel main road (parallel to the one in my block that is). At this point, I could have kept going east as well and delve deeper; the atmosphere was foggy and sparked some interest in the surroundings, even though I wouldn't have been able to shoot most of it. In that neighborhood there were intriguing villas indeed with some nice doors (I have a soft spot for doors!). However, what was the first to catch my eyes here was just under my feet; a grating. Sewage grating. I do have a passion for straight lines specifically when combined with geometry, but in Displaced, things had one more dimension here with that small green cover that popped on the edge. Actually, my first trials with this object was focused mainly on that little plant on the edge but then I realized I'd better go for a full abstract and take the whole thing into the frame instead of the plant only. In the process, later on, which was done from a single RAW as well, things had to be rectified and I've spent some considerable time making sure that lines are parallel (vertically and horizontally); and I hope my eyes didn't deceive me in this aspect. Now, it wouldn't be an image that I would upload to the stock or participate with in some contest, but yet, I do feel satisfied when I look at it because of the lines here.

جَنوبْ 3
(south 3)

And as I've mentioned before, I've made a series named South and the 3ʳᵈ one in the series was shot right after shooting Displaced. Actually, I've made several shots from this scene and I picked just one to be processed into HDR and then tone-mapped. However, even tone-mapping, there was a considerable amount of work to be done to enhance some areas, colors, contrast and other issues (and I believe I did crop a bit out of it as well). Worth noting though that I don't usually process HDR images in that grungy manner, but i do like to go out of my norms from time to time! It can be seen here in South 3 that the image is full of halos and it would have been better if it was processed otherwise or even from a single RAW (if the details in the sky would show considerably), but this is a shot for fun and to grease my gears a bit before I forget how to even hold a camera!

Yellow Mess

Cloud Park
Keeping going southward, heading towards the main road the divides the area (locally known as Schools Road full the number of schools overlooking this road), I've encountered few "interesting" objects scattered around me. At this time, the fog started to disperse unfortunately, as the sun had gone higher on the horizon. Anyway, I had a moment to stop by and shoot some flowers (hoping that no one would come to block my way or object to that). It seems to me that nature (specifically flowers) do show some fine drama when shot in HDR. In Yellow Mess, I had to count my blessings here since most of the shots were shaky but I tried to merge it into HDR anyway (done twice or thrice). Cropping was due to remove some objects on the edge. Not far off from that, I've arrived at a school, and for some reason unknown to me until now, I've decided to shoot the parking sign, in HDR. I think probably I've made it as a test, since I shot it once in landscape and then in portrait orientation. Of course, the portrait orientation was more suitable. It wasn't until I've started to process this shot that I've noticed that the arrow in the sign was pointing (or like pointing) to the clouds in the horizon just above the school, which made me give it the title Cloud Park; Otherwise, the shot was completely random. In the process, I've made sure to let the "P" be brighter than the rest of the sign just to grab the attention.

Morning Delivery

After moving forward from the school, I've found myself on the main road (or the Schools Road) and seems my senses got back to me then (well, after the fact), since the image I've shot here was done in HDR but with "reasonable" tone-mapping. There was nothing special in Morning Delivery, as I've made several shots while walking back home, but some cars passed by. Honestly, I was hoping to capture the trailing lines for the cars but with the sun shining already, the shutter speed would have been short and the images would be stable enough. Anyway, from the shots I've got, I've picked the ones with the cars on, and despite the movement already between the shots in the bracket, Photomatix did the job in eliminating these ghosts and fixed one car position. Maybe one thing I do like about Morning Delivery and that is the leading lines to the far horizon. In the process, I've tried to keep on the warmth of the sun (even though it wasn't that warm, since it was January) and I tried to keep some clear details in the trees branches.

Finale

So, this was all (I think!) for that stroll back in January. Since the weather is going warmer by the day, I'm not sure I would be able to do another stroll any time soon, especially with the circumstances at home and the continuous fatigue. Honestly, I was almost going to abandon this post altogether for this week.
After doing my last Arabic post for my Arabic blog, about 2 or 3 weeks ago, my mind went wandering again (and still) looking for a new idea for that blog. I don't think I want another post of telling a story about some photo I've taken, just like the last post. Thus, it seems it would be some months ahead before finding a good topic for that.
Meanwhile, I've been worried about my mental health in other terms other than what I was anticipating already. Forgetting things and missing what day, accompanied with the chaos in my sleeping pattern, all that made me think if this is an age thing (I know, many say I'm still young and that movie talk) or simply because of the stress in this house which I barely leave. It feels like I'd be hit with dementia by 50.
I'm struggling already to work with the camera. In fact, I didn't really touch it for about a month now. I did some shots with my phone but I wouldn't call that really a "work with the camera" - even though some of these shots were in RAW (phone RAW that is). Thus, it comes to me that at some point, I might stop blogging for a while until I find some material or something to post about here, since I've abandoned my conlang projects for a long time now (ironically, they were the reason I've started this blog in the first place!). Till then…

اِنْبِلاجْ 2
(dawning 2)
Done while typing this blog post still.


Thursday, August 4, 2022

Sporadichiskiy…

I was reluctant to make this blog post. Honestly, I didn't feel like it. But here I am, trying hard to force myself. For nothing but to think of myself as being occupied.
You might be wondering about the title, well, I was going to put it as Sporadic but then I thought it would be so boring, so then I checked the translation in Russian and it was Спорадичиский, which is exactly what the title says but I didn't wish to put it in Cyrillic; Maybe in some other time, just for fun really.
The reason for this title for this post is that I'm going to talk a bit about various shots taken on different dates and not necessarily in chronological order but it's like a collection of quick-minded ideas that were done in a hurry without much preparations. 

Before I head on with the body of this post, I'd like to announce that I've uploaded some loads of images already (from 2021 and 2022 so far) and they are available on Canstockphoto, Dreamstime, and 123RF; However, one image might be in one place and not in the other because of the different criteria that each stock website uses to judge the images. Just in case one wishes to visit the profiles, they can click on the links above.

Pinhole

In my past post I've talked about creating some abstract art by intentional camera movement while having an infrared filter on the lens and shooting indoors. This activity somehow triggered me to think more of long exposures which I didn't do for a while. Naturally, using the pinhole was one of my first ideas. In the beginning, I wanted to keep it simple.

夜間孤獨
(nocturnal solitude)
To keep things simple, I headed out in the yard and decided to shoot the little palm tree we had (I've posted some shots from the same palm tree before on this blog) and my plan was to shoot a long exposure and convert the image into B&W. I've done this at night specifically to have a significant long exposure with the pinhole without the need to use any ND filters on a regular lens. However, I think I'll be defining the idea of bad luck, as my hopes for some motion in the image were just shuttered by the fact that (suddenly) not much breeze did accumulate or shake significant part of the palm leaves during the 13-minute exposure! However, I have to give due credits, as I didn't expect some colorful flare to appear (caused by the lights on the wall above the palm tree). For this reason, I've kept it in color and made another version in B&W (and posted both on YouPic).


Nocturnal Solitude (BW)

The B&W version is still interesting though, despite the fact that the flare doesn't appear colorful. The hardest part though was to gauge and control the tones in B&W (and because of the tiny details in the leaves, I disliked the idea of using layer masks). The final result, Nocturnal Solitude (BW), looked like some infrared shot done in daytime! Other work was needed though to keep the bottom of the image from being too dark and add a bit of details; Of course all of that was done in Photoshop (I don't convert to B&W in ACR often as I need more control). One particular thing that I've noticed or maybe I think I've noticed and my eyes are just playing tricks on me: The image, despite being taken with a pinhole, looks sharper than other pinhole images taken before (which were mostly in daytime). It's still blurry a bit (not because of the motion though) but I do notice that it is sharper in general, just a tiny bit. I did for sure apply some sharpening but this is now what I meant here of course. I meant the original shot. Not sure what to make out of it but maybe because the surrounding lighting was closer to the blue color? Or is it because a really long exposure? But the most strange thing of all… why did the breeze stop when I needed it to be there already?!!!

وَحيدْ
(lonely)

Another pinhole experiment (with a hope of some motion) was done 2 or 3 days later but this time it was indoors (after midnight) and including me personally. The idea of Lonely is not just having a selfie (away with the dramatic title already) but I was hoping to capture those tiny reflexes and breathing movement in a form of a "ghostly appearance" somewhat. The exposure took around 7 minutes and I remember doing it twice, and picking the best of the two. Probably the difference was in the pose itself. Anyway, the intention, again, was to convert it to B&W already and this also helped in covering up for the colorful and checkered blanket! Added some tone and vignette for some "vintage" feel to it. It was a nice shoot though; Somewhat a chance to relax and meditate while asleep! However, I'm not done with long exposures yet…

الأَغْبَرْ
(the dusty one)

I was still interesting in doing long exposure combining myself (because I have no model of course) to record the body movement. I've done one experiment in the yard using my 10-stop ND filter (which I used only once in Malta back in 2015!). The experiment in the yard somewhat failed and didn't like the overall looks. So, I moved indoors. This time I've set a challenge to myself, to stare into the camera for more than 8 minutes. I know this is not possible already (specially for a coffee-addict like me) but this is the goal of the whole thing after all.
In the processing phase, I tried to add some drama to the ghostly-shaped face somehow and made use of some dodge and burn. Well, wouldn't say I like it much but nevertheless I consider it as an achievement to stare into the camera for full 8 minutes! However, on the other hand, the linear version of this image came out really interesting!

Plastered Man

Now, I don't know how it occurred in that way but the whole thing seems to be formed by layers of skin on top of each other with holes for the eyes sockets! I really like the "linear" version more than the original. It looks like a surreal painting in some way (not sure what genre it would roll under though). Scary a bit though, isn't it?

So, at this point, I think the first part of the sporadic shooting ends (even though it's not all about pinhole). But still another part remains which I think I should include here as well. 

Frowning

I think I've mentioned somewhere in my previous post that I've done some experiments with high-speed shooting involving water and shells (walnut shells to be specific). The fact, actually, is that I've been collecting a lot of walnut shells. I've been buying those lately as Mom likes them and me too (and some times I put some of it in my coffee!). For some reason that I can't really explain or understand myself, I've got fascinated by the shells and started collecting them in hope that I would do some photography projects later on with them (which I did to some extent). My collection of them is getting quite large though and I need to find proper storage!
Anyway, I will keep the talk about that high-speed experiment for another post, but now I'm going to talk about a simple (and might be strange) quick selfie experiment which I've done with these shells. I've called the series: The Frowning.

عَبوسْ
(frowning)

The aim here wasn't really just to do something with the shells (which I'm fascinated with by the way!) but also to work and go crazy a bit with HDR tone-mapping; It has been a really long time since I worked with HDR images. I'm talking here about a span of years. But as it will be shown, normal processing wasn't bad as well (and somewhat preferable too). In fact, from the series of shots I've done with these shells, I ended up with only one or two shots that were the base of all the versions that I'm about to show now. The only difference here is the processing.

عَبوسْ 2
(frowning 2)

The shooting was done using my lovely 50mm, and at f/1.8. Even though I could've gone lower to f/1.4 but I wanted to add a slight depth to the front. I've headed out under the sun to shoot it just to ensure a quick shutter speed, as I didn't want to complicate things with such a "crazy" quick shoot and use speedlites. From the series that had been shot, as mentioned above, only 1 or 2 that were somewhat proper (with some cropping) as they had a good depth as I want it. Shooting selfies with such a shallow depth of field on your own is surely a mission for superman! 

عَبوسْ 3
(frowning 3)

All through the Frowning versions, I think each one of them has a specific visual impact and personally I couldn't really say which one is better than the other. Frowning for example, which was tone-mapped from HDR, has this look as if some nuclear explosion just happened in front of me! Moreover, I like it for the grungy look and the details in the hair (upper right) which don't appear quite much in other versions. Nevertheless, Frowning 2, which was processed from RAW (with additions from Photoshop itself of course), does have this dramatic (dark) look that probably adds more emotions to the overall look. Meanwhile, Frowning 3 (which is based off Frowning 2) has even a darker mood I guess. Worth noting that when converted to B&W, I've added a slight "titanium" tone (Hex: #B6AFA9); Honestly, I think I like this tone pretty much and will be using a lot when converting to B&W (or monochrome that is).

The Frownies

Frowning (linear)
Afterward, and just for fun and comparison, I've worked on manually blending the three versions of this shot and put them all in one image; The Frownies. Probably I can say it serves as an optical illusion, just a bit! I think it needs a bit more brushing though. Moreover, probably you could tell by now that this "linear" technique is becoming a trend for me already and I've been trying it on many images, old and new, and Frowning was no exception.
The base for working out the "linear" version is the RAW version of the shot. I still call it "linear" technique because of the basic look but maybe I should change the name at some point because for images like Frowning it doesn't quite look like linear because of the heavy texture of the skin and other things here. The technique is based on merging various layers blended with Difference blending mode, so I might as well call it the "difference technique". I think I've talked about it in this blog before, as well as in my Arabic blog. All in all, I do like the "linear" version as well for its strange dramatic look; Actually, I can imagine it being printed on a t-shirt or something like that (my mind is working on some ideas now).

Finale

So, this is some of the sporadic stuff that I've been doing in the past 2 or 3 months, and actually I'm still going on with it. There are many other stuff actually but I wouldn't put them here since they are re-makes or so of old photos, specially with that "linear" technique I've talked about already.
I do have some plans at the back of my head and I'm not sure if I can even try those or not. Meanwhile, I've just remembered some old projects that I've simply forgotten about, and I might as well try to revive those or something. All I have here is to wish myself good luck.

Recently, I've gone back to my obsession with Solitaire (the classical card game) on my phone. I didn't play it for a long time but now I'm just back at it and I could wipe half of the phone charge just playing it. It feels soothing for some reason, but I'm not sure what exactly. Is it a sign of hidden desires to gamble (I don't)? Or is it the order and structure in the game (which I lack in real life)? Whatever the reason is, I just feel it leaks away my stress. I play it the Vegas style (only one round of the deck is allowed). On the same line, I've realized that I didn't play any PC games in such a long time (even before my official retirement in October 2021). Maybe if I can find time back for this activity my stress (and depression) would be lowered down? 

They say no Man is an island, but apparently I became an island myself with my social circle. I had bursts of urge to chat, to talk, to say something, to anyone, but there is no one to talk to. Not even on the so-called "social media", which made me think why do they call this stupid thing "social" in the first place; All there is to see is trolls, ads, and people who made it their job just to correct you. Even those in fact, there was none for me in the past few days to just say anything with. I've been sleeping a lot, skipping meals a lot, and I'm just not sure where I'm heading with this, nor what's the meaning of it. All that I know is that my body is alive, but my mind is…


Thursday, July 23, 2020

The King…

Well well well! Here I am after a little vacation away from blogging (and shooting!). Meanwhile, despite this vacation, which was supposed to help me calm down, I did have my own share of stressors away from the camera business; Work, house, personal life, you name it. Oh, mentioning work, I'm officially considered to be "working from home" though I'm not doing much really, but there is quite a mess in the management that leaves me wondering if everything is alright. Really; attendance record must be kept by my director (yes, though we are at home, don't ask me how or why) and other things.
On the other hand, I'm trying to get some "life" for myself. I'm processing old images in some new methods and techniques, I go reading in the morning in the yard to get some sun exposure (beside having some supplements as well with meals), I stroll through languages, and I water the plants almost daily as well; Well, though it's done under the harsh sun of 7:00 a.m. or so, still it has some refreshing feeling specially when you see those little buds grow bigger and bigger. On the side, I'm also having sleep as much as I can, almost whenever I want!
Meanwhile, I'm also wondering these days about the future of my Ayvarith conlang (which ironically this blog was supposed to be about it) after the Instagram account for it (@Ayvarith) had been hacked or simply stopped (just not sure what's going on there). Anyway I don't think I will be having another Instagram account just for Ayvarith, again. I'm done with this stupid platform. So, I'm wondering what's next on that plane.

The King

So, in this blog post (the first after some vacation here) I want to showcase some images that I've shot for a project that started by a coincidence, and ended (unfortunately) abruptly. I've talked about this little project in my previous post (or posts) I guess but didn't show anything from this series I guess. So, this post is for these images, which were done some months ago.

Quarantine Day 54
King of The Bathroom
The whole series started with an idea for a single shot back in the early days of quarantine (back in April). The idea struck me at the spur of the moment when I thought that maybe I should clean my bathroom after months of neglect (ahem). I had an eye for humor in this shot from the very beginning, so I was thinking of something artistic and funny away from the "contest culture" and the seriousness that I would usually work with, so I went on with shooting for HDR. The space in the bathroom was quite narrow so I had to take refuge in my Sigma DG 12-24mm lens (which proved to be one of my favorite lenses for shooting portraits!). I could have used my Rokinon 8mm fisheye lens here which has a wider field of view and could have saved me here as well BUT such field of view will be problematic, as it will include so much from the surrounding area and eventually I would have to crop so much, and the image would become smaller and probably insignificant.

Quarantine Day 67
Soon, however, ideas from that single shot started to stem out and my mind started to create a story in fact. Ironically, a story that I've imagined its ending but not its progress so starting from this shot for Quarantine Day 67, I've actually started to fill the story gaps somewhat.The crown, the green robe, the toilet seat and the pipe all occurred to me as "trade mark" for this series starting from this shot. Also from this shot for Day 67, I've stopped giving titles, but rather captions right away. The caption for Quarantine Day 67 is: I don't get it, I should've been a superhero according to this...!
Just for the record: I didn't buy any astrology books in a long time. This book you see here is a gift from a friend.
Again, the shooting for Day 67 was done in a similar manner: HDR, Sigma DG 12-24mm, but the location this time is different. It was my brother's old bathroom (not used much and has less clutter and no bathtub).

Quarantine Day 73
 And so the story continues actually and another part of it was made, with Quarantine Day 73. By the way, in case you are wondering by now about the number of days here, I'm actually counting the days indeed (approximately) starting from February 25th, 2020; around which the whole quarantine vacation started (and that was the National Day break). Now, Quarantine Day 73 was somewhat hard to do and I'm not quite satisfied with it as I think the ball with (my) face should have been clearer (and terrifying more). Anyway, the caption that went with this image was: I made a new friend. His name is Corna... Crona... something like that. He's nice.... I think?
Again, Day 73 shot was made in my bathroom and I did work quite some time to clone out stuff behind me and stuff on the ball itself and then add my face (which was shot separately in another shot and copied from there to the shot). I'm not including here the talk about the HDR rendering or tone-mapping as it is a basic process right now but worth noting that I do spend quite some time trying to find a tones that I like for each shot in this series; They are not tone-mapped under the same settings every time. Each one processed differently. In Day 73 shot specifically I've striven to tone-map the HDR slide in a way mimicking the ink sketches or comics as much as possible by brightening the tones and darkening the shadows while reducing the saturation of the skin tones a bit.

Quarantine Day 80
Then comes the only shot in the series where I used mt Rokinon 8mm fisheye lens. I was forced because of the angle I wanted to use as well as adding a dramatic look, and of course the narrow space. I should have used my brother's bathroom again here but for some reason I can't remember right now, I didn't. At this stage, I've already broke many taboos: Editing in Photoshop, HDR unreasonable tone-mapping, and more. So, I've set my thought on doing a collage between two shots showing myself being sick of myself. The caption that went with this shot was: The whole kingdom went into total lock-down. Sitting by myself reflecting trying to find solutions, but apparently myself is... sick of myself.
The blend of the two images was not easy as well and actually I almost wanted to abandon the whole idea altogether or shoot again (and in the back of my mind I did envision this shot differently actually). But with a lengthy work with layer masks and cloning, I think I've kind of pinned it down, even though I wished for two separate heads sharing a neck (go ahead and imagine that!). Worth noting that it is at this image that I've decided to stop my Instagram account. Actually I've posted the image and barely received any likes for about 24 hours, so I realized that I'm really wasting my time with the so-called Instagram's Algorithm and trying to expose my work to others. Thus, I've completely abandoned the idea of posting to that platform altogether.

Quarantine Day 92
Despite stopping Instagram posts, I've still had some more ideas to work with this project, as I had somewhat a story going on in my head. The phase now is at the king is escaping his enemies. For this, I've made Quarantine Day 92 that you see here with a caption that goes: Escaping the enemy with the kingdom in total lock-down drove me to some unprecedented measures. Thank goodness, I kept some water supply.
This photo included more work than the previous 2 shots here. Two shots combined, and a lot of work with the wrap and puppet warp tool in Photoshop to fit my body inside the fridge (and adding some shadows to make it as realistic as possible). But probably the real struggle was to cut the head and lower it down without much artifacts. In fact, on a close inspection some motion blue is prevalent because shooting HDRs in such position is not something... I want to try again. A shaky body was inevitable. Another struggle here was matching the lighting conditions (to approximate the looks, I've shot myself in front of a window so the light would hit my back like the light inside the fridge). The rest was a work of toning and adjusting contrast. 

At this point, the series ended abruptly. I had more ideas, but I didn't have the power to pursue them further. I wanted to continue the story with the king escaping through various locations around the house (had an eye for the washing machine), but all that I had to stop as I didn't have more power to do all of that, specially that I'm working all alone. The mood swings and the conditions at home all had their toll on me that I seriously needed some peace of mind. In fact, as I'm typing these words, I didn't touch my camera seriously all that time except for few shots just days before I start typing these words, doing some macro shots in the yard, just out of curiosity. 

Finale

Nostalgia
Now, this is the series that I've talked about in previous posts. On the side, there are a lot of old images that had been re-edited, some of them were neglected and completely forgotten (and deemed useless), but suddenly with me learning new techniques and ideas in editing, I've started to check for possible chances, going back in time as far as 2011, like this Nostalgia shot taken on my way to work back then. Anyway, I don't want to proceed further or I might go on and talk about many past images that have undergone a re-make!
Work-wise, I'm considered "at work" as I'm working from home, supposedly. But not much to be done really (like in normal situation anyway). But I had to go to work for mundane tasks that, as I deem, just plain stupid and unnecessary since we are not going back to our offices any time soon. The tasks involved, simply, opening doors for the janitor to clean (in the beginning I thought that there would be a professional disinfection and sterilization process). I was asked to go again to run a test on some device which for some reason I was not told about when I was there, which made me mad and I've refused to go all the way just to do a 30 minutes work.
Strangely, during such a lock-down and being at home most of the time, and the recent incident, all that made me feel sick of work even further even though I'm not going to it. I've realized as well that there are some people who can be quite annoying when they are not around more than when they are around in fact. Strange how life works. 
Meanwhile, my feelings of isolation are growing; That is, inner isolation and not being connected to anyone, or anything (well, almost). The idea of having my own home where I can live as I like, without annoying or being annoyed by any, had been occupying my mind for almost every passing single day. Yet, I'm not sure how this is to be done specially in a place like this. Would it be that my dream cannot be here and elsewhere, away. If so, I just don't know how this is done either, nor how my finances would sustain such a leap… in God, I trust.
 

Thursday, December 12, 2019

Djinn…

Officially winter! We already got some rains here and I'm trying to enjoy as much as I can out of it because I know in some months from now, it will be so damn dry and "cooking".
Anyway, I didn't post anything here for about 2 weeks (or 3? I didn't count!) for some... legitimate reasons I'd say: A new panorama!

Djinn

Just before I get into the story, I'd like to explain the word Djinn to those who don't know it or never heard of it. Djinn (Arabic: جِن) according to the Islamic literature and belief, are creatures created even before the creation of Adam and Eve and they inhabit and dwell Earth and even space. They are created of fire and unseen by humans (except to few, saying that from experience). So, in some sense they are equivalent to what the Westerners would call Demons. Also, they can be either good or bad, they have different faiths and beliefs, as well as living in tribes and social classes of their own, just like humans.
So, I hope this introduction fascinated you a bit to read on, as I think the technical stuff coming along this post might be a bit boring! Since I didn't touch my panorama gear for quite some time now (mainly because I didn't travel nor I'm part of any group that does activities here and there). Thus, I had to look for alternatives; Ideas, mainly to be done in my periphery: Car, home, work... etc. It took the idea some time to "cook" in my head and I was kind of slow and sluggish in preparing my gear (typical), and the target was one of the rooms in my house where typically guests use, in case we get to have any sleeping over.
Now, the keywords for the work or the general idea revolves around: Magic, black, dark aspect or darkness, and maybe a touch of some horror and fear? Since I don't have models (as usual) I had to think about it thoroughly because the task is not easy here as the idea started to take shape in my head. I will be shooting myself, in various locations within the room, while it is dark and definitely needs a somewhat longer exposure (not good for stable poses!). Anyway, things (unwillingly) went on two trials and for this reason I didn't post last week, because the plan was to have this material ready by then but, unfortunately, the first trial failed drastically and I had to re-do the whole work in a different manner and a different setting.

جِنْ (Djinn)
Click to enlarge


Voigtländer Color Skopar 20mm f/3.5
Lumicon H-Alpha (Night Sky) filter.
Try #1: The first try was done  with my modified Canon EOS 7D and Voigtländer 20mm lens, fitted with the Night Sky filter (i.e. H-alpha filter) which is, partially, an infrared filter actually, allowing a band of Reds. I've tested this filter against my B+W 092 Infrared (threshold: 650nm~690nm) filter and compared the results (in-camera, using Custom WB). Comparing the blue tones specifically, I've decided to go with the Night Sky filter instead, this is beside providing a tiny bit of shorter exposure time. Working with 20mm instead of my usual Canon EF 15mm fisheye lens meant, of course, shooting more slides or angles, and that means forgetting about doing any HDR work here because the load would be simply RIDICULOUS. Now, using 20mm introduced another problem here is the need to change the usual orientation while shooting. So, instead of starting at 0o for the tilt, I've actually used -15o instead. This is just to include the whole stool with my body in the separate shots that I would need to do later to merge with the panorama while stitching (having myself in two shots to be stitched together is next to impossible; It must be one shot including my whole body). Another problem is the misalignment of many slides, and the empty spaces that added to the chaos (the computer was unable to connect these slides nor I was able to do so manually because of the featureless spaces). After 2 weeks, or so, of working on stitching this panorama, I've realized that this thing is beyond repair and I must re-do the whole thing, and probably drop out some of my requirements for this panorama, like using an infrared filter, and just shoot in the usual manner.

Canon EF 15mm f/2.8 fisheye
Try #2: So, after the failed attempt, I've switched back to my 15mm lens and this time I thought of some trick to compensate for these empty spaces; I've simply stuck some electric tape on various sections of the wall just to aid the computer later on to stitch these images - and just to show you my luck, the idea did work really but the tape was some bad quality and almost fell down, so I had to work fast! Anyway, testing the White Balance before the shoot, I've realized that this is almost equivalent to infrared shooting with my modified Canon EOS 7D, because the room is dark and the major light source is to be from the candles (which issue infrared of course). I banged my head at that moment; How come I didn't think of this before instead of all the hassle with my first trial?! Of course there should be remnants of the visible spectrum but that was not a problem specially after calibrating the white balance in-camera. The scene already turned to be an infrared-like. With this, it was like shooting a normal panorama and I had the power to do bracketing for HDR merging and tone-mapping, which I did. *sigh* Just like the old days!

Process: Processing the images was typical: Load the files, run Photomatix to merge the brackets, and then start with the stitch. It was essential here to calibrate the white balace in-camera before the shoot, otherwise the HDR merging and adjusting the colors would have turned to be a "wedding party of wild elephants" - Sorry, the best I could find to express my thoughts here.
However, while merging the bracketed images to create HDR slides as usual, I've made a mistake which I didn't discover until I tried to stitch the panorama for the first time. The mistake was enabling the Remove Ghosting with Detection level set to High. I'm not sure what I was thinking but in a nutshell, the computer created a movement where there were none in fact, and that PRODUCED ghosting! So, the situation was like the old advice of turning off the image stabilization on your lens when your camera is actually stable on a tripod because that would trick the lens and creates a movement. This is exactly what happened, but digitally this time. So, I had to re-merge the bracketed image in Photomatix again and this time putting the detection level on Normal. I've activated this option in the first place just "in case," specially that we have candles here and there might be moving shadows that would make the stitching harder a bit.
That was concerning the merging process but there was still a side work that had to be done and that is preparing those slides of me (specially those involving my reflection in the mirror) but no need to go on with this - it was just a simple masking process. But all had to be done in HDR mode of course with HDR slides.

Effects of using High detection level for ghosting removal on Photomatix.
Click to enlarge


One slide with tape cuts.
Click to enlarge
Stitching: As for the stitching process, it was typical to try to stitch the HDR slides first right away, but as usual, it failed. I remember in old times, this didn't happen much. Anyway, what can I say here; The image was indeed dark and I've intended for it to be so. Thus, I followed the typical procedure of tone-mapping the HDR slides using Photomatix again, and trying to get the best details from each slide. Of course the process is automated; I just pick the darkest slide possible to work with and save the settings then apply that to all. From these tone-mapped images I would create a model, and base the stitching of the HDR slides on this model. Lot of details here, but anyway the thing was not out of troubles, as usual. The tape trick did work to some extent but still needed some help or let's say a "push" from my side so I had to add some manual control points to match between the slides. Actually this problem happens all the time with or without sharp details between the slides for various reasons. All these tapes on the wall would be cloned out of course when the panorama is stitched completely. The final stitched panorama still had some stitching errors which I couldn't fix before stitching so working on that in Photoshop was inevitable. The thing is that I have to do these fixes every single time I create a new projection out of the same panorama; So, it will be such a slow process after all.

Finale

Well, this was the "short" story of this panorama, and I'm still having some more ideas at the back of my head, cooking and waiting to be served when I get the power and time. Beside that though, I'm still working on other projections of this same panorama here. I didn't want to put all the eggs in one basket so I might post about these in 2 weeks time from now; If they are ready though.
Now, it is time to think about some other panorama to do, beside the other ideas at the back of my head of course. The past few weeks were kind of hard, mentally. I was literally waiting for weekends just to sleep as much as I can (and even skipping my socializing with the family around some games like I used to every weekend). I'm trying to re-discover myself here, in some ways, but seems the process is taking longer than I participated. There is a talk about change in the horizon, things going to be better, the hardships years are over... yet I don't really see any of that in the horizon from my side. The travel that I've participated for 4 or 5 years now is still an idea that I could not make a reality. Would it be soon? We'll see. I'm planning for a little vacation by the first week of the new year, but I'm still not sure if I would be able to because I need to make sure that I won't be needed in my workplace. Boy, I'm going to sleep for real, and who knows, I might head out to shoot at night like I used to in the past years…

Thursday, December 21, 2017

Escoba…

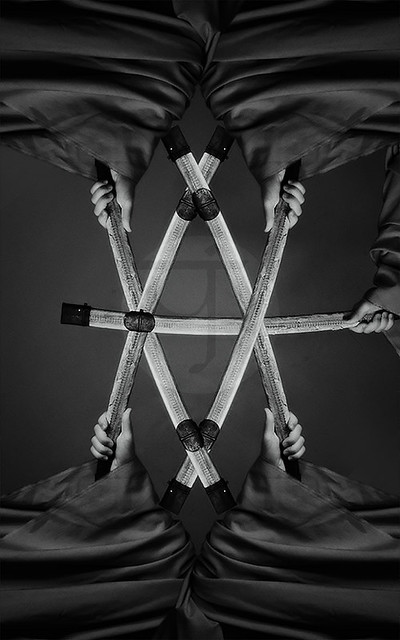
Things with my Scopa project are going slow but steady, even though in many occasions I find myself baffled on how to create the design of the assumed card under question, specially when it comes to numbers higher than 5. So far, as I'm typing these words, I've been well into cards of six. Depending on what I have at hand, sometimes the card design can be somewhat awkward compared to the original design on the Scopa card, Napoletane design, like the one I did for Five of Clubs!

Cinque di Bastoni
Cinque di Bastoni

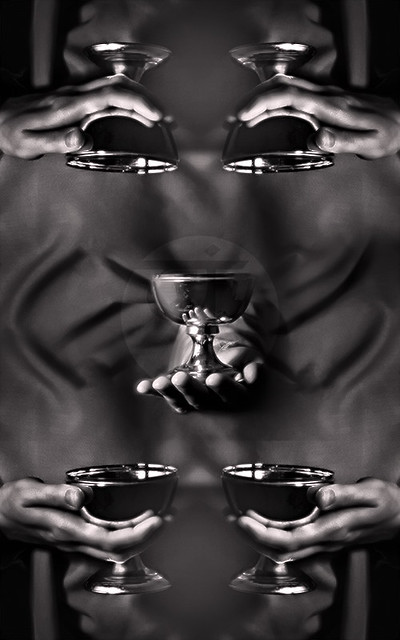
In some other instances, the design would need a completely new shot to add some more elements which I can use in the future, like the Five of Cups cards. Even though I could have used the Ace of Cups card which was previously shot (first one in the series in fact) but I thought that the Asso (or Ace) card should have its own special look, and the Cup used in that card should not appear in regular cards then after. There is an idea though to use that for more advanced cards like the Donna (or Fante), Cavallo and Re cards. Those would include a model, some human figure, which is the hardest part that might take quite a time to be done.

Cinque di Coppe
Cinque di Coppe
The central portion of the card was shot anew,
while the rest are elements from older shots.

As the series is going on, I'm planning to do a special design for the Settebello (i.e. seven of Coins) which is a special card in Scopa (worth a point on its own right). The design would be without any hands appearing like the rest, and with more saturated golden tint. I make some shots already for this design but did not work on it yet, as I have to finish the sixes first; Just to be organized rather than working in a sporadic manner. This in fact kind of puts on a crossing thoughts: Should I do the same for all cards of Seven for all suits, or should I do this alone for the Settebello card? I doubt I can ask the opinion of anyone else around…

Scopa Project
Album of completed cards.

Now, going back to the court cards or cards that need a model (from 8 to 10), I've been thinking thoroughly and I think I will try to use some members in the family, even though I'm usually the type that does not get encouraged in that venue, since I had my own bad experiment when dealing with photography with family members (not taken seriously as I do it). However, I'll try. Next problem to think of is the problem of the clothing and props; What should I use and how should it look? Medieval or Renaissance? Or maybe something completely different, and simple? I had some plans already for the poses (well, somewhat) but I think I will cut these plans and stick to shots down to the torso level instead of taking a shot for the whole body. However, in that case we might have a problem to be solved with the Cavallo; The Horseman. Many ideas coming in and out and I wouldn't know how to solve them probably until I get my hands on my camera and work! 


Junk

Probably I've talked about my intention to do apply some idea of a panorama in a narrow space just to experiment and see how it would look. I did, and twice in fact. As my first trial seemed to have failed, with me using a speedlite in a dark room, I guess it is final that any trials for a panorama with speedlites is destined to fail anyway for some reasons!

The storage room shot with speedlite (fit with a diffuser).


The speedlite was handheld (with its battery-pack in my pocket) and tried my best to place it behind the camera in every shot (in the darkness) with a globe (oval) diffuser on its head. Good news: with a speedlite, the exposure can be limited to 1/250s. Bad news? Everything; almost. Because of the change in the relative position of the speedlite with every shot, the shadows tend to change positions as well, and that would increase the factors for stitching errors. I have to say, I've never thought about it despite its simplicity! It just slipped through my mind. After all, even the spooky look was not achieved much. You can notice the reflections of the speedlite reflected mainly off the wooden door of the cupboard. That called for another trial, and this time working with HDR, as I usually do. 

Same Location done in HDR and tone-mapped.


Working with HDR bracketing now, I used the single light in the ceiling of this small room, and the technique proved to be efficient in achieving the dark and mysterious I was aiming for, beside other looks; That with some additions in Photoshop later on of course. From that point on, other projections were generated using this stitch only. Maybe the only awkward thing here is, the lengthy working time (one hour or a bit more), and in this place specifically I've avoided shooting the zenith and the nadir points. Stitching errors were there and it was hard to eliminate them, so since it was an experiment I didn't bother much about fixing them. However, this might be caused by the proximity of the place or maybe my panorama head needs some check-up. All in all, my Canon EF 15mm fisheye lens which I usually use for panorama shooting doesn't have a unique entrance pupil which eliminates the parallax error completely; My last check for it some years back proved that it can be reduced, but not eliminated.

Planet projection of the panorama.


My dreams of doing a panorama out of the ordinary using a speedlite or any type of portable light source must end up here I guess and look over to other methods, if any, to do panoramas. The field of infrared and UV are still waiting of course. In fact, I've been planning for one panorama of that kind even before thinking about this panorama in this small room, but the problem is, having someone to aid me with it, and since I have no one to help with this delicate business, I've been seriously thinking of getting a mannequin (just the hand at least) of some sort to what I have in my mind. We'll see…


Finale

 Well, seems things are going somehow slow but steady. Which is fine, but I won't be satisfied until I finish them one by one. Ideas of travel seem to be putting a lesser burden on my mind but they are there after all. And more over, some serious thought but living here as a whole - it's not about the quality of life after all but sometimes you just need the right people to be with, to surround yourself with, and achieve something with. That doesn't seem to be happening in this place on Earth where I am right now. My only soulful joy for the time being, as it seems, is to enjoy every bit of winter, before it all runs out and we are again into the hell of summer. I can't wait to get some long weekend by next week…
 

Stock photography by Taher AlShemaly at Alamy