Showing posts with label infrarot. Show all posts

Thursday, July 8, 2021

Kika XI…

Honestly, I was too tired to even start typing this blog post. Thus, probably this one would be somewhat a short post. I think there is nothing weird with being tired, recalling my usual back pain sometimes, and my hectic life or routines everyday. There had been days that I wouldn't eat any lunch or dinner even. Anyway, it is time now for Kika's photo challenge, and this time with Week 11.

Kika XI

At this level of the photo-challenge, I got very busy with my brother and his studies and I barely had the capability or that piece of mind (pun intended) to work with the camera or to think of something new, or even to just edit. Well, editing is what I did but after some long time of searching and reflecting. The theme for the 11th week challenge was "Weather." And of course, you can't speak about weather, in Kuwait, without speaking about the sun and summer. Because, well, this IS the weather of Kuwait! What else do you expect here?

Sunny


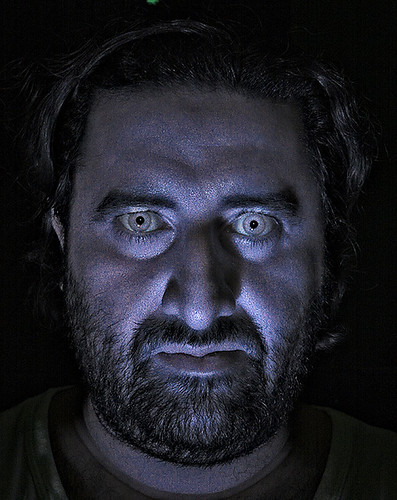
For this photo-challenge, as I've stated before, I didn't take any new shots, but I've referred back to some old shots, specifically some of those that I've shot in the shining morning sun of May of 2020, during a total lock down back then. I remember I was testing all my infrared filters back then and this particular shot was probably made with Neewer IR950 filter (and of course using my modified Canon EOS 7D). To be honest even, it seems, for some good reason, the shot was taken with B+W 043 black filter (UV-pass filter).
If I remember correctly, this image was processed differently back when it was taken in May, but for this particular photo-challenge, I've processed it again with a huge crop to the image to let the focus go to the eyes specifically. Not sure what type of processing I used here but I'm sure it is not the typical IR processing that I would usually follow which typically turns the image into almost a monochromatic one. Adding also some more emphasis on the luster of the eyes.
With this, the photo-challenge almost comes to an end with only one week left. Actually I could've done week 12 here as well but I'll leave it for another week. The last image posted for Week 12 is, again, an old one.

Bubbly

At this point, I come to the bubbles project which I've postponed previously. It's a photo shoot that spanned several days; Trying a new method or technique every now and then. The final result was more than 90 images (which have been processed and published).

Final setting

In the process, I've tried several ways to light the bubbles and also worked with 2 lenses (50mm and 100mm macro). I'd say though that the 100mm macro did fit most of the shots. Those shot with the 50mm needed a great deal of crop. Now, I don't want to go on with the story in length, but the goal initially was to shoot a bubble at the bursting moment. Though I succeeded only with 2 shots but nevertheless, the collection of these colorful bubbles was worth the lengthy work. 

Bubblosphere LXVIII
(one of the bursting bubbles shots)

It would have been better if the bursting shot was done in midair but unfortunately, as usual, I had to work alone. So, most of the work was done on a stable ground (used an oil burner as a base for the bubbles) and I've been moving around, blowing the bubbles and taking the shots.
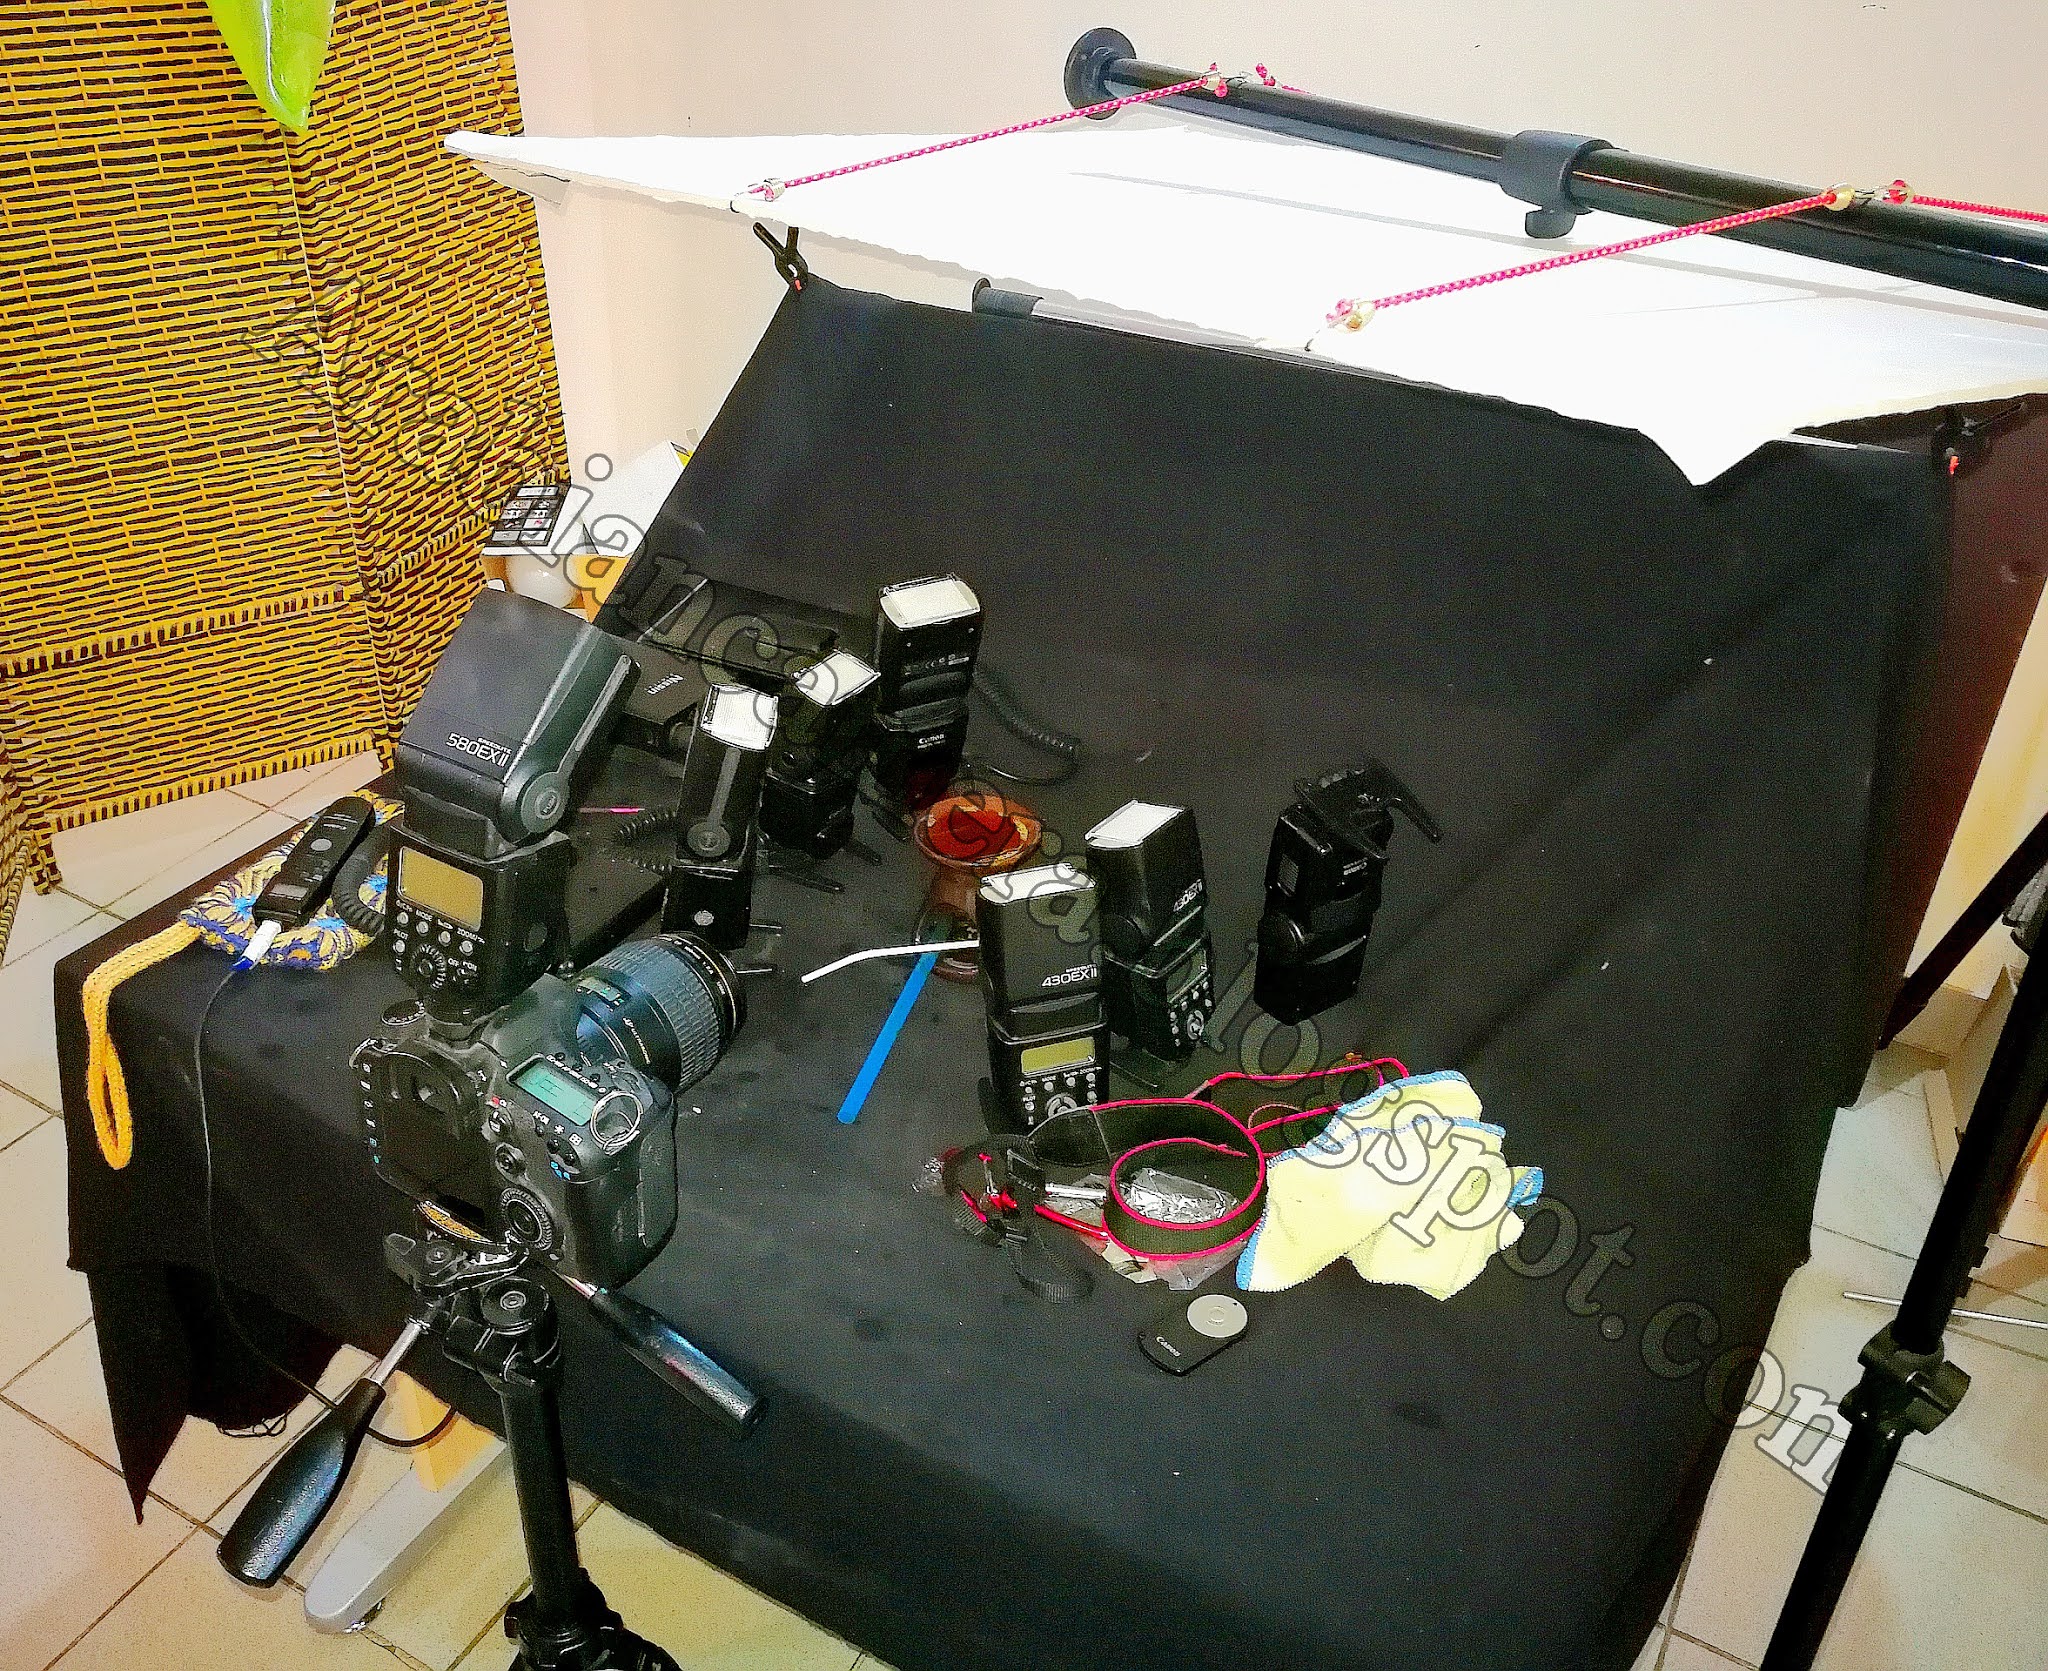
Speaking of bursting, that calls, of course, to the usage of high-speed. However, that was not done right away. I was actually having some trial-and-errors with the lights and I've been using several lighting methods, and even a handheld beauty-dish to light the bubbles. Anyway, turns out that the perfect lighting angle for the bubbles is to be (as seen in many videos on Youtube) from above. The  final setting can be seen in the image above, where I used a white board hung over the work area to bounce the light from all my speedlites below. I had to do it that way since I don't have a softbox.

Bubblosphere XX
(shot with handheld beauty-dish)

Worth noting that despite this number of speedlites (and the supplies of batteries!), I still needed to raise the ISO a bit to get a proper lighting level in the images. Normal I'd say, since bouncing the light or even diffusing it would cause such loss of power anyway. Though at such moment I would appreciate some light source with AC input instead of DC batteries! Ah well…

Worth noting also that I've been doing some stroboscopic experiments before all of this work as well but the results were not quite to my liking but I've merged several images into a single ones (and I've posted about them few posts ago in Kika's photo-challenge about Colors).
Anyway, to summarize it all, I've made a video containing all these images. If you are reading this and wish to get any of these, you can find the full collection on my Canstockphoto profile (you can also click the signature at the end of this post) and some of them had been accepted as well on 123RF


Finale

As I've stated in the introduction of this post, I've quite lazy (or tired) to type down this post. This makes me think of having a break after doing the last post about Kika's photo-challenge in two-week time from now. Not sure how long this break would be but I think I just need it not only for physical reasons, but also to build up some content as I'm actually too tired to hold my camera or even to think of anything new.
As time is ticking, it seems that I will be back to work around the end of July or the beginning of August. I don't want to start talking about the stress that I'm already living in since I heard the news. I'll be back to the rush hours, and even more, more stress at work because of the events that took place there during our days off (around one year and a half). I'm all alone there and surely ugly things will be hitting the fan. Meanwhile, I'm still waiting for sparkles of hope to shine as I'm looking forward to get my medical retirement if possible for retinitis pigmentosa, specially before moving to the new location which further away from my home, and it will surely cause me hectic time in driving to there. So many ideas, so many thoughts, and all cramps my brain rendering me paralyzed. All I can do is pray, and send my heart with hopes across Heavens…


Thursday, August 6, 2020

Rolled…

I was really reluctant to type this blog post and I was going to let it be an off-week again, but then I thought maybe I should talk a bit about some of the old images made anew with new processing techniques. But then, I've realized that there is just a tiny pocket of new images that had been taken in the past 2 or 3 months that I've never posted anything about.
I have to admit that I've been lazy with my camera; No motivation whatsoever to even touch it. Anyway, from time to time I would just pick the camera and take a "snap" shot here and there, just because. So, some of the images that will be posted in here don't have any big story behind them, mostly, but merely snap shots and a story of processing…

Roll

So, in case you read my previous post, you did probably see the "king series". During the make of this series which took a span of several days of course (depending on the influx of ideas into my head), there had been some snap shots here and there as I was trying to grease my mood and appetite for photography, again and again.

سُجودْ
(prostration)
Not surprisingly, many of such ideas occur at or after midnight when everything goes quiet in this house. My sleeping pattern during the COVID-19 crisis had been up and down; Once regular, and many times out of sync. Because of coffee abuse I literally drink one mug and just fall asleep right away. Anyway, in one of those nights, I thought of shooting سَجودْ, Arabic for prostration. This kind of shots is not new really, but I'll talk about the story behind this in a bit. It was shot with my Rokinon 8mm fisheye lens, and as you might have guessed already, there was a lot of crop that had been done beside "coloring" or burning parts in the background to hide them. The reason for picking this lens and not any other wide angle lens (e.g. Voigtländer 20mm f/3.5) is the type of distortion that I wanted to apply here, and also the size of the lens so I can place the camera between my legs as I prostrate (my Sigma DG 12-24mm is bulky for such a job!). Despite being somewhat stable, I was actually planning for some tiny movements and that's why I did lengthen the exposure a bit (by adding +2EV) but anyway, with a fisheye lens, movements can be barely visible and this is natural with most wide angle lenses (talking about small movements or shakes here). The rest of the job is, of course, just a story of processing and converting to B&W, and rotating the image upside down. Controlling the light and dark areas was a delicate matter here.

تَسْبيحْ
(glorification)
The shot above, سُجودْ, is in fact a result of pondering at an older shot, تِسْبيحْ (glorification), which was shot with my Huawei Mate 9 phone. It was a long exposure shot, and in my Huawei there are a number of options that would stylize such a long exposure, besides it's light to use and quick (just needed my mini-tripod to put it in front of me). The resolution of the shot, of course, is not comparable to that of a DSLR, specially that the image is done in JPEG and not RAW. Anyway, some user on YouPic noted that "he" can take that photo with DSLR and started to list his gear and whatever that is. Tried to make him understand that I do indeed have the gear required, but it's something done in a whim; Not everything should be professional and done with hi-tech gear. Well, seems he didn't get the idea anyway. But that actually sparked in me the idea of shooting another shot of a similar type. Still, though, I didn't use ND filters with سُجودْ (as he suggested).

Perspective

Then, there was this shot which was done… in the sink of my bathroom. The situation was shaky, I admit; I feared any water drops from the faucet onto the lens, but miraculously, it didn't. Again, Rokinon 8mm fisheye came to the rescue, and again, of course, the final image needed some crop to remove the unneeded edges here. I've placed the camera on a towel at the base of the sink and I've used that to pull it left and right and shoot. It was hard to put that one image that covers my face perfectly, so I kept on shooting and pulls the towel to one direction just a bit and shoot again, and so on. All shots were bracketed for HDR merging later on, so the one you see here, Perspective, is tone-mapped from a HDR slide in fact. In tone-mapping I tried to be moderate as much as possible and still give that grungy (dramatic) look to the image without going crazy with the sliders! I thought also that the blue tint would give it that "medical" or hospital-atmosphere that I usually see in horror movies (I don't watch movies anyway so I might be wrong here). Anyway, the blue tint serves the mood better here more than a warm tone would. Later on, I've even created some anaglyphs out of the shots.


The fun continued (in some other day) and AGAIN, with my Rokinon 8mm fisheye lens. I guess you can tell already how much I love this lens despite my fail in adapting it to some of my landscape shots when I used to travel! Nevertheless, the distortion it provides, does add such a dramatic tension to the image (well, if used correctly and thoughtfully).
So, I picked this lens again and went on trying to find some interesting venture to shoot, and i decided to do some camera motion (again).


So, nothing really special about these shots except for the abstract and I'm actually thinking now to upload them to some stocks. All what was needed here is to fix the exposure time to 1 or 2 seconds, just enough to rotate the camera in my hand for a full circle. As for the colors here (despite shooting the same subject under the same lighting conditions), this is just a change of the white balance (probably when processing the RAW files). More work was done to fix the exposure actually as the images were originally brighter than this (and softer).

Infrared Craze

Been months now with the lock-down (it's easing now but my schedule didn't really change much here) and I got into the habit of going out in the yard to read a book under the sun in the early morning before it gets scorching hot. I also water the plants and all of that; A daily routine (almost). Anyway, there was a time when I wanted to write a post for my Arabic blog about infrared (part 2) and just needed some infrared shots to explain some aspects about this art. So, after doing the "innocent" stuff for that blog post, I've found myself roaming and playing around with these infrared selfies, and I kind of created a path or a style for me here that I might try on other images (portraits and other).


The general aspects of this style are:
  • Raise the brightness (by exposure or brightness sliders or even Fill) but without going off the histogram.
  • Raise the blacks just to show outlines (or until it kisses the left side of the histogram).
  • Maybe just lower the saturation to near B&W. 
  • Outside the RAW editing window, the pupils are kept as black as possible with selective (layer masks) editing techniques.
The rest, then, is just a work of contrast (which I would probably set before doing the above adjustments), beside fixing the white balance and other color issues. So in a sense, it is kind of a synthetic high-key done after the fact instead of with speedlites or strobes in a studio. It is important though to realize that the less shadows are there, the better. I've tried this technique already with some older shots done indoors, and the results were not up to the level, but I'll keep trying anyway and see!

Finale

Well, I guess I better make this short at this point. There are some few shots that I did want to talk about but probably I'll keep them for later for now - along with a probable discussion for another style of editing. We'll see if I get the time to do that post in the future!
On a side note, it seems I've totally forgot to mention this item of news, and that is two of my images had been accepted in 16th PSAChina international exhibition of photography, and I've received some emails to provide the original images for display in the exhibition. That does not mean that I've won any award, but simply that these images did pass the judgement or critique and deemed worthy of display. I didn't get involved in any contest for a long time and probably I will not do so in a long time as well, but this display do give me a bit of spark.

The two accepted images: (left) Anxiety, (right) Houdini.
Worth noting that Houdini was marked as inspirational on YouPic as well.
It seems that, at this point, that YouPic can be somewhat an aid for me to judge my images in the future and see what to submit to contests, though I know this approach is not quite accurate, simply because professional photographic circles do not work in that manner, and YouPic is still, after all, a social media website and not a circle of professional photographers whose job is to critique. You can critique on YouPic but I doubt people there would welcome that anyway specially if not asked for it.
Anyway, after receiving the email about the pick, I was asked to submit the originals (for printing I suppose) plus a personal photo. I did all of that, but now, I'm not sure what's next. Would I receive an online catalog (like most contests)? Are my images considered or classified as Honorary Mention? I'm not sure, but we'll see. I might receive some other email containing the catalog. It's funny though to know that both of these images are actually selfies or self-portraits!
On the other hand, there had been some few incidents with my workplace that I didn't talk about before probably but amazingly I'm discovering new things about my life and the whole thing called "work" at this point and this stage. I've realized that some people are simply annoying or causing problems even more when they are further away (and work online)! i kind of feel sicker of my workplace at the moment despite the fact that I didn't go there for months (except for 2 days back in July). This calls my brain again to find a substitute, but as always, most probably the search end up with nothing and be in vain.
As I'm getting closer and closer to 40 (in less than 2 weeks time), I'm looking back at what I've achieved and what not. Some say I've done a lot, yet I don't really see it. They say that 40 is a new time or a new age, and it's like opening a new page of life, and again, I don't see that coming. Maybe I don't want to see? Maybe. However, I'm trying to keep it as real as possible. One of my simplest dreams was to have my own family and stay away from this problematic house and build myself up as I like, yet, all my attempts failed miserably. And reaching 40 does not make the process or the thought of it any better. In fact, I've already abandoned such an idea already and I think I better be on my own. All what I need for now is a home; A place I can call home.

Thursday, December 12, 2019

Djinn…

Officially winter! We already got some rains here and I'm trying to enjoy as much as I can out of it because I know in some months from now, it will be so damn dry and "cooking".
Anyway, I didn't post anything here for about 2 weeks (or 3? I didn't count!) for some... legitimate reasons I'd say: A new panorama!

Djinn

Just before I get into the story, I'd like to explain the word Djinn to those who don't know it or never heard of it. Djinn (Arabic: جِن) according to the Islamic literature and belief, are creatures created even before the creation of Adam and Eve and they inhabit and dwell Earth and even space. They are created of fire and unseen by humans (except to few, saying that from experience). So, in some sense they are equivalent to what the Westerners would call Demons. Also, they can be either good or bad, they have different faiths and beliefs, as well as living in tribes and social classes of their own, just like humans.
So, I hope this introduction fascinated you a bit to read on, as I think the technical stuff coming along this post might be a bit boring! Since I didn't touch my panorama gear for quite some time now (mainly because I didn't travel nor I'm part of any group that does activities here and there). Thus, I had to look for alternatives; Ideas, mainly to be done in my periphery: Car, home, work... etc. It took the idea some time to "cook" in my head and I was kind of slow and sluggish in preparing my gear (typical), and the target was one of the rooms in my house where typically guests use, in case we get to have any sleeping over.
Now, the keywords for the work or the general idea revolves around: Magic, black, dark aspect or darkness, and maybe a touch of some horror and fear? Since I don't have models (as usual) I had to think about it thoroughly because the task is not easy here as the idea started to take shape in my head. I will be shooting myself, in various locations within the room, while it is dark and definitely needs a somewhat longer exposure (not good for stable poses!). Anyway, things (unwillingly) went on two trials and for this reason I didn't post last week, because the plan was to have this material ready by then but, unfortunately, the first trial failed drastically and I had to re-do the whole work in a different manner and a different setting.

جِنْ (Djinn)
Click to enlarge


Voigtländer Color Skopar 20mm f/3.5
Lumicon H-Alpha (Night Sky) filter.
Try #1: The first try was done  with my modified Canon EOS 7D and Voigtländer 20mm lens, fitted with the Night Sky filter (i.e. H-alpha filter) which is, partially, an infrared filter actually, allowing a band of Reds. I've tested this filter against my B+W 092 Infrared (threshold: 650nm~690nm) filter and compared the results (in-camera, using Custom WB). Comparing the blue tones specifically, I've decided to go with the Night Sky filter instead, this is beside providing a tiny bit of shorter exposure time. Working with 20mm instead of my usual Canon EF 15mm fisheye lens meant, of course, shooting more slides or angles, and that means forgetting about doing any HDR work here because the load would be simply RIDICULOUS. Now, using 20mm introduced another problem here is the need to change the usual orientation while shooting. So, instead of starting at 0o for the tilt, I've actually used -15o instead. This is just to include the whole stool with my body in the separate shots that I would need to do later to merge with the panorama while stitching (having myself in two shots to be stitched together is next to impossible; It must be one shot including my whole body). Another problem is the misalignment of many slides, and the empty spaces that added to the chaos (the computer was unable to connect these slides nor I was able to do so manually because of the featureless spaces). After 2 weeks, or so, of working on stitching this panorama, I've realized that this thing is beyond repair and I must re-do the whole thing, and probably drop out some of my requirements for this panorama, like using an infrared filter, and just shoot in the usual manner.

Canon EF 15mm f/2.8 fisheye
Try #2: So, after the failed attempt, I've switched back to my 15mm lens and this time I thought of some trick to compensate for these empty spaces; I've simply stuck some electric tape on various sections of the wall just to aid the computer later on to stitch these images - and just to show you my luck, the idea did work really but the tape was some bad quality and almost fell down, so I had to work fast! Anyway, testing the White Balance before the shoot, I've realized that this is almost equivalent to infrared shooting with my modified Canon EOS 7D, because the room is dark and the major light source is to be from the candles (which issue infrared of course). I banged my head at that moment; How come I didn't think of this before instead of all the hassle with my first trial?! Of course there should be remnants of the visible spectrum but that was not a problem specially after calibrating the white balance in-camera. The scene already turned to be an infrared-like. With this, it was like shooting a normal panorama and I had the power to do bracketing for HDR merging and tone-mapping, which I did. *sigh* Just like the old days!

Process: Processing the images was typical: Load the files, run Photomatix to merge the brackets, and then start with the stitch. It was essential here to calibrate the white balace in-camera before the shoot, otherwise the HDR merging and adjusting the colors would have turned to be a "wedding party of wild elephants" - Sorry, the best I could find to express my thoughts here.
However, while merging the bracketed images to create HDR slides as usual, I've made a mistake which I didn't discover until I tried to stitch the panorama for the first time. The mistake was enabling the Remove Ghosting with Detection level set to High. I'm not sure what I was thinking but in a nutshell, the computer created a movement where there were none in fact, and that PRODUCED ghosting! So, the situation was like the old advice of turning off the image stabilization on your lens when your camera is actually stable on a tripod because that would trick the lens and creates a movement. This is exactly what happened, but digitally this time. So, I had to re-merge the bracketed image in Photomatix again and this time putting the detection level on Normal. I've activated this option in the first place just "in case," specially that we have candles here and there might be moving shadows that would make the stitching harder a bit.
That was concerning the merging process but there was still a side work that had to be done and that is preparing those slides of me (specially those involving my reflection in the mirror) but no need to go on with this - it was just a simple masking process. But all had to be done in HDR mode of course with HDR slides.

Effects of using High detection level for ghosting removal on Photomatix.
Click to enlarge


One slide with tape cuts.
Click to enlarge
Stitching: As for the stitching process, it was typical to try to stitch the HDR slides first right away, but as usual, it failed. I remember in old times, this didn't happen much. Anyway, what can I say here; The image was indeed dark and I've intended for it to be so. Thus, I followed the typical procedure of tone-mapping the HDR slides using Photomatix again, and trying to get the best details from each slide. Of course the process is automated; I just pick the darkest slide possible to work with and save the settings then apply that to all. From these tone-mapped images I would create a model, and base the stitching of the HDR slides on this model. Lot of details here, but anyway the thing was not out of troubles, as usual. The tape trick did work to some extent but still needed some help or let's say a "push" from my side so I had to add some manual control points to match between the slides. Actually this problem happens all the time with or without sharp details between the slides for various reasons. All these tapes on the wall would be cloned out of course when the panorama is stitched completely. The final stitched panorama still had some stitching errors which I couldn't fix before stitching so working on that in Photoshop was inevitable. The thing is that I have to do these fixes every single time I create a new projection out of the same panorama; So, it will be such a slow process after all.

Finale

Well, this was the "short" story of this panorama, and I'm still having some more ideas at the back of my head, cooking and waiting to be served when I get the power and time. Beside that though, I'm still working on other projections of this same panorama here. I didn't want to put all the eggs in one basket so I might post about these in 2 weeks time from now; If they are ready though.
Now, it is time to think about some other panorama to do, beside the other ideas at the back of my head of course. The past few weeks were kind of hard, mentally. I was literally waiting for weekends just to sleep as much as I can (and even skipping my socializing with the family around some games like I used to every weekend). I'm trying to re-discover myself here, in some ways, but seems the process is taking longer than I participated. There is a talk about change in the horizon, things going to be better, the hardships years are over... yet I don't really see any of that in the horizon from my side. The travel that I've participated for 4 or 5 years now is still an idea that I could not make a reality. Would it be soon? We'll see. I'm planning for a little vacation by the first week of the new year, but I'm still not sure if I would be able to because I need to make sure that I won't be needed in my workplace. Boy, I'm going to sleep for real, and who knows, I might head out to shoot at night like I used to in the past years…

Thursday, September 26, 2019

Collective…

As a starter, I'm really not sure how am I typing this blog post with my continuous sleeping problems which are adorned with marvelous migraines from time to time during this week. Anyway, since I don't have much material for this post, I think it will be somewhat a quickie one.
In a continuation for my previous post, I'm still working on my project of shooting profiles (side shot) in infrared using only a candle. I'm not sure if I've mentioned this in my previous post, but I've decided to call this project The Candle People. Things are now out of the profiles section as well, and I've started to shoot some face-front shots as well, upon request.

Abdullah A. (profile)

Abdullah A. (halfie)

So far, there had been only two requests to re-do the candle shots and change the profile look to the face-front look. Both from nephews. My first nephew did not like the look of his nose in such profile. Well, I guess many people are displeased with their noses nowadays (me included but I don't tend to hide it). However, I'm not expecting from people to understand the artistic values the way I see it through. In profile shots, I do appreciate the contour and the dramatic light and look of the face rather than the "beauty" of the person. Personally, beauty has nothing to do with this little project of mine. It is about evoking emotions via light and contour with no or little facial expressions. However, I've complied to the request and I still like the results. My first trial with him was to shoot a "halfie", but this halfie is not exactly done by cropping the face (even though it is a little) but by implying heavy shadows to half of the face (mainly by editing). This halfie might have a strange effect on the size of the eye here; I didn't change the size of the eye while editing, but it seems to me that is kind of large. Might be my imagination?
Abdullah A. (front)
Anyway, the other frontal shot here for Abdullah A was not exactly a halfie. Too bad though I had to crop a little too much here to balance the image because while shooting (using burst mode) the head was moving and one of the ears did not show completely in the image, which in turn forced me to crop a little from the other (and that meant cropping from the whole image and just from the side because I tend to keep the aspect ratio). On purpose here, I told my nephew to look up which I think gives a better emotional expression (at work with the forehead lines). To have some dramatic look (or to increase it so to say) I've resorted to an old technique which involves the usage of the High Pass filter in Photoshop. This of course exaggerated the noise level as well but I didn't bother to clean much of it here because the image in the first place is not intended to be "soft" in looks. This look, upward, seems to be a "hack" on its own to have a dramatic look. I've applied already with my other nephew who requested a re-shoot and seems to be OK. As I'm typing this there are still some from this series that needs to be processed yet.

Collective Ideas

Meanwhile, as I'm trying to work on the Candle People project, a flow of ideas somehow ticked my mind lately. At some level, I think the Candle People is one of these projects that just doesn't have a dead line. But it is ongoing whenever the chance shows up. Anyway, meanwhile, I think I will be back to one of my old passions, and it is a tiresome one actually, and that is: High Speed photography.
I didn't formulate a concrete idea about the subject but I'm intending to use the full set of speedlites in my arsenal (7 at the moment). I didn't make up my mind yet about how to set them up, but I think there would be two main methods or sets: a) Manual, and b) With an external trigger.

General scheme for the setup
First of all, sorry for the bad sketch here (and the bad scanning, done with my mobile in bad lighting conditions). As you can see here, this is the intended general setup that I'm thinking of for method A; the manual shooting. What I mean by manual shooting here is that I would control the camera manually with a master speedlite light on it to control other speedlites on the set. Meanwhile, the master will not shoot, but only responsible to give out the command to shoot to the slave speedlites. What I'm intending to do here is (and let's hope it works out well), is to use a very low flash power (if I can, lower than 1/32) and try to shoot using burst mood in hope that the low power consumption at this level of power would help on quick recycling and re-shooting quickly. I wouldn't know if this will work until I try! It would be a shame if it doesn't work that way though because with such number of speedlites, things could be balanced out somehow. Of course the position of the speedlites and direction is subject to change accordingly when the practical work is ongoing.
As for method B, the same schematic above applies, but the master speedlite is placed on the set as well and would be connected to a trigger. A laser trigger (which I failed using before). In previous times, I've used this trigger in connection to the camera itself but researching a bit and asking some professionals, I figured that the lag time (the time for the signal to travel from the trigger to the camera) is considerably long, making capturing the exact moment quite hard. Most professionals, as it seems, connect the trigger to the speedlite and not the camera and thus reducing the lag time considerably. I can connect one master to be triggered in that way and set others to slaves and all should (theoretically) shoot about the same moment. However, in this method, I'm supposed to leave the shutter open and work on the subject and speedlites with the trigger. For this, such method must be done in a dark environment, or maybe some ND filter on the lens would do? Not sure. We'll see about that. And like the situation in method A, the power is supposed to be set low for a quick recycling time and low power consumption.
Thinking about it, just theoretically, it seems that method A is favorable, despite my wish to get my old trigger working again since I failed using it many times. But if the burst mode works well in such setup, then things are set and I don't think I will try method B. The hardest part though remain: To setup my gear to work!

Finale

Beside the idea mentioned above, I'm thinking of other things as well but no need to put all the eggs in one basket. There had been also some simple shootings with my mobile for some geological stuff around my workplace and I've even uploaded one of the images to the stocks. I didn't upload to them in a long time.
With me now putting the contest on Duolingo behind my back, after some incidence of cheating as I've discovered, I've realized now the big mistake I've done in using this platform. I'm now trying to be more at ease and back to learn the language on my own pace instead of trying to gain more points and be leading the "score board" (or whatever they call it). In fact, I've had more time to post some articles in the Arabic forum after deserting the forum for quite a while. I've realized now how people do appreciate these posts which have some delicate matters and tips about Arabic that Duolingo is not providing for those who really want to learn the language. This made me think: What is really made for me? What I'm really supposed to do? I think this appreciation and this enthusiasm is the answer. Thinking about it, what did I really gain from being #1 on these leaderboard contests or whatever? Nothing but stress. While the solution was quite easy but I didn't see it back then; To leave these contests and focus on education and learning, and teaching those who need to. After turning off the "public" settings on Duolingo (which removes the leading board and all these scores stuff), I do feel such a relief. I have no more time and more organization capability for my time. I won't regret this.
Now, it's time to post this and go and figure my next move. A poem, or a new photo, or maybe a new article for the Arabic Duolingo forum. I can't believe it is weekend already. I'm perplexed as to whether I should sleep more, or work more on the things I like to do. or maybe play more. Two days for a weekend are just not enough… Not enough to forget what I need to forget out of my life…

Thursday, September 12, 2019

By A Candle…

Well, just when the holidays are over, here I am having a short vacation on my own just to rest at home and have some sleep! Anyway, at the time of posting this, this would be the last day of my actual vacation and I'm going back to work after the weekend. Luckily, there had been some activities, and ideas still on the go. But let's start first with those that I didn't post about 2 weeks ago.

Remains

Some weeks ago I got this idea, or maybe a recurring idea, of doing some cubism in combination with selfies. Of course, the best (and first) solution that occurred to me is to do that with my Huawei. But despite its relative easiness, I had some hard time shooting because I wanted to use the rear lens rather than the front lens, because the resolution is greater. I also, somehow, had better view using the rear lens and shooting a selfie while looking at myself in the mirror.

بقايا إنسان (Remains of Man)
Click to enlarge
One of the problems was the perspective while shooting and I had to re-do some of these shots and just hope for the best focusing possible without looking directly on the phone's screen through the mirror. Moving my head would change the perspective of course and this is what I was trying to avoid, right? I made several shots (I believe more than 10) but I didn't use them all in composing the final image بقايا إنسان (Remains of Man). The main idea was to figure out one image per part of the face, and since we are talking cubism (well, sort of) then I had consider even the plain areas of the face, like the cheeks and the forehead and I'm glad that I did so! The image you see here is a complete collage, i.e. the images were not pasted on an original image of a full face. But totally put together from separate pieces.
I have to admit that the idea of shooting cubism like that is still going on in my head. Originally, I wanted to do this with my brother (my typical model in such cases) but he was too busy to have some time for me, so I decided to do a selfie out of it, as usual. However, I'm still hoping that I can do more of such art and probably with a DSLR if possible rather than a phone camera. But is it worthy? The phone camera seems more flexible and way too easy to handle the job, but the grave downside about it is: No technical flexibility. I really shot all these slides to compose my face you see above without controlling anything; from light metering, to shutter speed, to aperture. All I had to do is click the shutter button (which I've set to my volume button). Such pros and cons need a bit of thinking I guess, then I'll be ready to pick my next victim!

Candle People

I've been working on doing something with my DSLR, after all that fuss that Huawei contest made for me, so it occurred to me to start slow a bit. I did some macro shots but I'll be talking about in some other post maybe; It was something small and not really that interesting. But what happened later on is the thing that sparked a project in my head.

Candle Selfie
 At some point, I had kind of a flashback about portraits (or rather selfies I should say) done with my modified 7D and B+W 092 infrared filter, namely a series I've called Candle Selfie. I thought then, what if I expanded the idea further, with a bit of modification too. A face, one candle for light, but this time with a profile of the face and not face-on. Technically, I decided to use the Neewer IR720 (that is with 720nm threshold) filter instead of my typical and old B+W 092 infrared filter (which has I think around 690nm of threshold). Maybe just for a change? Not sure. But probably just to stand away from the typical looks of the infrared selfies that I used to take before. Even though, while processing, the looks persisted. Anyway, I started off with myself of course.

Boihéamach (Bohemian)
One critical change in the process here is the usage of my 50mm lens instead of the 20mm lens which I used to take those candle selfies back in 2017. Increasing the focal length played a critical role in giving my life a hard time to take a selfie with no help from anyone :)
I tried to use my wireless solutions but holding the candle in one hand and the mobile phone (which runs the wireless app and connecting to my camera) on the other hand was really cumbersome and I had to drop that idea once and for all. I won't be exaggerating if it took me about 2 days of trials and errors until I shot Boihéamach in the traditional way (focusing on a monopod and then trying to stand in its place). I used to shoot in a dark room but then I realized that I'm shooting in infrared with somewhat a high threshold and the lights in my room were all LED or CFL, so I can shoot with lights on! Which I did and it made my life just a biiiit easier…
Boihéamach (details)
Despite working on my own, I was lucky in fact to get my eye into a sharp focus. I was so fascinated with the details that I've cropped the image later and made a separate image out of the eye alone. In processing the image (and the images afterward) I've emphasized the blue and the "pink" color of the inner eyelids and the lips by increasing the Vibrance up to 100%. I don't normally do such a thing but since we are going crazy with this trend, why not? The problem with this step is that it increases some apparent chromatic noise (typical to infrared images), specially that these were shot using ISO200 instead of the lowest, ISO100. I picked this ISO just to have enough flexibility with the shutter speed (which ranged between 1/6s to 1/10s for all shots, this one and later ones). This was about enough to freeze the motion and avoid motion blur (because of the body movement not the camera's of course) but still, problems were ahead.

Abdullah F.
So, the project started and I've been already calling family members (males mainly) to model for me. Working with family members is one of the hardest things to do and that made me think of seriously calling for some professional model, but I'm not going to spend money just like that on some experiments and ideas I'm going through; After all, I'm not still a professional photographer. Shots for some of my nephews like the one of the left here turned out good (relatively) but still made me think of more work to be done. For example in this shot for my nephew, Abdullah F., a large portion of the shoulder is apparent in the shot (and this is because I kept my camera and 50mm lens away), which was not the case with my Boihéamach shot (it was cropped but still not much and the shoulder did not show up in the original shot that much). In this shot of my nephew as well, it seems that I've kept the camera in a lower position; lower than his head level. Despite all that, I still like the shot here and I've worked on dodging the hair to add some delicate details on that part of the image. So, probably I shouldn't get my camera that close to the face and show some portion of the head and hair after all?

Jassim H.
Unfortunately, I was not lucky with the rest of the people I've shot and many of them are to be re-made, if possible. One of the hardest aspects here is not only keeping the person stable, but also to look straight instead of looking at the candle. Raising the level of the candle as well did not help much, and that kept some of them look down (apparently my "high" is not equivalent to their "high"!). Also, 1/8s was not quite enough for the shutter speed to freeze the body movement in some shots like for my nephew Jassim H., and using 1/10s left the image quite dark even at ISO200. Thinking of going over ISO200 was out of the question (in fact I've hoped to lower it down at some point but that did not help and made it worse so I switched back to ISO200). I told my nephew already that I have to re-do the shot, maybe next Friday.
I've taken other shots but I will post them later maybe. Some of them were good and some are bad and need to be re-done, so let's see how the next week will unfold. I've already lost hope in re-shooting some people because I've already re-done it and it didn't work any better!

Finale

I'm typing this in supposedly a short vacation (for a week) off work and believe it or not, I'm seriously lacking the time to do many things I want to do! My time is torn between having rest as much as I want and doing my routine daily chores (e.g. Duolingo exercises and learning). I'm typing this just in the final hours of Wednesday.
Things look foggy around my workplace. Moving to the new location, which would be quite problematic for me, is still foggy for me. Things are quite but sometimes it feels like the calmness before the storm.
This little vacation makes me think of a bigger and longer vacation at some other time. A vacation that I need to take, and a travel that I need to make. I'm looking at my panorama gear with some sorrow as I didn't use them for some time. Probably the last panorama I've shot was here at home back in 2018. However, the world is going crazy and that makes me reluctant to do much in that field. I need to get some habits back but it's hard to fit them into a schedule. Maybe I'm being a bit of a perfectionist and I shouldn't think or work that way? But again, if I leave these habits for long, I'd be losing them, maybe, forever; Like writing poetry which I didn't do much about for months. On the same line, I didn't also make any posts for my Arabic blog for months as well. Is it all because of the summer season? i really wish if this is the reason; At least I'd be having some hope that I will be active again next winter. Some hope…


Thursday, August 16, 2018

InfraFestiva…

Well, I'm not sure if I should type this post but not typing it would make me absent for 2 weeks from this blog. My life had been a bit dormant lately despite the light work conditions and the lesser traffic jams currently - but thanks to the heat which leaves me exhausted most of the time and disturbed sleeping as well. Meanwhile, my mind has been kind of empty of ideas to work with except for few trials which I'm going to talk about here right now. I do deserve a little vacation though (on a personal level) since Friday is my birthday; So I'm signing for a day off on Thursday and I didn't want to type anything in this blog for this week specially for this! But oh well... let's see what horrible things I did the past 2 weeks…

Change of Perspective

Well, there had been some continuous work with texture-creating which I've posted about in the previous post (and this might continue for a time maybe) but I won't waste much time here talking about these abstracts and textures, but I prefer talking about something else.
I'm still on a roll trying some more experimenting with my new Neewer infrared filters, and specifically, the IR950 filter (which, supposedly, has a threshold of 950nm). I've showed some pictures in the previous post taken with this filter and how it did help on showing some veins in my hand (and foot to some extent), even though according to what I've found online, a threshold of 850nm is just as good for showing the blood vessels under the skin. Such shooting was done under the harsh sun to have a wide band of wavelengths in the range of infrared to get some nice results. Now it was time to change the perspective.
I was somewhat inspired by the medical field here, where some new inventions are coming out to help medics on checking the blood vessels under the skin using infrared beaming. Also, I did encounter some texts about using "infrared flash," where the flash is somewhat modified (or filtered) to issue only infrared radiation without the visible wavelengths! This is useful in a number of ways; Mainly, for not blinding people with my flash (my brother specifically!) when shooting for them in infrared, this is beside (and this is the greater advantage) using the camera and focusing in a normal regular way instead of struggling with the LiveView method which is a MUST when the infrared filter is placed on the lens (since it's opaque, it's impossible to use the viewfinder to check the scene). Using the LiveView has its (somewhat) disadvantages in my case because some functions do not work there and the metering method just changes drastically, in addition to the increase in handshake.
ExpoImaging Rogue Grid
Anyway, since my infrared filters here are circular and made to fit lenses, I had to come up with some way to fit them onto my speedlite here (while the gel filters are limited and I don't have a large enough piece to cover it). So, I thought of putting the filters inside ExpoImaging Rogue Grid System which I got long time ago (along with a full set of light modifiers). They fit with some gap but they do cover the bulk of the speedlite head. The main issue here, though, is that this method would direct the speedlite into a beam (because of the grid), and that might be problematic if the aim was for longer distances. Anyway, this would do for now.

Left: IR950.
Right: B+W 092.
Of course, the first target was to take a selfie using this method. The results were astonishing indeed. Color-wise, the results are similar to fitting the infrared filter on the lens actually, but there is a bit of difference here with the shot taken with IR950 filter. The one you see here had some increase in saturation but it's not quite the bright infrared shot I used to see when shooting a selfie (the eyes specifically); This result was weird but anyway I did put it to some good use!

Conriocht - Werewolf - مستذئب

The work was simple here: lighten the eye, and sharpen some more, and you got yourself a Werewolf. Anyway the question remains here as to why it showed like that while that did not happen exactly when using the B+W 092 infrared filter. After checking again and again, it seems that because of some gaps around the filter disk, some light from the speedlite itself did leak and thus giving some mix up between infrared and visible spectra (remember that we are using the filters on the speedlite and not the lens, so the camera really is catching everything on its way!). When I fitted these gaps, the resulting image was indeed like the one I usually get when placing the same filter on the lens, just like the case with the image taken with B+W 092. It's kind of a lesson here that being perfect is not always a good thing. The joy here was that it was all done without going blind because of the flash pulse into the eye or anything! That would help me greatly in some tasks (specially when I have my brother as a model; He is greatly annoyed by flashes).
Variety of spectra for various flashtubes.
Click to enlarge.
Source: Wikipedia.
My next target was to shoot the veins or blood vessels using a speedlite and IR950 filter. Even though it is somewhat common to use the threshold of 850nm for infrared beams dealing with blood vessels imaging, it seems that 950nm would add a bit more contrast to the matter. After all, I did try the IR950 already under the sun and it did show the veins of my palm! My trials, however, were in vain, and apparently, it is not the filter we are talking about here but the source of the infrared - And for that reason the sun works fine to show the veins but not the speedlite. According to little research I've done, Canon Speedlites use Xenon flashtubes, and the spectrum of such gas go downward (as seen in the diagram) around the value of 800nm (0.8 microns on the diagram). There are ups and downs in the graph but the bulk of the power seem to be in the range of 400nm to 600nm somehow. I'm not sure what is the intensity of the 580EX II speedlite compared to this diagram for Xenon flashtube, but the general scheme, as I believe, applies anyway; And probably speedlites are not the best infrared source to be working with when it comes to IR950 and some veins work! In fact, even IR850 which has a lesser threshold did not yield a clear image for the veins of the palm when used with the Speedlite. Thus in conclusion: Speedlites are not a good source for infrared when it comes to penetrating the skin to show the veins. Tungsten lamps, on the other hand, look promising from some test shots. Still though, I had some ideas to implement even with speedlites using IR950.

Der Erschöpfte (the exhausted)

Source
In the beginning, my aim was to picture the blood vessels in my face (got inspired to do this after checking some anatomical images online), and ironically, I can't remember if the IR950 infrared filter was placed on the lens or on the speedlite. However, judging from the direction of the light in Der Erschöpfte, I presume the speedlite was on the camera actually and I think the filter was placed on the speedlite with some extra stuffing (probably duct tape around its circumference) to fill the gaps and trap the speedlite light. Anyhow, after taking several shots I've picked the one you see above to be my target for processing even though all of the shots didn't show any signs for blood vessels. In processing this image, I tried to keep the histogram in the dark region as much as possible without being cut off, and thus having minimal details in the shadows BUT not lost details in that region.

Histogram for Der Erschöpfte, with Adobe 1998 color space.

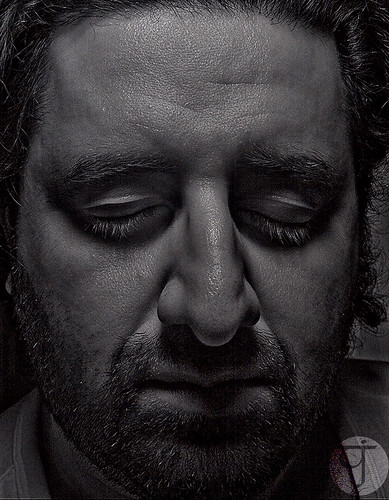
I like to be somewhat delicate sometimes when processing B&W images. Pulling the histogram to the left further to an extreme made some interesting touches of light on the nose tip and the eyelashes. Notice that the image would look a bit brighter than it should on some displays (I work with a calibrated monitor to ensure correction rendering for colors and luminosity). As I work on a PC and a laptop, I can see there is a difference in the looks; My laptop is not calibrated and I can see the background of the image here, while originally it is dark and hard to see any significant details, giving the image dark and mysterious look. It is amazing how I got my white-ish skin to be so dark with a glimpse of infrared! This experiment needs to be redone probably under the sun for better details if any (or is my face skin that thick?!). There is a holiday coming and after a period of turmoil at home because of renovations, I can get out and shoot some selfies in the sun with these filters and check the results.

Finale

Originally, there was so much I wanted to talk about in this post, like my experiments with hand-made pinholes, but I'll keep that till I get more material and more thought about it. I've been also trying to push my mind into poetry again but the words did not really accumulate into a single verse to be posted along. I hope words and ideas come together in the coming week, though. Beside that, I'm trying also to check some older images to see what new processes can be done (specially to those neglected images deemed useless before).

An Chathair Dhorcha (the dark city)
Infrared shot for Kuwait city done in 2015 and processed this week only.
Shot from the 60th floor of Al-Hamra tower.

Arts away, I do have also some plans to "pamper" myself a bit, starting with a day off (today) as a gift to my own self for my birthday. I'm also planning to have some "adventures" of mystic nature, such as doing a palm reading (not the first time). Then, I'm off to a LOT of sleeping, and dreaming of some travels as well. I can have some days to myself just inside away from this harsh sun that cooked me alive already. Should my birthday be in such time? After all, I'm a Leo, and it's hard to complain about it…


Stock photography by Taher AlShemaly at Alamy

Thursday, July 5, 2018

Breathing Still…

Flipping through my activities as the summer goes on and on... and on. With a sigh, I just can't wait for it to be over. It is just the beginning of July now, but we had our share of dust storms and humidity which leaves me wondering what is left for August and the rest of July already?! My body is typically exhausted more because of the change in temperatures between indoors and outdoors. Ah, and mentioning dust, I didn't let this opportunity pass without something to do. I remember one time I did shoot a panorama in a dusty weather, and this time I did use the dust to my "amusement" again; With the help of the microscope. The same old junky microscope.

Dusty

The frequent waves of dust lately reminded me of some of my studies back in the days when I was in college. In geology classes, specially those related to mineralogy, we used to work with reflective microscopes to check specific properties of the minerals. One of those most important features was to find the refractive index, if I remember correctly, which could help greatly in identifying the mineral at hand. That feature was investigated using polarized light. All of these information was somewhere there in my mind and I thought: Why not?
Things are not similar, of course, between the situation in classes with prepared mineral sample and the dust at home with an old junky microscope. However, it was an interesting encounter nonetheless. I started by collecting a dust sample from the outside during the "storm" (the wind is not always strong enough to be called a storm though, so I prefer the term "dust wave"). The collection was done using a paper cup (though I really wanted something bigger) and leaving it outside for about one day or a bit less. Tiny amounts of dust accumulated there, so I washed the cup a bit with distilled water (the type used for car maintenance) and poured a little on the glass slide. Couldn't wait for the water to evaporate, so I placed a lamp (tungsten) close to the slide to dry it out and leave the residue only. And that's it! The sample was ready! All is left is to secure it with a glass cover glued with nail polish.

Dust Sample - 40x
Mobile shot.

First, I wanted to mimic the method of the reflective microscope as we used it the labs back in the day, and actually this is somewhat done by force; Because having a light going through the sample yields nothing but silhouettes! So, I had to close the aperture below the stage and move the light source (desk lamp with LED) a bit upward to shine the light over the surface of the slide and it worked like magic! To my surprise, the dust sample was not made of... dust! There were strange particles looming around and some round objects which might be pollen (and this is quite natural); But what about those other hard stuff? I did check dust and mineral samples before during my studies and I can definitely say this is nothing like it! Now imagine we are breathing this...

Dust Sample (51.2x)
Canon EOS 7D

After a simple mobile shot, it was the turn for more serious work with the DSLR. My main interest was this portion of the sample where a spherical object appears; I'm guessing it is pollen. Not sure though. For beginners, I kept my the magnification power low since going deep would squander about lot of details. Thus, I worked first with my usual 50mm lens in reverse (providing about 1.28x magnification) in combination of 40x (total) in the microscope, thus yielding about 51.2x in total magnification. Then, it was time to move to a higher level.

Dust Sample (660x)
Canon EOS 7D

On the next level of magnification, I've changed the lens to Voigtländer 20mm, which gives a magnification power of about 3.2x when reversed alone (using Vello Macrofier), but there is a little catch here. Extension tubes.
Adding extension tubes with this lens on reverse yields about 6.6x. Now this, combined with 100x on the microscope, yields about 660x! Probably for a reader these number don't mean much, but for someone working with a microscope AND a digital camera, it does make a difference, simply because framing the object of interest (our spherical body here) would change because the scene is under more magnification power. Thus, even after fixing the scene in the microscope with the naked eye, it would be adjusted again in terms of focus AND framing (by moving the glass slide on the stage of the microscope), which is quite a tedious work to be done. As expected here, the image quality at such a high magnification is not quite "sharp" or interesting as it was in lower magnification but it was just about enough to show those details on the surface of this spherical object which looks like the surface of Mars! I'm not sure if any of the stack images were shaken a bit during the making of the 660x image, but surely the color aberration and other distortions have their own effect on the quality of the image. I tried to reduce as much as I can and sharpen the image (after minimizing it).
As I've stated earlier, I was trying to mimic the work of a reflective microscope with this old piece of junk. Thus, I gave it a go and tried using a polarizer BUT on the lens (which was hard to control while fitted into Vello's Macrofier). Anyway, nothing interesting appeared and no change in the light level at all. I think the polarizing effect must be applied to the light source itself rather than on the lens receiving the light rays. I have also tried to shoot in infrared (just a quickie one) but, again, nothing interesting happened and the image was just in B&W and no additional gains. Now after this "little" work with this sample, I'm somewhat feeling the urge to collect more samples of dust (since we are on a roll here) or maybe work further on this very same sample looking for other features in it; I did see some stuff that might be of interest!

Escaping Still

Just felt the need to add this section as a continuation for the post about the panorama I did few weeks ago. After completing the "regular" projection, I started stitching some other projections, and for the most part, I didn't bother myself in correcting the stitching errors as I'm not planning anything "big" with those projections; Yet.

Escape The Shining

I did a number of stitches but I won't bother listing all of them here, but I'd rather just show those which I think have some potential, like the one above, Escape The Shining. This one was done using Mercator vertical projection, with a twist, and I quite prefer it over the regular vertical projection. I still, though, regret the fact that I put the sofa to block the entrance which appears here in the upper left corner; It could have been all black and thus adding more to the symmetry and balance, I believe.

Planeta Effugium

But probably the most beloved of all the versions I've made out of this panorama is the little planet projection, Planeta Effugium. Originally, it was less interesting really, but yet more plausible than its predecessor, the tunnel projection (the invert of this one). However, once I decided to play a bit and see the results, I got shocked somehow when I inverted the colors and the whole scene became like a negative slide. To add a bit to the twist, I've eliminated this inversion effect from the hand and the black space, the whole scene is somewhat a mix between original and inverted colors. I've also tried to make the whole image as a pure B&W but after many changes and fluctuations, I decided to leave it as it is and hence it became a bit red and yellow when colors were inverted (originally it had a hint of blue).

IR950

Well, IR950 is the name of one of the infrared filters I've got lately; A product from Neewer. The set of 4 filters was pretty cheap that I still can't believe they do really do some infrared work! But well, seems it works well so far. Except that, apparently, the make is not tight enough and the glass is shaking by now. I'm quite interested in this filter specifically because of its presumed property: threshold of 950nm. Which makes even higher than Kodak's infrared gel filter (87B) which has its threshold at about 820nm (or 830nm? Oh well). The 87B class of filters of such threshold are sometimes called X-Ray Infrared filters (just a mockery) for how they sometimes expose features under specific fabrics (with certain thickness of course), and this name was actually used in Neewer's title for this set of filters. These filters can also yield interesting results when shooting the skin, as they can show traces of veins, and this is something I need to work on a bit.


Sample shots done with IR950.

I've been testing all the filters in this test but I had a keen interest in IR950 as I said before. For fun, I started shooting (with the camera!) family members using the on-camera flash and raising ISO to the max point (12,800), as well as a quick selfie. Despite the high ISO, cleaning the images (in small sizes) was reasonable and some sharpness was added as well. Usually high ISOs, specially with cameras of cropped sensors like mine, produce a muddy-looking images, but probably the case is also different when it comes to infrared photography (even though classically, infrared images are known for their grainy soft look). The interesting thing here is: Usually, calibrating the white balance in-camera would not quite fix the problem with Photoshop when editing the RAW file. I'd still need to change the camera profile in Photoshop to Infrared profile in order to compensate for the limitation in the color temperature and tint in Photoshop. However, RAW files of shots done with IR950 do not behave that way despite being clearly infrared. They do appear as they were shot in-camera without any modification. Saying this, I just realized that I didn't check how the image would appear shooting with this filter WITHOUT calibrating the white balance in-camera.

A Nose With Personality
Collage.


I like the tones of blacks and whites even before editing them in Photoshop; They attract attention, as well as fear at some point because of the contrast maybe, and that adds more surrealism to the subject I presume which triggered me to do this "funny"collage of my selfie and my brother's face in A Nose With Personality. In fact, some people did indeed state that it IS scary rather than just a funny surreal image! While bring on a roll, I didn't want to miss the chance to test this filter with a panorama of course.

The Pano-Work

Seeing how the sun shines through a window pane over the stairs at home, I got triggered to try to do something about this. I did in fact shoot many simple shots before and recently for this play of sun beams over the steps, but now it was time to put my IR950 to some good use and see. A panorama.
Now, because IR950 is a circular filter and must be attached to the lens front, I had no choice but to use my next option for panorama shooting; The Voigtländer 20mm lens. I've tested this lens before in shooting panoramas, and at the regular settings of my panorama-head (shooting at every 30 degrees and counting as much as 12 shots per circle) and generally speaking, not many stitching problems occurred. However, the displacement between one angle and another with such lens is quite large and for this, to avoid any mishaps in working in such narrow space like the stairs, I changed the setting on my panorama-head to 24 degrees, making a total of 15 shots per circle. This change is not only done to the horizontal swipe, but also to the vertical swipe as well; Instead of shooting at every 45 degrees up and down, this was changed to 30 degrees (thus shooting at 30 degrees AND 60 degrees, and finally 90 degrees if needed). Wander with your imagination and think of such amount of shots we need to complete one scene: (15x5)+2= 77 shots for one scene, and we are not speaking of HDR yet!

Ghosted

The first problem, in practice, was to settle the camera down on such stairs and make it balanced as much as possible. I can't say I've done this perfectly but I was hoping on fixing the issue later on when assigning the horizon line and fixing the vertical lines before stitching the panorama. However, another problem occurred here unfortunately; Many shots were featureless and could not be connected to others in the scene -and this somehow made me wish that I worked with the old settings of my panorama-head but it's too late now- and finally, I had to satisfy myself with some of the scene and cropping the rest that simply didn't work and stitch properly. You can see that I've added some sandals and shoes in Ghosted, as my main idea was actually confrontation but seeing how the tones turned out as typically as they are for this filter, I've changed my mind and let my mind wander to its darker side in assigning a title to this.

Ghosted II

Not being a full panorama means there are limitations in projections and looks I can achieve with this panorama. For a try, I've used the vedutismo style in Ghosted II which added depth to the center while, supposedly, keeping straight verticals. To add drama a bit here, I didn't convert the panorama to B&W like its first predecessor, but rather inverted the colors like I did before in Planeta Effugium with some twist in blending to keep some areas original without inverting their colors. Yet more, I added some touches to improve the spooky look, like applying radial blur to an extra layer and blending it with soft light.
This is all to it for the time being and after this experience and this number of shots involved in this work, I might consider switching back shooting in 30 degrees with Voigtländer 20mm despite the hazard of having misplaced features or features not connected between two successive shots. This is of course when need arise.
On the other hand, there is still some thoughts and ideas I need to check about this filter and I do not have the capabilities to test it with. Like, does this filter really have a threshold of 950nm? After my bad experience with Tiffen's hot mirror, I hesitate to trust whatever the specs from the manufacturer say about the product. There is also the issue of the infrared source. According to Neewer's guideline, they propose each filter of different threshold to be used for specific conditions (and in dedication to landscape photography) with IR950 to be used under the harsh sun. This, however, doesn't work with me that way for sure and I need to explore my options with infrared sources and how do they react with the subject at hand; Specifically, the skin and whether the infrared source under question is good to show the veins under the skin in a photo, or penetrate specific fabrics (or even night vision as some claim). So much to discover with this filter alone, not mentioning the others as well.

Finale

I could've made the story longer here and talk about my shell collection and going back to documenting them but I think it is enough for the time being. I'll leave the issues of these shells for another time. There are more shells waiting to be documented.
Meanwhile, as I'm typing these words, I'm thinking seriously of leaving the Instagram community and gain some of my peace of mind (and more time to do other things), but the main issue here is the ridiculous updates and changes that Instagram comes up with every now and then. I'm still considering the idea though and didn't decide for sure yet. There is the issue of exposing and displaying my images to the public but probably it is not much of an impact, since I'm not getting many Likes on Instagram as well not comments; Thanks to some relatives and random visitors who appreciate what I do (or simply do it as a duty when it comes to my relatives).
There seems to be so much on my plate; Ideas, projects, experiments… yet seems I'm not doing much with them. I blame it on the summer and the heat that brings down all my strength but let's face it; I'm lazy after all. During this time, I'm waiting for my new passport to be issued, but would I really travel? I don't know. No plans whatsoever.
In poetry, I do have some words visiting and going and I'm really trying to force myself on writing it down. I just need that glitch in time between work and home (and responsibilities at home) to focus on writing. Unlike photography, writing coherent words and translating feelings on a paper (or typing them down) is probably as exhaustive as shooting a photo, or even more at times. Mentioning poetry, I was surprised that one of the poems that I've posted on Writing.com did get the 1st place award and a ribbon (with some award points with that). It came as surprise to me since I'm not checking my email in that website regularly and totally forgot about that contest within the website. Probably I've posted that poem here before, but I'm posting here again to finalize the post and leave you with it for reading it at your own pace, if you like!

Aman Aman

Not black and white but splashing colors,
worldly, such a never ending course.
No left, no right, nor wrong or even just,
aman aman, nor my mind I can trust.

Aman aman, O trembling Bulbul,
tweeting loudly in a funeral?
How does your spirit work I wonder indeed,
for seldom a smile had been in my need.

Seldom does it shine, if would, it could,
for sorrows I never understood.
O Bulbul to whom the tweet and the dance?
or maybe a salute to some past romance?

Salute me by the morn or by noon,
whether under the heat or the moon.
Take this core where it never had befitted,
in hope! May my grinning face be permitted.

When the blooms of May may surrender,
and off life bereft be the tender.
Lull me O Bulbul, and put me to sleep,
Aman aman, my eyes need not to weep.

Stock photography by Taher AlShemaly at Alamy