Change of Perspective
Well, there had been some continuous work with texture-creating which I've posted about in the previous post (and this might continue for a time maybe) but I won't waste much time here talking about these abstracts and textures, but I prefer talking about something else.
I'm still on a roll trying some more experimenting with my new Neewer infrared filters, and specifically, the IR950 filter (which, supposedly, has a threshold of 950nm). I've showed some pictures in the previous post taken with this filter and how it did help on showing some veins in my hand (and foot to some extent), even though according to what I've found online, a threshold of 850nm is just as good for showing the blood vessels under the skin. Such shooting was done under the harsh sun to have a wide band of wavelengths in the range of infrared to get some nice results. Now it was time to change the perspective.
I was somewhat inspired by the medical field here, where some new inventions are coming out to help medics on checking the blood vessels under the skin using infrared beaming. Also, I did encounter some texts about using "infrared flash," where the flash is somewhat modified (or filtered) to issue only infrared radiation without the visible wavelengths! This is useful in a number of ways; Mainly, for not blinding people with my flash (my brother specifically!) when shooting for them in infrared, this is beside (and this is the greater advantage) using the camera and focusing in a normal regular way instead of struggling with the LiveView method which is a MUST when the infrared filter is placed on the lens (since it's opaque, it's impossible to use the viewfinder to check the scene). Using the LiveView has its (somewhat) disadvantages in my case because some functions do not work there and the metering method just changes drastically, in addition to the increase in handshake.
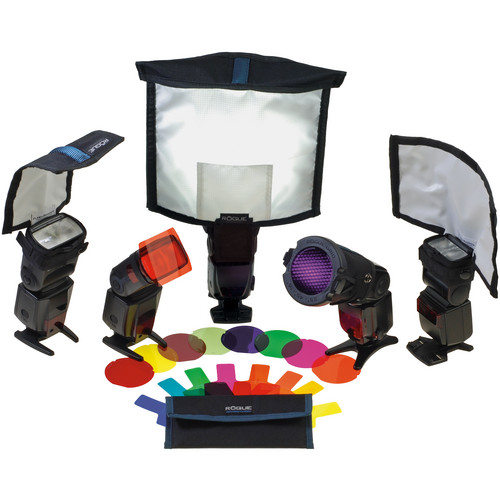
 |
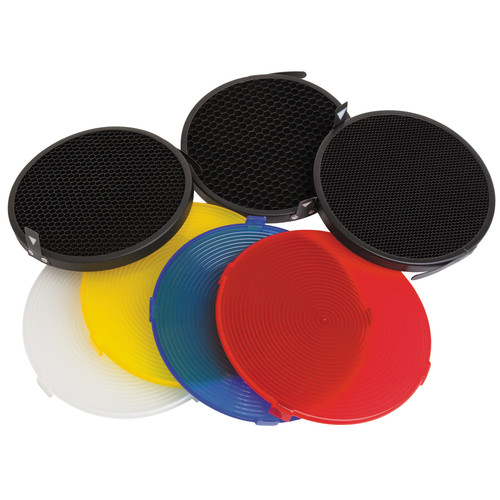
| ExpoImaging Rogue Grid |
 |
| Left: IR950. Right: B+W 092. |
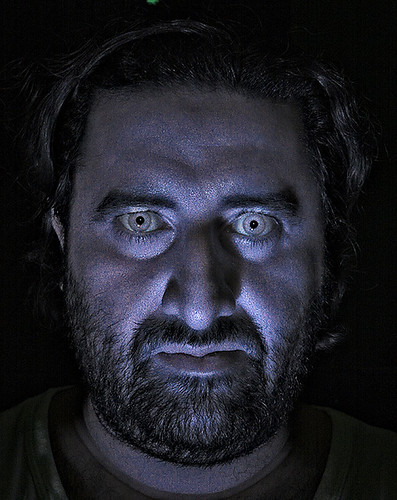
The work was simple here: lighten the eye, and sharpen some more, and you got yourself a Werewolf. Anyway the question remains here as to why it showed like that while that did not happen exactly when using the B+W 092 infrared filter. After checking again and again, it seems that because of some gaps around the filter disk, some light from the speedlite itself did leak and thus giving some mix up between infrared and visible spectra (remember that we are using the filters on the speedlite and not the lens, so the camera really is catching everything on its way!). When I fitted these gaps, the resulting image was indeed like the one I usually get when placing the same filter on the lens, just like the case with the image taken with B+W 092. It's kind of a lesson here that being perfect is not always a good thing. The joy here was that it was all done without going blind because of the flash pulse into the eye or anything! That would help me greatly in some tasks (specially when I have my brother as a model; He is greatly annoyed by flashes).
 |
| Variety of spectra for various flashtubes. Click to enlarge. Source: Wikipedia. |
My next target was to shoot the veins or blood vessels using a speedlite and IR950 filter. Even though it is somewhat common to use the threshold of 850nm for infrared beams dealing with blood vessels imaging, it seems that 950nm would add a bit more contrast to the matter. After all, I did try the IR950 already under the sun and it did show the veins of my palm! My trials, however, were in vain, and apparently, it is not the filter we are talking about here but the source of the infrared - And for that reason the sun works fine to show the veins but not the speedlite. According to little research I've done, Canon Speedlites use Xenon flashtubes, and the spectrum of such gas go downward (as seen in the diagram) around the value of 800nm (0.8 microns on the diagram). There are ups and downs in the graph but the bulk of the power seem to be in the range of 400nm to 600nm somehow. I'm not sure what is the intensity of the 580EX II speedlite compared to this diagram for Xenon flashtube, but the general scheme, as I believe, applies anyway; And probably speedlites are not the best infrared source to be working with when it comes to IR950 and some veins work! In fact, even IR850 which has a lesser threshold did not yield a clear image for the veins of the palm when used with the Speedlite. Thus in conclusion: Speedlites are not a good source for infrared when it comes to penetrating the skin to show the veins. Tungsten lamps, on the other hand, look promising from some test shots. Still though, I had some ideas to implement even with speedlites using IR950.
 |
| Source |
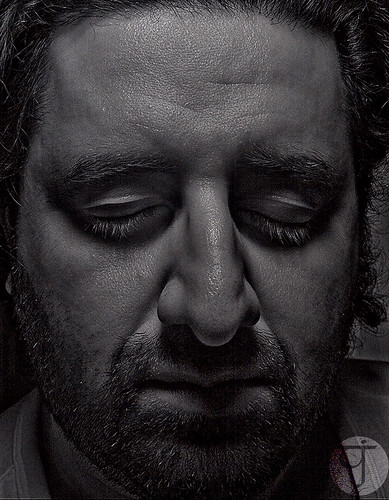
In the beginning, my aim was to picture the blood vessels in my face (got inspired to do this after checking some anatomical images online), and ironically, I can't remember if the IR950 infrared filter was placed on the lens or on the speedlite. However, judging from the direction of the light in Der Erschöpfte, I presume the speedlite was on the camera actually and I think the filter was placed on the speedlite with some extra stuffing (probably duct tape around its circumference) to fill the gaps and trap the speedlite light. Anyhow, after taking several shots I've picked the one you see above to be my target for processing even though all of the shots didn't show any signs for blood vessels. In processing this image, I tried to keep the histogram in the dark region as much as possible without being cut off, and thus having minimal details in the shadows BUT not lost details in that region.
 |
| Histogram for Der Erschöpfte, with Adobe 1998 color space. |
I like to be somewhat delicate sometimes when processing B&W images. Pulling the histogram to the left further to an extreme made some interesting touches of light on the nose tip and the eyelashes. Notice that the image would look a bit brighter than it should on some displays (I work with a calibrated monitor to ensure correction rendering for colors and luminosity). As I work on a PC and a laptop, I can see there is a difference in the looks; My laptop is not calibrated and I can see the background of the image here, while originally it is dark and hard to see any significant details, giving the image dark and mysterious look. It is amazing how I got my white-ish skin to be so dark with a glimpse of infrared! This experiment needs to be redone probably under the sun for better details if any (or is my face skin that thick?!). There is a holiday coming and after a period of turmoil at home because of renovations, I can get out and shoot some selfies in the sun with these filters and check the results.
Finale
Originally, there was so much I wanted to talk about in this post, like my experiments with hand-made pinholes, but I'll keep that till I get more material and more thought about it. I've been also trying to push my mind into poetry again but the words did not really accumulate into a single verse to be posted along. I hope words and ideas come together in the coming week, though. Beside that, I'm trying also to check some older images to see what new processes can be done (specially to those neglected images deemed useless before).
 |
| An Chathair Dhorcha (the dark city) Infrared shot for Kuwait city done in 2015 and processed this week only. Shot from the 60th floor of Al-Hamra tower. |
Arts away, I do have also some plans to "pamper" myself a bit, starting with a day off (today) as a gift to my own self for my birthday. I'm also planning to have some "adventures" of mystic nature, such as doing a palm reading (not the first time). Then, I'm off to a LOT of sleeping, and dreaming of some travels as well. I can have some days to myself just inside away from this harsh sun that cooked me alive already. Should my birthday be in such time? After all, I'm a Leo, and it's hard to complain about it…