Showing posts with label vacation. Show all posts

Thursday, April 6, 2017

V and V…

Sickness had rendered me idle for the past week (still) and other matters kept me busy from writing in this blog. Meanwhile, I'm also trying to find a good topic to write about in my Arabic Blog. Not much had been going on,, except of some trials with vine leaves, and some videos. Yes, videos.

Vinology

On the same lane as Pearology in the previous post, I was doing some experiments with vine leaves as part of March project with the group. I didn't post these images last time so I think now it is the time. My start, as usual was experimental, as I did not plan anything but I was sure that special filters like IR or UV do have something to offer; after all, foliage is the main target to set white balance (usually) when performing landscape IR shots.

Veins
Canon EF 100mm Macro + 092 IR, f/16, 250-1sec, ISO100.


My beginnings were random in fact. It is usually advised to examine the object with a magnifying lens before doing a macro job, but as usual with me I just rush things and "experiment" whatever there is to be offered. My start with Veins was to place a transparent (acrylic) board on top to make it flatter, and then try my best with speedlites to light the sides through the board alone; in other words, no light beams from the speedlites should escape and cross the lens' front. The result was interesting somehow and giving some depth with the play in highlights and shadows, making it look like a surreal landscape pictured from above. I'm aware of the tiny vessels or veins, so I was trying to emphasize these features as I was processing the RAW file. This image, Veins, being an infrared shot, did not undergo any channel swapping techniques to produce the colors seen here, but simply an increase in vibrancy and other factors.

Veins II
Canon EF 100mm Macro + 403 UV + Tiffen Hot Mirror, f/20, 250-1sec, ISO100


Then it was the time for trying out a UV filter (with IR-Cut filter), which in time I've taught myself to be more "graceful" and "accepting" for this combination of filters, as I will explain later. I think the result here was not interesting as much as the one done in IR, and moreover I was perplexed with the noise, as some blue spots made it hard to decide whether these are real noise artifacts or a by-product of using a UV filter!

100% Crop from Veins II. The blue spots cover the surface and it was not easy to remove them as well!

Reading further about UV photography, I've become more accepting to the gear I have, despite the fact that even my lenses do have anti-UV coating, but it seems we can compromise some aspects (like, doing a long exposure in a converted camera?). According to this website, most UV filters do indeed leak IR at some region and using hot mirrors (like I do here) is a must, though various hot mirrors exist and they vary in their blocking capabilities for IR band. Thus, with this little gap of about 50nm in IR region between the 403 UV filter and Tiffen Hot Mirror, it seems something acceptable. The question is though, what or where can I find a good UV source for lighting the scene (for indoors), which is something I'm still researching.
It was a time then I had to leave it like that and forget about it, and then come back to continue to work with the same vine leaf which now became dry. To my surprise, dryness provided more "creativity" than the original wet one!

Vine City
Canon EF 100mm + 092 IR, f/32, 250-1sec, ISO100.

At this level, the minor veins separating the cells on the leaf became more visible, specially after converting the image to B&W. The thing though, my problems with my Canon EF 100mm f/2.8 Macro lens had just began! Despite using f/32 and speedlites to provide much light (which they did), but f/32 seemed not sharp enough. Truth be said, I've totally forgot about the lens testing I've done for this lens long time ago, where the sweet spot in fact lies at f/8. It was time also to change perspective, which also, for a dried leaf, made a good composition after all despite the unexpected shallow depth from this f/32 problem!

Arousal
Canon EF 100mm + 092 IR, f/32, 2m15s, ISO100.

At this point, when Arousal was shot, I've given up with the speedlites and decided to do it as it is with the available room light, and thus it took such a long exposure for more than 2 minutes. The upper left corner suffers from overexposure and generally speaking, the left side seems to be out of focus. I can't remember, at that moment, whether I was using the acrylic board on the top or not, but further experimenting proved that the lens is misbehaving at f/32, in terms of depth, as well as in measuring the proper exposure required! Whether this behavior is related to using the LiveView or not (though doubt it), or whether it is prevalent only with my converted Canon camera is something still under inspection (which I couldn't do further because of sickness). Anyway, that didn't keep me from going on with my plans and did more shots using my UV and IR-Cut combination…

Veins III
Canon EF 100mm Macro + 403 UV, f/8, 4m16s, ISO100.

This time, I've continued my work with a "fresh" (if I can call it so) vine leaf which was wet when spread over the table. After many shots and trials with and without speedlites, I've decided to go without any speedlite (even better to reduce the IR intake) and to remove the acrylic board from the top. The final UV shot, Veins III, made it in about 4 minutes and 16 seconds; Yep, a long exposure with this filter with a converted camera! After editing the RAW file a bit, I refrained from converting the image to B&W as I guess the bluish hue is more pleasant to the eyes. The final composition was enhanced using the Rabatment of The Rectangle method, making the main vein as a divider. At this point, all my ideas were exhausted and I was having fun with some videos with filters and checking my capabilities to edit them using Photoshop (yep, not Premiere).

UltraVideo

The prime goal for me was to, have fun. Yes. I wanted to check the difficulty of recording a video with a heavy filter such as B+W's 403 Black UV in addition to Tiffen's Standard Hot Mirror, and then I continued experimenting further with IR filters. Notice that in the coming videos I had to reduce the size and quality for uploading purposes.


For your sanity's sake, I'd go with this video on silent mode! Here we have the original video made by 403 Black UV filter + Tiffen's hot mirror. The looks are quite similar to an infrared rendering in fact (and for this I'm always suspicious of the validity of such filter!). I had a minor problem first with editing the video and adjusting the colors as needed since I don't have Adobe Premiere, and though I know that Photoshop does open some video files, but I didn't realize at the time that I was actually working with the 64-bit version of CS5 (yeah, that old), which has limited features (Not sure why!); e.g. incapability of duplicating layers when working in HDR, and opening video files. Thus, problem was solved by switching to the regular 32-bit Photoshop CS5 (Extended), and the edit was as easy as working with a single shot! However, the drawback here is that no sound is rendered with the video, either while playing it in Photoshop or after exporting it from Photoshop. Thus, I had to go around this problem with a minor, no need to mention it here.


To adjust the white balance in this instance I referred to an old method which I use sometimes to fix color casts in JPEG images (remembering, editing a video in Photoshop is in terms of layers just as done with regular images). This method uses the Photo Filter adjustment layer and picking a color with the picker from a grey or a white surface (or any foliage form maybe?) and reversing the signs for the A and B channels in the LAB system. Without going deeper into details here, the video right up is the final product of such technique plus swapping the Red and Blue channels just like in singular shots. However, I've tried another method later on.


Without testing my humble B+W 092 Infrared filter, I've decided to jump right away to the extreme: Rokinon 8mm Fisheye lens plus Kodak's gel Infrared filter (with threshold almost equal to 1000nm). This filter is so opaque that with a regular camera and in a sunny day, it might require an exposure of 2 to 5 minutes. I was eager to see a video with such filter and how it would act. In fact, nothing abnormal about it. As it can be seen from the video above, the typical purple/magenta that come with such filters is there, and even after adjusting the colors it would be almost as it is in regular IR shots done with this gel filter.


Here in this video, I've adjusted the white balance using a manual method of "shifting" the histogram (by means of changing the Gamma value) for each channel: R, G, and B; and let them coincide with each other as much as possible. This method, even though manual, but has lot of potential because the range of possibilities is wider. Not to say that the LAB method is limited, but in the LAB white balance fix, we usually aim for something white or grey (mentally). As for the Levels method and changing Gamma value, the histograms for the three channels can meet at any point along the line. The video above looks close to B&W but it's not quite so, as it has a slight cyan tint, but after all this is natural because the threshold is quite high (1000nm); the higher the threshold, the closer to B&W an infrared shot would be.
Now, remains the big hassle which is the fact that any editing, whether using LAB signs reversing, or Levels to adjust the Gamma value, these two work as per a single frame from the video and their effects take all over the video; meaning a single frame would decide how the video should look! Now, I'm not an expert videographer, but probably there is a way to edit a cluster of frames in one video in various ways in Photoshop (pretty sure it is more complicated in other specialized editors like Premiere), but that might take a long time (and it takes long time already when rendering and adding effects to such small videos). Thus, my best bet is to look for a suitable frame and work on that frame to adjust the white balance in either method. I have some ideas running in my head now as I'm typing this but I'll keep those for later! Too bad that I could not find a UV-pass filter in gel format to fit with any of my fisheye lenses (and if there is, we would also need a gel IR hot mirror filter as well). I'll keep searching…

Finale

My sickness had gone down a bit for now but the cough surely tire my body off. I got some plans pending right now as well as the work for April's project, which involves working with reflections and shadows. I might get to merge this project with my own investigations about some geometrical shapes (hypercubes specifically).
Meanwhile, I think it is getting serious here and a plan for a travel must be made up ASAP. The idea of visiting Failaka island before getting too hot is also in the atmosphere but I would sure need to book a 1-week leave from work for this trip, beside arrangements before commitment. With the world going crazy it makes me feel a bit down whenever I think of traveling; I don't think I'm ready for the security hustles and bustles. The peace of mind is my main aim for traveling away from this place, not to exchange it with other annoyances. Anyhow, such activities are surely not for this summer, but for after summer, as usual; further away from the tourism season. Till then, I'll keep dreaming…


Stock photography by Taher AlShemaly at Alamy

Thursday, October 15, 2015

Wara Malta…

Here I am. After some long journeys and so much fuss and hassle in life! I think there's so much to be talking about right now, specially that I didn't write any blog posts when I was in Malta (from September 27th until October 8th), but thanks to my laptop, I couldn't do that and now many things and many details escaped my mind. However, processing images and some panoramas is ongoing.
I have to say that I didn't get into the maximum of my efforts in Malta, specially after being struck with a serial bad luck, starting with my laptop stopping to function in what it seemed back then to be a short circuit in the motherboard. Luckily I had my tablet to do some of my business and when I did a search about this problem it seemed that most people suffered from this problem owned a DELL like me! And it is noted that most likely it is a motherboard problem. However, when I got back to Kuwait, the laptop worked just fine as nothing happened at all! I'm still trying to figure out what was going on exactly and learn, so I can avoid this problem in the future! Malta's and Kuwait's electricity are almost the same (230V for Malta and 240V for Kuwait, and both run on 50Hz). It sure gave me a hard time, but thanks to the owners of Dar ta' Żeppi who allowed me to use a laptop to transfer my files from the camera to my external hard disk.
I'm not sure what came over me but something out there turned my ambitious venture around and made me dormant. In fact, I didn't go to the typical tourists attraction in Malta, and specifically in the island of Gozo (Maltese: Għawdex), and I had just my share of walks in the narrow roads of il-Qala, the town where I was staying. The weather is nice but it's not as cold as Ireland in October; a typical Mediterranean weather. Thus, walking around had its toll on my body. In fact, I was literally "climbing" in some of these roads!


As you can see in the video, this is just an example of some portion of the roads. There were scenic views however. The owners did indeed offer me a ride to some of these tourists attractions but I was on hibernating mode and all I could think of is relaxation. I got tired of carrying my gear with me wherever I go, hence after few days I've totally abandoned the idea of doing panoramas out of the periphery of the B&B. I took strolls like in this video above, simply carrying my camera and 2 lenses maximum (typically the Canon EF 50mm f/1.4, and Rokinon 8mm f/3.5 fisheye). In the beginning I was wandering around with my full gear (plus the VR-Head for panoramas) but it proved to be a killer specially in such roads. Not only you will get tired going up a road walking but also going down from the same route because you will need some power and force (while you're exhausted already) to brake your body and avoid falling down!

Is-Sema li Jaqgħu
(the falling sky)
Canon EF 15mm fisheye, f/9, 18m, ISO100.


Beside regular shots and panoramas there were infrared trials of course. I wasn't always lucky in this matter in fact (seems luck was always down in Malta!). I tried to take an infrared shot with my Rokinon 8mm fisheye lens in front of Kbir Qaddis Ġużeppi church, but the wind direction was always driving the clouds away from the scene giving me at the end a clear sky (those exposures took around 40 to 42 minutes!). I might though work on those later, but probably the best infrared shot I've taken was done with my Canon EF 15mm fisheye lens (the one I usually use for panoramas as well); Is-sema li jaqgħu. The clouds here served me well but the composition isn't quite right and somewhat "barren."  The sun provided a strong flare and had to be cropped out as well. For infrared shots with Rokinon fisheye lens (which has no socket at the back like the Canon EF 15mm fisheye), I've decided to do it the hard way by sticking it using a duct tape to the back of the lens. It is a long process and wastes time but I think it is worthy after all, specially with exposures lasting for long time like this. 

Fuq L-Għolja
(above the hill)
Sigma 70-300mm @300mm,
f/20, 4s, ISO100.
I didn't have to wander off far away just to snap some shots anyway. Some of the brilliant shots (to me at least) were snapped from the top of Dar ta' Żeppi itself. I noticed from the top of the roof how people are dependent on solar energy! However, I have to say that the lighting in the place was not giving me any easy time with my eyes. With this I have to say I'm not very optimistic about adapting to this technology! 
On the roof, I've waited specifically for the sunset time and I did take a lot of shots that need to be processed and checked for further manipulation. The one like Fuq L-Għolja was shot after the sun disk disappeared below the horizon. One thing I feel sorry for here is the fact that the sun disk was not going exactly behind the church (Nadur church here) but beside it. However, I did snap a lot of shots which I might work slowly on them later on after finishing essential key images.

Panorama-wise, I didn't wander off far to do them. The furthest point at which I did a panorama was at the piazza in front of Kbir Qaddis Ġużeppi church (a landmark of Qala town). Even though I processed this panorama (and I've planned it in 3D anaglyph format) but I'm still perplexed about its arrangement and is it really good enough to be a 3D image. In the meantime, I've worked on the rest, specially those taken inside Dar ta' Żeppi, mainly for writing a review in TripAdvisor, and to send a smaller version of those to the owners as a little gift. I doubt I will make any prints this time. To myself, two panoramas were really interesting for me.

Kamra tal-Banju
(the Bathroom)


One of these panoramas is Kamra tal-Banju, which had a dark atmosphere with those yellowish energy-saving lamps on the wall. I was baffled in the beginning whether I should do this panorama in daytime or nighttime (because of the window which leaks daylight into the bathroom). In fact, in daytime, the view is brighter to my eyes without even using the wall lamps. However,I've decided to do this one at night and depend on the wall lamps to make the lighting unique and avoid patterns of light on the walls. Thanks to the HDR technique, I was able to elaborate this more and also thanks to my white balance disk, I've calibrated the white balance before the work resulting in (almost) pure white tiles with brighter look.

L-Orizzont
(the horizon)

Probably the most brilliant panorama for me so far is the one taken from the roof (and in non-conventional panoramic way!). L-Orizzont was shot using my Sigma 70-300mm lens @225mm. No VR-Head was used here since it is not about doing a 360° but it's about catching a moment in the horizon and to show the elevations of hills and valleys against the bright horizon. The shoot was, of course, done in HDR technique, which allowed a lot of control. However, the sun disk was problematic that's instead of cropping it out (and the panorama then was already cropped after adjusting the tilt), I've cloned it out. In order to increase the contrast (after increasing it already with Curves and Vibrance layers), I've decided to add a Photo Filter layer to add a bluish streak, specifically to the lower part of the panorama and hence making a contrast on the basis of Complementary Colors (Blues and Yellows are at opposite ends on the color wheel).
L-Orizzont makes me feel happy when I look at it. In its original format, this panorama is 6.5 meters wide (~256in). I do wish if I can make a print of it in that size one day instead of shrinking it to few centimeters in one of those miserable exhibitions we have here.

Finale

That was briefly what was it like in Malta. Many details and events I've skipped actually, trying to keep it to the point. Strangely though I've got struck with some tearing feeling of loneliness more than I usually get when I travel alone. I get that feeling often, but not like this. For some days I was really pushing myself and forcing myself to go out and at least enjoy the weather (a weather type seldom I experience here in Kuwait). There had been few days when all I desired was to lay in bed and watch TV, specially music channels. They played a great variety to my liking. One of these songs got stuck in my mind up till this very moment.
It's a trip that made me shuffle my mind about many things and re-think of many things. It would be some time until I can go ahead and continue with whatever is there of unfinished projects in my list, but hopefully I've persist on. One thing I can't deny for sure, and that is, my life is such a great mess… I even can't imagine myself traveling again any time soon…


Thursday, July 30, 2015

Heizung…

Supposedly it should have been a quiet and an easy-going summer. Well, I was wrong. Things are going with speed, specifically after the announcement of some Expo for which our group was invited; and it is of a classy type as well. Photos must be chosen carefully. Beside this fact, I've been busy running errands to complete my Visa request to Malta. Quite pressed in time here and I've changed the plans already. Seems that I'm going to divide my was-to-be long vacation into portions of smaller ones to save days and also because of reservations problems in the chosen time. Hence, I'm going to have first a 3-day long leave (followed by a weekend holiday) for my travel to Oman with the group. Then after, I'm going to have to wait till 27th. I got a nice offer for staying in between this time and up till October 7th.
This Visa specifically is somehow weird for me to do, as it is a Schengen Area (Malta is a member in the Schengen). No online application, no fees, but a health insurance (!) and I have to fill it on papers. Needless to say that I had to go through a maze just to find the location of the embassy itself! (before this time, in 2010, the Visa request was attained via the Austrian embassy here). As of this moment of writing this blog post, tickets are purchased already via Turkish Airlines (Türkçe Hava Yılları), and I've taken a personal shot for the application. I'm left with the insurance and officially booking the place and, ahem, filling the Visa form!

Expo

Now back to our Expo story. As I said, we received a special invitation and hence the photo pick and sorting is a delicate matter. As of writing these words, the sorting meeting is not yet held, so probably the results will be available by next week's post. Meanwhile, I had to press myself a bit and try hard on fixing some photos and looking for those which I didn't bring to a sorting or filtering meeting before. There is one troublesome issue though: size.
Issues with size require a special crop and I do think that it is better to be done without interpolation; meaning: cropping to the required size without keeping the DPI resolution fixed. Keeping the DPI fixed will create extra pixels to compensate for the lost pixels in between. More to come about that below.

Yggdrasil

Some of the images underwent a critical fix, like Yggdrasil. This panorama was shot back in April in Al-Hamra mall and there were many projections made out of this one. However, one of the most dramatic projections of those was the one used in Yggdrasil. Previously, the panorama was deemed interesting if not for the group of people on the lower left corner which broke the symmetry. I decided to crop out this portion of the panorama ending up removing the whole ground; ironically, no one made a comment about the traces of cloning out the tripod on the ground!

Spider

The final look of the panorama became more as an abstract. Because of the colors tones and the severe chromatic aberrations on edges (mainly because of the high amount of stretch by the projection style), I've decided to change the image totally to B&W to get rid of all that hassle.
Most of the images to be sorted out are panoramas except for one single shot. I wouldn't list all the fixes that were involved with all of them, but let's hope some of them get a pass. The noise level is humongous and that lowers my expectations!

Finale

Printed and Varnished
Here it is finally, one of my favorite shots; printed and varnished! Well, I didn't print it in the original size, otherwise it should be around the size of A4 (210mm x 297mm). I've enlarged the image (keeping the DPI flexible here and not fixed) to the size of, around, A2 (420mm × 594mm). I wished I could enlarge it even further, but I feared the flaws. Keeping the DPI (dots per inch) flexible and not fixed, means that the size of the dots composing the image is changed, while keeping the DPI fixed means that the image had to be interpolated (i.e. follow a specific algorithm) to predict or generate the new dots (or pixels) which would fall in between separated dots (because of the enlargement). Notice that DPI is precisely a measure for the displayed dots on monitor, and for the printing process the resolution that must be used is PPI (point per inch), but eventually despite the difference in their concepts, the two are proportional; changing one will definitely change the other. Beside, controlling the PPI for a printer does require a special RIP (Raster Image Processor).
Changing the size from around A4 to A2 reduced the resolution or the DPI from 300dpi to around 160dpi. Doing the calculations this seemed a fair resolution to view the image from a distance of one meter or so. The print seems clean after all, and the contrast was increased by the varnish. The sepia tone seem to be vibrant even more after the varnish (was much closer to white without the varnish). All what is required now is to deliver this humble print as a gift to the celebrity! I'm not sure how to find him (and surprise him) but I will try to do this ASAP (adding to the burden on my back for this summer!).

Now with all that fuss going on about the vacation and the Expo, it feels like events are taking place in few days from now and not by the end of September (the Expo is in August though). Some are saying the situation is dangerous with all the crazy situation world wide. Well, I will be crazy myself (if I'm not already) if I stayed here without a change in scenery. It is astonishing how your bitter memories turn out to be the sweetest after all. It is time to be isolate, again…
Thursday, September 18, 2014

Die Flucht…

Well, here I am, on a vacation. Finally!!! I was not going to do anything or post anything for this week, but decided on doing so after getting the chance to do some shots.
On the other hand, being on vacation is not so idle yet, but certainly more active and cheerful; even though I still have to pick Mom to and from the dialysis center. My flight is in around 10 days from now, and I'm preparing slowly for it. I'm still not quite sure if I should carry my camera bag on plane, or put it with the main luggage as I used to do in my previous travels. As for the former, it would be better for the total weight, but a havoc for the security procedures specially in times like these we are having now. As for the second choice, the weight will be more for the main luggage (and might pay extra), but I'll my head the usual security headache.

Die Flucht

I really don't know how this idea escaped, but I've suddenly noticed this small space, which according to some architects, supposedly working as a vent for the kitchen. Anyway, the space was tempting, but the steps later on were hectic and it was so hard to do a panorama in this small space, mainly for the amount of reflections involved - Something cannot be avoided!

Die Flucht

The panorama was done twice, and Die Flucht you see above was the result of the second. Many differences were there, and because of the mistakes that happened in the first, I had to reduce them in the second attempt. I will try to list some of these problems:
1. In the first trial there was a chair. It seems this chair caused lot of havoc (adding to my reflection on the glass). The chair was not completely stable and seems to have been shaking while working. Thus, I've decided to remove it in my second trial.

2. My reflection in the window is surely a cause for many distortions and misalignment. This is because of my body movement which, of course, acts like a moving body in continuous shots. However, this obstacle could not be eliminated naturally! Thus, broken lines and some misalignment remained in the second trial and I had to conduct dear ol' Photoshop!

3. White Balance wasn't much of a big deal, but I've decided to use my White Balance disc to calibrate the white balance of the place accordingly; which initially yielded better results (colors been changing as I changed color spaces and other things later).

4. Probably, but not for sure, I do need to calibrate my camera and lens combination with the VR-head again - or maybe it is the small space that tends to induce so many errors. I'm not sure, but I've done panoramas in narrower spaces than this and I don't remember so much errors like in this one!

Hello Word!
A panorama in an even a smaller
space than Die Flucht.
The only projection to hide some of the errors is the one you see above (deduced from Little Planet). Flat and others definitely won't work. The only problem here is the remains of the tripod head in the nadir point which I had to "craft" piece by piece in Photoshop and still didn't make it better, but, at least, it's not that obvious in this smaller version. For these reasons, this panorama, Die Flucht, is not to be uploaded to stock websites. The adventure inside this tiny place is not over yet though; I still had to come up with something...
Meanwhile, I do tickle the idea of using a wide angle lenses inside narrow spaces - the results are kind of unpredictable at times. Probably it is a result of the packing structures in narrow spaces, like this one. Thus, I've placed the camera on the floor (putting some plastic to protect the LCD first) and I tried to center the camera as much as possible. Using my Rokinon 8mm fisheye lens, I've snapped some images in that space. However, it was not until the third trial that I got it somewhat right.

Der Flüchtling
Rokinon 8mm fisheye, f/11, HDR, ISO200.

The first trial, included that chair and it didn't sound right, specially that it was done in an opposite orientation to Der Flüchtling; which is an orientation that didn't give much space for the door on the right here. I believe that the door should have more space, and the chair in that first trial was simply wrong. The second trial was like the one above but plain. Then I got the idea to include myself. All trials were done in HDR format of course.
No flashes were used in this shot - the light was completely controlled using the HDR capabilities in the HDR slide before "baking," or tone-mapping the HDR (HDR was merged in Photoshop instead of Photomatix). Probably some halo is obvious around my body and in fact I intended to do that way for some reasons:
1. I wanted to guide the eye to two bodies here: the sky, and the body.
2. Darkening the rest of the shot was to hide some reflections on glasses (and had to do some cloning).

Using Exposure adjustment layer in HDR mode, I was able to control the light level in various areas with the help of layer masks, and with some blurring to the layer mask, I got the soft halo around my body. Ironically, I had some other ideas after I started working with this shot, which would require another trials - but probably this is enough for now. The rest of the work before and after tone-mapping the HDR was to clone some unwanted features (like a pipe and some reflections) and to adjust contrast as well as darkness and brightness of some zones here and there (while keeping the sky vibrantly blue). I have dropped the saturation for the whole image and increased that of the sky. Cropping though was a hard aspect specially that not shooting my hands full in the original made me a bit awry (yes I can be a perfectionist in such situations). However, I've decided to base my cropping on the center of the blue space of the sky (i.e. make the center of the sky is the center of the image). With this done (and after adjusting the tilt of the image), a large portion of the hands disappeared as well as my thighs, but I don't feel comfortable yet about it! Lesson learned now, hopefully.

Finale

It seems that the vacation is refreshing my appetite for shooting. An appetite that I will burst, hopefully, in Ireland in few weeks. My next move now is to stop worrying about Mom when I'm away. In the meantime, I can't stop asking myself would be there anything changed in my workplace after this long vacation? Typically, the answer is: No. But who knows.
I'm living some days with weird feelings, of joy and ecstasy merged with sadness and melancholy. Sorrow about lost days of youth, and fear of elderly conduct. I've started recording some cassette tapes that I've recorded while a teenager, in an attempt to digitize the whole set. Every song passes my ears ticks some memories and how beautiful my days were without knowing that back then. Along with that, comes memories of some hopes that, not surprisingly, been lost at most.
One particular song that I had some hard time looking for, and which really spark in me some weird feelings - probably it is the desire to live a love story - and big thanks to some users online who helped me find it on Youtube. Weird that there is barely some record for this song, and here I leave you with it…


Well, it would be appropriate to say R.I.P. Charles Pettigrew. Wonderful song, from a wonderful time.

Thursday, September 4, 2014

Selfies Galore...

My vacation date is getting closer now. It seems some relief in the air. Next week, however, schools are supposed to be starting, which means we are back to the daily congestion. I have to deal with this for one week at least before I start my leave from work on the 14th, and with the start of this leave, I have to keep on preparing myself for the flight on the 29th. Meantime, I've been reckless with work a bit, specially in days when humidity was striking. If my workplace doesn't care about my well-being, I have to take care of myself somewhat I guess? Got to say though, I'm spending most of this time in sleeping more instead of doing something with some of my projects!

Good Galore

Some good news have been visiting me lately. Well, kind of needed such news in some long time ago. I even did notice a change in my general attitude just by "some" good news. I wonder what would happen with lot of news of that type, how my life in general would be?
Anyway, the first item of news is about the struggle going on in Iraq - yes, I have nothing directly involved about it, but I'm so sick of these groups who push nations back to block zero again and again. This time accompanied with atrocities as well. Iraq is full of history, and for someone with passion for Archaeology, these events and the destruction of many religious and historical places by barbarians like those did give me a shock as well as melancholy. Now the tide is turning as it seems, with the break of Amerli siege, and things look promising despite the political turmoil that still go on. In fact, it is one more reason to make me believe that in the Middle East, a so-called democratic system never works - people always believe in the leadership of one man. Parliaments are always a place for struggles and paralysis.
Anyway, with the second item of good news. One day I've received a surprising email from the Trierenberg Circuit, the committee responsible for Austria's International Photocontest, to inform me about picking one of my images (and another image for another member in the group as well) - picking it for the luxurious edition of a coffee table book, with limited number (500 copies worldwide). The winning image for this honor was the surreal panorama Ludendorffs Wirklichkeit.

Screen Shot from the email sent to me.
Click to Enlarge

Ludendorffs Wirklichkeit

Seems I made a mistake originally by placing an apostrophe as I can tell from their email to me! Anyway, as far as I remember, genitive case in German doesn't use ('s) as in English. Ah well. Who cares by now!
Now to get a copy of this edition I have to pay and so I did, and I asked to change the delivery to my UK mailbox (which is a first time for me actually, mostly I deal with the US one). This is in hope that I will get it faster that the regular mail as we didn't get the catalogs made for Austria's contest itself until now (after news that it will be here by July or August). The post services here suck big time and might even destroy the shipment without informing. Praise the service. Thus, the only guarantee for me to track it is using an external mailbox (and pay extra).

More Selfies

As I didn't have much to do lately, all I could think of is do more selfies (self portraits). In fact, my room is still a mess as I'm typing this and I'm way too lazy to recollect the gear. I'm thinking that I might get some idea to do at any moment.

Source: B&H
Anyway, I've been mainly trying to use some of the Impact Syl Arena light modifiers just to accustom myself with the way light is formed. I have to say it was hard to work and imagine  - probably because I don't have background in portrait anyway! - but I've found myself mostly using the Bulb diffuser. Most the images taken were kind of useless, but I tried to manipulate some of them anyway with the RAW editor, by fixing the exposure. Well, some of them turned interesting!
One of the things that really frustrated me is the inability to work on specific spots (like doing dodge and burn) in the RAW editor. I'm wondering why didn't they put that option? Or, is my RAW editor that old? I can't even remember its version...
Anyway, in a spur of some "madness" I decided to hit the Exposure value to the max and the result as you can see on the right, and seems like I like it that way! It has some "sketchy" quality to it, as if it was done by colored pencils I'd say. I can't remember which modifier was used here but most probably it was the beauty dish.
Source: B&H
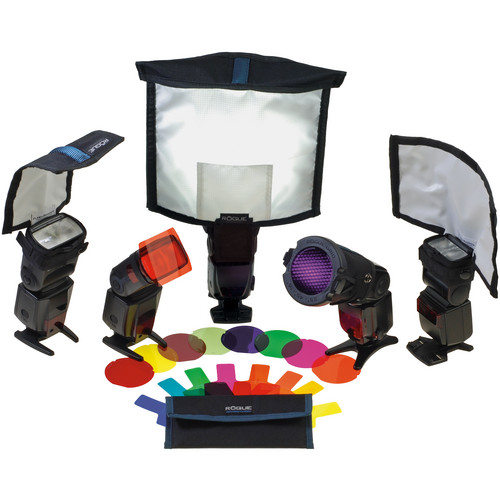
As I've mentioned before, I've used mostly the bulb diffuser. I like this particular diffuser because of its resemblance to a real bulb, and it also provides the feathering that I need. However, when I think of it, I always think of it as a secondary light and rarely as a prime one (i.e. aiding and not key). The image on the left here is not a high-key attempt at all (it's wrong anyway!); it was simply using the bulb from the top with another light from below (or bounced). It was dark, till I manipulated it in the RAW editor. Now in conclusion, it seems that Syl Arena modifiers do indeed work best when ON camera, or at least this is how it felt for me. When I compare those with Expoimaging Rogue modifiers, I would say that Expoimaging set offers more flexibility when it comes to moving the light around and providing diffusion, Meanwhile, Syl Arena's kind of require a direct impact, face to face, and sometimes extra power (with distance and specifically with beauty dish). Right now, though, I do like using the Bulb diffuser in the Syl Arena set to light the hair.

Source: B&H
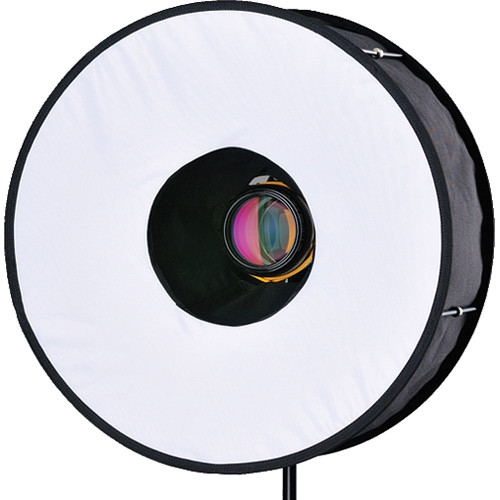
Just before I finish experimenting I decided to try the RoundFlash modifier. This is the first time to try it out with a long lens like Sigma 70-300mm here. In combination with the bulb diffuser it proved to be good somehow for softening shadows in general, but still I did need some work in the RAW editor (despite the high ISO, like the other images too). Seems that the RoundFlash is the best to add some light to the eyes somehow but I would need more work to get the light done properly. It seems that another speedlite is due at such situations, but I'm not thinking about it right now. If there is a real need for it, it would be using it for High-Speed shots, which for me, is more important than doing portraits! If only I can get some help, I would be using snoots properly directed to the eyes. In case you wonder why I concentrate much on it - well, for me, the eyes are all what portraits are about.

Agony
Since nothing worked perfectly as I wanted it to be, I decided to have some fun with one of the shots that didn't work out well. This is, of course, by some Photoshop manipulations. Agony didn't work out because of the bad light ratio (and position) between highlights and shadows. However, since I've been playing with the others, I've decided to play with this one and this time extend it further to Photoshop. In Photoshop, the usual fangs edit was done and some work then with Liquify command to enlarge the mouth and re-shape it and dislocate the nose and eyes a bit. Not quite satisfied with the fangs though and wish they were more "fierce" and standing out further.

Finale

Tick Tock. I'm counting every tick in the clock waiting for the 14th to start my vacation. My growing sickness of work is becoming unbearable and I'm throwing everything behind my back, despite the sensitive situation I've been placed in at work. Once I start it, I have to get on with preparations for my travel.
Meanwhile, the domestic front doesn't seem quite well, as always. Sometimes I can't help it but to stop and think "why am I alive?" It's like my purpose is just to help others (and how I wished to get some help back at times). I'm thinking and measuring the consequences to enroll in some M.Sc. program (again) after abandoning the idea for some years since my graduation. This time I'm thinking of something else other than Physics and Archaeology (which I tried to pursue outside). This is just to "do" something about my life and nothing else. Probably that way I can forget loneliness...


Thursday, March 27, 2014

Snooze...

I think I'm reaching the climax of my endurance capabilities through the past 2 weeks. It is just the fact that nothing goes as planned, and more unexpected events.
People here (and everywhere) are happy for the arrival of spring. However, it is my weeping time. My nighttime photography had already ceased and almost no power is left for me to leave at night. I technically spent 2 weekends sleeping most of the days. With the arrival of summer soon, I'm left to do tiny projects at home, specially in the macro field.
In the meantime, I've already signed for a 2-week leave from work just to rest my nerves from the amount of stupidity that lurks in this workplace (and all workplaces in this country; let's be honest). Everyone thinks I'm traveling somewhere - my chances are slim. The best I might be able to do is to head to Failaka island, if possible, and maybe spend a night there. My leave should start on April 1st and extends till April 17th. The best part of a vacation is to see people go to work while you don't!
Anyway, despite the hibernating activity with photography, I still had some few trials with my camera (and flashes) and might be interesting to share...

Ego

Don't read it wrong; Ego here is the Latin form for I or Myself! For the past week (and also for the coming few days) I've been trying to test my flashes and light modifiers on a real subject this time and not against some slid subject: me.
The fact that I don't really do well with portrait with other people, and yet I don't have someone to help me with testing my gear, leaves me with me! Experts usually advise the photographer not to be the subject of their own self; this is related to the degree of concentration and the attention paid by the photographer to the light formation - it would be lesser in such situations. Anyway, I'm working with my own face here and I don't have much options. The funny part is, as it is supposed to be a check-up for my gear and lighting positions, it became also a trial for some Photoshop experiments.

With RoundFlash
All of the coming shots are taken with my Canon EF 50mm lens, not only for its sharpness or wide aperture (f/1.4, which in fact is not used or needed here), but for its perspective in regard to the distance available for me in the room, and for the scale on the lens' barrel which I used to adjust the focus range properly. The first thing to try out with my flashes is the RoundFlash, beside another flash for the hair light on my right and above my head, with a diffuser. The rest is a simple processing in ACR (Adobe Camera RAW). One of the fascinating aspects of using the RoundFlash is, like the ring-flash, creating an interesting catch light in the eyes. The post-processing included some simple fill light, contrast, vibration, and clarity adjustments.

After the initial (simple) post-processing, I couldn't hold my fingers from doing further editing like I usually do for some friends photos. I have to admit that the edit does scare me a bit! When it comes to black and white converting, there are two possible paths actually: Convert in RAW, or convert in Photoshop. Each one of those has its own benefits and limits in fact. The image you see above is converted in Photoshop (and it is just one image from the series of shots).

RAW Edit
I've picked one of the many shots and this time tried to convert it to B&W in ACR alone without the help of Photoshop. The results, to me, were astonishing. Te image you see on the left is completely edited in RAW without any enhancement in Photoshop. The difference here is, while in Photoshop you can convert to B&W using the Black and White adjustment layer, which in return has specific tonal ranges to fix the black and white tones depending on the colors - in ACR, the tonal ranges available are varied and more delicate than the simple black and white adjustment layer in Photoshop. For example, in the adjustment layer we have tonal sliders for Reds and Yellows; However, in ACR, there are tonal controllers for Reds and Yellows, with another one for Oranges in between. This latter addition can prove very useful. in specific situations, like my selfie here. Usually, in Photoshop, raising the Reds tones to brighten the eyes would brighten the eyes and the face altogether, calling for a need to use layer masks. In ACR, however, the two zones are somewhat easier to control by the Reds and the Oranges tones (and with some fill light increment). At this level, it all looks normal. For more eye-catching bright eyes effect, then, of course, Photoshop is needed again.

The second experiment with the flashes was to light the face from top and bottom, in something like the so-called hatchet lighting. Usually, a hatchet lighting is when lights are used on the left and the right of the subject, but here it's on the vertical plane. To achieve this, beside the head light above my head (with bulb diffuser), I've placed a white cardboard on the ground and bounced the flash from it.

Selfie #4
After many trials to check the position of the lights, I had some nice shots. It seems that this hatchet method is good to show the details of the muscles of the face; though it might not be so pleasant to look at! In Selfie #4, most of the editing is done in ACR as well, including desaturating. However, some editing was needed in Photoshop to boost the eye of the color. Also, some drama was added by sharpening the image excessively.
Unblinking
And there is a big benefit of having some high resolution to your camera; It is some way to make an abstract with suitable resolution out of the general image, like it is in Unblinking. Probably it won't be a good image for a large print after all, but nice to see online! In Unblinking, the image was converted to B&W in Photoshop (except of the eye), and was given a tint to have some drama.

There is a method of manipulating images that I've read something about, in a long time, and back then I really didn't pay much attention. Probably because the talk was technical more than artistic. However, now with the ACR, it seems that this method is opening a new window for the world of Black and White manipulations. This is the method of tone-splitting. The idea is simple: give one tint to the highlights, and another tint for the shadows. The result was somewhat perplexing I have to say!

Selfie #5
I applied this method to one of the selfies taken with the hatchet technique and the results appear interesting. After converting the image (and adjusting the tones accordingly) in ACR, I've applied the tone-splitting (also in ACR) giving the highlights a tint of violet, and the shadows a tint of green. There is in fact no limit for the choices as you can control the tints and their saturation and also the balance between the shadows and the highlights in general. However, it seems reasonable and more appropriate to work within the circle of the laws of the Hue Circle. The method is simple, after adjusting the tint for the highlights by picking a specific hue and adjusting its saturation, I picked a tint for the shadows then after by adding (or subtracting) 180o from the hue value of the highlights; For this reason, it got to violet highlights, and green shadows. I've adjusted the Balance control in ACR towards the highlights simply to reduce the weird look of the hair and black areas of being too green. Also, to add more luster to the eyes, I had to sacrifice the contrast for the whole image, and yes, I could have done it in Photoshop editing later on, but my goal was to produce an image edited in RAW only without much editing in Photoshop; and I think I've done it. This in fact taught me a lesson for the time being: It's not all about pronouncing the tones by adding contrast, but contrast must be added carefully in regard to what features of the image I'm willing to express and show more than the rest.
A note as well I'd like to add: it is a common advise when printing Black and White images, it would be a good idea to add a slight tint (most probably a yellow tint) even in a small amount just to give a color to the image and show some of the details that might be lost in printing. This is because in printers' language, White is almost synonymous with "do not print a thing here". Thus, it is advised to have a slight tint to give some color and life to the image. Anyway, experimenting with your images is always the rule I presume!.

Heaven is Watching

Out of the desire to break my daily routine and also to try to produce something before the summer is finally and completely here, I've decided to do a panorama near my workplace. I have to say though that I was in a fighting mood as well; I was willing to fight anyone who would be interrupting me and try to stop me from taking photos near my workplace. Anyway, at the end things went smooth, but I wish if I can say that to what happened later when processing the panoramas.

Heaven is Watching

That day, I've decided to have lunch near my workplace and head back when the road is less congested. I've walked up to the roundabout which overlooks my workplace (and specifically the building where I work) and started to shoot there, even though it was congested little bit but the road was giving way and getting easier. That was not a big deal for me in fact as the whole thing was an experiment and I'm not looking for perfect conditions, but I did some mistakes later which became both: a regret, and a lesson. Anyway, I was astonished for the clouds hovering over the place and reminded me of the time I spent in Failaka 4 years ago when I had some marvelous shots under clouds of the same type. Bad thing though that I couldn't (for time limitations and capabilities) do any long exposures in that location. Anyway, after shooting the first panorama, I've moved the tripod manually for few centimeters and started to shoot again. I've measured previously the distance between the centers my eyes, which was 7cm, but here I had to do things blindly and I'm sure I've displaced the tripod for no less than 10cm - can produce a big problem, and it did indeed as you will see...

WARNING: DO NOT STARE WITH 3D GLASSES FOR LONG TIME.

The image you see above is not a perfect anaglyph (or as I called it before: panaglyph), but it is one its kind and I'm hoping to do more experiments with this kind of panaglyphs; Because it is a full panorama and not a simple horizontal panorama turned into an anaglyph as I did some weeks ago. However, I've tried hard to give a good alignment for this panorama but it never worked - needless to say the stitching errors that plagued me in between the two panoramas for the left and the right scenes. Without going into details of the stitching errors, I shall discuss here the points that made this unbearable to look at!

  • The distance of the displacement of the tripod seems too large which caused the difference in between the two scenes, visually, large. This would cause hardships when aligning the two scenes at some points.
  • The center of the panorama should have been one of the palms, and this is a misjudgement from my side. Centering the panorama around the center of the roundabout would have produced a more interesting scene like above. This also played a role in the bad alignment between the two scenes - the scene should have been aligned around the palm that was my zero point (and to which the movement of the tripod was parallel), but I was trying hard to align the two scenes to a new point (which was theoretically parallel as well but not quite accurate).
  • The ground on which I was standing was not even. This produced a change in the elevation of the tripod and the camera configuration after the displacement, and henceforth, another problem was added to the alignment process.
With these problems in mind, I'm hoping that these can be avoided in the future for another experiment like this. I just need the good location with interesting architecture or landscape to work with.
There was a plan to produce and work with a planet projection of this same panorama, but because of some internet problems in the current time I decided to delay this research to be posted in a later time. This would give me also more time to investigate the matter and the other possibilities to produce an adequate panaglyph out of this panorama. Just remember please: DO NOT STARE AT THE ANAGLYPH ABOVE FOR A LONG TIME!

Finale

I have to finish this quick and post it. I'm living a life now where I'm expecting a problem wherever I turn and wherever I go. My only escape would be a vacation outside, which I'm already planning for, hopefully to be in September of October. But I have to wait and see the circumstances. Day by day, I feel my luck is draining, and needless to say, my home is throwing my out. What is home, if you just don't feel the respect you need in it? Would it still be called home?
Everyone is telling me that I need a vacation. Everyone is seeing my bent back and my burnt eyes, and they are advising me of some vacation, far away from home and the work environment. But what can I do with added responsibilities? The least to be done now is to have my short vacation for 2 weeks just to rest my body from the everyday traffic, as well as spend some more time with my camera, and if possible go to Failaka. So many hopes I have for such a short vacation in the homeland, but let's see what is going to be achieved after all...

Thursday, January 16, 2014

Turbulent...

I'm not sure how to describe this week, but one thing for sure: I'm getting sicker and sicker from work. One of the graceful "gifts" from the "palace" of my work place is that they have given me some days when my fingerprint scanning (to check the attendance) is canceled. Thus, I kind of had the chance to get back home early without checking out, specially in the days when Mom has dialysis.Things will be back to the old rhythm starting from next Sunday anyway. This time even with further stress as college students would be back probably, hence the traffic jam will be optimum as usual. All that pushes me for a real vacation. And by real, I mean out of this place, away from those people.
On the other hand, some ideas for a panorama inside the car had to wait a bit because of the rains and the foggy days in the past 2 weeks, and yet I have to find a proper place to work. I've stated before in my previous post that the parking lot in my work place is a good spot, but because of the many headaches I've been involved in at work, I just became so sick of the idea.

Old is (not) Gold

As I was going through my archives one day I've figured that there was once a project, a small one, that I didn't yet complete back in 2011! This small project wasn't completely a photography project but more like a photo manipulation which, naturally, includes doing some photography of myself. The idea was to mimic or to express a feeling about Asperger's syndrome.

Asperger's

The final look wasn't what I exactly envisioned but since I totally lost the vision about this old project, I've decided to do some final touches and finish it. The image is supposed to show the tear of mind and soul, and how a person is stretched back in pain with every step advancing forward; this in my vision, how an Aspie (a person suffering Asperger's) would be feeling.
The merging of the two images (face and hand) isn't quite plausible. I had this idea back in a time when I had some doubts about my mental processes and my actions; as I thought I do indeed have Asperger's or something in that spectrum already. Anyway, even after assuring me that I can't have such a condition by some friends (in the know), I still kept on going and thinking about this shot. After working for some time with it I've suddenly left it as it is without completion and went on to do something else (ADHD now?). Anyway, it should have been worked out further than this but it's old and I think it is the time to just finish it without asking about the final result!
This though inspires me to do more self-projects in the near future, if possible.

Boiler

The boiler room on the top of the house has been a subject for some thoughts for some time. In fact, I was waiting for winter just to do some shooting inside. In summer the temperature in the vicinity would not be bearable. I, in fact, had the chance to work with this room at the time of doing my first sun shots 2 or 3 weeks ago, but never posted them here.

The Boiler Room

The panorama part was hard to be done. I had a dream of, by some means, keeping the VR-head hanging in the air somehow to do the panorama from the top of the machinery in the middle of the small room. Yet, looking at the situation, my wits weren't enough to find a solution for this, thus I've decided to go to the corner (directly in front of the door) and do a "small" panorama there for around 3/4 a circle, or ~270 degrees.
Looking at the final results, I've known that it's not something to upload, specially with the skewed bottom in the image. Even though I did take a lower portion (lower set of images at -45o), but still more images and work was needed to keep things straight in such a small space. With such circumstances, I've realized that I won't be uploading this image to stock sites, and hence, I've decided to play around with tone-mapping to make it unreal a bit. I think the slightly opened door helped here to add some ghostly atmosphere to the scene. The organization of the objects in the scene still leaves a lot to be desired, but these are stable objects and I don't think I could do anything better than that, for the time being.

Boiler

Then after finishing the small panorama I still had the urge to give another try, this time though with my Rokinon 8mm fisheye lens. I've placed the camera on the gorilla pod (which I call spiderpod as well) in the same corner I stood in and with some help with the light meter, I've gone with bracketed shots from -2EV to 2EV. I've taken several shots, and every time the angle of the camera would be changed slightly and I think Boiler, above, was the best from all, in terms of the angle and the luminance.
Unfortunately, here too, the lines in the whole image aren't quite what I desired. I feel they are random. Probably, the only feature that captures my own eyes in this shot is the set of faucets on the right side. The gap between the faucets and boiler machinery somehow breaks the homogeneity or harmony. I think we are here, somehow, working with a concept that works against the typical minimalism. In other words, stacking features and lines to complicate the image, but with a condition of finding some harmony and balance between these lines and shapes, in such a way to form a continuum for the eyes to follow when viewing the scene. I've heard about the concept of maximalism (as an opposition to minimalism) but I'm not sure if I should define the concept that I've just stated as something that goes under the umbrella of maximalism. Probably, I will just call it Anti-Minimalism.

Getting Wet

As I've stated above, because of the rains and the foggy days in the passing 2 weeks, I had to delay the idea of a panorama inside my new car. However, some drops of rain on the body of the car inspired me for some abstractive shots.

Perlen der Natur
Canon EF 50mm + 20mm ET, f/22,
HDR, ISO400.
That day, I've placed my new Manfrotto macro rail on my monopod (which does sound like a crazy idea) and headed outside while it was raining. I was in a hurry that I've just forgot to cover the camera and the lens with my new LensCoat. Working with a monopod was indeed a hard job and it was barely stable but I had to because my car, back then, was parked in front of the house and surrounded by other cars, and working with a tripod here isn't feasible.
With a high f-number as f/22 and an extension tube, I had to raise the ISO just to shorten the time of the shots and get a proper bracket into HDR later. Many people commented on Perlen der Natur, saying that the lower right portion is distracting, and that's true indeed, but to crop this portion out, I would literally diminish the image down to the size that it can't be used as a stock or a print even, and would be barely suitable for online galleries!
Liquid Gold
Canon EF 50mm + 20mm ET, f/22,
HDR, ISO400.
After doing the major work with Perlen der Natur, which included not only a crop of some portions, but also a rotation of the frame itself, I've decided to test some work-out which is usually and typically used for infrared shots: swapping channels. The Reds and Blues channels that is. The rotation of the frame, from my own point of view, was essential. The original orientation of this image was 90o clockwise of what you see here.
I think the main issue has to do with the inclination, or the diagonals, which are made by the water droplets and the light reflections on the body. I'm not quite sure what are my feelings toward the original orientation but it just felt not right and needs to be rotated. Probably, just a theory, the droplets of water on the body in this new orientation are directed upward while in the original is going downward (naturally!); and that is a symbolical expression for hope and challenge in my unconsciousness? In any case, originally such shot would benefit a lot from focus stacking specially with me now using the Manfrotto rail, but with a monopod, my chances were slim for a successful stack.

Durch Dunkelheit

Last week specifically, with some clear atmosphere and lesser chances for rains (but more rains might visit in the coming days from now). Thus, I've decided to head out at night as usual and look for a new location that I didn't work with before (or not much at least). In previous nights I've totally forgot about one location which was a place where I created one of the most puzzling panoramas that people in here talked about!

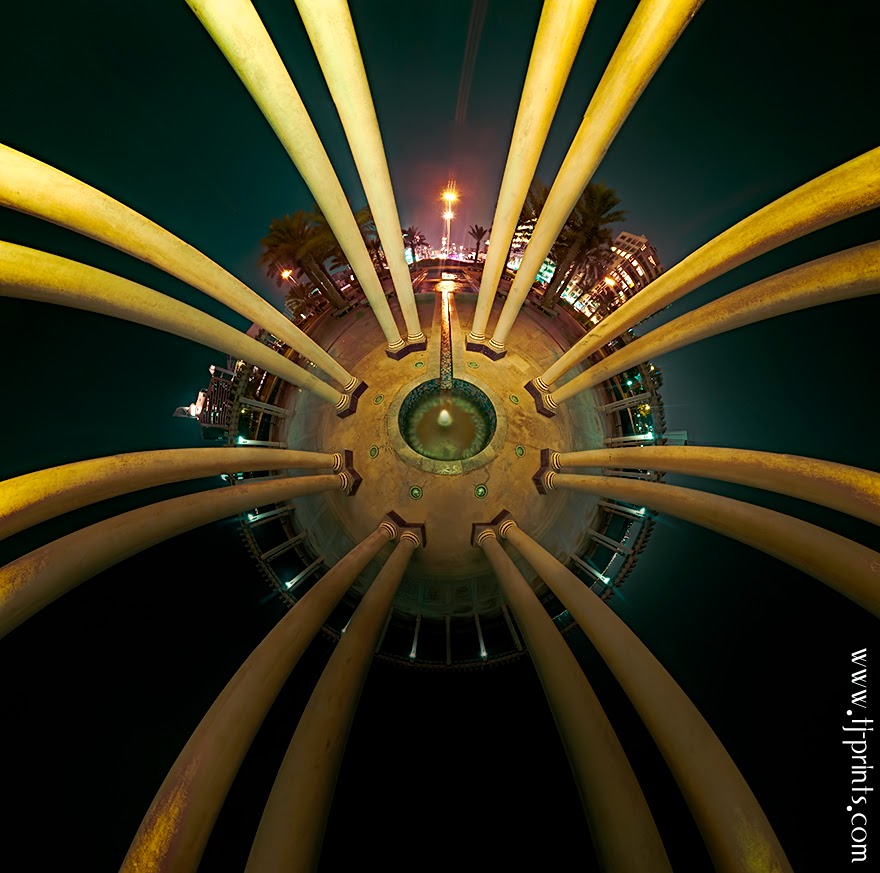
Planeta Columnae

In fact my visit to this location again, would be a source for another vision for this panorama specifically but I will head to that later in the coming days. However, this panorama was taken after dusk hours and people were roaming the place (and I'm sure many of them were looking at me as if I was a loco). This time, I'm heading there for complete darkness after midnight with as few people as possible.

Skylander
Rokinon 8mm fisheye, f/8, 40sec, ISO100.

One of the killing mistakes that I've committed there is to go out and forgetting my LED lights or any other light sources to see my way. Thus, I had to use my intuition bit and a bit of my memory (which can be worse than that of a goldfish!). Because of this, it was a shaky situation because I was standing with legs open above a water channel from the main fountain (you can see it in the panorama Planeta Columnae above). I've used my memory to set the f-number or aperture without looking at the numbers at f/8. Focusing though is another story and as a result, most of the shots taken that night had some soft focusing problem. Anyway, the problem is more apparent when viewed at 50-100% in the original file.
Despite the fact that I've taken several exposures in order to do a HDR merging later, Skylander, which took only 40 seconds, was chosen for some RAW editing instead of the other long exposures, which some took like 2 minutes. This is because the histogram of this particular shot was suitable and adequate for RAW editing more than the darker frames lesser than 40 seconds, and those very bright frames taking 1 minute and above. At the end, I did a channel swap again to show the tiny traces of trace in the sky more, as the blue is so dark and almost hid the features of the clouds as well as some trails. I think the surreal look at the end with a red sky is something, rewarding!

Das Licht Der Dunkelheit
Rokinon 8mm fisheye, f/8, HDR, ISO100.

Later, I headed to the outer walkway around the center of the place or monument. My aim in the beginning was to centralize the monument but the problem was a pillar standing in my way and covering much of the monument when I stand close by. Thus, I've decided to create a twisting line from the curved walkway roof. My thoughts were going in the field of "guiding line". I've taken several exposures, from 4 minutes down to 3 seconds even and merged the whole set into HDR. But processing this image to reflect the mystery in it was trickier than I thought!
I've made several versions of Das Licht Der Dunkelheit, either by tone-mapping the HDR slide or by editing a single RAW file. Editing the RAW file was promising in fact, with bright blue/magenta sky and yellow lights, but the problem is that this wasn't what I aimed for. It's not the soft feeling I wanted for this scene. Tone-mapping, however, proved to be even more baffling because of the many possibilities and many feelings that can be triggered by different settings when tone-mapping.
Generally speaking, I do have some regret for this angle specifically because I feel that the light sparkles (even after the slight crop from top and left) is somehow corrupting the view. I've settled my mind now on visiting this place again as soon as possible to adjust and check other angles if possible. I'm somehow satisfied with the final version here, with these directional shadows and lights, but something more could have been done, I believe.

Finale

Source: B&H
Source: B&H
Source: B&H
Source: B&H
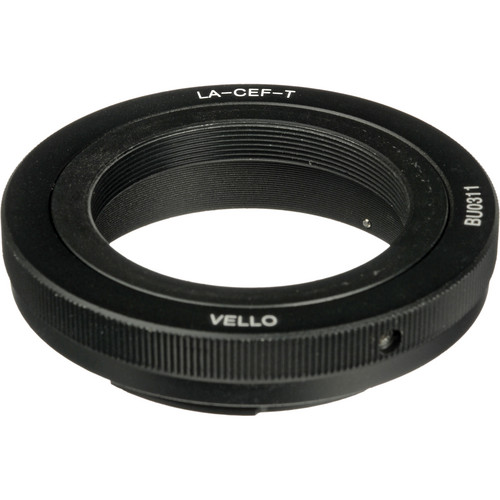
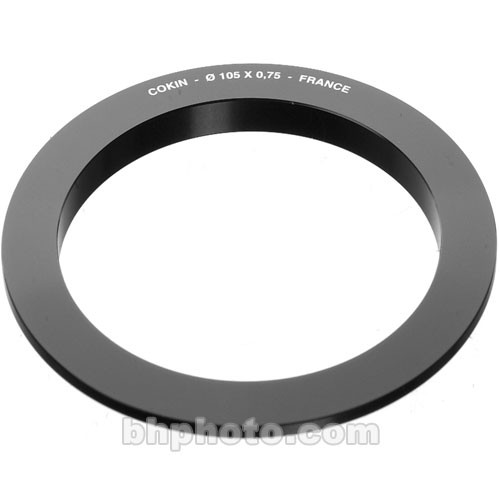
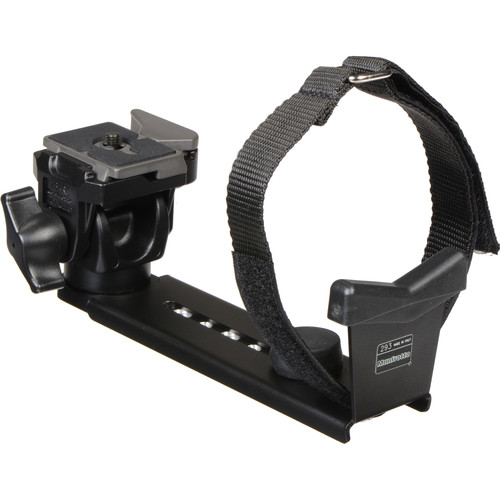
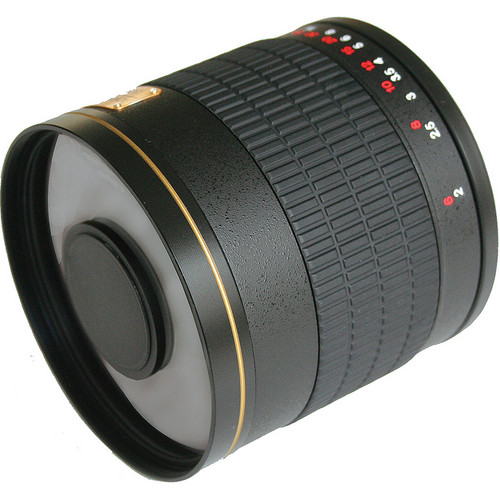
Things are drawing near now. I can't have more patience to get more tool in order to enhance my astrophotography experience. I'm not sure when to put an order for Rokinon's 800mm mirror lens, but it is (along with other accessories in the list) are already in the cart and I might click the Check-Out button at any moment! Probably I would place such an order directly after receiving my salary payment in the 20s of this month. naturally, to order this lens I have to place an order for a T-Mount adapter (second image) in order to connect this lens to EOS systems. Then comes the Cokin 105mm adapter ring. This ring is specified for X-Pro series, (Canon lenses for EOS systems usually run under Z-Pro series) but anyway with my strong paper clips to hold the filters on the adapter I believe it won't be a problem. I've been checking the dimensions for the welding glass specifically and I think it will cover the whole opening of the mirror lens if it arrives here. This is quite essential to shoot at the sun. The only drawback here is the fact that I can't fit the IR filter in any way (not even with a step-down ring). To my experience, IR shots are more interesting than welding glass shots to some point. Finally, there is the Manfrotto 293 Telephoto Lens Support with Quick Release which will help me to give some support for the set of lenses either in astrophotography, or in macro shots, or extra macro shots (with lens coupling) instead of having the body of the camera attached to the tripod. The reviews for this device sound great!
Now with a simple calculations, what I'm expecting is a working focal length of 800x2x2, that is 3200mm! Meanwhile, most of the astro-shots for the moon and the sun are at 1200mm maximum. This is something around x2.6 more zoom power.

My future hopes and projects are what make me alive right now. The thought of leaving my current work place and just act as a freelancer is haunting me day and night. I don't know how to bear this and for how long. A vacation in this time is a must. A real necessity. Day by day, I'm getting so fed up with the disrespect in this useless work place.
Looking at the people around me I do sometimes thank God that I'm not married, specially under such conditions where everything is rocketing high up and no one is holding the greedy people back from chewing this country's people and economy. Makes me have dreams of what I would do, if I was a president of some country. The situation with my sister seems desperate somehow and I would wish to help her out somehow with her kids, but I guess my hands are cuffed in this matter. Needless to say, the more I live and grow, the more I despise the parliament and its people. I wish if I can set this place, and those people on fire.

As much as I try to ease out my life in any other way, seems everything I face is, simply, denying me this pleasure. A work place that I despise, and a home that I don't feel for. I'll wait then for some signal to see where to head next... this, with exhaustive thinking, is all I can do...