Showing posts with label nadir. Show all posts

Thursday, December 12, 2013

Rokinonian...

Such a weird week. Not so weird if I can compare it to my luck with things anyway. By the beginning of this week almost, I've spent some time roaming over places of car dealers to find a brand new car and this time I would prefer it to be an elevated car to give me a better view of the road (and help me carry things around in the future). Ironically, that same day, the garage phoned me to tell me that my (beloved) Seat is finished with and I can take it now. All in all, it's going to cost me a hole in my pocket. Even though I like driving my small car, but I have to give it away in any way possible because of the problems with the spare parts that are hard to find for this car!
Anyhow, I'm starting some sort of a program to try and go out and do some night photography every weekend if possible. Night photography in winter is synonymous to long exposures of course but that doesn't mean it would be a single exposure of course.

Guten Mitternacht
After the initial trial last week for some night photography on the dock of Soog Sharg, I've pushed myself (despite my tired body) to go again and do some shots after some planning for some angles, and luckily, there were clouds this time!

Sessiz
Rokinon 8mm fisheye, f/5.6, ISO100.

In the beginning I've placed the camera with my Rokinon fisheye lens in some corner and pointed it toward the sea in order to capture some curvy image. The exposure was long (around 4 minutes), but it was too long that the lines of the clouds movement were so blurred and almost featureless. Add to that, some fishermen were moving here and there in front of the light source which made things worse. Still considering working around these problems though.
Next, however, I've placed the camera almost in the middle of the roofed end of the dock and pointed it west toward the sky and a portion of the city. After some tests with ISO12800 to check my location and measure the required exposure later with ISO100, I've realized that capturing a single exposure with all the details is impossible in this area. It would be either a blown out city and light wooden beams, or black beams and suitable city lights. Thus, I've decided to go with a little adventure in a sequence of long exposures, starting from 4 minutes exposures and then going down 1 stop each time until reaching 3 seconds: 4m, 2m, 1m, 30s, 15s, 7s, and 3s. A total of 7 exposures that were later combined together into HDR to produce Sessiz.  I was afraid that the movement of the clouds here would vanish so I made sure that when merging into HDR with Photomatix, I've turned the option of Ghost Removal off. The White Balance here was set to Fluorescent but I did make some tests before merging just to check the general appearance of the sky, because usually in such situation I would prefer the Tungsten WB, yet in this instance like in Sessiz I've decided to have a soft appearance and Fluorescent WB helped very well. Adding to that some processing that had to be done to fix and reduce some issues like the saturation of the Reds tones and increasing the tones of the Greens.

The name Sessiz means "Silent" or "Without sound" in Turkish. This name is a reflection of my feelings at that moment (but I don't know why I picked Turkish specifically, probably just for the sound of it!). Despite the harsh wind blowing and the coldness, and the fishermen around, that moment specifically was majestic. Silent, and quiet, giving me a tranquil (and a chilling) feeling deep inside. Exactly why I like winter and night photography combined.

Solitude
Rokinon 8mm fisheye, f/5.6, ISO100.

Then after Sessiz I thought of creating a symmetrical shot of some sort by pointing (and moving the camera) to face the bridge or the dock itself with all the light sources on it. This time though, there was no escape shooting the fishermen, and again with multiple exposures. Like in the previous trial, 7 exposures were taken by some problems with the white point and the flare of the lights that made me merge only 3 exposures instead of all of the seven. Here though I consider myself lucky somehow because one fisherman was closer to me and the rest were far away and that somehow gave out a reflection and a sense of Solitude, from the rest of the fishermen and from the city itself with all its colors and light. Maybe a still image would have served me better for the meaning of this shot but of course I couldn't ask the man to stop still to do 7 exposures! Anyway, probably one can argue that the movement of this fisherman specifically adds some dynamic element to the image instead of being static.

Sessiz (B&W)

I couldn't resist the urge to convert some of those night images into Black and White because, typically, night images into Black and White add to the element of mystery; either for the unknown, or for fear of something. Converting Sessiz to Black and White also helped me with some noise and hot pixels (random red dots) in the scene, and some noise in the shadows because of merging into HDR; such stuff are a normal occurrence in both, HDR slides and night shots. The results of that night really pushed my enthusiasm forward for more activity and, hopefully, more complicated shots in terms of composition at least, if not technique. But maybe in the near future I have to change my location and do long exposures elsewhere if possible.

Exposure
The exposure I mean here is not the typical photographic term, but exposure to the public. I've received an email last week stating that one or more of my pictures that I've submitted before for some contest (and didn't qualify to the finals) were all exhibited in a street art project organized by the contest's organizers themselves: Al Nowair Group.

Collage

I've visited the place in the weekend one morning so that not much people would be around. The exhibition was divided into two parts around the Marina Crescent mall. One part was made by the word "FOCUS" and the other one was made into the shape of the word Focus in Arabic, Rakkiz [ركّز]. This is the main title and goal of the group; to focus on the beautiful things in life. I roamed the place taking pictures of my own images (and unfortunately couldn't take a selfie) and probably I won't be exaggerating if I say that my images could be the most repeated ones in the whole exhibition, specially the shot I've named Eigen (but whose name I've changed to Unique upon submission to the contest).

Eigen

In the Collage as well, you can see that I've taken a general shot for the exhibition with my Rokinon fisheye lens and in fact I was planning to do a long exposure as the clouds were awesome, but unfortunately for me, the wind was blowing and placing the ND gels into the backside of the Rokinon was a risky task and I simply got frustrated and left the place! Probably it is time to look for another solution for this problem other than putting gels at the back of such lens.

This event made me think again about contest. It was a nice exposure somehow (even though my name was not mentioned on the images) even though I didn't qualify. If there would be contests in that manner probably I would join in because the end result isn't important after all!

Nadirography
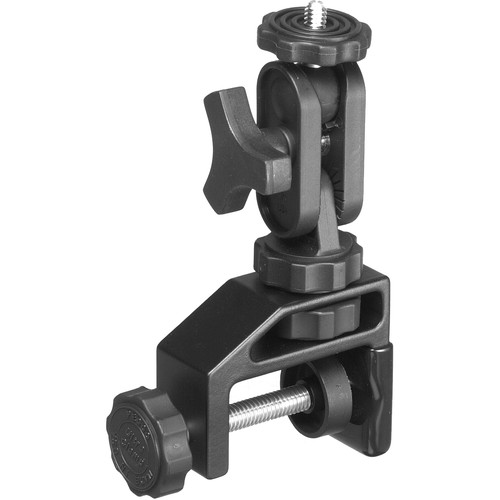

Source: B&H
 Probably I should coin this term? I do like it in fact... Nadir-o-graphy. Taking pictures pointing downward. Now, after receiving my last shipment from B&H, I've tried to try out the new equipments, and specifically here the Pedco Ultra Clamp Assembly with 1/4"-20 Screw for such nadir shots. The situation is scary, I have to admit. Hanging your camera into some ceiling that is more than 2 meters (~6.6ft) above the ground is not something easy to do, or to look at even, but I've tried 2 successful shots so far.

At work, busy with no work...
Rokinon 8mm fisheye, f/11, 30-1sec, ISO400.

The first trial was set in the office (all shots in fact were taken few hours before writing this blog!). I've brought my camera to work and just one hour before my working hours are over, I've decided to bring it and hang it with the Pedco clamp onto the A/C opening. The table surface here was GRACEFUL to carry my body weight without breaking! Also, it is much easier to move on top of it than moving on a ladder as I later did in my own room.

My room = My mind
PS. This IS my room. Nothing was deliberately changed.
Rokinon 8mm fisheye, f/11, 0.4sec, ISO400.

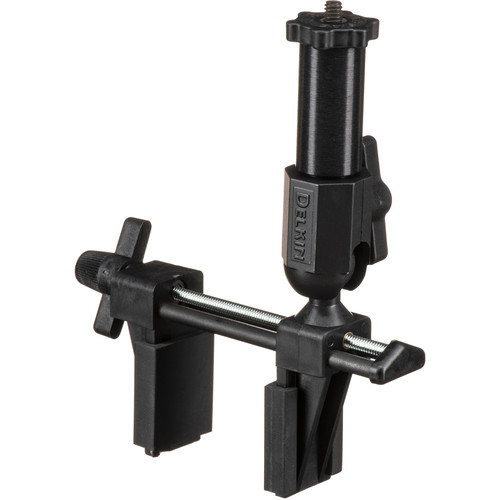
In my room I had to use a heavy ladder to reach the ceiling (and remove one of the CFL lights to put the clamp in its place). The good thing about Pedco here is that it has several joints and several degrees of freedom making mounting the camera and pointing and screwing the clamp at any body relatively an easier matter; quite the opposite to Delkin mount clamp which was so simple, and weakly built.
In both of the shots above I had to use the lightmeter, and also 3 bracketed shots were taken with 1-stop difference just to make sure that a proper exposure is achieved - but at the end no HDR was made, and only a RAW file was edited. Here also, I tried to make use of the hyperfocal distance concept but I'd say I'm still training myself on this and the real test would be using that concept at night photography with my Rokinon.

Finale
Before writing my finale for this week, I was about to post bits about the new light modifiers that I've purchased lately, but anyway, probably this post is long enough as it is. I think I will do more testing till next week's post.
Now, with my ERG examination been scheduled to January 23rd, 2014, I think I have to forget about it little bit for now and try to do as much as possible with my camera and other projects. On hold as well, is the Geltani project, which I've sacrificed its time for the sake of the new books, and the camera.
Talking about emotions had been a hard task lately, even to myself alone. The mind is floating in an endless sea of thoughts and the only way to revive it is to have few moments of ecstasy with daydreaming and practical thinking. I try to amuse myself with mathematics from time to time, or simply thinking of those who already suffer from vision loss like my brother and how to help them (and try to push myself more into studying lenses in that direction). There are always moments when the heart jumps out for something special, but my intuition taught me to always keep a low profile when it comes to happiness. Such a pessimistic look, and to change it, I'm trying to swim against an oceanic tide. The least I could do probably is to try and surround myself with beauty in any form; after all, it is one of Leonardo's advices. But where is beauty.... ?

Natasha


Thursday, November 14, 2013

Goodbye Tamron...

Here I am, after 2 weeks of being almost idle. As much as I hate to admit it, but seems my mood swings were at apex. The material I was trying to prepare for this post wasn't much as I couldn't work much with my camera. I was too lazy to touch it and prepare stuff for more nadir shots. Disasters didn't stop at this level yet, as you will be reading further!
On the other hand, I've started with the beginning of last week to do on some eye checking. From one clinic to another, and then to the eye hospital here (and let's not talk about the procedures and the hordes of people in the queue line). There is a big chance that I do suffer from retinitis pigmentosa just like my eldest brother and one of my sisters, but I'm not sure how dangerous my situation is. It was supposed to be a regular and a routine check up in fact, but oh well... I'm trying to cool myself down and enjoy my time as much as possible, with games and the camera when possible. I'm now waiting for November 25th to do some eye testing and check with the doctor.

Nadirology
There were many struggles to take nadir shots (or shots pointing downward) specially that I don't have much means to handle the camera and make it hanging in a vertical position.
Source: B&H
FAIL!
One of the "toys" that were supposed to help me with this such task is the (crap) Delkin Fat Gecko Gator Camera Mount which caused me a disaster the last (and it was the first) time I used it. I left it unused after that failure but with my limited hopes in such tasks like taking nadirs inside rooms I've tried to work around it somehow, and the result was another failure and the device totally disintegrated, piece by piece. I'm simply amazed how come I'm the only one who made a negative review on this item on B&H website (or so it seems)!

Above Hall
Rokinon 8mm fisheye, f/16, 1.3sec, ISO500.

One of the trials to take such shots, like in Above Hall, I tried to improvise something: a hard paper bag with a hole at its bottom for the camera lens. However, this method didn't work out properly because the body of the camera is not uniform and the result is a tilted camera dangling from the light fixture; a situation that persisted in all situations almost. The camera could hardly be balanced straight. Probably it is time for more of DIY solutions with some metal work - or simply order something! I already had some hard time doing the same procedure in my bathroom. Anyway, I did take a twisted picture but I won't post it here for the time being.

Shots like Above Hall aren't something that I applaud but it did teach me some aspects about taking such shots in terms of composition. Probably a congested place is a good thing for such shots, because in Above Hall, the hall was empty almost and not many features are presented, making the shot somehow boring, unless you appreciate the minimalistic approach!

Geometrical Amuse
Canon EF 50mm, f/16, 8-1sec, ISO800.
Not all shots, however, were for rooms (and I think I presented some 2 weeks ago). This time though I continued my work with the stairs but since shooting was awkward from upstairs to downstairs, this time I decided to put my monopod to some good use. However, using such a method and dangling the camera (with the portable monitor connected in hot-shoe) calls for a higher ISO to fasten the shutter speed ad get a stabilized image as much as possible. Geometrical Amuse is one portion of an image taken this way (with others being shaken and blurred). The crop changed the perspective of the whole image from landscape to portrait. Again it is a combination between abstraction and minimalism I suppose. Still, I didn't get enough amuse from such shots yet. Probably I should consider doing "zenith" shots frequently as much now with the hardships taking such nadir shots. I have to concentrate also on doing nadir shots on objects and other minimal features and not necessarily rooms or landscapes. Landscapes, however, are a good target for a monopod raised up with the camera!

Micro Macro
After such many failures doing nadir shots, I've decided to move my point of interest into another field: Macro photography. Or maybe I should say, Extra Macro Photography.
Source: Amazon
R.I.P.
Tamron 70-300mm
Source: B&H
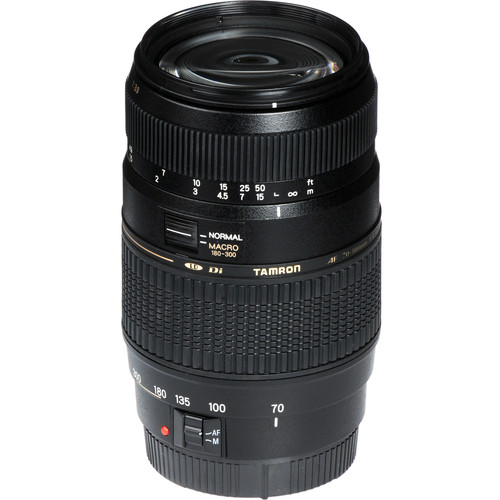
This change of interest in fact resulted in a disaster in the beginning. My Tamron 70-300mm lens got broken as it was connected in reverse with the Canon EF 50mm. I'm not sure what went wrong but seems I've used some power where it shouldn't be, specially that the body of the lens is plastic. What has been broken is the mechanics for zooming in and out. Thus, with any connected material to the front of the lens, it might make the lens front be dragged forward. However, I can still pull in and out the lens and the focusing mechanism is still working (manual focusing that is, I didn't try the AF!). It did some nice job for some time, but anyway, for the time being, it seems it is time to get a real telephoto lens other than this cheap choice. It was a matter of time. Anyway, with Tamron broken, I do get some choices now and maybe I have a bit more guts to manipulate this lens further somehow (and maybe try to disintegrate it and see what's in!).

Cutter Edge
Canon EF 50mm (R), Canon EF 100mm macro + 36mm extension tubes,
f/32, 60sec, ISO400.

As you can see from Cutter Edge, I really didn't have much of good targets. In such trials I just picked the paper cutter to shoot at some of the corrosion on its surface. I made several trials here with Tamron and Canon EF 100mm macro lenses, but this is my first time to use extension tubes in such macro shots, and I'm not quite sure if this is really effective in increasing the zooming power. I need to do a comparison between the two cases and see if extension tubes do really help. Extension tubes are normally used for macro photography but with the purpose of reducing the minimum frontal distance between subject and the lens. The situation here though when reversing two lenses is different though. Just to note, with direct measurements the distance between the 2 grooves in the image above is about 0.5cm (~0.2 in), and when the image was taken the distance on the image was around 22.6cm (~8.9 in). By finding the ratio between the two, the result is 45.2. Does that mean that the magnification factor for the whole system is x45? I'm really not sure how this is calculated. Anyway, we can still get awesome results!

Fibers
Canon EF 50mm (R), Canon EF 100mm macro, 36mm extension tubes,
f/32, 60sec, ISO400.
Portion of my blanket!

In the meantime, I'm trying to understand the processes behind reversing the lenses and seems I got the general image:
  1. Seems the first portion of the system is supposed to enlarge the subject with the reverse method. In my system this is done with the Canon EF 50mm lens. There are adapters, however, used to adapt a lens directly to the camera body in reversed position and they are efficient as well.
  2. The second part of the system is to enlarge the image taken from the reversed lens in step No.1, at least this is how I understand it. This was evident when I changed the lenses from the Canon EF 100mm macro, to Tamron 70-300mm and trying the lens at 300mm. The blade of the cutter in the first trial above was magnified further with the increase in the focal length of this portion of the system.
  3. Two problems, however, occur when trying out greater focal length, and/or trying to add teleconverters to duplicate the focal lengths: a) shake, and b) dispersion or chromatic aberrations. The shake of the system is so sensitive that I had to use the intervalometer (plus the timer in the camera itself for 10 seconds) to delay the shoot for around 30 seconds to give time to myself to step away from the (shaky) system. The system is so sensitive even to the steps on the ground nearby. As for the dispersion, this was magnified in Tamron, and this is natural because of the low quality (hence it was cheap lens). Also, teleconverters are made of low quality glass relatively, usually, and they do add to such distortion. So far, the best result is as seen above in Cutter Edge by using the Canon EF 100mm lens directly with reversed Canon EF 50mm lens without any teleconverters.
After these trials, I'm thinking now of building something like a glass table that would help me further with my macro experiments. Some methods and tips are mentioned in Cyril's book (cover above) which I've read some weeks ago. I need to go over the book again quickly to get some ideas and inspirations; not only for the macro shooting, but also for the nadir project!

Finale
Source: Amazon
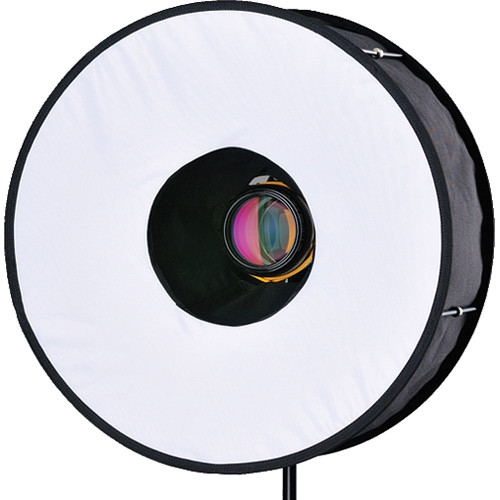
There are stuff that are on hold for the time being. After finishing the books in my arsenal, I've been almost idle at work and too lazy to do "work" itself. I didn't even write any reviews concerning the books (left and above) that I've purchased some weeks ago, or any reviews concerning some of the gear that I've got some time ago from B&H, like the RoundFlash. The RoundFlash specifically needs some time to be tried out and have some thoughts as it can be used for portrait and macro - two fields that I'm not quite friendly with (portrait even more). I thought of using the RoundFlash for my (extra) macro projects in the near future but seems to me that the length of the system of lenses attached together would hinder such addition useless.
Source: B&H
For this reason, right now, I'm thinking of building a small glass table which be lighted from below. Of course, it would be useful for transparent or translucent objects and not opaque ones but that's not a big deal. I'm sure there are ways to light opaque objects from the side or above without using the RoundFlash.
Further more, I've read an interview with Jonathan Boakes, one of my favorite game developers, and in my process trying to seek inspiration whenever and wherever I can, I think Jonathan sparked (again) the fire of photographing old deserted places (which are abundant on Failaka island). On the agenda as well, a trial for the new IR gel filter to make a panorama, but of course it would be a panorama at broad daylight, when possible!
I've been stuffing my schedule with games in the past 2 weeks (and writing reviews about them) and I think the trend is still going on. I'm not sure what is still going on in my mind but there was something that felt severe. Something I just needed to vent through games. Now with the probability of developing Retinitis Pigmentosa, it seems I have to push myself to do more photography before it's too late.


Thursday, October 24, 2013

The Nadir...

Well, here we are. A first week in the working force of this country and technically, doing nothing for the time being. But I'm expected to do a lot in the coming few months. Field trips mainly, beside some lab work probably. With Mom's schedules, I think I won't have a day of free time the whole week (weekends are not counted in).
I've started the procedure here to make an appointment for a general eye check and to see if I do suffer any "extra" stuff - mainly, the retinitis pigmentosa, which is a hereditary problem in the family. It's funny how I'm doing all of that when I'm back to work already and didn't do them when I was free already!

No signs for fixing my car any time soon. However, the garage people keep giving me hopes about it which makes me not sure yet to either believe or disbelieve in such spirits. On the bright side, I've finally managed to get my shipment which was held in the customs all the holiday's period and now I have 2 books to read (almost finished one already!) and some tiny stuff for my camera work. Anyway, this week, I've decided to do some bits of a project and put my thoughts in a single lane instead of thinking or waiting for inspiration to hit. More of that below.

Nadir
I had this idea in my head for a while in the past week and didn't come to work with it till this week in fact. I don't remember exactly what inspired me to think of such a project but probably it is George Barr's blog post which included some photos taken at a hill or a cliff. Anyway, probably I should explain a bit what is Nadir.
The word Nadir is usually mentioned in the context of panoramas. The nadir point is the point directly under the photographer and generally it is the hardest to take in the process of shooting a panorama. Now, to the historical part. The word Nadir is derived from the Arabic word Nadheer [النظير] which means "the opposite (point)". Arab scholars (mainly astronomers and astrologers) used this name because this point is the opposite of the Zenith (Arabic: Al-Sumt [السمت]), which is the point directly above the viewer's head.

Liquid Solid
An old shot that probably inspired me beside George Barr's post?


So, what this is all about? The whole process is actually simple. In one time in my life, I was obsessed with panoramas and I would think of a panorama wherever I go and try to do a panorama wherever I settle. Same thing went on for HDR (even though HDR making is now a habit or a second nature to me). I though, since I'm not getting much inspiration for any photography plans maybe I would just concentrate on a trend and try to see through it. This might as well would help me to somehow master a technique or two. This new trend is taking pictures from above like if I'm taking the nadir point in panoramas but with elevated camera. How ironic that I've just read a chapter in my new book about Aerial Photography!

Nadir
Rokinon 8mm fisheye, f/11, HDR, ISO100.

The results can hardly be predicted, for the time being. You will see below that there are some images that I just didn't like but I enjoyed the experimenting. One of the first images, however, was Nadir. The technical aspect for the shot and stabilizing the camera is a terrifying experiment - at any moment the camera can simply slide out of the grip and go down. This shot specifically was taken from the top of the roof of my home looking down from one side which has a brick tiling roof (happens to be above my room's window). I've taken several shots at some different elevations by changing the central column of the tripod itself and because the lateral arm and the camera combination can and would flip the whole tripod over, I had to have a firm hand at the tripod and the camera's belt.

Flat Perspective
Rokinon 8mm fisheye, f/11, HDR, ISO100.

The Rokinon fisheye (and generally, fisheyes) are my favorite choice when shots from elevated space are considered. They add depth and encompass more scenery into the view, and with the help of DxO nowadays, the distortion can somehow be adjusted as in Flat Perspective. The shot for Flat Perspectve is different than Nadir; the former was done with the central column raised higher while the latter was done with the central column was down. Raising the central column high actually helped me to crop safely without cropping much from the body of the roof, this is because when the lens is raised higher, more adjacent spaces for the roof gets included in the view, and with flattening the image, these parts will eventually be cropped and deleted. One of the hardships of taking pictures in such manner is that you can't really plan for a center. Just take it and manage whatever you can manage later. If I had or have a helping hand, I would surely connect the portable monitor as the camera is dangling in the air and try to adjust the position, while the other person is holding the gear firmly. Adding weights is an option but working with them would be hard and impractical when moving from one place to another.

Bird In My Yard
Rokinon 8mm fisheye, f/11,
30-1sec, ISO100.
My next target then was the balcony, overlooking the yard of the house. The shot was taken in the morning time. After waiting for a day to check for the shadows at different times of the day, I've realized that no interesting or pronounced shadows are produced in the yard, and thus I though that the morning time is the best as there are virtually no shadows in the yard.
The situation in the balcony was shaky because the ground was a bit slippery and the legs of the tripod did slide a bit (and had to use a brick I've found there to hold it firm). The tripod itself was going to trip over as well because the lateral arm was extended to its full length almost; this is just to try to put the camera as far away from the rail as possible. Even though I did shoot for HDR (with the help of a timer of course) yet I chose only one shot from the bracket to process. The image needed lot of work with DxO and yet it's not to my liking but I did like the experiment anyway. I did crop to align some lines to the frame accordingly.

Geometrical Coma
Canon EF 15mm fisheye, f/11,
0.5sec, ISO400.
The main hall was also a target and I was ambitious about it, but unfortunately, my current gear didn't help me with it and I do have to improvise as it seems. The idea is to hang the camera (safely) onto the light fixture and trigger it either with the cable remote somehow, or even better with the IR remote (but it would give a shorter timer period). Anyway, after the fail, I headed elsewhere. The stairs. The situation at the stairs wasn't any better; dangling my camera from the third floor's staircase to look at the lower floor staircase has its own dangers as well. I tried to improvise a way to stabilize the camera but no avail. Finally, I've found myself holding the camera and dangling it by holding its strip firmly. In this experiment specifically, I've tried several lenses to encompass the right elements but probably the best I liked were the 15mm fisheye lens (after rectification and cropping) as you can see in Geometrical coma and the shot done with my 50mm lens, Dementia.

Dementia
Canon EF 50mm, f/11, 0.6sec, ISO400

As you can see from the shots on the stairs, the ISO is raised here to compensate for the shake, and the camera's mode was set to Av. I've put my trust in the camera here to get the right exposure time (which was relatively slow but enough). In close-up, there is still some shake in the images but probably less noticeable when in small size. Both images, Geometrical Coma and Dementia needed some rectification to make the lines as straight as possible. Both of them would be classified as abstracts I presume.
Many places run through my head right now but first of all I need to get some proper gear to hang the camera when it is required to do so. As for the time being, I have to rely on improvising. Even though there are some DIY solutions to such problem, but it requires some time and a space to achieve the purpose and build the gear.

Finale

Source: Amazon
At the current time, I'm digesting the first book that arrived finally: The Wild Side of Photography. This book in fact didn't bring much new things to me and doesn't go deep into the topics. It is a collection of articles written by various photographers, each to his or her own field. Ironically, there is an article about aerial photography and the use of kites at the time that I'm planning for more nadir or bird-view shots. This field of photography is out of my reach and probably will never do it but it is inspiring after all. My nadir shots are mostly in confined places and without winds, quite the opposite of aerial photography, in which winds and spaces are critical. Interesting topics and I've almost finished the book in 3 days only - only few is left to read.
I need some more time to test my other gadgets, specially the RoundFlash which is a substitute for the ring flash somehow (and it can be used for portraiture as well). The other critical gadget is my IR gel filter from Kodak, which looks darker and more opaque than my round IR filter (from B+W). I'm hesitant to cut this gel filter into a small square to fit into the 15mm fisheye lens but I guess sacrifices have to be done here. I'm just afraid that it won't work as I wish because of the opaqueness of the filter.

The nice weather now is fixing a bit of my spirit that got shattered during the summer and the problems of the summer. I have my wish now to see my car fixed again, as my financial situation is, not shaky, but not advancing either. Mom keeps asking me from time to time, whether I'm going to travel or not, or why wouldn't I travel. All what I have as an answer is: I can't. Life is weird, but even weirder, are the people living in it.


Thursday, September 27, 2012

Architectural Amuse...

(Some large files in this post, please give some time to load!)

The days are running fast, and the travel time is getting closer, and yet I'm not sure what to prepare first. I feel lazy and sluggish in these days and now I do wish if I signed for my leave from work earlier than I did already. My leave starts only 3 days before my travel on October 10th. However, I'm trying to use my time there with reading the books that I've received already and I'm digesting them now slowly. It is just the matter of sleeping more that makes me wish for an earlier leave.

Amuse
After some struggle and almost dipping myself in water, I've managed to take a full panorama from the gazebo, of the secret spot. Upon reaching the place, I've realized that I cannot expand my tripod over the diameter of the fountain, thus, the best choice I had is to stay close to the edge; a dangerous situation for sure. Talk about stress, people looks, clumsy movement (and I'm renowned for that) and fearing to dip the camera into the water... all in all, it was an uneasy process. Why close to the edge? Of course, to have the dome centralized as much as possible.

Radiosus

Working with this panorama alone was tedious, or maybe I should say more tedious than I've previously encountered. Because the location was a delicate one, I had to think about shooting the nadir point. The ground bears interesting details that can't be missed like any other place - we have  fountain there. For this, I've brought my monopod and my lateral arm.
Now, the rewards of doing a panorama is several sets of projections. But, initially, some parameters must be set right. In this workflow, I've tried to centralized the camera and align it exactly with the fountain's outlet. However, I've realized later that my alignment was not really precise and I had to adjust some angles when checking out the panorama stitch. For each projection I try, I save the file as is for later stitching - because my mind was burning for visual stimuli and I didn't want to stop it for a long process (that would take 6 or 7 hours sometimes).

Radiati
Well, I'm not going to talk much about the stitching errors here. If you are a follower, I guess you already know the tedious part; not to mention the fact that I'm stitching a nadir here beside a zenith. Taking the panorama itself was a struggle by itself because I had to wear my backpack and move my monopod and lateral arm from one side to another (because I kept it prepared for the nadir before I proceed with the usual shoot); all of that to keep the scene clean from my stuff. The nadir was taken at the end with a slightly different point of view (of a different elevation from the original position of the camera during the panorama shooting) but seems PTGui took good care of perspective fixing.
One of the good decisions I've made here is to raise the camera above my head level for this panorama. One of the bad decisions? Well, it was to raise the camera above my head level! We'll see about that later.

Radiosus Rectus

As you would notice here, I've made 2 flat versions of this panorama (originally 3 but stitched only these 2); Radiosus and
Radiosus Rectus. The main reason for the former is a flat panorama that shows some details of the dome and the fountain together, while the latter is a simple regular flat spherical panorama, to be used later for QTVR rendering. I like the wavy columns in both versions after all! However, 3 projections that I've considered, personally, as masterpieces.

Radiatio

The first masterpiece (to me) to be created was Radiatio. It is a typical tunnel view like I did before with many other panoramas. I was going to name it as Spaceship or Mothership, but to keep it consistent with the rest of the panoramas, I've decided to name as Radiatio; Radiation.
I've mentioned previously that one of the good decisions I've made here is to raise the camera above my head level, and it is also bad in the same time. It is good because by raising the camera's level I would include some space for the nadir point and also it helps the perspective in such projections - the bad point is operating the camera at such level is difficult - specially when I have to look at the number of degrees on the rotating plates for the camera's tilt.

Planeta Columnium

The other projection, which I had visions for since the early beginning of my work is the planet projection, as you can see in Planeta Columnium. In this projection, I had to crop the outer zone to remove the remnants from the dome and leave the columns dangling in the air in a surreal form. It was not possible to remove the dome by changing the perspective alone, but however, in PTGui itself, I can set the limits and boundaries for the zone to be stitched.

Astracolumnae

 The last piece is what I called Astracolumnae. It never occurred to me to use the circular projection in PTGui. However, I do wish if it was rendered in some other way other than this. I think it would be great if the symmetry was sustained on all axis of pillars pair. Anyway, I have to satisfy myself here with this result for the time being, and I'm happy that I've discovered some new point of view! such points of course would be more interesting if the panorama was taken under a common central point (hence I think it is more useful indoors rather than outdoors). In Astracolumnae, I've removed the background and saved the file in JPG and PNG for web usage. However, some websites don't identify the transparency in the background and replaces it with white tone. The embedded image here is PNG and needs some time to load (~2MB).

QTVR

The QTVR was rendered from Radiosus Rectus, and luckily for me the nadir point was stitched gently despite the difference in the perspective. Some cloning was needed of course to hide the legs of the tripod (which I used to support the monopod holding the camera with the lateral arm).


The original Radiosus Rectus produces a larger QTVR of course which sized up to 9MB, and it has more details than the smaller version (and more crisp). The smaller version of Radiosus Rectus is soft somehow because of the noise cleaning process which was done more than once. I didn't care much about details at this small size anyway! Most of the details relate to some dust particles or faint cracks in the floor, and some cavities in the pillars which can be hardly seen anyway!

Toys!

Source: B&H
Source: B&H
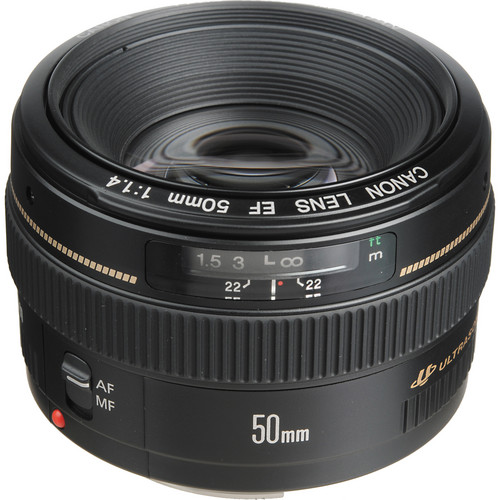
The toys are finally here. Namely, the Canon 50mm (normal) USM lens, of f/1.4. I'm already thinking of some work to do with this lens before traveling. As a fun activity (and a challenge), I'm thinking of taking my camera with this lens alone - no accessories, no other lenses, no tripod. Just me, camera and 50mm lens - and head out looking for some photos to catch on the way. In hope that this activity would spark some imagination and enthusiasm for more productivity. The 50mm lens is called Normal usually because at this focal length the lens matches almost the human vision (in terms of the field of view). However, with a cropped sensor like mine, it is not exactly normal. Anyway, it is a prime lens after all and  I should satisfy myself with the quality that can be produced from such lens.

The other toy is the ExpoImage Rogue Master Lighting Kit, which consists of some light modifiers for speedlites. So far so good, and the modifiers are nicely designed. However, for each type of modifier there is only one piece, so you won't be able to use the same modifier on two speedlites in the same time - but I don't think it is a big deal right now.
Just as a simple test for the kit, I've tried to take a head shot for my brother using some reflectors and a diffuser on my two speedlites (580EX II, 430EX II) and formed an oyster-like formation - with 580EX II on-camera, and 430EX II held by hand below the camera's level. 

Canon 50mm, f/8, 500-1sec, ISO 400.

You might have noticed here that I've used a shutter speed exceeding the typical sync speed (250-1sec for Canon EOS 7D). I was simply using the speedlite in High-Speed mode, to kill the ambient light and light the face with the speedlites alone. The overall goal was to give a soft light to light the face, and brighten the eyes as much as possible. Well, we are Middle Easterners and typically our eyes are dark brown and hard to be lit in that way I presume. I would say I'd need another speedlite with a snoot directed to the eyes. I tried here not to adjust too much in Photoshop - only few edits in the RAW editor (e.g. contrast, clarity) and in Photoshop some noise cleaning and sharpening without trying to lighten the eyes (as I usually do in my spare time with girls' head shots!).

Digesting!
Source: Amazon

Then come the books with the arrivals in the last shipment. They are two books and I'm trying to read them both in -somehow- scheduled manner. The first book is Build a Better Photograph by Michael Stern. This book is relatively thin and I think I would finish it in a course of a week or so! In the first chapter there was somehow a heavy load of Photoshop talk and making composite images - interesting but not quite what I was looking for, as I think right now I'm in a developmental stage where I care for aesthetics and ideas more than I do care for working around Photoshop. However, the technical aspects mentioned here are good and can be kept for a reference. The surprise was on the second chapter, when Stern talks about 3D scanning and how to make some art through regular desktop scanner! Inspiring for some ideas (specially that I wanted to do a scan for my ring long time ago!). So, the book really is not about camera work specifically, but about visual artistic talents in general, if I should say.

Source: Amazon
The second book is The Art of Photography by Bruce Barnbaum. I was surprised, sort of, for the size of this book and its weight! I'm reading this book slowly now (dedicating the last hour in my working time to read some of it). This book now is heavily about aesthetics and how to see a photograph. It is about the philosophy behind photography - exactly the type I was looking for. I think I will be taking this book with me when I travel to read some, if I got the time to (or maybe at night to force my eyes to sleep!).


This has been the journey for this week. There are some thoughts other than the travel and the camera that had been occupying my mind, and they do cause a huge unrest. I need to travel for now for the necessity of a vacation, but also for the necessity of going on with my life - there had been a lot of plans in my head that I've postponed because of this travel. 
My sight for the coming future is shrouded and unclear - if only I can sleep as I like right now. Without nightmares...


Thursday, September 15, 2011

Cuvaitum At Work...

My mood has been off lately. Trying to smile and laugh just to cover up for the bleed. Ah well, who cares anyway. At least I had the chance to play with my camera and catch a panorama in day time, away from the cops and security people. An experiment that I might be willing to do again, some time...
Previous weekend was specially weird. I did sleep so early. So early that I won't be sleeping like that for work itself! And wake up early too. I didn't want to miss the chance here so I went on to have breakfast on the beach and look for something to capture. I took my tools including my Manfrotto 303SPH VR-Head (was it a coincidence?) and drove along the beach. It was around 7 a.m. or a bit before that when I settled behind Kuwait Towers and started to do my job in a hurry fearing the usual. One panorama was enough to keep me busy for a while now. There are lot of things to do with one panorama, as different viewing angles do make a difference now and I won't let go, from now on, of a panorama until I exhaust my options with it. However, I didn't miss the chance to take some single clicks here and there. It's nice to add some icing to the cake isn't it?
Just before going on, I would like to talk about my previous "homework" in my photography class.

I. Homework #1:
It was our first homework in the Photography Class L1. The main point was to criticize the images in general. Along the years that I've been working with my camera and specially in the field of HDR techniques, I've faced many useless comments and criticism that just don't consider what I'm trying to say in the image. Anyway, I think my mind now has developed a sense of what is a "real" criticism and what is "trash". For this reason, I tried my best to do the shots in JPG only without RAW and without any adjustments at all. Since my teacher is the one who will criticize me, then I have no problem at all and I would learn here, instead of putting up with depressive non-sensical comments. Anyway, our homework was to take 4 shots, and I did take several shots for same scene and then picked the best as I think for this homework. Some people brought 5, 6 and even 10 shots. I wonder if they have problem with mathematics!?

Nail in a Wall

My first shot, nail in a wall. I don't know what happened to this nail, anyway I was surprised for its shape. The fact is I had only 2 hours probably to take the shots before my class starts, thus my mind went on thinking so fast about a solution. The idea was to have a long shadow of the nail but unfortunately, the sun was not in the proper angle in the afternoon. I tried to fix the proportions according to the law of thirds as much as possible, as shooting in this angle was hard. The nail is on a column and a bit high from the ground level, and also on the edge of a small stairway. I had to play around with my tripod until I made it stable and high up above the stair steps and the ground. My teacher said he likes the texture but because he didn't want to announce the names of the photographers when he viewed the pictures, I decided to keep silent and not explain my motive and the things that went wrong for me. The main concept of this image is loneliness, and if there was a shadow it would complete the meaning I had mind. Loneliness vs. Greatness.

Metallic Design

The second picture was taken for the rail of the stair way at home. After taking the image and uploading it to my PC I've noticed that the front portion (top left corner) is a bit blurry which is something I didn't want in fact. Anyway, my teacher liked the concept but, like I thought also, he said the door and the books on the left were a source of distractions. Unfortunately, I can't remove them, and if I was to take the shot in portrait I believe more distractions would be included. He liked the angle and the blur effect (shallow depth). I would crop the distractions but as I said, I wanted the images untouched as much as possible.

Floral Design

The third image, Floral Design, was also from the stairway rail. I had this idea long time ago (but thinking of a panorama for the stairs alone actually). The image was taken with my Tamron 70-300mm, and probably at 200mm or close to that. I was pointing to the rail from a distance of around 2 or 3 meters (~ 6-9 ft). The reason for this is simply, from a close distance I would be able to put my tripod calmly. Because I didn't use a timer here to take the shot, seems the image was shaken a bit, or it was blurred slightly because I used manual focus (always use it with my Tamron). My teacher noted that there is a little shake in the image when viewed in 100%. At this point, my teacher said that apparently this person (i.e. me) likes textures, which is true. I'm not so fond of portraiture.

Qul

I don't remember really what my teacher said about the fourth image, Qul, but the image you see here is actually the adjusted RAW and not the direct JPG that was viewed in the class. Anyway, it is simply a zoom into some Arabic calligraphy engraved on a wall clock in the main hall (living room). Tamron was also used here and I had to raise the tripod higher than my head. The play was in the WB to give more golden streak to the whole thing. I think it was Flash WB.

The clock in the hall (old picture with illusional adjustments)

My teacher is a school by himself, and I guess I'm lucky to be one of his students. Trying patiently to wait for the big bites of info that will make my brain jump a bit. So far, in Level 1 now, the info encountered are mostly well-known to me. Left to say, all of the images except of the first one were submitted to stock sites, but after RAW adjustments. No HDR this time.
My teacher has an impressive photostream on Flickr. Give it a try. He's a genius! As for me, I still hate Flickr for some reason I don't know. I just reject it mentally!

II. Cuvaitum:
One of the surprises that I've encountered this week is, when I wanted to name one of my pictures in Latin, I've discovered that Google Translation engine did include a translation for "Kuwait" in Latin. I didn't know there would be any translation for it really, as mostly the name, specially Kuwait's, is copied as it is in English into various languages. Kuwait was translated as Cuvaitum.
Last Friday morning, and because of the amazing adjustment in my sleeping time, I woke up in the very early morning (with ease), something that doesn't happen when I think of going to work! Anyway, I didn't want to miss the chance and picked my tools, and specially my VR-Head. I can say, I picked it up half-intentionally. I was hoping that I will do some panorama, but I didn't know just yet for what. After having breakfast I was staring around trying to find something, and even drove along the seaside trying to search for a potential. Finally, my eyes was set on a location that I deem, usually, a taboo. I did take pictures from there before but this location is always dangerous to me (me, being someone with past experience with cops). Kuwait Towers.
Now, Kuwait Towers are a pretty nice target for photography at night more than it is in day time (probably only in very early morning or at sunset when you get some special light qualities). I did take some shots long time ago for the towers when I was experimenting back then with my Canon 350D. Sweet old days.

Humid Towers


Kuwait Towers in A Windy Day

But this time the circumstances are different. Completely different. Day time, early morning, the sun is rising and, a panorama. Maybe one thing is common between the old and the new images: all are HDR, and all were manually tone-mapped.
Since I'm working with a panorama, I had to do it as fast as I can for fear of any "undesired" visitors in the early morning (a bit before 7 a.m.). I skipped working out with the nadir and took only direct shots that I didn't use later on. One panorama, many opportunities...

Towers of The Rising Sun

I know that Japan is the land of the rising sun, but are there towers for the rising sun? Oh well. The main difficulty here lies in cloning out the lower portion. I've cropped a bit from the lower part where the VR-Head shows, but this was not the difficult thing to do. It was my shadow with the tripod. Because the ground had a pattern in formation, it was so hard to make it unique, or maybe I'm out of patience to finish this and I couldn't bear in mind working slowly and copy brick by brick. It is possible to make it unique but it's not for me now. I don't have all the time in the world nor the power (cloning work is done in HDR mode, meaning more processing power). I approached the situation with many tricks, the last was to copy a portion of the right corner and paste it over the left portion where my shadow was (after cloning it already) and then do a layer Blend as in stack focus.
The tone-mapping was done manually, i.e. in Photoshop itself and playing around with the curve of the histogram myself. I've been a good boy here and didn't touch other slides like the Threshold and the Radius which caused me grief in the past, and will never learn how to do them adequately. But before tone-mapping, I had to reduce the luminance of the sun and that was done simply by adding Exposure adjustment layer, and with the White dropper I click on the disk of the sun. The image appeared darker in the beginning while the sun was like a dot in the sky (which is the thing I want actually). You have to bear in mind when you work in this way that this is HDR. The luminance data are there and not gone; maybe shifted, but not gone. With this simple correction in Exposure, I've moved to tone-mapping. All the later versions of this panorama, were tone-mapped in the same manner, but maybe the fixes for my shadow were different a bit.

Planeta Cuvaitum

The great advantage here in tone-mapping with Photoshop (which is something I rarely do right now) is that you have a control over certain areas, even though Photoshop's tone-mapping algorithm is considered Global, meaning it effects the whole pixels in the image in the same time. However, with the help of the curve and the histogram. This way, I was able to make the sun as a disk with a halo around it by doing a "U" curve at the end of the line. This "U" curve simply means "high-low-high"; now imagine this to the sun disk (out-middle-inner part) and you will be getting a bright circle, then darker circle, then bright spot in the middle. Are you following? Hope so! Such control is not possible in Photomatix and I did try indeed doing some effect but nothing worked to my taste.

Although I almost chose my location randomly in the area behind the towers (and hoping to keep me a bit hidden from the eyes wandering on the street in the front), I think now I was lucky to pick this location! This was apparent when I went on doing a TV (Tunnel-View) effect for this panorama...

Crescent Sun Towers

The shape of the crescent was indeed random. I didn't plan it. It just happened to be there when I twisted the panorama. Only one thing is annoying me here though; the patch in the sky. Cloning problems are apparent here as you see. Cropping further to hide my shadow or the bad cloning would cut out the fun from the rest of the images with nice patterns made by the pavement, so, I guess I have to bear it as it is.

Two projections though, didn't appeal much to me but I had to do them after all just to make things complete. The Vertical and the "Wide View" or WV. The WV is a term I've made out myself really, since I didn't find any proper names for it. It is a manipulation of the Little Planet projection by changing the angles of Pitch and Roll mainly and fixing the orientation with the Yew.

Nos Regulam Solis

Cropping the sides in this vertical panorama was a hard issue for me and I'm still not satisfied with the final product here. I felt cropping was screwing the balance of the image in general specially that the sun and the towers are not exactly on the same alignment. I had to do the cropping to the side to remove the highly stretched pixels (which is normal in such type of panoramas of course). I think what makes it so hard to decide with the crop is the diagonal lines in the image itself which, if straight, would make for a unidirectional look on the whole thing.

Dancing Towers

Not one of my favorites really. The Dancing Towers is supposed to be something with a comedy twist after all. The twists in the tower were made in HDR mode before tone-mapping by using the Wrap option in Photoshop. The tone-mapping (and adjusting curves later on) didn't help me to add some strong contrast but rather darkening the ground. The other problem was that the ground and the sky portions were too much compared to the main subject: the tower and the sun. I had to crop and cropping here wasn't easy either. The subjects of interest are nudged to the left rather than the center or one of the points of the law of thirds.

QTVR
I was drooling to do a QTVR out of this panorama but unfortunately, things were not easy. The fact that the panorama was tone-mapped manually in Photoshop made me lose one key option here, which is very important for making a QTVR: the seamless blend. In Photomatix, this is simply done by ticking one option while tone-mapping; the "360 panorama" option. I don't know yet how to blend the left and right side seamlessly still using Photoshop as my search on the net was in vain. I even tried to put the final panorama into Photomatix and stabilize the sliders as much as possible to keep the look (changing only the Gamma to fix the contrast) and turning on the 360 panorama option, but even that was in vain. Probably the only real benefit that I've gained so far from such search is to know how to add a label or a logo to my panorama instead of the nadir point in more comfortable way, using PTGui. You can find the tips here in the Support/FAQ webpage of PTGui (with many many other useful info that I didn't read before). The QTVR might need some time to load, plus, of course, the QuickTime plugin.


III. Land, Paper, Wall:
On land, it was the ruins of Hore Abbey, which moved to my camera's sensor to be printed later on. Mom desired something to fit in the living room to change the scenery and she was so fond of Ashford castle in fact, an awkward handheld panorama taken back in 2009 in Co. Mayo, Ireland.

Ashford Castle

Unfortunately, when viewed in 100% I've found that the middle portion of the image is out of focus. Probably I was working in AF mode (a big mistake in panorama venture). The greens also don't appear as they are when converted to CMYK system. I had to convert because of previous experience with this printing shop which seems RGB is not appreciated much (although an expert told me that it is a single print and they should be able to produce it properly in RGB). Anyway, the mistake with the focus was a killer enough to abandon the idea. So, mom picked another shot, the ruins of Hore. I have to say I'm really proud now that she picked my stuff!

Ruins of Hore hanging on the wall of the living room.

The print and the frame prices were fair I'd say, but while watching the process going on (in 2 days) I really wished to have my own tools. I fell in love really with the HP designjet 800ps in the printing shop, but unfortunately it is discontinued, and for sure it costs a fortune!
My signature. Still think it sucks!
However, one of the things that I was limited with is, the type of paper that I could pick. In fact, there was only one variety. I'm sure there are several papers out there that are better (and more expensive, I know), but there was only one type so I had to put it down with that. I wasn't ready to move around to other place to check.
The next thing was, after the print and checking the colors, I went to the framing shop. As I expected they were not that professional I would expect but they did a good job with the frame. I was a little upset about it because when I went back to the framing shop to give them a leaflet with my own signature, the print was rolled up and kept between other stuff. I was a bit angry inside because this is not the way to deal with a print. Also, the matting they provided was not thick enough and seems merely like a cardboard. The leaflet I brought was not stuck or anything but merely fixed, and I didn't get the chance to sign on the matting myself. Anyway, after all, mom is happy with it. I only wish if I have the money to get all these stuff together in one place and do my own prints. My printer supports A4 size maximum, but I wish to have one with A3 size capabilities. Would be awesome and in fact, more elegant to frame in that size I think.
Color Management in Digital Photography: Ten Easy Steps to True Colors in PhotoshopI'm trying now to finish this lovely thin book which my friend got me for my birthday (but didn't get the chance to give it to me in time). It is a practical book and to the point, for beginners. I want to write something for now, but I don't know what. So much is gushing out, yet little words are coming in my mind. For one moment I just wish if I can sit down, one leg on the other, and my palms behind my head, and stare into the world... maybe thinking of No Other Worlds...