Showing posts with label bulb. Show all posts

Thursday, May 8, 2014

Secret Spot...

QTVR ahead. Give some time to load and be sure you install QuickTime to view it

My vacation is over, and I'm already dying to start a new one. The summer is hovering over making it harder to breath even at some point. Fasting is putting my down a bit; it's the month of Rajab and like the previous 3 years, I usually start fasting in this month, and if I can, I would add the next month, Sha`ban, to it. Then comes Ramadhan. However tiresome I might get, Ramadhan will always get me down further even though the working hours are shortened.
Anyway, today I'm going to talk a bit about a special place that I planned to shoot in for a year or more even but never had the chance till few weeks back.

Secret Spot

This is not completely a secret spot, but I like to call it so because it is somehow deep and isolate. It is a piece of land from the beach isolated from the rest of the urban features around it with an artificial cliff of rocks. In high tide time, the water level gets really high that it is almost impossible to stand there and work for a long time (even though I did that already in fact!).

Das Licht Der Dunkelheims
The secret spot is not far from this location fair straight and down.

As stated in the image caption, that location isn't far from there. First of all, I paid a visit to the place with my regular intentions to study the location and see what I can do with it. This simple visit paid well with my Rokinon 8mm fisheye lens!

Washing Shore
Rokinon 8mm fisheye, f/8, HDR, ISO100.

My single shot there back that night, Washing Shore, seemed to get the attention of the viewers. I planned it in such a way to make a curvy line leading the viewer from the bottom right corner to the top portion of the image in a curve. Two bad parts here though:
  • The building on the left, which seems to weaken the image for me.
  • The noise and processing later on.
 Because of the temperature, the noise was unavoidable with this HDR image done completely with long exposures (ranging from 8 minutes down to 30 seconds). The final result was some complicated smoothed and sharpened details all over the place, with some banding in the sky (after using Hue/Saturation adjustment layers and Selective Color adjustment layers). I'm still not sure how suitable this would be for printing but I won't be sacrificing money for the time being just for experimentation! 
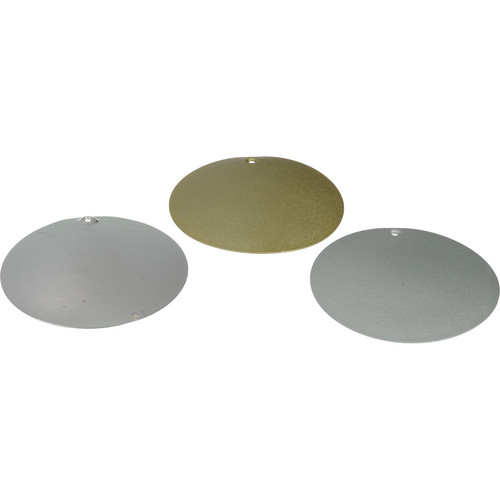
The most terrifying aspect here was, not surprisingly though, the white balance. I admit; it was my mistake to not use the white balance disk to fix the white balance properly before shooting. I had to relay on many layer masks to adjust the colors in one place rather the others and so on which made it a lengthy work and process.

Seeing how things turned around for this single shot, I've decided to head the week after with somewhat an adventure mood. It's not easy for me to be in that mood, I tell ya! But first things first; I had to check the low tide timing and I was lucky to get it accordingly for the weekend after midnight. The hardest step though was to get down through this rocky slope, which might be an easy task for a sportsman, but not for me, specially in the darkness. Retinitis Pigmentosa hits severely in the darkness.

Mare Lunare

The work began when my feet hit the ground. It wasn't easy as I didn't carry my LED lights and only my bulky flashlight. Also, setting up the tripod and the bulky VR-head on such soft sand was troublesome and did consume a considerable time. I've found out also that the VR-head needed some tightening in some positions as some screws were getting lose! Pretty dangerous working conditions if you ask me - imagine losing one of those small screws in such soft sand!

The Hanging Cliff
(Hour Glass)
The work was done completely using the Bulb mode, and took around two hours. Yes, and all of that was done without having a book to read during these long exposures; which ranged from 2 to 4 minutes. Believe me if I say, going around the tripod in such soft sand is not an easy task, and needless to say that walking around must be done carefully so that the level of the tripod doesn't change while shooting the panorama.
Things went smoothly, but very lengthy (and at some point, pretty boring I have to say!). The rewards were as you can see in Mare Lunare and The Hanging Cliff (Hour Glass), and more to come in few. In somewhat a strange turn of events, the Nadir point wasn't that easy to merge into the panorama but that was fixed in a hurry with some cloning. In fact I had to do some cloning in each panorama projection I've made so far.
Processing-wise, there was a lot to do; really a lot to do. This is because every single RAW file (total 41) in this panorama was checked for the histogram to ensure it's alright histogram-wise at least and no cut in highlights or shadows. All the files were converted to TIFF and the stitching process started from there. The final result in each projection needed also lot of work in Photoshop because the colors needed to be emphasized; the pure output was simply dull with not much strong contrast. Probably you've already noticed the green water surface in the panoramas. To do this, I had to use some layer masks and plenty of delicate work in selecting the water surface only. This is because without any change in the color of the water, one would deem it all as one with the sky. The water itself looked faintly green and hardly noticeable, thus the color cast was increased using Hue/Saturation adjustment layer.

Skyscope

Probably my favorite projection of all, is the tunnel view projection; Skyscope. The texture of the sand acted naturally as a guideline somewhat to the center of the image. Here, specifically, I didn't change the water color cast to make it merge with the sky a bit and form semi-circle. I think adding a third color to this combination of yellow and blue (and bit of magenta is already in the clouds) would make things diverse in a bad way.I've tried, as well, to create a slight twirl in the outside rim of the image to make a feeling of something sucking into the depth of the image (and to do this you have to work in 8bit format rather than 16bit), but the process got complicated and I decided not to waste more time with this.

Planeta Litus

The planet projection of this panorama wasn't much dynamic like its cousin Skyscope, except for some faint clouds lines which somehow acted as field lines around some planet. In case you were wondering about the long white line in all of the panoramas above, this is just a light trail and flare from the lamp posts as it seems. 

Schwimmend am Höll

The last projection in the series is a wide-view projection, Schwimmend am Höll, which appeared to me as a floating island in a surreal view with a sky that seemed like burning in flames. Originally, I've stitched this panorama in a large format (11,000 pixels wide) in order to be cropped later into a suitable size. However, after looking at it for few minutes, it did appear to me as if the sides were essential despite the featureless space there. I think without such space, the look won't be that of a floating island balancing itself on a tip of a hill... am I exaggerating here? Ah well.
Ironically, all of these panoramas were refused from some stock website for "too much processing" - probably these people never heard of something called panoramas ever, and processing is the core of panoramas. Anyway, at the end of my work, the sun was starting to cut out through the horizon and the atmosphere began splashing with violet hues, and I didn't want to miss that chance...

Good Morning Kuwait (VIII)
Rokinon 8mm fisheye, f/8(?), HDR, ISO100.

The exposures ranged from 2 minutes and down for one stop each time till 1 second. This was somehow essential because of the city lights and balancing the atmosphere with these lights is somehow impossible with a single exposure. The final image had strong artifacts caused by chromatic aberrations (one thing that I really hate about Rokinon 8mm in such situations) - but after a tedious work in Photoshop I did somehow reduce the effect of these colored lines at the edges of the buildings.

QTVR

With this hard work that lasted for two hours, it would be a shame not to do a QTVR for this place, specially that the nadir point was relatively easy to fix.


If you look to the top above (zenith point), you will notice some strange mark in the sky, and the truth I'm not sure what is this either. However, as I didn't really use a zenith slide in the panorama (even though I did take it), probably this mark is the result of cloning the gap in the original flat spherical panorama, which is Mare Lunare. The gap was so small to even think of adding the zenith slide to the whole panorama (and cause a mess to the whole set!).

Delays

I keep telling myself that I will be facing my projects soon but I'm not sure how much soon is soon in my own timing. There is Geltani, and IPA check up for Arabic (which is pretty important for me). In the meantime, the nearest thing I could think of right now is at least to try and translate UDHR (Universal Declaration of Human Rights), which is usually used with most languages on Omniglot (both constructed and natural). With that, I would probably do a voice recording to see and examine closely how the (new) conlang of Geltani does sound; needless to say, it is a real test for the transliteration system (or codification so to say) that is to be used or transcribing this conlang as well. Time management is one major leak in my personal life, which is full of leaks already...
On the other hand I've been testing some sounds of Arabic and trying to figure out precisely where my tongue resides in some of them and how the air articulates in and out of my mouth. Well, been acting (more) as a maniac while doing this while driving or being alone in the office. Still I didn't catch the whole concept completely in fact. The major difficulty resides in two letters: [ض] and [ظ], which, sometimes, are both transliterated as "Z" from the fact that many "dialects" of Arabic today do so. The IPA version provided in Omniglot seems to be on the same trend and hence, it's not convincing for me as an Arabic speaker - Yes, I don't speak the standard Arabic in my everyday life, but it is the supposedly lingua franca between all Arabs, and yet, it is the formal and the prestigious form of Arabic for letters, communications, and the media. My other blog is in standard Arabic as well and I cannot ever imagine myself writing something to the public in one dialect of Arabic, and say this is Arabic.

Finale

One book is off my list now. The Extraordinary Everyday Photography by Brenda Tharp and Jed Manwaring is somehow just another version of another book I had before; The Contemplative Photography. It is in fact a mix between contemplative aspects and technical aspects about the camera and some tips and tricks to do some shots. Never the less, I did like reading it, and specially the last few chapters which are related to dusk and dawn, and night photography.
Source: Amazon
Source: Amazon
Source: Amazon
The book on the queue line is Optics and Optical Instruments, which looks from the few pages I've read so far - looks that it is a students' book; and this is good! Exactly what I was looking for. My previous reading about lenses and their design made me somehow in a status of stalemate; I couldn't comprehend much of what was there, specially the mathematics involved. It is an engineering book of the advanced type which requires some background. However, Optics and Optical Instruments might look old from the shape of the graphics in it (obviously handwritten) but so far so good with the body of text. But that doesn't mean consuming the context is going to be an easy task, specially without someone forcing me to "study" so to say.
Away from books, I've been carrying a load; a load of emotions and responsibilities. Probably more of the former than the latter. I'm taking it seriously in my mind now to spend a vacation, a real one, abroad. Ireland for a third time is in my mind as well. Not sure when exactly but the usual timing would be between September and October if I can. I have to settle things down first, and inform everyone about my plans so they would prepare to take care of Mom. My mind is fluctuating between a new location or visiting the first location I've been to back in 2009. I think the latter is my choice for now, because I have better equipments now, and I don't want to miss the beauty of Lough Corrib (Loch Coirib).
I'm starting to feel numb to almost everyone now. Asking myself, why should I care...

Thursday, March 13, 2014

Panafraglypherous...

Well, I made the word in the title up out of boredom. However, it is somehow related to the coming body of the post. This week had been somewhat slow. I think this is related to the day becoming longer right now, and the Maghrib prayer (dusk time) which was due aaround 5 p.m., is now due some time after 6 p.m.. I'm just hoping it won't make for shorter sleeping times, as it is already short! Anyway, I got some ideas that had been partially done, in hope that I would continue the trend in the coming week(s).

Nocturnal

The winter is slowly disappearing, and along with it the chances for long exposures, specially at night. In fact, last weekend, I've been going out at late night (or should I say before dawn time) aimlessly just to grasp the sensation of the last nights of winter. In Kuwait, the spring is hardly a "spring," and unless it is windy and harshly cold, then no long exposures are feasible because it seems that temperatures above 15oC or 20oC have drastic effects on long exposures and the noise level in general; specially with a camera like EOS 7D.

Sternensturm
Canon EF 50mm, f/14, 15m, ISO100.
In one of these nights, I've tried some approach to Kuwait Towers; an area that I deemed as a taboo for some time. With my previous experiences, specially with security guys in some malls (day and night), I thought what makes me approach the towers? Anyway, I had a go with it and this time I planned my visit just one hour or less before the beginning of the twilight of dawn - because this is the time when the lights in the towers and the surrounding area are turned off.
First, I had a trial with Rokinon 8mm fisheye lens but anyway because of the distance and some light sources in the far horizon, the image was really out of composition after all. My main aim at this point was to capture the landscape, but I realized it is a failed attempt because, simply, there is no organization on ground itself. I wanted to leave after this failed trial but then I had the idea of using my 50mm lens and create some abstract with the towers (or maybe a minimalistic approach) with some long exposure, in hope that I get some trails like I did some weeks ago on another side of the beach. The final result, Sternensturm, contained some faint traces of trails but it would need some 100% view to show clearly. This in fact gave me some tiny hope in repeating the same experience but closer to the towers and using a different lens (could be 15mm), but I need to wait and see the weather this coming weekend, as we had some tiny rain showers.

Tick-a-Tick

It was about time to do this experiment, which requires somewhat a strong sun. Since I've been around the Towers area lately, I've decided to finally start with an infrared session shoot for a panorama around that place specifically.

InfraCuvaitum

The experiment was relatively successful. I say relatively because there are some issues I still need to think them through. The panorama, InfraCuvaitum, took around 2 hours and 15 minutes, literally; from 7 a.m. up until 9:15 a.m., excluding the time for setting up the configuration. The panorama, of course, was not shot for HDR processing, but only single RAW files of infrared images. Because my camera is not "converted", i.e. adjusted to allow more IR, by removing the hot-mirror filter on the sensor. For this, each single exposure in the 36-shot process took a time period ranging from 1 minute to 6 minutes. In other words, the whole panorama was done in Bulb mode; not Av nor Manual mode.This in fact was quite an experience!
During the process, I had many visitors; wanted and unwanted. However, because of the long exposure times, they were not recorded persistently on the sensor. In this panorama however, and because of my location relevant to the towers, I had to refer to the planet projection specifically because, otherwise, the towers would look too compressed and out of features. The only way to enhance the tower's look was to use this projection. The sun was harshly blown out (naturally) and hence I had to cut it out of the frame which distorted the square-shaped proportions I usually apply to such images. The sun's flare is still obvious on the right side of the image though.

This experience taught me something about managing the exposures and working in Bulb mode all the way. Mainly, I had to reduce the time of the exposure as the rotational motion of the camera would approach the areas where the sun persists. All that was majorly done by intuition and it was 90% successful, having in mind that these RAW files will be processed to recover highlights and shades. If this method was applied with HDR intention, at night time, I might be able to somehow reduce the rocketing dependence of raising the ISO up to 800 and 1000! Needs patience though, and calm atmosphere.

Panaglyph

This is my new term that I've been using to mark a panorama in 3D (or anaglyph) format. I've been wondering for some time about the possibility of such image because of some paradoxical concepts are involved: while panoramas are supposedly done with the least parallax error, anaglyphs seem to be using this parallax to deliver a 3D illusion to the mind! The solution was simple, and I just can't figure how come I didn't think about it before!

My first "panaglyph"
Click to Enlarge

The concept is, apparently, about creating a difference in perspective. Thus, all what we really have to do is move the camera along some axis to create a change in the perspective. In other words, move the whole set (tripod and camera) to some axis. This simple solution was hidden away from my thinking because I was thinking about the camera's movement alone and I didn't think about the core of the issue: perspective change.
The panorama above is a simple 360o panorama from the vicinity of my home. As you may notice, the separation between the left (red) and the right (blue) layers is increased at he edges of the panorama. However, ghosting artifacts, at least to my eyes, are not persistent even at the edges. If you are looking at this image right now, with 3D glasses (red/cyan) concentrate on the spikes on the top of the door and you will quickly get into the 3D sensation. There are several points though that I've went through and some of them needs more experimentation:

1.
First of  all, and to make things realistic as much as possible, I did  measure  the distance between the centers of my eyes. The distance was about 7 centimeters (~2.75 in). Thus, the displacement of the system should be around this value as you can see from the sketch on the right.

2.  Because we have to displace the system in a straight line for some distance, in any direction, then the center of the panorama, meaning the point that should be at the center when stitching the panorama, must be known beforehand. This is because, this point and angle that will be overlapping (and with the least difference between red and blue fringes). The displacement should be parallel to the plane of that surface or angle, as in the sketch.

3. In the stitching phase, the first panorama is stitched and arranged in the proper manner, then a template is saved from this stitch, and simply applied to the second panorama directly. This is what I've done in the panorama above, but more experimentation is needed specially with a full panorama. I won't be surprised if I get a lot of discrepancies and stitching errors in between the two panoramas.

Now critical questions remain: How would other projections behave under this procedure, specifically the planet projection? Would I be able to coincide an angle other than the one parallel to the displacement? Probably this is hard to do because objects in the planes orthogonal to the displacement direction would change in sizes; either get smaller or bigger. But it is worth a try after all.
Now this is one new field to experiment with - and with summer coming, probably it will involve a lot of indoors capture!

Finale

Now, it is the time that the group had been working with Austria's international photography contest and I've been somewhat busy with this issue in the past week; because I'm the one responsible for this account in their website. The payment will be from my own Paypal, and then I'm supposed to receive the cash money. Let's hope the process is done smoothly. The deadline to submit the images is March 17th and I'm waiting for the rest to upload.
I got some interesting messages and emails concerning some of my images, which made me think again about marketing further somehow to some specific users. Not sure how really but I'll try to flip the idea around my head and see where would I arrive. Apparently, even Flickr can be a good source for marketing when used properly! Furthermore, I'm not sure that the outcome would be something more than a reputation at this stage.
Furthermore, I'm trying to get myself a bit immersed in my work business and related matters despite my concrete knowledge about its futility. With the administration, just like the rest of administrations around this country, I'm not an optimist about creating anything useful, nor raising the awareness about our roles as scientists. I live where administrators who barely know algebra and barely write good Arabic are guiding the general assemblies of the working forces. Imagine the outcome...

They say the best cure for a weary mind is work and getting busy. I'm trying my best so far amid my exhaustion and time limits. Yet, I can't help but to get panic attacks, the fear from the future. Everyone is talking about the collapse of this country; people are getting sicker by the day from the deteriorating conditions, and the general control over people's lives by corporate people and estate owners. Life had stopped here almost, and people don't think of having families of their own. More people are thinking of immigration to a better place. With family pressure, I can't help but to worry more and more. Sometimes it does feel like I was born, just to carry out my injuries alone...


Thursday, December 19, 2013

Zu Studieren...

Let's see. A week that started with a semi-disaster, after the escape of the maid from the house. Now, we (or me) have to do much of the house work as much as possible to keep Mom rested as much as possible. It is hard as it is WITH the presence of a maid, as Mom tries to keep active and simply denies her ailments.
On the other hand, I've done all the paperwork and payments to get the new car. I think I will take a shot for it and maybe even a panorama from the inside. It's too early for this talk anyway!
Because of this busy schedule either in daytime or after working hours I didn't even have much time to do anything with my camera except for a simple study and a simple shot. Even that simple shot is not worthy (so far) for publishing, specially after discovering that my leg is in the image by mistake!! (common mistake in fisheye shots!).


Comparison and Study
As I've mentioned last week that I've done some experiment to check and make an idea of the effects of some light modifiers after receiving my new shipment of Impact Syl Arena Strobros On-Camera Flash Light-Modifier Kit.

Source: B&H
Initially, I've done the test with my 580EXII Speedlite against my green wall. After checking the results of such test, I've decided to do the test again, and this time against my wooden door because it has a clear texture and it is better to judge the effect that way. I've also added the RoundFlash modifier to the list for a general comparison. But first, I'll post an original image with plain 580EXII in use. It's worthy to mention that the distance from the front of the lens to the door was kept at around 1 meter (~3.3ft) and f/8. The shutter speed and the power of the speedlite were subjects to change to adjust the level of the light. To ensure a neutral white balance with natural colors as much as possible I've used the Vello Universal White Balance Handheld Disc and shot with the speedlite naturally and used that image in Custom WB settings. In the following set of images, it would be better to click and enlarge the picture to have a better view.

Plain 580EXII
Canon EF 50mm, f/8, 320-1sec, ISO100.

Notice how the center of the light strike is closer to the top edge with flare and gradually fading in all directions. I don't know though why it is not exactly at the center of the top edge!

RoundFlash
RoundFlash shot

Source: B&H
In the RoundFlash shot here, I've used the High-Speed mode for the 580EXII to kill the ambient light and also to decrease the flare on the wood. Strangely, and probably it is a property in the High-Speed mode, the light became more bluish despite fixing the WB by Custom WB settings.
As you can notice, the light accumulated in the center of the shot and gradually spread to the corner, but the graduation is short and blends to darkness like it's vignetting. One of the main problems with the RoundFlash modifier is that the lens should have some length to fit properly in the center. My Canon EF 50mm f/1.4 USM lens was not long enough and initially had problems to fit it in between the strings in the middle of the modifier.
At such level, and 1 meter away from the target, the spotlight of the Speedlite falls almost perfectly in the center (even though in the plain shot it was not!). A good point to consider when shooting portraiture and macro; in fact, RoundFlash was made as a cheap substitution for the expensive ring flash used in typical macro shot. One bad point about it though, it is bulky and I wonder how fit it is for macro shots. You must have some long lenses to keep away from the target (if it was a sensitive one as an insect for example) and to have the lens fit firmly in the center of the modifier. Concentrating the light in the center, and in such amount, would somehow mean harsh shadows for the subject if it was used for portraiture shots I believe.

Beauty Dish, Golden Plate, and Diffuser
Beauty Dish + Golden Plate + Diffuser

Source: B&H
Source: B&H
Then comes the beauty dish, which is a well-known modifier in the fashion world and fashion photography. Technically though, I've never (so far) used it for portraiture or anything else but this test as you can see here. Along with the kit, some specific diffusers and grids to fit the beauty dish are available, thus I've decided to check the effect of the diffuser (the white disc in the image), as the other discs are simply colored diffusers and probably wouldn't help me if it casts a color on the reddish-brown wood. I also didn't check the effect of the grids because their effect is known - simply to concentrate the light into a narrower angle.
Back to the light show now.As it is noticed, the flare of the shot is on the top level above the center and closer to the edge but the size of the flare is relatively small (compared to the RoundFlash and the plain shot). The color of course is changed a bit because of the golden plate inside the beauty dish which made it a bit of greenish hue more than bluish hue. The graduation of the flare is faint (and appears first as if it is cut abruptly). This light attitude makes me think of the usage of the beauty dish; it must be used with some angle even though it is (here with this kit) considered an "on-camera" speedlite modifier. Otherwise, if it was used directly to hit the subject, it would cast a harsh shadow on the spot where it falls. Well, unless a dark background was in use which would hide such shadow maybe!

Beauty Dish, and Golden Plate
Beauty Dish + Golden Plate

I see that when the diffuser is removed there is, virtually, not a big deal of difference in the location of the falling light according to the frame, or to the graduation in the light level. Probably the diffuser provided a greater expansion in the periphery of the falling light, and probably this difference would be more apparent if the power of the light was increased (by the speedlite, by the aperture, or by slowing down the shutter). Could be a subject for further testing.

Beauty Dish, and Silver Plate
Beauty Dish + Silver Plate

Source: B&H
The next plate in the queue was the silver plate to be fixed in the center of the beauty dish. As it's predecessor, the silver plate doesn't seem to change much except for the color of course where it accentuates the blue tint of the speedlite. Usually, with gel filters fitted upon the speedlite, a balance between the ambient light temperature (or color) and the speedlite temperature is sought in that way, and consequently, the white balance is controlled more properly. Here, however, the story is a bit different when using the plates and a speedlite which emits a tinted blue light. Makes me wonder now about the possibilities (and the creative process) of blending gel filters on the speedlite with those colored plates in the beauty dish. The results got to be crazy!

Beauty Dish, and Mirror Plate
Beauty Dish + Mirror Plate

It might appear as completely black frame, but in fact there is a faint light. This result, however, was a complete surprise for me as I was expecting more reflectance from the mirror plate. The mirror plate (which comes in a concave shape) has two sides: polished (convex) and unpolished (concave) surfaces. Other plates don't have polished surface like a mirror. Anyway, according to the settings I've noticed, the concave part must be facing the speedlite. The light here was very faint. I would increase power to make a clear note of how the graduation or feathering of the light goes, but it's enough for me now to see and compare with other settings of other plates. Seems that the mirror plate feathers and scatters the light emitted from the speedlite so much that it only makes a faint tracing of light in the frame. Leaves me with the question: How would that appear in a wide-angle lens?

Bulb Diffuser
Source: B&H
The next modifier is one that I've seen photographers use it a lot, either directly or indirectly. However, the usage of the Bulb Diffuser might be known to many but that didn't keep me still without testing it here. It is a diffuser after all and dedicated for smoothing and feathering the light in a pleasant way. Anyway, because the bulb shape emits lights in all directions almost, and because the typical setting as shown in the guide that the speedlite must be pointed up, I've decided to do my own testing with various tilting angles of the speedlite.

Bulb Diffuser, speedlite pointing up.

On the first trial here with the typical setting: Speedlite pointing up. As it can be seen above, the feathering is nice and smooth going all the way down from the top with little flare on the top edge. Remember that we are using the Canon EF 50mm lens here, meaning that with a little extension in the focal length, more than 50mm, we can be left with the feathering alone without the flare on the top edge of the frame. A good point to memorize I suppose!

Bulb Diffuser, speedlite at 45o.

After trying the typical position, I've tilted the speedlite head down by 45o. This position looks good despite the relatively large flare on the top of the frame (which as I stated above would be avoidable by using a longer focal length). The graduation or feathering is slow making the luminance almost (not completely) homogenous across the frame. Probably this would be a favorite position when doing portraiture (with a little raise in the speedlite level or longer focal length).

Bulb Diffuser, speedlite at 90o.

Finally, we have the 90o position which in fact almost replicates the plain shot of the speedlite without any modifier. Yet, however, in the plain shot above you can notice the black edges like vignetting effect, but here with the bulb diffuser, the edges are also illuminated and almost no vignetting can be found. This makes me think of using the speedlite with other modifiers from Rogue collection which I got before in order to maximize the spread of the light circle and yet give an act as if the speedlite is unmodified originally! Needs a bit more of trial and error.

There are a number of other modifiers along with the kit but I didn't test them because, simply, their effect is known; like the snoot (with grids) and grids for the beauty dish. In addition, a new set of gel filters and a velcro band arrived with the kit but I didn't use them yet, as they are similar to other sets I had already. I need to practice my "speedliting" as much as possible now.

Finale
It feels like my life has been monotonous right now. The only way to break out the routine and the duties of the everyday living seems to be paying close attention to details around me in a trial to amuse my brain in things that usually I don't think of. There are books still on the queue but they are not photography or archaeology books, so my progress in digesting these books is slow. I'm praying for some vacation again, but a real one, out of this country. I'm feeling sick of my (unappreciative) work place, as well as of the majority of people around me. Such a dream seems far a bit for now.
Now, I'm waiting for every weekend like a treasure seeker, and hoping that I can do some night photography in each weekend. Is it worthy to try to be unique already?


Thursday, May 9, 2013

Sorry, No Photo...

As the title for today's post says it. No Photos. Well, not exactly no photos, but I've merely tried something with my camera, while I've spent the rest of the week simply, thinking.
What I'm thinking of might be a long talk, and probably I would shed some light on that later on. But first, let me just talk a bit about one image I've prepared last Friday after many many trials with my speedlites (580EX II and 430EX II).

Das Licht:
I did take a picture of some light bulbs before and this time I was trying to do it again. This time, however, is a bit different because of my latest reading for Cyrill Harnischmacher's book Tabletop Photography. In his book, Cyrill described some aspects of shooting glass surfaces and what kind of background and props that might be needed, beside some tricks - all of that with concentration on low costs and some DIY aspects with the help of two speedlites only. Exactly my situation.

Das Licht
Canon EF 50mm, f/5.6, 4000-1sec, ISO200.

Usually, I've been taking some shots for regular light bulbs before in different situations, and this time I did take some shots with a translucent (i.e. not completely transparent) light bulb. Unfortunately, the translucent was not good enough to show the filament inside the glass. Later on, I've decided to exchange this bulb with a typical spotlight which was half transparent and half dyed with some reflective silver-like material. The filament might not be so clear, but with Fluorescent WB, the color compo seems to be work in a surreal way!
I did take zillions (figurative speech of course!) of pictures but this one seemed the best (and it was the last in the series). I've tried to change the WB but Fluorescent WB kept showing up as the best for such situation. The critical change and test from one shot to the other is changing the shutter, aperture and the reflectors settings, beside changing the direction of the speedlites. Maybe a diagram would explain a bit.

Simple schematic diagram of the basic setting.

What I like here about Harnischmacher's book is how he used regular speedlites (not studio flash or strobes) and few tools to make perfect glass shots without the need to use any polarizers, but only reflectors. This is what I was trying to do however but seems my luck is not as good as Cyrill's!
I've changed the reflector position to many places trying to achieve a somehow gentle light streak on the glass but, as you can see above in Das Licht, the hard spots of light were there anyway but in that specific image, they were the slightest I could make out from this experiment. My teacher, after seeing this image, said I should have stroke the black background with the flash to light the edges of the bulb, which sounds somehow a weird advice to me (specially that the black paper gives a blue streak with flash strikes).
One of the problems when using a spotlight is the fact that because of the shape of the surface, the extension or plug under the bulb was reflected upon the glass of the bulb itself! At this point, I've cut a piece of white board and fixed the light base in it and connected it in hope that this white would help on illuminating the bottom part of the bulb. Well, it did, but unfortunately, because of the glass shape, it acted as a fisheye lens reflecting much more space than the white board itself. Thus, I have to give up the idea of reflecting more light in the bottom part, and get myself satisfied with suppressing light there by replacing the white board with a black one. The filament after all appeared merely as a line because it falls approximately between the transparent part of the bulb and the reflective layer. All in all, I do like the shape of the bulb itself but working with such types of bulb is a hard task and a regular bulb seems easier to work with. But, there is a lot of innovation in the spotlight bulb if you ask me. Who knows what I might think of next...

Give Me Wings!
Last Saturday was a time for one of our meetings in the photography group and we ran through the regular check ups for some updates and the usual complaint about the moderate efforts from the members. I think I will come to discuss this in details later but at this point I want to mention the Red Bull contest.
Almost at the end of the meeting, a representative of Red Bull arrived into the meeting to discuss a contest established by Red Bull company, and despite the fact that he mentioned it is specified for the group, a quick check up to the website made me realize it is not so and it is open to all various contestants.
The theme of the contest is Kuwait (not a weird topic in a country where most people are patriotic AND idiotic in the same time) but with a twist of a story - that is under the category of Series Photography. Every contestant is meant to give 5 images that tell some sort of a story, and I've began to think about it seriously. The deadline is the 20th of May, which somehow gives me a little time to work. Eleven days are just not enough to create such a thematic approach unless you do have an arsenal that can make up a story, which is not my case here.
I've been trying to seriously brainstorm my imagination and get out of some theme for the story, but to no avail. Or let's say, not much advantage was there in such methods but I got out with 2 main ideas for the whole thing:
  1. A Day in Kuwait: This theme should reflect a typical day in Kuwait, from the early hour of morning time up till the evening and then night time. I might have one or two images already under such story theme, but the rest needs to be worked out. Also, it sparked my imagination for some idea but unfortunately such an idea needs lot of work and probably a permission to do it near the Towers.
  2. Progress: This theme would be more problematic and I would need to capture a glimpse of the past and present, and the destruction done by 1990-1991 war and then the re-building. 
After some reflecting, I think I would choose the first approach. I just need to work out what to present. Initially, I had an idea of representing 5 portrait shots, but I've changed my mind later when I realized that I can represent one of my panoramas as the opening of the theme.

Towers of The Rising Sun
The Opening?
One of the points that I'm thinking of taking care of while establishing such series is to include the sun in every shot when possible (of course no sun at night time!). My theme should progress as follows:
  1. Morning time. This is reflected by the sunrise beside Kuwait towers. The only available image so far.
  2. Rush time. This image should include the traffic jam that all Kuwaitis suffer from everyday. In fact, the rush hour can be significant for morning time, or (after)noon  time when people get back from work, but I don't want to duplicate images.
  3. Afternoon time. This time is mysterious to me as I don't know what should be in there. An image of some nap? (typical in the life of Kuwaitis) or should I reflect on family gathering? Or maybe a stroll in some malls having lunch? That would require permission to take a picture in some public places!
  4. Evening time. This time is more like it for a family gathering and visiting. It is also the time for visiting the typical Diwaniyas (beside late night time as well).
  5. Night time. This shot specifically should reflect the peace and tranquility. I have a crazy idea but I would need a lot of help with it thus I'm reluctant to go ahead with it. This image is also a public one supposedly near the towers.
These are the main ideas and all what is left is work on them and even dig in my arsenal, as I might save some time with some shots (like the morning time shot). Here we go with one more burden to carry around!

Independence:
My mind had been strolling on some sensitive topics lately, specially those concerning the group that I'm supposed to work with. After Mom's problem, I've somehow lost contact except for few notifications and activities that keeps me updated from time to time. However, in the same time, I do hate being idle.
However, after our latest meeting, I've discovered that some members were "kicked" out for not being active and/or not paying their membership fees. The fees, however, are a flexible matter from the point of view of the group's management but the thing was, some of these members didn't give any explanations nor replied back to any inquiries. These events made me think for real about the validity and the usefulness of the group's activities.
From my side, I've tried to help the members a lot by trying to transfer my technical knowledge to the members (most of the members) to help them out with their images and produce a high quality images and files. A lot of the members are good photographers, but unfortunately, not so good in processing (developing) their own images, needless to say that some of them hold the point of view of Purests; photographers who believe in submitting and printing their images as they are and any editing would disturb the beauty of the moment, as some say.

The lack of such technical knowledge did already blow us into troubles with expos and other activities, and despite my work and recommendations, nothing was done in that field. It seems to me, my name is remembered when there is some job to be done, but not when my recommendations are considered. On the other hand, all what is asked is photos photos photos, work work work and contests contests contests, and boy how much do I hate contests. I had a vision for this group to be a scholastic star, but now it seems to me it is just a media player with economical revenue. I do miss those days when I was free to think and act with my own slow pace from week to week, rather than being rushed with some extra dose of hard work.

On the other hand, another discussion was opened for the third time and I have to say it made me a bit sick. A contest is sparked for the third time in, what it seems, apparent desperate trial to achieve something for someone, or so I think. The contest is one for the group members and after a weak participation from the members in the first round, it was recalled again and this time with some incentives: 60 K.D. and a patronage of a famous local coffee house; a coffee brand that I've realized later that it belongs to an honorary member and a critic in the group. In this second round, I did, or tried, my best, yet the result was a complete failure; the supposed judges announced that the level of images was way under the hoped or expected. This made me angry in fact because this is a contest among group members and the judges are also, group members - they do realize our capabilities in tabletop tools and studio instruments, don't they?
Now, it is sparked a third time with the same incentives and with a special discount for a workshop about coffee photography for those who attended the previous workshop (and I'm one of them). Besides, what is 60 K.D. (~US$210) in today's day-to-day living here in Kuwait? I know some people who recharge their calling card or pay their phone bills for such an amount. Is it possible that the group members are dragged for virtually free ad campaign, and the sponsors are dying to have a job done for free? The situation, in my eyes, seems like it. I had some time thinking about it and I've decided to not participate this time, and if asked why, I think I will have to steam off a bit. If you are a businessman and own a brand of your own products all over the country, I'm pretty sure that 60 K.D or $200 or even $1000 is not much of a big deal, is it?

Scriptures:
After finishing Cyrill Harnischmacher's book about Tabletop Photography, I've started directly with Lens Design Fundamentals by R. Barry Johnson. It is a heavy book with lot of geometry and mathematics and it seems even my background on mathematics is not quite enough while some parts need refreshing. Anyway, I'm reading on with somehow slow pace. It is not a book to finish that fast and I guess it is one of those that you must have a tutor to explain it for you - after all, it is an academic book.
In the meantime, as I've posted before, I'm planning to make a note ready for my conlangs and any additions to them. Frankly, I didn't do this so far, but my concentration now is dedicated less to this avenue, specially with the new books. I lay hope that these activities will be on my schedule soon. It's my life's problem: time management.

Now, I'm finishing this post with heavy eyes and hands, as I feel the fever creeping through my body... perfect timing...


Thursday, January 17, 2013

Infra Me, Infra You, Infraday...

Things are getting busier and busier! Not sure how long it will last but seems that January is a season for many events locally. The photography group seems to be chasing lot of butterflies in all directions, which makes me fear a bit for its well-being. However, I'm not forced to go to all of these events, but I do have my own share of load of things to do for the group already.
Kuwait University (Kuniv) presented a personal offer to me to represent myself with some of my photos in a special expo dedicated to the youth with the beginning of the second semester at January 27th. However, I've informed the organizers that I'm a member in a group, and it is better to have a group of photography presenting itself rather than a single photographer; that will provide a high potential and provides a greater number of photos. On Tuesday we paid a visit, the group's leader, the chief organizer and myself, to the place and the leader seemed to like it and we are in already. What's left now is a burning engine work to filter and provide photos (and print) - and who knows, maybe add some digital media since there were some usable flat TV sets hanging.
The location is awesome in architecture and I'm really considering doing a panorama inside when possible.

Infra:
It had been almost 2 weeks since I got my infrared filter and I'm still doing experiments on this venture. The experiments done so far were mostly... silly, if I should say.

InfraCandle
Canon EF 50mm, f/1.4, 5sec, ISO 100.
One of the simplest trials was just to light a candle and try to snap it. My aim was generally to see the type of patterns, if any, that a flame might produce under infrared. The image was later converted to black and white and some adjustments followed. Probably a significant attitude for such images when converted to black and white is the abundant of the gray tone - and sometimes a fuzzy feeling to it related to the focusing shift when doing infrared photography (did you not notice a red dot on the focusing ring on your lens?).

InfraCoal
Canon EF 100mm macro, f/5.6, 30sec, ISO 100.

Long story short. When talking about infrared filters (with unconverted cameras), then we talk about tripods as well. One night after coming back home I've encountered the family gathering around a typical coal tray and grilling (or frying) chestnuts and hamburgers and sausages. Since it's hot, I've directly brought my camera and fixed the infrared filter and tried to capture something with it. The view is abstract of course and my aim was to try, and not to create art by any means.
You might be wondering why 100mm macro lens, well, simply put, this is to stay away from the coal and its heat and also to frame the coal only. I've tried the 50mm but I couldn't achieve the same framing, while it kept me close to the coal and its heat. After uploading the image, first thing was to settle the white balance to the completely red image. After doing some reading online (specially at www.infrared-photography.co.uk), I've started to formulate some workflow aspects for such type of photography. After the white balance is set (which sometimes doesn't change much) I've reduced the red saturation which left some areas as white while some as magenta or orange. Contrast and Vibrance were added slightly too.
In Photoshop I've tried to swap the channels (red and blue) to create a look that is similar to those colored infrared landscape shots, but here, with no sky or anything, the red was simply replaced with blue, and I didn't quite like the new look, so I kept the original as is.

Meanwhile on The Moon
HDR

The journey with my infrared filter continues when I tried to combine it with the polarizer and also do HDR on the beach one morning. Sometimes I would face hard time focusing so it is time to raise the ISO to max, focus and measure the exposure and push it back to ISO 100 and do the calculations, but in early morning hours when the sun did shine already it won't be much a hassle after all - yet it is considered a long exposure of some sort.
When processing Meanwhile on The Moon, I've tried different approaches to the RAW files taken in brackets to produce the HDR:
  • Merge the originals into HDR and tone-map them then.
  • Convert each RAW file in a similar way as it was done to InfraCoal, and save the files into TIFF, and merge into HDR from there.
Seems, however, that the second approach is more feasible and more pleasant. I have to do more research on this aspect. That session from the beach still has some (normal) images that I didn't process yet - I've just remembered that while typing these words!

Blind Me!
In some effort to create some new images, specifically as a homework for the Philosophy of Light workshop, I've tried to create something; anything.
Many ideas raced through my mind and eventually settled down with an idea of a light bulb and a water drop. I had my plan for the water drop specifically to make it hanging in the air but I ran out of possible capabilities to make it so, and hence I had to drop it for the time being.

InfraLight
Canon EF 50mm, f/11, 0.5sec, ISO 100.

Since I'm at it, I've decided to take a picture of the light bulb with infrared filter. It was not much of a design or anything, and when I tried my 580EX II speedlite, it didn't quite effect the lighting drastically. I had to work a bit with dodge and burn in Photoshop to emphasize the edges of the light bulb. Significantly though, the infrared filter reduced the halo around the filament of the tungsten bulb without the need to use a high-shutter speed, as it was done later in Lighting Through.

Lighting Through
Canon EF 50mm, f/3.5, 8000-1sec, ISO 100.

After playing around with the infrared filter, it was time to get serious a bit and start my speedlites: 580EX II and 430EX II. In the beginning I've tried to use the manual mode, but I've realized it is hard to control it in such conditions, specially with such high speed. So, directly, I've moved to E-TTL. mode. The 580EX II being master and 430EX II being wireless slave, I've tried to change the power of the speedlite by controlling the aperture, after finding that a slight change in the shutter speed had some catastrophic effects from both, the speedlites and the bulb itself. The location of the 580EX II was fixed on the right side of the bulb while 430EX II was carried by hand and always changed while taking many shots and trying the polarizers to reduce the flare on the glass. In the final result, Lighting Through, I've cloned out some flare as well. Using the polarizer filter with flashes is hard specially that it does not have an indicator of the direction of polarizing, while using the polarizing sheet on the flash head while not on-camera, it is even harder to judge to what angle the polarizer on the lens should be. Anyway, the final image was emphasized in contrast in Photoshop by setting the Black Point in Curves layer to eliminate some light noise around the bulb (and had to use layer masks to confine its effects). Dodge and Burn were used again to emphasize the edges of the bulb. In this final image, the 430EX II was on top (and close) to the bulb and tilted little bit toward the camera's direction (to avoid casting light on the black board as much as possible).

Lingua Aevarica:
In the meantime, I'm trying so hard to organize my time but to no use. I think I should probably finished reading some of those books before I get my time re-ordered in order to work more with Geltani and Ayvarith. As for Geltani, it is a not-yet-finished business with its syllables and some basic grammatical structure of the language and its script, while for Ayvarith, there is always the matter of establishing a website capable of holding my media files (images and sounds) and also working further on creating something new out of it. My love for fantasy and conlangs is almost a match for my love for my camera and photography - it is the first thing why I've created this blog in the first place after all! It is just sad that I can't do much about it for the time being. I have to make some plan, but how, I'm not quite sure. I think photography did suck me in greatly that I've paralyzed other areas of my life, like the conlangs and the poetry. Now imagine how my life would be if I was married already. Simply, dead.


Thursday, June 28, 2012

Rover...

A quiet week of some sort. I'm adapting the habit of bringing my camera to my work place as much as possible, everyday, whenever possible, because there are chances that might occur at any moment. More to come about this later.
I've finally managed to upload the most recent recordings and the vocalizing work with chapter 6 of Alexander's story is going on again. The problem was simple, and now I feel really dumb for not noticing it in the first place. The Google Sites account I used to upload to was simply full, and I needed to find another place. However, I've made another account and the recordings are up again from 1417 to 2016. There are moments when I just decide to stop recording for one day, simply because I'm so tired to read correctly and the whole process becomes a headache!

The form for the Job Request is ready I guess and now I'm supposed to move on and contact potential customers, specially those who did not reply. It is majorly a marketing campaign.


In the meantime, I'm educating myself more in the fields of exposure control and flash photography. I'm preparing for some new order of books and tools to be ordered soon, I hope. I've already ordered some items and books, but it will take some long time to arrive to me since I didn't use any speed mail options.

IndiPRO portable monitor
Source: B&H
Maybe one of the most important items for me right now is the portable monitor (left) along with this order. Compared to other portable monitors, like Sony's for example, this portable monitor is not much with options. However, it works with LP-E6 batteries; same as those used in Canon 7D. For this reason, I've placed an order for one extra battery as well (since it's not included). It would be beneficial as an extra battery for the camera when needed too!
This monitor will be useful when I need to take shots in critical angles with me having to bend my back severely. Back issues are a reality with a man in my age (yes, 32 is old).
Along with this monitor it occurred to me to check on something, and I'm not sure I would be able to use it, but I won't know till I try myself.

Rosco Polarizing #7300 Filter
Source: B&H
 Searching for some way to polarize the light and reduce reflections with my Canon 15mm fisheye lens, I though I might find some kind of gel filters to be fit into the rear side of the lens, like I previously ordered some ND filters gel sheet to be cut and made ready to be used with the lens. However, Rosco Polarizing Filter seems to be used mainly with light sources, but I'm interested in experimenting with this kind of sheet and whether I can cut it into pieces and fit it in the rear end of the fisheye lens. All of this was sparked by a friend who needed my help to order a specific polarizing disk for one of his own lenses. The sheet is relatively large (17x20" ~ 42.5x50cm) and might be useful in many situations, if it is to be cut into various sizes.

Camera Rover:


It was somehow a status of hiatus and unsettling mind along this week. As I've mentioned before, I'm taking my camera to my work as much as I can, and I try to take it out in regular outings as much as possible. I'm trying to capture an inspiration at the slightest chance or hope in the air. This triggers for more abstractive work.
Maybe one of the first trials to increase my understanding for the light and shadows and how they work together was my trial with the camera's flash in broad daylight.

Botanical Arc
Rokinon 8mm fisheye; DxO-corrected.

As I made few test shots for the arc, I've noticed the hard shadows in the lower part of the arc, so I've simple turned on the on camera flash (which I couldn't control because the lens was completely manual and no support for TTL) and just made the shot. Few adjustments were added then by DxO and the distortion was corrected slightly and the whole image was cropped. It's not much of an art work, as much as it is one experiment I loved to do. However, this little experiment was done without any thought to the light level of the flash or any measurements. The same scene was tried for 3D anaglyph too, but didn't work out well.
Also, around my work place, in those moments when boredom just crashes my mind (and there are a lot of them), the camera, then, would help me out in getting back to reality or at least jump from one dimension in my imagination or daydreaming to another. Some weird ideas can occur in weird places, like the bathroom.

Mönster (Patterns)

Even though this place is visited daily, there are only specific moments when everything stops and your eyes would gaze with gushing thoughts and images of ideas. I liked the geometry that I couldn't resist but to go ahead and take my camera from my office and head to the bathroom again.
Despite its simplicity, the shot was not easily done and I had to shoot many times (handheld). After going back home I've I've sorted the images out and with the help of DxO I've picked the best and enhanced its highlights and its distortion as well to make it as straight as possible. Simple patterns like that and such abstract art got its own people I believe. The least to do is to print it out on A3 paper and frame it with a simple plastic frame and hang it in the office to disturb the routine of the office or cubicles work humdrum. 

It's not all about my work place however. Strolling outside had its own benefits too, even though now it's summer and the beach area is not hospitable for my needs as it is in winter. The temperature would simply reach around 38oC by 6:00 a.m.!
The funny thing is that, I was on a hunt for some scenery that would produce some good 3D effect like the 3D Gazebo that I've done last week. Ironically, none of the shots did work, but on the other hand, I've discovered a place on the beach that I might consider for another visit at night, if possible, and do some long exposures there. Also, I've caught two images, that with some twisting, did produce some abstract (if I can call them so) with a philosophical blend in them.

Einsam (Lonely)

Waiting The World

In Einsam, beside emphasizing the color of the sand, I had to clone the uppermost portion of the image to hide the water line. There was cropping as a consequent for adjusting the horizon line and make it straight. I took the picture from above (something like a watching post) and the umbrella was lying in a diagonal line with respect to my vision.
Waiting for the World, however, was another story (and it was shot first before Einsam). I've cropped the image here to remove the horizon line and give a sense of infinity, and also cropped from the lower edge to let the shore line cut through into the corner. Call it Perfectionism if you like, but I did hate leaving the line of the shore hitting on the right side freely!

The chain of thoughts did not stop here anyway and accompanied me home, with some trials on a burnt out bulb. Taken from my car couple of weeks ago, I've stored this bulb specifically for this experiment. Though I've forgot about it a little, but it just came in time.

Colorful Bulb
Tamron 70-300mm

The bulb had a black patch, and I was thinking already of doing HDR to eliminate this problem. To add some twist, I've decided to do the HDR by bracketing the Flash pulses instead of the Exposure brackets in the camera itself. Placing the bulb in front of a printed paper used for making noise profiles for Noise Ninja added even more glamor to the image I believe.
Maybe it was a mistake to point the flash from the camera directly into the bulb without bouncing it upon some surface, but this might be debatable. The noise level was relatively easy to remove except of some areas that a Median trick would do.
In Photoshop, many, many, adjustment layers were added to increase the contrast and pronounce the bulb more (specially its edges) and fix the color cast little bit. It would have been done more easily if I did take a picture of my Kodak card and simply point the Black eyedropper into the black patch of the card.

QTVR

I've decided to go back to some of the images taken back from Failaka back in March. I've tried my best again with the Ikaros Hotel panorama, and this time with single images and not HDR, yet my trials were a failure again. Seems the critical point which ruined the whole thing is the fact that it was a windy morning and the shades covering the main yard (where I took the panorama) were shaking already and causing much of the fuss and the non-alignment problem in the panorama as a whole.
However, this was not the issue for now. I've remembered one panorama that I've stitched only in one format; which was then called the Planeta Herba.

Planeta Herba

This panorama specifically is semi-full spherical; with exclusion to the zenith and the nadir shots. In fact, and because of the blue sky, the zenith shot is not necessary I believe and could be fabricated easily I presume. The nadir shot was not a big deal too because there is sand only and it is easy to clone out. However, the shadows of the tripod and the camera (ad mine at some points) needed some work to be cloned out.
The panorama was stitched again but in flat format in order to make a QTVR. A simple QTVR.

Θάμνοι του Ίκαρου (Bushes of Ikaros)

The noise level did persist and nothing was all easy to clean, beside some burnt edges. All of these details are apparent of course in the original file, but printing the image itself has the final word when it comes to the noise level and other artifacts.
When it comes to the QTVR, I've been putting some of my Prefectionism, if I should say. It is indeed nice to have a full spherical space to look at in all directions and feel free, but also I'm trying to put down my expectations and also be realistic. In this QTVR, the space is almost fully spherical, with only zenith and nadir missing:


Again, the window was made small for quality reasons. The original file (which sizes up to 130MB) is clearer. Maybe it is a change in my own psychology or something; I just don't know. I think there are lot of things I need to give up in this life just to be going on. I hate it when I'm forced to, but what difference does it make? Annoyance is available in either case: whether you put down your expectations, or not.

The world is becoming a scary, and a silly, place to live...