Showing posts with label impact. Show all posts

Thursday, March 21, 2019

Warrior…

Blah. I guess after posting using an external text editor and then pasting it here didn't come out well last time. So, I'm back to typing the blog directly in the page and let's hope no fuss this time!
I've been trying to keep myself busy to some extent here, despite the tiresome body. The weather is getting warmer (some rains and winds though) and insects are showing more frequently than before (and THAT is not a good sign!). On the other hand, I also got a new toy, which I will try to talk about along with its usage in capturing one of the photos last week. But before heading there, let's talk about some News maybe?

Relapse

I think I've stated in my previous post that I'm going to participate (or actually did participate already that time) in Trierenberg's Circuit (or Austria's International Photocontest), and I'm going to list some of the images that I've uploaded for the contest at the end of this post.
On another note, I'm back to YouPic; A social media website for photographers (supposedly) which I've been part of for a short period of time 2 or 3 years ago but deleted my account then. Now, after quitting Instagram for almost a year (will be a year in July) and being chased by Flickr with deletion of more than 1000 images as per their new policy, I felt now the need to get some new outlet. Thus, I've turned back to YouPic.


I'm not sure what was the reason back then for deleting my own account, but I think I was focusing on simplifying my life (and still) and I didn't want to waste so much time moving like a bee from one website to another, and thus I've deleted this account along with my account on 500px back then. Now, 500px might be a destination again but not for the time being really.
Things with YouPic were smooth in the beginning. I've used to upload from two to three images per day, but then suddenly things started to get nasty out of no where, and I have to wait for 11-12 hours after each upload. Yes, half a day! This is, of course, to push people to get the Premium (paid) account, but I'm taking it slow. I'm not ready to pay for such websites yet. I think beside the time period limitation (which is way too exaggerated I think) - I do think that they also control the publicity of the photos you upload to the website; Meaning, if you are a Premium member, then yourr photos are more easily exposed and propagated through the platform, while in case you are not (like me) then you have to rely on luck big time. On the other hand, it also has ventures to see other people's photography and styles, which I will be amusing myself with when bored I guess or when I really need some aspiration to continue with my camera. Let's hope this trend lasts a while with me though.

Retinital Warrior

Well, for a starter, I made this term up myself. There is no such thing as "retinital" in the dictionary. Anyway as the month of February went by, I didn't get the chance to do any shot reflecting on Retinitis Pigmentosa. However, I was still on the trail and had some ideas at the back of my head despite being in March already and after the failure of my very first idea. Like my first idea (no need to explain it here really), this new idea involves working with the blind-cane as well.

Retinital Warrior
Sigma 12-24mm @12mm, f/4.5, 250-1s, ISO100.

I have to admit though that I procrastinated so much with this project, and eventually I've done it in a sleepless night in the middle of the week, waiting to go to work in the morning! Anyway, back to the technical details here.

As you can see above, the lens used here is not a typical portraiture lens, but more like a landscape lens, the same Sigma that I've talked about some weeks ago in doing a one-camera-one-lens challenge with myself, around my workplace. I'm trying to get it into action further here. The thing is, I was forced to use such a lens because of the size of the room I was working in and the limited space. I had some struggles with the angle and the focal length actually but then decided not to waste any time and just do some cleaning later on in Photoshop when required. Focusing on the perspective, you can tell that various body parts are not exactly in the correct proportions, but I think this adds to the drama as well, and it's fine with me.
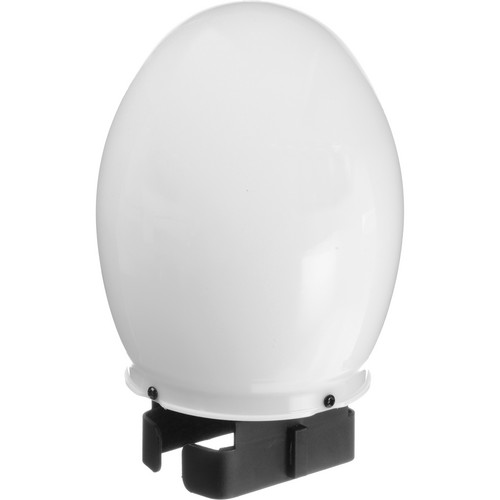
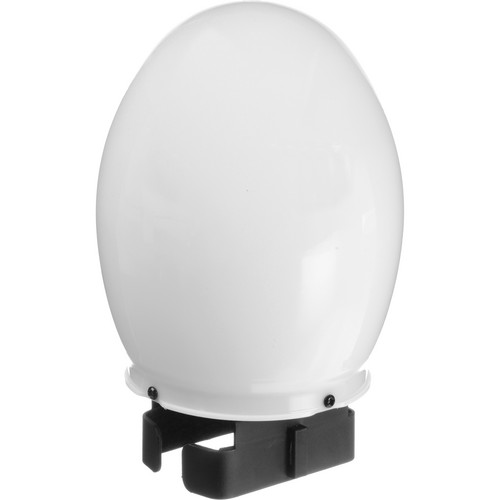
Oval diffuser for speedlites from Impact.
Since it was a dramatic shot, I've pulled my eagerness back a little for using multiple speedlites here and used only one, on the lane of low-key, so to say. After some struggle with the location of the speedlite, I've placed it on a small bedside table with an oval diffuser (which by now became one of my favorite light modifiers!). Beside using one light, I've kept the power low; Lower than I usually do with my selfies. This is to keep the dark aspect or atmosphere (otherwise, in some sense, the image might point to the concept of power rather than exhaustion). I soaked myself, literally, to give the impression of exhaustion (in fact I was at that time but without the sweat!) and the water spraying bottle which I got specifically to do this shot didn't work quite well. I needed to soak myself heavily, so I did... under the shower. I was really afraid of catching cold after finishing this.
The rest of the job is the usual cleaning and straightening a bit, but the major edit here was to pull out the colors and make the image closer in looks to B&W, while it's not. I've used the Vibrance adjustment layer here which pulled the colors' saturation in the scene perfectly but in the same time kept the vibrant red tone of the cane obvious; Which is perfect! There were also some minor dodge processes for the central part of the image or so.
Now, would I do this again using a conventional portraiture lens (like 50mm, which is equivalent to 80mm on APS-C sensor)? Most probably, I won't think about it even. I like the distortion here with some parts being exaggerated, and I think it ads more emphasis on the hand holding the cane, and my facial expression, while leaving other parts relatively smaller. Some people liked it already, but unfortunately, this image was done AFTER uploading the photos to Trierenberg's contest. Oh well, I might upload it for other (minor) contests if I get the mood to, or simply just wait for next year's contest. This said, I'm not over with RP ideas yet, and I might as well revisit the failed attempt later on.

Wirelessly

It has been a habit in the family here, with every Friday gathering, to play UNO (a card game in case the reader does not know it). With few weeks, I had this idea sparking in my head for taking a photo, a long exposure to be precise, for the game from above. That, of course, would be done without a drone. For some reason, actually, I don't look nicely on drone photography despite the beautiful images and beautiful perspective that is shown from above (bird's eye view as dubbed sometimes). Not sure why though... because it is easy? Limited? Anyhow, I did spend some long time thinking about how would I do this shot.

Case Air
Part of the solution came in as I was watching some YouTube videos and realized that such thing as "wireless tethering" do exist indeed! I really didn't know about it till that moment. All that time I was thinking that such a process would be done using a cable. But here we go! I was so lucky to find this in a local store here in Kuwait (AAB-World stores) which even had a delivery service (took a while to be delivered because the payment was not in cash but by Visa), and the price is not too different from other stores outside. Just connect this to the tethering port in your camera and download the corresponding app to your mobile phone and you are ready to go! They provide various cables to fit various camera models. It took me a short time to get used to it and to surf the app thoroughly, even though I can get stuck sometimes and a bit sluggish (a lag in the image update on the app) but that's not a big deal, when I can view things on my mobile regardless of the camera position and its angle! The Case Air solution works on Wi-Fi signal, so you would need to connect your mobile phone to it via Wi-Fi option (i.e. no internet while connecting it to the camera but that's not a big deal for me). That also means, I suppose, it works fine under the sun, because Wi-Fi signals are radio signals and not infrared (like when I control speedlites by that) and the sun does not issue any problems with that.

Case Air overview,
with a glimpse on its app.
Clamp mount similar
to the one I have.
As I've stated, this was one part of the solution. Yet, I have to come out with a solution that enables me to raise the camera high above while the card players would be situated underneath it. One of the solutions I've thought of, and the easiest (sort of) is to use a clamp with mounting thread (which I've used before to shoot from above). The problem with this solution is, though, that the fixtures in the ceiling are not quite in proper places related to the ground where the group game would take place, usually. Under these circumstances, I had to think of something. I really tried to improvise something but all roads lead me to one solution: Old School → High tripod and a lateral arm. For this purpose, I had to use one of the old tripods I had (which I stopped using because of its shaky status). I was really afraid that it would flip over specially with the lateral arm being extended at full with the hinge of contact between the arm and the tripod being close to the edge of the arm. Gracefully, things went smoothly, without a shake. To help on achieving the long exposure, I had to use my Kenko's ND filter (super ND, 10-stops), which I had no problem attaching while is up high. And since the camera is up high, the Case Air tethering tool helped me fixing the angle and the perspective of the camera to centralize the carpet's design as much as possible. One problem was there though: The tripod's legs show up in the scene, and I had to work on that later in the post-processing phase.

A Circle of UNO
Voigtländer 20mm, f/9, ~17m, ISO100.

Now, in doing this shot, A Circle of UNO, I did discover some disadvantages for Case Air, but I was able to go around them (with some mathematics!) but life would have been much easier if such problems didn't exist in the first place. Here are some problems I've noticed:

  • Case Air app does not simulate the exposure properly (if any in fact) like it is the case on LiveView. This was obvious when I attached the Big Stopper filter and raised the ISO to max to estimate the time required for the long exposure (as I usually do), but once the filter is on, then that's it. No simulation and no histogram estimation possible even on high ISO. Because of this, I had to calculate the exposure from images shot in Av mode, and even with that the final image, A Circle of UNO, was a bit dark and I had to add 1 stop or more in RAW editing.
  • When switched to "Bulb" mode, the Case Air app switches off the view (or LiveView) on the app and you would not be able to check the scene as on LiveView on camera. Thus, everything must be done prior to putting the ND filter and before switching the app to "Bulb" mode (of course Bulb mode must be switched on the camera as well).
  • After capturing an image, in whatever mode I'm on, I can't review the image on the app but I have to do so on the camera itself. I think there is a way to control the camera in such a way that I can view the images saved in the card inside the camera (by displaying what the LCD is viewing as if the HDMI cable is connected to an external monitor, but wirelessly this time). With my case here, the camera being up high would not allow me to check every image after capture.
Other than these (major) points, this product worked well for me in this occasion. The rest was post-processing job of fixing the exposure and the contrast, while emphasizing some aspects of the image (like the UNO card at the center), and then removing the tripod legs (at the bottom of the image). Too bad though, I wanted my nephew, sitting on the top frame of the photo, to show more, but it seems he adjusted his pose before shooting and hence barely his knees show up in the frame.
This tethering tools have some promising stuff that I need to test as well, mainly the "focus stack" mode, which I'm not sure what it does really, but I think it works (or MUST work) with a lens of AF system. Something to try in the near future, I hope.

Finale

As promised in the beginning, here are "some" of the photos that I've uploaded for participation in Trierenberg's contest, and of course they are minimized in size to fit in here.


Now, if there is one thing I'm regretting really is the inability to write some poetry, which started maybe about the beginning of this year. Despite being in abundance, but emotions don't come easily into words. Writer's block I'm guessing? Typical. Same thing happens with me in photography. Meanwhile, I do keep writing some thoughts and save them on Writing.com, as I might reflect on those later on.
Away from all that, there are some ideas related to RP cooking at the back of my head but I'm just waiting for the opportunity to start with them. I've started a fasting cycle already here, for the month of Rajab, and I'm not sure when I will stop; I guess when I'm totally exhausted? We'll see. In fact, at some level, fasting somehow do push me to do some more sometimes despite exhaustion, but the lengthy naps are a must here. Good thing is, even with afternoon naps, I'm able to get some sleep at night (though sometimes late a bit). I think exhaustion works to my advantage here. For the many worries and anxiety issues have kept me sleepless AND exhausted already.
Many things are happening at work, and everyone is talking about moving to the new location which is further away from home (more struggle with the traffic than what it is already), but I'm keeping myself silent and all to myself. Here I am, trying to put my mind off with games and photography and not sure what will happen next. They say I should not worry about what's coming and focus on the moment and live each day to its own; Yet, I really don't know how people are supposed to do this. It never worked for me. I have to get my skin (and mood) prepared for summer here, and I must think of my next travel. Apparently, the only way to capture panoramas for me now is to travel, since nothing seems worth it here. Supposing I can shoot anything I like…


Thursday, September 7, 2017

Light Me!

It has been a quick holiday, and I really need some more of it; to sleep, and to work with my camera a bit. Nonetheless, I managed to work a bit with my camera and specifically fixing an image that I've posted in my previous post, after getting some notes from my brother about it. As for the rest of the time, I've been either dozing off or working with selfies and filters, but with a twist!

Re-Make

As I've mentioned, I had to try out and fix an image that I've posted here previously since I got some notes about it. Without going into details, but the main aspect of change in the shoot is to change the light source, using the candle alone instead of speedlites as was previously done.

وفوق كل ذي علم عليم (1)
"and over every lord of knowledge He is knowing" (12:76)
Done with speedlites in HSS.
وفوق كل ذي علم عليم (2)
"and over every lord of knowledge He is knowing" (12:76) - II
Change in perspective and using candle light alone.

I have to say that I really like the second version; Not only for its dramatic appearance and the play of light, but the perspective (as per my brother's suggestion) did add to the difference, which I think is quite interesting. In fact, in my chase after landscapes and architecture I've realized the importance of shooting with non-ordinary angles of view to keep the image being interesting (somewhat excluding panoramas since it doesn't work all the time with this art). However, it seems I've totally forgot about this concept when it came down to still life images like this. I'll try to remember that next time (and I'll try to remember to remember next time); go figure! Being satisfied about this shot did not stop me from doing some other experiments with the same set as well.

وفوق كل ذي علم عليم (3)
"and over every lord of knowledge He is knowing" (12:76) - III
B+W 403 UV filter with hot mirror.

Since I didn't use the Ultraviolet 403 filter in a long time now, I've decided to put it in action here despite the fact that, after checking the typical spectra for candles, it seems that candles do not issue much of UV radiation (if any at all), but anyway, I've decided to try. To add some charisma here, I've decided to do some HDR bracketing which required me to raise the ISO a bit (to 400). Focusing the set was a tricky business since the filter was opaque. Anyway, I've managed to make the third shot above by bracketing 3 shots and merging them into HDR. The flare was quite hideous and even controlling the parameters in tone-mapping the HDR couldn't help in suppressing these artifacts. However, there are these blue lines which emerge from the candle (not really emerging here), and that is an artifact I've noticed its presence when using UV or H-Alpha filters, with or without hot mirror, when working in LiveView mode specifically. They disappear when I work in a regular way. Not sure what is the mechanism that works behind such artifact but in this instance it was quite desirable to add a bit of magic to the scene. The high ISO played a great role in increasing the noise which was hard to clean (but reduced a bit).


وفوق كل ذي علم عليم (4)
"and over every lord of knowledge He is knowing" (12:76) - IV.
B+W 403 UV filter with hot mirror.

In the third shot, the white balance was not calibrated in-camera but was left on Auto. In the fourth shot, however, I've managed to calibrate the white balance with such hard filter (even though I'm working with a fully converted camera here), and also put down the ISO back to 100. To eliminate those lines emerging above the candle, I had to work in a regular way without LiveView. With that sprung the idea of doing HDR bracketing but using long exposures like I used to do some years back during my regular visit to the seaside through winter nights. So I did, and started at around 8 minutes and halving the value with each exposure until reaching 30 seconds. The more exposures, the merrier, since that will provide a smoother "histogram" of data for the light levels. The result in the 4th seems more pleasing than the 3rd with the absence of these distraction lines above the candle, but nevertheless, I still had to crop a big portion out to remove the flare. The matter of flares was there in all attempts, but having a filter and a hot mirror on top of it increased the internal reflection which made the matter worse. Let's hope I would not have to shoot directly at a light source again!

Candle Selfies

It all started with testing the H-Alpha filter, and the easiest subject to think of when testing is, actually, my face. Things, however, evolved later on.

Hl-Alpha filter + hot mirror.
430EX II speedlite on camera left with oval diffuser.
Voigtländer 20mm.

Ovel (Globe) diffuser from Impact.
Source: B&H
My first experiment with the speedlite was fruitful if I can call it so, because it provided some insight into this simple light modifier, the oval diffuser from Impact. Anyway, this is not the core of this text right now, but shooting a selfie with speedlite is surely an easy task, because I got to speed up the shutter speed and kill the ambient light significantly (and hide the messy background effectively!). I think I just needed a reflector to the left of my face to bounce back some light and light the shadows a bit, but well, this is dramatic enough as it is and nicely sharp (later, while processing, I've sharpened the front eye specifically in Photoshop). But since I was going on with ِAugust project about books (which for I've taken the shots posted above), I've decided here to try and use the candle light only to light my face and check the general outlook. I have to say, I'm quite impressed despite the simplicity and the technical limitations for such light.

Candle Selfie 1
H-Alpha filter + Hot mirror.
Through out these selfies, I've always used Voigtländer 20mm lens, which is my favorite right now for many tasks, be it macro (on reverse) or other styles, even selfies. Despite being a wide-angle lens and, usually, such lenses are not used for proper portraiture shots. But the fact that I was so close to the settings and its capability of focusing at minimum distance of 20cm made it a plausible option; adding to that the fact that my camera is a cropped-frame camera and it eliminates much of the periphery (20mm on 1.6x cropped frame is equivalent to 32mm). However, my first trial was with the Night Sky filter, H-Alpha, and a hot mirror (Tiffen's) placed on top.
Using an external LCD monitor connected via the HD input of the camera, I was able to manage the focusing issue pretty easily with this filter. Needless to say, I had to do a white balance calibration before shooting the selfie (and it should be calibrated with a candle in front of the lens because this is the variety of light I will be using to shoot). The result? Mesmerizing. I really loved the looks. The candle light, despite being simple and kind of hard to deal with somehow (I had to work in completely dark room and find my way through the mess), but the light itself is not "pointed," that is, it is not concentrated into a beam as it is the case with speedlites, thus it can be considered as a diffused light on its own, even though it is a weak source. Placing the candle typically under my chin level produced the so-called "horror light" but in some diffused manner which it made it, let's say, less horrific.

Candle Selfie 2
B+W 092 infrared filter.
One observation about the usage of H-Alpha filter with a hot mirror is that images are slightly like infrared when processed but with darker tones and I've found out later, from checking various transmission charts for such filter, that using a hot mirror on top of it is actually not a good practice because this filter operates around the range of Reds and above (in sense of wavelengths) which extends to the infrared range. Anyway, The first shot inspired me to use the infrared filter, namely the B+W 092 infrared filter.
I picked this filter specifically because it has a low threshold (at around 650nm) which gives some colorful results at times, unlike the Kodak infrared filter which has a high threshold (about 1000nm); The higher the threshold, the closer the image to B&W it would look. In Candle Selfie 2, I had to get even closer to the lens and with some cropping I was able to hide the flame. Probably this selfie is the best, but this was not the end of the story.

Top Row: H-Alpha + hot mirror.
Low Row: B+W 092 infrared.
Left column: originals.
Right column: Red-Blue channel swaps.

I couldn't pass the chance of all this work with these filters without trying at least one swap; the most common being Red-Blue channel swap. That produced some interesting results as well as seen above. All images here (and those before) were processed to reduce some of the flare. As I've stated before, flares are quite common and natural when the light source is in front of the lens, and that's why my beard specifically in the infrared shot looks colored; this actually had been caused by a light spot which I've tried to reduce its presence in the process (it was more saturated and lighter). I've tried to take some selfies using the B+W 403 Ultraviolet filter plus hot mirror but this is another story, maybe for another post.
Conclusion: despite its weakness as a light source, candle light is a pretty interesting and a dramatic source of light. It provides a somewhat diffused light look, but not necessarily light shadows as it is with properly diffused light (from flash or others). I'm definitely going to consider candles in other projects when I get the chance to. One set back though, it would mostly need a dark room (unless the photo idea is not about using the candle light and its dramatic look).

Finale

My experiments are going on still and there is a lot going on at the back of my head. I'm keeping some material for the next posts in the weeks to come as I don't want to put all eggs in one basket here.
I think old age is creeping to me indeed as my body is not what it used to be and I'm getting tired easily; The light time I can find to work with my camera would be a hard time resisting a nap! Is it a lack of motivation or it is indeed my body which is hitting a low. Anyway, I'll have some quiet to myself in the next 3 days with the family going out to some resort, and hopefully I can manage to work more with my camera.
All this work with my camera, which is really some experimenting after all and not a trial to make a fine art, seems to be my way to escape my anxiety and my panic attacks. It doesn't work all the time but it is after all some productive. Things at work, despite being quiet at the moment, it is yet loathsome and sometimes I get a darkened vision about the future of this place, and again I try to get my mind back to the tracks and avoid believing in things that did not happen yet. I'm clinging more, as days pass by, to the past and the sweet memories of the old times. The present, and future, are quite repulsive to me right now. Many people I like and love are disappearing or simply leaving and I can't do much about it, except to watch it. It is the law of life, I know, but these things were, and are, the only lovely things as I remember.  I miss me, so much…

Stock photography by Taher AlShemaly at Alamy

Thursday, December 19, 2013

Zu Studieren...

Let's see. A week that started with a semi-disaster, after the escape of the maid from the house. Now, we (or me) have to do much of the house work as much as possible to keep Mom rested as much as possible. It is hard as it is WITH the presence of a maid, as Mom tries to keep active and simply denies her ailments.
On the other hand, I've done all the paperwork and payments to get the new car. I think I will take a shot for it and maybe even a panorama from the inside. It's too early for this talk anyway!
Because of this busy schedule either in daytime or after working hours I didn't even have much time to do anything with my camera except for a simple study and a simple shot. Even that simple shot is not worthy (so far) for publishing, specially after discovering that my leg is in the image by mistake!! (common mistake in fisheye shots!).


Comparison and Study
As I've mentioned last week that I've done some experiment to check and make an idea of the effects of some light modifiers after receiving my new shipment of Impact Syl Arena Strobros On-Camera Flash Light-Modifier Kit.

Source: B&H
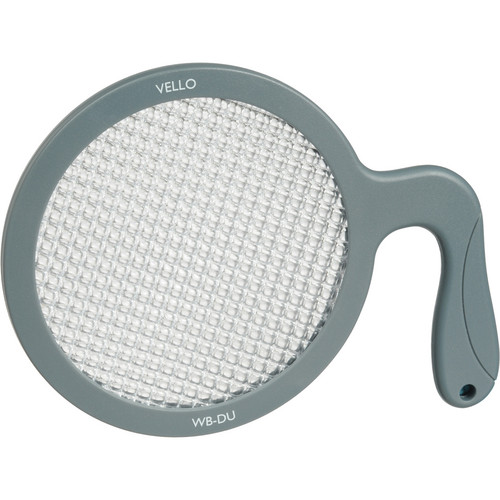
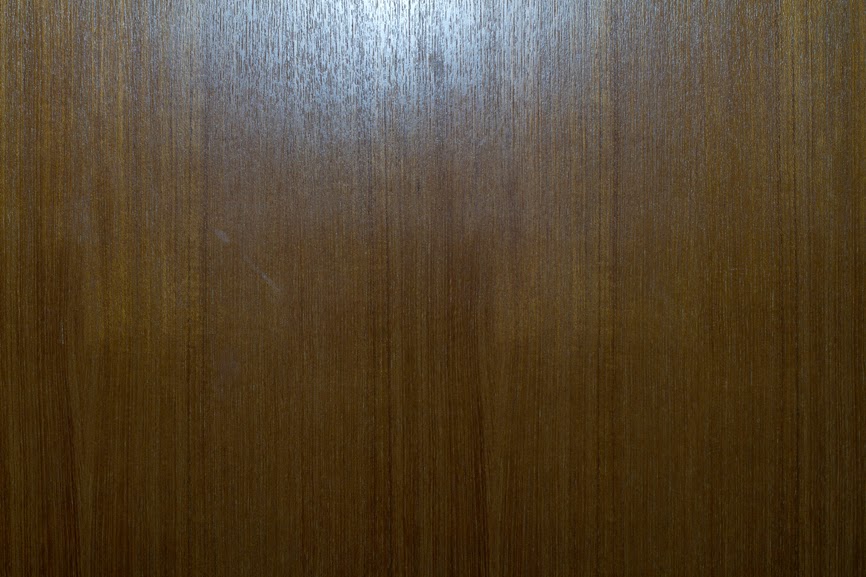
Initially, I've done the test with my 580EXII Speedlite against my green wall. After checking the results of such test, I've decided to do the test again, and this time against my wooden door because it has a clear texture and it is better to judge the effect that way. I've also added the RoundFlash modifier to the list for a general comparison. But first, I'll post an original image with plain 580EXII in use. It's worthy to mention that the distance from the front of the lens to the door was kept at around 1 meter (~3.3ft) and f/8. The shutter speed and the power of the speedlite were subjects to change to adjust the level of the light. To ensure a neutral white balance with natural colors as much as possible I've used the Vello Universal White Balance Handheld Disc and shot with the speedlite naturally and used that image in Custom WB settings. In the following set of images, it would be better to click and enlarge the picture to have a better view.

Plain 580EXII
Canon EF 50mm, f/8, 320-1sec, ISO100.

Notice how the center of the light strike is closer to the top edge with flare and gradually fading in all directions. I don't know though why it is not exactly at the center of the top edge!

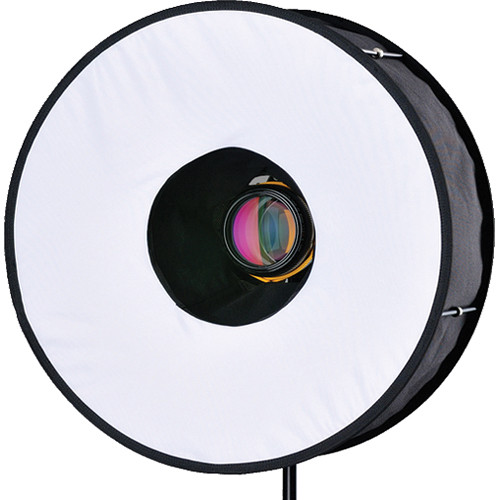
RoundFlash
RoundFlash shot

Source: B&H
In the RoundFlash shot here, I've used the High-Speed mode for the 580EXII to kill the ambient light and also to decrease the flare on the wood. Strangely, and probably it is a property in the High-Speed mode, the light became more bluish despite fixing the WB by Custom WB settings.
As you can notice, the light accumulated in the center of the shot and gradually spread to the corner, but the graduation is short and blends to darkness like it's vignetting. One of the main problems with the RoundFlash modifier is that the lens should have some length to fit properly in the center. My Canon EF 50mm f/1.4 USM lens was not long enough and initially had problems to fit it in between the strings in the middle of the modifier.
At such level, and 1 meter away from the target, the spotlight of the Speedlite falls almost perfectly in the center (even though in the plain shot it was not!). A good point to consider when shooting portraiture and macro; in fact, RoundFlash was made as a cheap substitution for the expensive ring flash used in typical macro shot. One bad point about it though, it is bulky and I wonder how fit it is for macro shots. You must have some long lenses to keep away from the target (if it was a sensitive one as an insect for example) and to have the lens fit firmly in the center of the modifier. Concentrating the light in the center, and in such amount, would somehow mean harsh shadows for the subject if it was used for portraiture shots I believe.

Beauty Dish, Golden Plate, and Diffuser
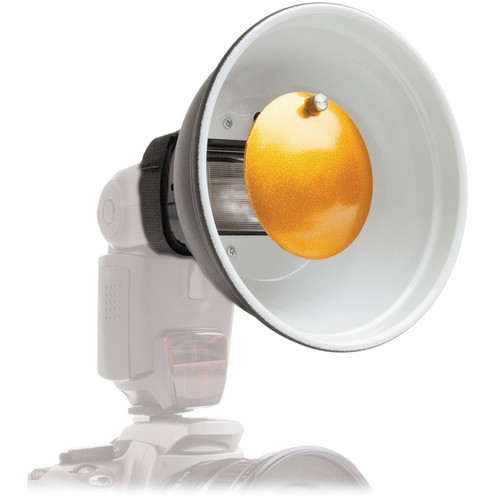
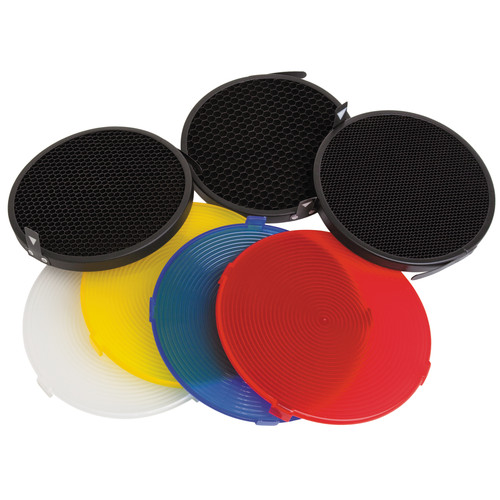
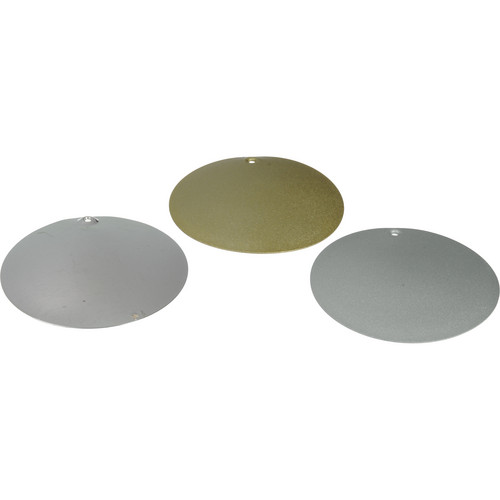
Beauty Dish + Golden Plate + Diffuser

Source: B&H
Source: B&H
Then comes the beauty dish, which is a well-known modifier in the fashion world and fashion photography. Technically though, I've never (so far) used it for portraiture or anything else but this test as you can see here. Along with the kit, some specific diffusers and grids to fit the beauty dish are available, thus I've decided to check the effect of the diffuser (the white disc in the image), as the other discs are simply colored diffusers and probably wouldn't help me if it casts a color on the reddish-brown wood. I also didn't check the effect of the grids because their effect is known - simply to concentrate the light into a narrower angle.
Back to the light show now.As it is noticed, the flare of the shot is on the top level above the center and closer to the edge but the size of the flare is relatively small (compared to the RoundFlash and the plain shot). The color of course is changed a bit because of the golden plate inside the beauty dish which made it a bit of greenish hue more than bluish hue. The graduation of the flare is faint (and appears first as if it is cut abruptly). This light attitude makes me think of the usage of the beauty dish; it must be used with some angle even though it is (here with this kit) considered an "on-camera" speedlite modifier. Otherwise, if it was used directly to hit the subject, it would cast a harsh shadow on the spot where it falls. Well, unless a dark background was in use which would hide such shadow maybe!

Beauty Dish, and Golden Plate
Beauty Dish + Golden Plate

I see that when the diffuser is removed there is, virtually, not a big deal of difference in the location of the falling light according to the frame, or to the graduation in the light level. Probably the diffuser provided a greater expansion in the periphery of the falling light, and probably this difference would be more apparent if the power of the light was increased (by the speedlite, by the aperture, or by slowing down the shutter). Could be a subject for further testing.

Beauty Dish, and Silver Plate
Beauty Dish + Silver Plate

Source: B&H
The next plate in the queue was the silver plate to be fixed in the center of the beauty dish. As it's predecessor, the silver plate doesn't seem to change much except for the color of course where it accentuates the blue tint of the speedlite. Usually, with gel filters fitted upon the speedlite, a balance between the ambient light temperature (or color) and the speedlite temperature is sought in that way, and consequently, the white balance is controlled more properly. Here, however, the story is a bit different when using the plates and a speedlite which emits a tinted blue light. Makes me wonder now about the possibilities (and the creative process) of blending gel filters on the speedlite with those colored plates in the beauty dish. The results got to be crazy!

Beauty Dish, and Mirror Plate
Beauty Dish + Mirror Plate

It might appear as completely black frame, but in fact there is a faint light. This result, however, was a complete surprise for me as I was expecting more reflectance from the mirror plate. The mirror plate (which comes in a concave shape) has two sides: polished (convex) and unpolished (concave) surfaces. Other plates don't have polished surface like a mirror. Anyway, according to the settings I've noticed, the concave part must be facing the speedlite. The light here was very faint. I would increase power to make a clear note of how the graduation or feathering of the light goes, but it's enough for me now to see and compare with other settings of other plates. Seems that the mirror plate feathers and scatters the light emitted from the speedlite so much that it only makes a faint tracing of light in the frame. Leaves me with the question: How would that appear in a wide-angle lens?

Bulb Diffuser
Source: B&H
The next modifier is one that I've seen photographers use it a lot, either directly or indirectly. However, the usage of the Bulb Diffuser might be known to many but that didn't keep me still without testing it here. It is a diffuser after all and dedicated for smoothing and feathering the light in a pleasant way. Anyway, because the bulb shape emits lights in all directions almost, and because the typical setting as shown in the guide that the speedlite must be pointed up, I've decided to do my own testing with various tilting angles of the speedlite.

Bulb Diffuser, speedlite pointing up.

On the first trial here with the typical setting: Speedlite pointing up. As it can be seen above, the feathering is nice and smooth going all the way down from the top with little flare on the top edge. Remember that we are using the Canon EF 50mm lens here, meaning that with a little extension in the focal length, more than 50mm, we can be left with the feathering alone without the flare on the top edge of the frame. A good point to memorize I suppose!

Bulb Diffuser, speedlite at 45o.

After trying the typical position, I've tilted the speedlite head down by 45o. This position looks good despite the relatively large flare on the top of the frame (which as I stated above would be avoidable by using a longer focal length). The graduation or feathering is slow making the luminance almost (not completely) homogenous across the frame. Probably this would be a favorite position when doing portraiture (with a little raise in the speedlite level or longer focal length).

Bulb Diffuser, speedlite at 90o.

Finally, we have the 90o position which in fact almost replicates the plain shot of the speedlite without any modifier. Yet, however, in the plain shot above you can notice the black edges like vignetting effect, but here with the bulb diffuser, the edges are also illuminated and almost no vignetting can be found. This makes me think of using the speedlite with other modifiers from Rogue collection which I got before in order to maximize the spread of the light circle and yet give an act as if the speedlite is unmodified originally! Needs a bit more of trial and error.

There are a number of other modifiers along with the kit but I didn't test them because, simply, their effect is known; like the snoot (with grids) and grids for the beauty dish. In addition, a new set of gel filters and a velcro band arrived with the kit but I didn't use them yet, as they are similar to other sets I had already. I need to practice my "speedliting" as much as possible now.

Finale
It feels like my life has been monotonous right now. The only way to break out the routine and the duties of the everyday living seems to be paying close attention to details around me in a trial to amuse my brain in things that usually I don't think of. There are books still on the queue but they are not photography or archaeology books, so my progress in digesting these books is slow. I'm praying for some vacation again, but a real one, out of this country. I'm feeling sick of my (unappreciative) work place, as well as of the majority of people around me. Such a dream seems far a bit for now.
Now, I'm waiting for every weekend like a treasure seeker, and hoping that I can do some night photography in each weekend. Is it worthy to try to be unique already?


Thursday, December 5, 2013

Es Ist Winter...

What am I? A question that persisted all this week. I'm not sure how to answer it, but to answer this, I have to do some photography. Some more photography, as much as possible. It's winter, with fresh air that would help me clear my mind.
I've been running some errands and will schedule for ERG (Electroretinography) examination. It makes me awry and worrisome. I've read a bit about the test and how it is done and I do feel scared a bit of the way it is done, and annoyed. However, it is something that must be done in addition to the previously-done OCT and Visual Field tests.
I've gave up hope about my (old) car and seems it won't be fixed any time soon. After fixing the computer or chip was fixed, the mechanic said that the car would turn on, but can't be moved as the car doesn't response to the accelertion paddle. I've decided now to get a new car and even if my car gets fixed, probably I would give it up. It will be another drop of money and budget but for something very critical. I didn't decide yet what make of car yet, but it's not a big deal for now.
The nights of winter are lovely and chilling. Fresh air, quiet atmosphere, and sparkles of light. It's a shame though that I can't go out to do some photography every night (and this is one more reason to think of a vacation in winter only), but there is a beginning for everything...

Linien des Lichts
I've talked last week about my desire to go out and shoot, specially at night. This is a must for me in winter time. Winter, is the best season to shoot for many reasons, and for me, it's enough to talk about the temperature. Being cold and out alone in solitude is far better for me than being boiled at night when the soil gives the heat back after a hellish day, like those in summer!

My first trials here were not good but they are a start and I did spend some time reflecting on the results. I was wishing for a cloudy night to do some clouds' movement with long exposures. The target was the dock at Soog Sharg.

Nox Infinita
Rokinon 8mm fisheye, f/8, 4m20s, ISO100.

At the moment I've stepped out of home, I've realized that there are no clouds in the sky to help me. However, it happens that clouds can accumulate on the shores, or specific shores rather than others. I had to try after all. When I reached the place (and it was after 3 A.M.), I've found it busy with some fishermen or just "picnic" takers. I hesitated because I was (and always am) not ready for interference and annoyances, specially from security guys. Thank God, none of that happened. Back to the image now.
I've realized later that the location wasn't good. The fisheye lens did a good job in eliminating the presence of people far from my location, but the light sources made a harsh flare. Such flare might even be hard or impossible to avoid because the sources lie in front of the camera directly I suppose. The f/8 made the effect drastic as well. That, however, didn't stop me from making some few adjustments to Nox Infinita later on, at least to make the color blend nicely with some good contrast. One thing though I wish I've done back then; is to raise the level of the camera which was less than one meter high above the ground (< 3ft).

Unendlicher Nacht
Rokinon 8mm fisheye, f/8, 4m20s, ISO100.

While working with Nox Infinita back home after that night, I suddenly got the urge to transfer the image to B&W. I had some feelings that it would be a nice and a mysterious scene when in B&W (and probably more communicative than the color version); and thus, Unendlicher Nacht was born.
The work with Unendlicher Nacht was harder than I thought in fact. The matter was not a simple matter of adding Black and White layer in Photoshop, or simply changing to Grayscale. Not even as simple as desaturating the image. I had to spend some time changing the tones to reach my own satisfaction with this image. Amazingly, the lines of the stars (or planets) in the sky in the B&W version are clearer and more visible than they are in the colored version. These lines I will talk about later.

Back to the location, I've thought that since there are no clouds to record, the situation and the image was boring already. Since I've brought my LED light with me, I've decided to try and do an experiment with light painting.

Comparison
Left to right: Normal, writing "Allah" in Arabic, then writing TJ.
Click to Enlarge

My trials are awkward of course because light painting requires special arrangements first. I should have wore black clothes to avoid reflecting light back to the camera. I didn't flip the images when post-processing because they are not serious shooting trials. Another lesson I've learned in these trials, is the importance to time the writing with switching off the light. As you can see from the two examples above, the writing looks more like doodling because the LED was not switched off in between letters.
Back now to the lines in the sky formed by the stars or planets at that location. I have to say it was all discovered by a coincidence, because in fact, I've never thought that such place with relative abundance of light resources would allow the camera to capture any glimpse of the skylines. Let's take a closer look...

Click to Enlarge
Original image: Rokinon 8mm fisheye, f/8, 80sec, ISO400.

In the previous shot I've increased the ISO just to reduce the time to around 80sec, but in comparison, the histogram between those taken at ISO100 and those taken at ISO400 are almost the same; probably the only difference in this case is the length of the lines formed at ISO100 (because it takes 4 minutes and 20 seconds to perform the exposure then). At this point, I do see some hope in this location despite the (usually) inadequate conditions like those light sources and the fear of flare in the image. Add to that, of course, the movement of the active people in this place at 3 A.M.! This tiny discovery about this location, and finding out that B&W rendering do somehow help on accentuating the lines in the sky, makes me eager to do some experiments in the coming days if possible - but this time deeper inside.

Scattered Mind

Source: Amazon
We had the annual book fair last week and I barely had a chance to go there and get some books. I didn't roam the place and barely visited three corridors of the fair with composed (I guess) most of the Lebanese sector. Most the books I bought this year were from Lebanese publishers. However, I was somehow disappointed because not much innovation is involved. The books are mostly in Arabic, but most of them are translations from foreign books. One would say this is good for people who are not good in English (or French, or even Russian for example) but with me, it doesn't matter. One of the books I'm reading now is How to Think like Leonardo Da Vinci in Arabic (originally by Michael Gelb). However, it is important to read with some critical thinking present. I have to say a lot of the methods and notes written in this book are already done by me naturally (and some of them for unknown reason); Just consider this blog for example where I jot down my thoughts about some stuff in my life (but not much about my emotions like the book states). Moreover, the book seems to give a sense that the western methodology and culture is the base for the rising of a community and its "wake". This is some point that I critically don't agree with, not because I'm from the opposite side of the world, but because I follow up with history and many arousals did exist before the European renaissance. In fact, the European renaissance is the last in the chain so far (and to seal this arousal in culture and science, we had the two world wars with all their push to technology and industrialization) and as life progresses, we are surely to see another link to its chain (as the Chinese are already on the rise). This fact makes me consider Leonardo as a tool rather than an example. Yes, there are many things to be learned in his methodology, but not everything in his methodology should be learned, specially that Leonardo did work under the framework of the European culture back then with all its consequences and shadows over many fields like architecture and music. It seems, to me, the book is mainly dedicated to European audience more than to a universal audience, and this is one negative point in the translation movement. Arab translators seem to be translating without really knowing or understanding the contents of the context in between their hands - it is merely a process to milk money in any possible way. I did even find out many orthographical mistakes in the Arabic context and I didn't reach half of the book yet!

Source: B&H
Anyway, away with Leonardo for now and let's bring more toys into play. In fact, I was hesitating and asking myself if I should do this order now or not. After all, I guess we all have our crazy "momentos". Thus, I had to place a new order at B&H for some stuff that I'm going to list here. The first, and the most important item too, is the Sigma lens of 70-300mm which should replace my broken Tamron. It costs a bit more than the cheap Tamron, but it has an OS system, or Image Stabilizer (IS). It has some good reviews so let's see how it will act. Let's hope I fight the urge to do extreme macro tricks with this one! Good thing that the filter thread is like Tamron's; Ø=62mm. Meaning I can use Cokin's adapter ring already with it for filters. Unlike Tamron though, this telephoto lens, doesn't have a macro mode, which I deem not necessary by now actually.

Source: B&H
Then, I've decided to add a macro rail after the many failures I had while doing extreme macro shots lately and I though this item is a must by now. Compared to other items of the same category, this one rail from Manfrotto is considered cheap! It says that it can be up to 8kg (17.7lb)! Quite good! Ironically though, I should get a new tripod to my collection as well since I do feel my old-by-now heavy tripod is getting chipped and awkward to control by time. However, a tripod can be probably taken from shops around here instead of ordering from outside with the rest even though I'm sure the quality won't be a match.

Source: B&H
Next on the list is another kit for light modifiers. The Impact Syl Arena Strobros On-Camera Flash Light-Modifier Kit is named after one of my favorite authors about Speedlites, Syl Arena. I'm not sure what's the difference between this Impact kit and the other "original" kit, but bearing the name of Syl Arena sounded like it is a recommendation from the author himself! Anyway, I've been struggling for some time with a single set of modifiers and I've realized that I need more modifiers when I work with 2 speedlites. My Rogue kit which I already have, bear a single entity of each modifiers. Thus, in case I decided to use 2 snoots on the two speedlites, for example, then that would be a problem and I have to work around it. Now, it should be no problem I guess!

Source: B&H
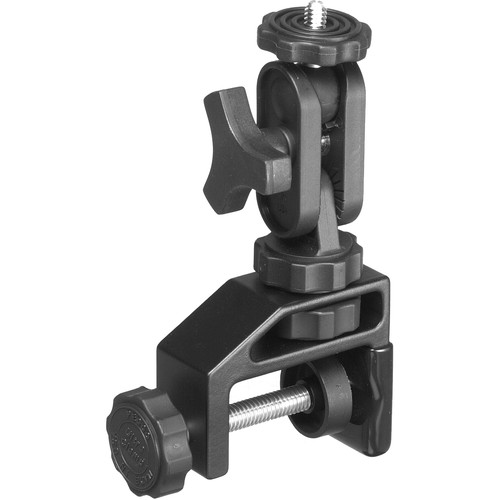
One of the ironic thing here is that I've ordered a new camera mount to replace the (crap) Delkin camera vice mount which became dismantled piece by piece with the first or second use. The ironic thing is, once I've placed this order, my brother managed to fix the Delkin vice. Anyway, I'm not sure how good the Delkin vice mount would be after the fixes, so two mounts are better than one. I didn't try the Delkin after the repair until now as I'm typing these words. The Pedco Ultra Clamp Assembly with 1/4"-20 Screw here has a high rating from users on B&H, but I came not to consider much of that. Delkin has a high profile as well and I AM the only one who wrote a negative review about it! Let's wait for its arrival and see how it will manage heavy weights.

Source: B&H
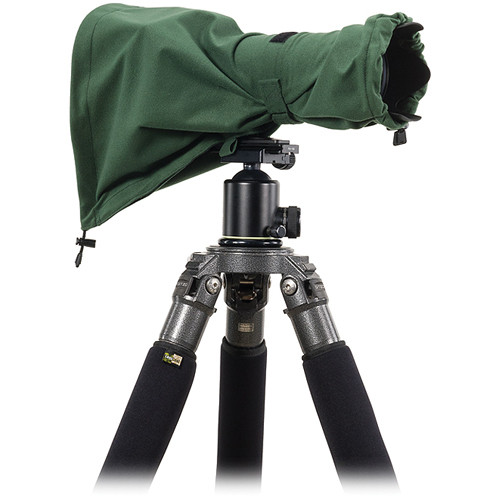
 I've always thought of doing shots in strange weather conditions. Well, not strange, but I mean under conditions that usually people try to avoid. For this reason I've longed for having one of those coats for camera systems. The LensCoat RainCoat RS (Rain Sleeve) (Medium, Green) would help me with this from now on, hopefully. I remember one time I had to spend few minutes in the rain waiting for my long exposure to finish. Ordering this sleeve, though, doesn't mean I'm looking for troubles specifically! But it is just something useful and good to have with you in winter specifically.


Source: B&H
Finally on the list, I've placed an order for Vello Universal White Balance Handheld Disc. I've felt that I need such a tool specifically when working at night time in locations that bear lot of lights of different types. It does indeed make a difference when trying to fix all that in post-processing. The disc here is handheld and I think it is what I need - it doesn't screw to the lens like other WB tools available and it is up to 95mm in diameter. Thus, I can use it with many lenses now and in the future without worrying about the filter thread on the lens itself. The thing I'm not sure of yet though is whether I should take a shot of the disc with the same ISO as my original exposure or not. In my camera (EOS 7D) all I need is to take a shot of the body that I want it to be a reference for the WB, and then use it by Custom WB function. Does the ISO make a difference? Theoretically, it should not. We'll see!

Finale
Books, tools, camera, lenses and even artificial languages... where am I and what I'm doing? It's a weird feeling inside me; it's like hope and despair entwined together. There are lot of things I want to do, yet, something is stopping me. Well, beside the physical condition that is. At work now, more issues are awaiting and I must tend to them, beside doing my own business with the eye-checkups and Mom dialysis schedule. As much as I want to keep feeling strong, yet I can't neglect that feeling inside me; a feeling of betrayal somehow. Like someone had been left all alone by life, despite all the good things that I've been trying to achieve to others. I wonder if this is what they call midlife crisis.

Now, with my ideas for getting new toys, and new car as well, I do hope that my mind is taken off a bit from such melancholic thoughts for some time and get busy with other creative projects. With my new car (if I get to purchase it any time soon), I would be free to go to Failaka island some time, at least for few hours if possible. On the other hand, and because of the retinitis pigmentosa possibilities, I've decided to dig out for solutions for my brother, sister and me personally. I'm so sick of life right now in fact that I'm challenging it not because I like living it - there is nothing much for me here, but merely because I hate it, and if it was a man I would have strangled it to death. Thus, I want to do everything I can and RP won't stop me right now. I want to keep looking and doing everything I can do and reach with my ideas. One step at a time... and all alone.