Showing posts with label feathers. Show all posts

Thursday, April 16, 2020

Strobogenic III…

Keeping myself busy here by typing some blog posts. I got some ideas for my Arabic blog which I didn't post into for quite a while. Suddenly, I'm filled with ideas and busy typing stuff for this blog and that blog, as well as doing some photos (or, trying to). All that with a heck of sleeping pattern. Anyway, the good thing is that I do have some stories to tell here, about experiments and shots that I've worked with a month or two ago before even the quarantine and home stay issues! These shots or experiments are actually a continuation for my experiments with the stroboscopic flash a while ago, when I did several selfies using this mode, as well as some "impressionistic" work with some roses, which I've posted about a while ago.

Fluffy

As I've just mentioned, this is a continuation for my work with the stroboscopic flash, and this time I've picked a very traditional item (for me) to work with: Feathers.
I kind of have a long history with feathers. I do like working with them in various situations: Macro, abstract, Still Life; And now, Motion.
This session was done on two parts actually. The first part was somewhat a failure because the speedlites were pointing directly to the set, where I kept a glass jar filled with water. Despite placing a paper to diffuse the light, but the distance between the speedlite and the paper was almost null and to have some good diffusion a space is needed between the material and the light source, so I had to shoot it again using a different method. In the second attempt, I did place some white boards to bounce the light from the speedlites and then onto the jar, but still the reflections were kind of harsh. Thus, the majority of the work here needed a heavy load of Photoshop work to enhance the reflections to some degree, beside the other adjustments of course.

The first setting before using white boards.
Just by luck, 4 feathers dropped down forming two Xs!
Hope this is not a bad omen!
In my previous attempts with stroboscopic shooting, I didn't get the chance to have a black background. This time, though, I do. And now I can say with utmost degree of assurance, that a black background for such shots is a MUST! This black background plays a grand role in enhancing the saturation of the colors and helps to show the movement much clearer. There might be some details in the black background but that's OK; These can fixed in Photoshop most of the time.
Red Chaos
Before I head to the bulk of my work here, I just need to talk a bit about Red Chaos because this image belongs to the first attempt, and not along the rest of my work in the second attempt. However, the image itself was not created until later in time, when I finished (mostly) working with all the shots that I've shot in the second attempt. After working with the second attempt, I did get this idea to examine the possibilities further with the images that I've taken in the first attempt; Because I didn't see any chance when I examined the images the first time, besides the hideous reflections on the glass. Red Chaos, however, is composed of various images overlapped together; A technique that I've been using a lot lately on various occasions and in old and new images. This technique is also one of the major tricks that I've used with the second attempt collection here (and these triggered me to think back at the failed attempt in the very beginning).
Raining Feathers
By the second attempt, I've decided to add more feathers of various colors instead of working with red feathers only as I've planned first (as apparent in Red Chaos). I have to say, Raining Feathers is one of my favorites despite the off-center alignment here as dropping the feathers was a random action and controlling the point of falling down cannot be set precisely. I realized, doing these experiments, that throwing off feathers is not an easy task at all! Also, the drier the hands, the better. The water at this level turned reddish because of the dye on one of the feathers that I've left from the previous attempt, but that was fine with me; The colorful, the merrier.
The Falling Red
Back with the red feathers, I did many drops and shots, all stroboscopic, and honestly, I didn't find much of the results amusing. In The Falling Red, I do like the movement of the feathers here, with movements like a dancer on stage, but the problem is that the tip of the trail at the bottom was not perfectly on the top of the jar, but behind it. I thought of fixing it but I decided not to lose much time on it and work on other shots. Probably Rest In Peace is the one with some acceptable result here, and it is worth noting that I've fixed the basic feather already on the jar (i.e. it didn't just land like that on its own).
Rest In Peace
At this level, I've shot a lot (and needless to say how much power I've used for the speedlites!), and I've realized that despite the movement, as recorded by the stroboscopic flashes, the shots were somewhat idle in some sense. Something was telling me that they needed some action; Some movement of some sort. I could have slowed down the shutter speed maybe to add some motion blur, but I've preferred something stable. So, it occurred to me to add some movement manually, without changing the shutter speed and see what happens. Sometimes, stroboscopic flashes do have an effect like the high-speed flashes in terms of freezing the motion. The final result was "creating" two images.
Eruption

Red Escape
The motion was easily recorded by dipping the tip of the feathers into the water in the jar and hitting them hard to make a splash, which was created successfully but without any presence for these feathers in the image in fact! So, it was time to be inventive as usual and compose images together. Adding to that, only one image for the splashing water was to my liking, while the rest didn't seem interesting much, so in the two images here, Eruption and Red Escape, the splashing water is essentially the same image put with these two, but got edited in different ways depending on the position of the feathers in the two images. In all of these images, and specifically in the second attempt of shooting these stroboscopic images with feathers after using a white board to bounce the light off, I had to edit the image and work on these white areas on the glass jar caused by the light reflections from the white board. I've tried to fix those in reality (i.e. by changing the shooting conditions) but that was almost impossible with the setting I'm using because diffusing light do require some space, and even though I'm bouncing the light off white boards, the boards themselves are not distant from the speedlites to give the chance to the light to spread. Actually all this work with the second attempt images made me realize that I could maybe do something about the images in the first attempt, and this is how Red Chaos (above) was created.

Methodology:
In my final work with the camera and speedlites, I've noticed the tendency within myself to take it easy and to just try and compose things by editing in Photoshop and such, like the previous shots for example; Eruption and Red Escape, as well as more that will come in future posts, hopefully.
This really made me think: Was I too hard on myself trying to do everything in-camera and with little processing? Or was I on the right track and I'm going astray right now? I don't really know the exact answer and probably there is no right or wrong here, but what I think of myself is that I was highly affected by the nature of my photographic life in the past few years, specifically when I was a member in a photography group, when there was much focus on doing "authentic" work with little editing because, naturally, these are the regulations usually for photography contests. However, when I see other people online do their photographic work, specially when it comes to commercial and product photography, those artists don't see any shame in editing their work to represent what they are working on. Many photographers out there do edit their work in composites to create some surreal images and deliver that WOW effect to the viewers. It is editing, but an estimated and carefully planned one, and not just a random one. Not everything can be fixed in Photoshop.

Now, to be specific about the stroboscopic photography, I've started to make sense of it all indeed. On many websites that I've encountered online, it might be stated that such type of photography is subject to trial and error. This is true to some extent but not completely as there is a window of calculated guess at work here, starting from the formula providede in the speedlite's manual:
Frequency = Number of flashes ÷ Shutter Speed;
(f = N/t)

From this formula, I can start, indeed, planning for the shot just as I plan for a regular shot based on the aperture I want to pick for the scene. The starting point here though would be either the number of flashes I need, or the shutter speed (or time). Mostly it would be the latter depending on the situation, and probably it is the most flexible factor here.
As for the number of flashes, I usually fluctuate between 5 and 10, and this is the simply the number of replications you want to see of your subject in the image. Condensing an image with so many replications of any object as it moves is not a good idea on most occasions actually and find a number between 5 and 10 is quite suitable for most situations.
Now, depending on these 2 factors, the shutter speed and the number of flashes (replications) required, the frequency is yielded using the formula above; But lo and behold! Sometimes the frequency exceeds the limit (199Hz for Canon's speedlites) or even simply that the batteries or speedlites power is not enough to support the operation, and here raises up the important of having a dark room or place to work; Because with this, you have the flexibility to increase your shutter speed as you like, and since the shutter speed is in reciprocal relation to the frequency, that means the more shutter speed you add (slow down, increase time of exposure), the lower the frequency would be - this said in case of fixing the number of flashes or replications.
And believe it or not, the frequency of the stroboscope is better be down and not high! This is because, the higher the frequency you use, the closer the beats of the flashes would be and the closer the replications of the moving object would be. If you care about showing details in your work for that moving object, then it would be wise to add some distance between replicas of the moving object in the scene or photo. By definition, the frequency is the number of beats per second (that's why we divide N by t), so the higher the frequency, the beats per second are going to be more, meaning more replicas in such a short period of time which essentially reduces the distance between these replicas in the image. To summarize all of that:
Number of flashes (N): Number of replications
Shutter Speed (t): The total time of the exposure
Frequency (f): The distance between replicas

Of course, all of this talk does not include the power of the speedlite(s). The more speedlites, the better, of course. Sometimes, one might find oneself forced to change the whole stroboscopic settings to meet the power requirements, specially if the speedlite(s) is/are running on batteries alone without any external assistance.
So, these are my thoughts about how to build up the initial settings and idea for working with the stroboscopic flash. Adding to that the very first remark I've mentioned above, that one must also think and include composing a number of images altogether if required and if it is not critical (e.g. for photo contests which usually require authentic work rather than composite photos). I hope the information here is useful for dear reader.

Finale

Well, at the end, I think I will be preparing these images here to be uploaded to the stocks since I didn't upload any images for a long time. There is a number of images too related to chess, which I might post about here later. I worked with chess for a long time and I think I will put it all aside for the time being and start something else.
In times like these I'm really not sure how I feel. I do feel relaxed at one point for staying home, but in the same feel upset because I cannot move around as I like as well (specifically for shopping and getting snacks and some necessities). But beside all these mundane everyday matters, I'm trying to focus on the bigger picture and what about to be coming next. Great uncertainty lie here and I can't figure out any heads or tails out of it. This even had me re-think, again and again, about my career possibilities beyond my current job. Is there anything I can do during this time to have some cash on the side? Moonlighting? Preparing myself to leave my stable job? This said, I have to say that things are fine so far with my work since I've already had my salary for March without going to work, but would that continue? I don't know, like I don't know many other things about the situation here. I'm supposed to go back to work by April 26th, but even that date, might be pushed forward further if things didn't calm down.
Many things, and ideas, are chasing through my mind and I really need to work with my camera further to help me calm my brain down. Also, I do have some plans to play some games. I'm enjoying this home-stay thing because this is what I do already before all this had started, but some annoyances are inevitable. Oh how I wish to have a walk in some lavish garden right now, and rest in a shady gazebo…

Thursday, July 6, 2017

Micron…

Here I am, back after a little vacation away from this blog for the Eid event (and actually not having time to type it down!). I've been spending Eid sleeping most of the time as I'm trying to fix my sleeping time, but I did some work with my camera and I will talk about some of it in this post. Moreover, I did receive my shipments and I'm trying to find an opportunity to try them out. Anyway, I might keep the talk about these stuff for another post, as most of them are actually accessories and spare parts.

Murder of Colors

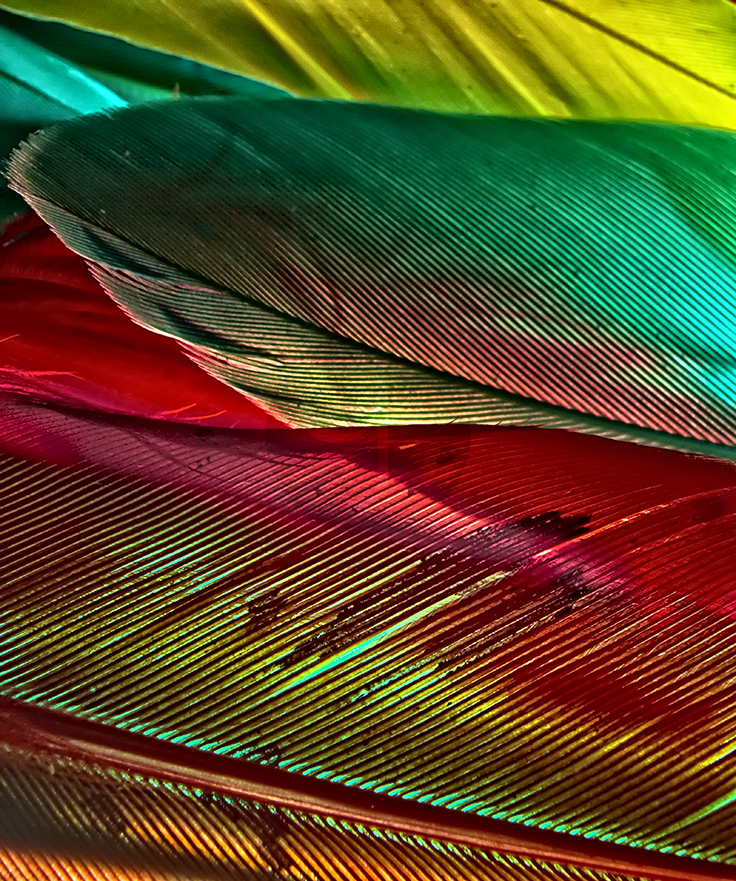
This is the title of a little series I've made, again, with colored feathers as a part of June project with the group which was themed "Abstract." Initially, the idea was to take a shot for some feathers, set randomly, from below with a wide angle lens, in hope that the distortion would serve me here to create an interesting attraction. However, many difficulties occurred, specially with the method of lighting with the speedlites, and after trying many times, I had to give up the idea and do a typical abstract approach as my mind is usually set to go: Macro.

Murder of Colors I
Voigtländer 20mm (R), f/22,
250-1, ISO100.
Changing to macro required a change of in the setting of course, so I placed the speedlites below the set (feathers were sprinkled randomly on a plastic or acrylic sheet) while I shoot them from above using the wireless function in my Canon EOS 7D to control speedlites via infrared. As it is not a matter of HSS, then infrared function can be used with comfort (HSS is not active when controlling flashes via wireless, unless with a special trigger). In this series, I moved from using the usual extension tubes with whatever lens, to reversing the lens with my Vello Macrofier. This method is a saver indeed, as it doesn't add more weight to the camera (which I'm going to shoot with by hand and no tripod), and apparently it does not have all the complications that accompany extension tubes when it comes to the focal plane placement and whether or not the focusing point would be in front of the lens or behind it (which deems it impossible).

Murder of Colors II
Voigtländer 20mm (R), f/22,
250-1, ISO100.
I was set to use Voigtländer 20mm lens on reverse here, as according to my calculations (which I've found out they were wrong later) that it would give a magnification of 2.5X, while using 50mm lens would give about 1X. I needed something extra here to avoid the typical zooming level that I've used previously in most of my abstracts. Also, to get some extra details out of the lines in the feathers. In this series which consists of merely 3 shots (after sorting them out), I think I prefer Murder of Colors I the most, as it has this glow and vibrant coloration, and some strange color cast from one feather onto another (mainly on the yellow feather).

Murder of Colors III
Voigtländer 20mm (R), f/22,
250-1, ISO100.
Unfortunately though, I didn't document this simple set for Murder of Colors, and at the moment, I've just realized that there is a whole different series done with feathers which I've totally forgot about despite being uploaded to stock sites already (and accepted by most)! Anyway, I might try to post about that series later. Seems that my busy schedule (or let's say me getting myself busy schedule) made some gaps in my memory! However, I'm happy for one thing, which is finally having an exact calculation method to estimate the magnification level, but that did not come by while working on Murder of Colors series, but rather later, as I was working with my microscope!


Reverse Magnification

Vello Macrofier
Source: B&H
I talked about how I was wrong with some of my calculations regarding the magnification when using Lens Reversing method. Generally speaking, it is supposed to be just like the calculations done with Coupling Lenses technique, where two lenses are connected in reverse to each other and onto the camera; In this method, the magnification is measured by finding the ratio between first lens (attached to camera) and the reversed lens. I could not really find a concrete formula for magnification by reversing the lens directly onto the camera, but I presumed that the focal length should be 50mm or around that, as it is the "normal" focal length. By that, the magnification is to be calculated as 50/FL, where FL is the reversed lens focal length.
However, as I'm working with my old microscope, I got my interest back again and I started searching again, and all I could find is actually practical method to measure the magnification by shooting rulers and finding the ratio between millimeters in the image and the actual width of the sensor. Doing that practically with a ruler did break my believe about the ratio of 50/FL stated above, and I started to look for the source of that difference, as the magnification ratio with a reversed Voigtländer 20mm which is supposed to be about 2.5X, proved to be higher than that (around 3.2X!).
This made me investigate the specs of my camera again and trying to find the true distance between sensor and the mount (a.k.a. flange focal distance), and to my surprise, it was indeed not 50mm as I was thinking, but 44mm. Yet, this didn't explain the results and I just realized the fact that the Vello Macrofier does add some distance further away from the sensor and it should be added (which was about 20mm). By this, the total distance away from the sensor becomes: 44mm + 20mm = 64mm. Thus, doing the magnification ratio again with this value: 64mm / 20mm (for Voigtländer lens) that would yield 3.2X indeed as measured practically with a ruler (values had been approximated of course and rounded to one decimal place).

The flange place for DSLR (top) and
Mirrorless (bottom) indicated by Red.
Source: Wikipedia
With this result I'm more likely to rely on reversing the lens for my macro shots more than using tubes or lenses coupling, or even using my 100mm macro lens. Even though using a dedicated macro lens has its own benefits of course and its quality. Nevertheless, reversing the lens with Vello Macrofier makes the job easier (specially that it offers an aperture control) and better focusing distance than with extension tubes. To elaborate further, again with Voigtländer 20mm lens, as per calculations, using extension tubes to gain a proper 2X magnification or a bit more with this lens, would yield a focusing point behind the lens front (which is impossible); While using reverse lens method, this enables me to get 3.2X with proper focusing distance (in millimeters of course) in front of the lens. Also, I can add filters (UV at least) to the lens front when in reverse just to increase the distance to the sensor (which I did already and gained about 3.7X). There is a whole new world to be discovered with this method, which made me think of having a specially made hood for my Rokinon 8mm fisheye lens to enable fitting adapters to the front of the lens. If this worked right, then I might be able to gain 8X just like a breeze!

Micro-Macro

Well, the upper part to explain the reverse lens magnification was ignited by this ongoing project of shooting objects under the microscope. I have this microscope since I was 14, and instead of leaving it to collect some dust, I've decided to put it to use with my camera, specially after surfing the net and finding new methods to shoot through the microscope without using a special mount and adapter. Mostly, a point-and-shoot cameras are used for this task (or webcam sometimes) but all I have here is two DSLRs with LOT of possibilities.

My set for shooting through my old microscope.
Using two 12W LEDs to light the set properly.
Well, the hardest part was (and still) making the set ready. My microscope is an old one with one eyepiece protruding upward and even though I can tilt the microscope but I have to keep it standing as it is because the samples I make are usually, well, not professional ones and can easily slide down. Here comes the hard part, with setting the camera (and rail) on the top of the eyepiece, and the small tea table did not make things go easier either. It's a matter of weight lifting and sometimes balancing the tripod with the lateral arm on top or it would fall over. Nevertheless, I made it with many samples and triggered me to do another research for better ways to stack focus my images (a single image won't do here).

Lamina

The beginning was with some of the colored feathers that I've already used many times for my abstract. There are many problems that are already there before I even think of shooting through the microscope. However, I'm not intending on producing Book-Quality images after all (otherwise, I do have a friend to help me with that). As can be seen in Lamina, which was shot from a red feather, such single shots do not bear much depth of field. Thus, there was a call for focus stacking, and this time by changing the focus in the microscope itself, not moving the camera and rail combination.

Hair Bulb

Typically, I would think of Photoshop as the main tool to focus stack my shots, but again, I've realized that however smooth I'd go with the focus, Photoshop would still give out some bad blends as can be seen in Hair Bulb. This shot was is probably one of the fewest that I did with 40X objective on this microscope (and thus reaching total magnification of about 1280X). Zooming so deep sometimes makes a loss of some good details, as well as it is hard to light even with external sources such as two LED bulbs. These discrepancies made me aware of the fact that Photoshop, and like the case with panorama stitching, is not the best solution for the task at hand. And again I go looking for other solutions.

Hair Bulb (Enfuse)
 
I've found many software dedicated to focus stacking and most of them were to be purchased, at the end I've found one freeware which is actually dedicated to blend HDR images, but according to some tutorials I've found, it can be used for focus stacking successfully: EnfuseGUI (the man deserves some donation there!). In the tutorials they use Hugin (another freeware for panorama stitching) to align images, but I've found that it is a command-line thing and needs quite a patience here! Thus, just for aligning my images, I used Photoshop back again (and cropping some excesses). No need to go to the details of the process here, but the results of using Enfuse can be seen on Hair Bulb (Enfuse), where the blend had been much better. I was not lucky all the time though, and most of the time with other stacks, I have to stack on stages (blending portions and then sub-portions, then sub-sub-portions... etc) which takes some time but the results are far more fit than what Photoshop could do. Did Adobe fix such issues in new editions of Photoshop? I really don't know, as I'm using CS5 and got no plans to go beyond that for the time being.

A Study of 20 Fils
"K"
320X
One of the struggles of focus stacking with microscope images is to achieve some 3D-ish look when shooting various specimens. Using external light sources got me the advantage of viewing metallic opaque objects, such as coins, specifically this 20 Fils which I did inspect long time ago by in-camera macro methods  (using lens coupling) and reached about 17X power. The story is different now and I'm able to few the metallic texture up and close! However, there is always the annoyance of artifacts from this old microscope but the fun lingers on. To this moment of typing this post there are still more work going on with some coins which I might post later.
As I've stated before, the fact that I'm using a lens on reverse enables me to add filters to the lens' front and consequently this would also increase the magnification ratio a bit because the distance to the sensor is stretched few millimeters. But to my own experience now, I have to say that having super magnification is not always what you want or need, simply because it might obscure details!

Banana Peel
320X

With filters, seems like I'm having different worlds to discover; Something I'm working on still. Probably the most astonishing view I had so far is that one with Banana Peel which was my first target to use infrared filter (B+W 092, threshold: 650nm). Things were dark and hard to see at first, and I had to raise the ISO to max just to navigate through, but I put it down when I saw something that captured my eyes…

Banana Peel under Infrared

The image you see above is of course the final product of focus stacking and infrared processing, as well as channel swapping. However, these marks were glowing in my LiveView while the rest of the peel (same peel posted above that) was dark while using this filter. I showed my friend this image and told him the story but we both were astonished and could not find a reason for this. The thing is, doing infrared shots for other materials did not yield such result!

Grape Skin (IR)
320X

Grape Skin (Normal)

I think this matter needs more picture taking to find if this thing is really significant for bananas only or there was something wrong with the microscope or my camera! However, I'll keep looking further for more samples to do. Despite being a tiresome job to do with this microscope and the heavy cumbersome gear that I have to deal with, it is still a good source of muse, specially with the arrival of my new H-alpha filter from Lumicon, which I'm dying to use (artistically and scientifically, if I can call it so!).

Finale

I guess this post is long enough as it is now and no need to talk about my new acquired stuff. This is beside not trying them out yet and having any thoughts about them. The Summer is scorching my head as usual and with me back to work after a long vacation during Ramadhan doesn't make things better for either mood or body, but I'm trying to muse myself with the camera and the new stuff. July project with the group is also ongoing right now and somewhat adds a bit of burden to my time which I want to dedicate further to my new toys and activities. Everyone, Everywhere I look, talks about traveling, I guess this is natural since it is Summer, a typical season, but it makes me drool and my mind is busy calculating to see and plan for some vacation outside, before I commit a murder or something. Anyway, my traveling is typically after the busy season, to have some "quiet" time. Yet, my mind is not set yet on a specific destination, nor I'm sure about my budget. Meanwhile, my only companion seems to be my headphone, and the heat…


Stock photography by Taher AlShemaly at Alamy

Thursday, March 23, 2017

Pearology…

Standing there at the end of a stress period, trying to have some breath to myself. Yet some more ideas and work is waiting for me to go through and test. Anyway, I've been working in the past weeks on March project, which is about shooting geometric concepts for fruit, fish or birds. I had to neglect some ideas for now, like working with fish skulls as it proved harder to get than I thought! Thus, I've been satisfying myself with pears and feathers so far!

Pear-ing

From the very beginning I was looking for some lines. And since regular lines might seem a bit boring, I've decided to look for curvy lines, and naturally my thought lead me to use pears! I've tried many settings and the start was pretty simple.

Linear Pear
Canon EF 100mm macro, f/16, 100-1sec, ISO100.

It seems in the beginning I was affected a bit with my previous work about tessellations, and fitting parts together. This is exactly what I prepared with 3 pears putting them side to side as in Linear Pear. Using f/16 to ensure enough depth drove consequently to use two 580EXII speedlites at full power. My preferred method in lighting had been mostly bouncing the light, thus I needed a free hand (and to rest my back a bit!), thus I've used the lateral arm over my tripod to hang the camera pointing down directly; this also assured that the camera is perfectly (almost) at 90o down. While putting the camera on timer, I've held a white cardboard over the set to bounce the flash from. I still needed to add some Fill Light when processing the RAW file and did some cropping as well. Can't say though I like it a lot, specially with curves not being, well, curvy! But I've tried.

Left Hand
Canon EF 50mm+B+W 920 IR, f/22,
200-1sec, ISO100.
After the first experiment in a while a bit of philosophy got twirling in, and I was back to the set and with pears again (but I could have used any fruit really). We can say the idea was about casting different opinions than the others, or simply being a left-handed person in a right-handed world. So, I needed to cast shadows in different directions and with a bit of precision. Using speedlites simply like that did not work of course and only two totally different snoots are available with different shapes. It was a time to improvise, and there is indeed an old method that I've tried before, back in time when I was a beginner with speedlites (and had only one). This idea requires: Pringles!
Pringles Snoots!
This is what I call a "light with flavor."
I'm glad that I've created these right now, as I come to think about it, there are a number of uses that might prove beneficial in the near future! The old method I've done this was by cutting the plastic lid to place the flash head, and remove the metallic bottom of the canister. However, I think this method was useless and it would be better to cut open the bottom and the place the head there, while using the plastic cover as a diffuser of some sort. We can add, for example, a white piece of paper to the back of this cover to increase the diffusion, or maybe add a black material or paper with a tiny hole to drastically decrease the radial dispersion of the outgoing light. There is quite a potential for this simple improvised tool, I think. However, I had some problems fitting the 580EXII heads and I had to tear some sides to enable the circular cross area to expand in an oval curvature.
Back now to Left Hand, I've decided to use my converted EOS 7D and my B+W 920 infrared filter to add a bit of mystery and move away from the traditional. The snoots worked fine, despite some gray areas in between the pears but I don't think it is disadvantage. Now, whether this shot is geometric in its means or not, this is something left to the critique to decide.

Zwischen
Canon EF 100mm macro + UV 403 + IR-Cut, f/22, 1sec, ISO100.

Then, there was a visit back to the first idea of using the negative space but by other means. Instead of using 3 pears, I've used 2 only placed side to side within some distance. To add to the atmosphere, I've used UV-pass filter (B+W 403) and adding Tiffen's IR-Cut filter on top (B+W's filter leaks a major band of IR at 700nm), and this of course needed great flash power, and I ended up using all my 3 speedlites, bouncing them off a white board placed on the top of the set. It seems with Zwischen I've become closer to the main idea of creating a negative space but there was something about the direction of the curves that somehow probably made it easily obvious for the viewer to know that there is a space between two objects; regardless of their recognition. It occurred to me that I might as well rotate the image; a common trick I usually tend to use to make an interesting outcome out of a regular/boring image. Quite useful for abstracts.

Zwischen II

It seems, to me at least, that rotating the image is the right choice when this image is to be displayed. I've also swabbed the Red and Blue channels in Zwischen II. Now in between the Red version and the Blue version, there is also a change of moods and feelings when looking at this. I think the Red version sparks with mystery, while the Blue version points to a calm atmosphere. This is my own sensing about it though and I can't generalize these feelings. Adding to that, I've start to develop my own ideology or chain of thoughts and style if I can call it so, but I will put these thoughts down in the Finale.

I moved then to work with feathers for a short while and I have to say it was sort of hard to work with them and create something geometric (despite the fact that they are linear in nature!), but I was aiming for something more than some macro shots like before. It was hard to think of something, but first thing to occur to my mind was order. I tried to arrange the feathers in sets on play-doh but didn't work in a good way, thus I've moved to using paper clips to hold the feathers stems firmly. Moving in between ideas, I've come out with shots, and some of them were discarded for being washed-out and over-exposed, and some few good ones needed great cropping.


Well, I won't go through the details of these shots, but all were taken with change of angles and such (and even after cropping, some image rotation was involved). Now, the critical "shot" was kept till the end. Despite using f/22, there was still some gaps in the depth of field and there was a call for a focus stack. However, I was so lazy to put the rail head, thus I relied on moving the focal plane manually by the lens back and forth.

Green Red

The final result, Green Red, suffered some errors nevertheless. Though might not be quite visible in this smaller version but it definitely is in the original size. The major setback is the fact that there are gaps in the stack and some areas remained blurred after the merge of these 3 shots. There was also a portion of a yellow feather which I was not paying attention to, which made quite a disturbance in the scene in the middle (between first red and second green feathers, from left). Worked it out with Healing Brush and Cloning but it doesn't seem quite right when viewed in the original. Anyway, it was an experiment to gain experience and I don't think this image would be any good for stock sites or for expos. If I get the chance to re-do it, I might do so with a bit of careful picking and placements with those feathers, with respect to their colors.
Finally, I've worked out some shots with maple (or vine?) leaves but I'll keep that for another post, as I didn't process much of these images and I still need to shoot further!

Finale

Coming to this project, March's project that is, I think I'm starting to become more conscious on how to work with ideas. This came to me as I was inspecting Zwischen all over again, and realized that working with negative space (or trying to at least) seems to be an unconscious reflect on a feminine body (pardon a single man's thought). However, if we change or switch the mindset to "conscious" instead of "unconscious" we might happen to arrive at some methodology to work in the future with still life and abstract projects, as in some kind of a translation machine for feelings into objects, and probably not necessarily objects of related topic. Sounds something psychologic in nature, but it is sparking ideas already.
Meanwhile, I'm sitting here waiting for summer with its scorching heat to come over and destroy the peace of mind (momentary peace of mind) that was there. Traveling is indeed a dream with one full year without any travel but I'm not sure yet what will happen within this house, and where I'm supposed to head to. Stress is stacking. All along, I'm keeping my ears amused by the voice of Sabah Fakhri and try to draw inspiration as much as possible from there… I was supposed to work with other projects with conlangs, wasn't I?

Stock photography by Taher AlShemaly at Alamy

Thursday, February 2, 2017

Feathers…

Many things are going around lately and kept away from the blog for a week, beside preparing for a post in my other Arabic Blog too. I was going to cancel a post for this week too after a little incident and spraining my right foot, but things seem better now. Anyway, I will try to be quick here (and every time I say this I end up with a long post!).

Eanáir

I've stated before in previous post that there was a stack of projects on my desk (well, virtual desk that is) and I was going through them slowly. One of these projects is related to the month of January (which is Eanáir in Irish) with the group re-establishing this activity: A project for every month. This month's theme was Black and White with no specific limits to the subject to be involved. I previously had some ideas and after stating this theme, I thought I might merge the two together, specially after the lack of materials!

Entwine Series

I had some ideas already as I said, and I was looking already for white feathers, and then changed my mind to black feathers, but well, I couldn't find any. I was looking for the feathers for another project under a workshop entitled Art of Seeing which finished back in December! However, with the arrival of this project for January, I started to merge the two.
Since I couldn't find either black or white, and only colored ones (red, green and yellow), I thought it would be fitting now to shoot in B&W and mimic the black and white feathers! As thoughts were racing through, I made some abstract experimenting with macro shots as seen in Entwine Series above. I've made several shots and filtered them down to 3 only, and then asked for a vote from the group members to see which composition is, to them, feels better. Most of them picked #2 (the middle one), and this is the one which was submitted. I'm keeping the others for various projects as well; I like them still!

I went on working on some ideas and nothing worked out, but I had to move quickly from one to the other for the lack of time I was suffering with! A substitute idea was to throw some feathers on my Omani dagger and capture the moment in high-speed. Unfortunately, didn't turn as I wanted it to be for many factors, like space available and lenses, but I've sorted the shots into final 7, and again, asked the group to vote for one.

Aftermath Series

The vote picked #2 here too. I was hoping to record the motion of the feathers, but working alone didn't make things easier for me even with a 10-second timer. Anyway, I had to satisfy myself with these results after changing from the course of the main idea: A feather penetrating a knife; as I couldn't apply this idea in any possible way I could think of. My goal was impressionistic endeavor of how gentleness could come over sharpness and savagery. Thus, throwing feathers on a dagger merely has a potential for something or some idea. In fact, it was done completely randomly with no specific philosophical idea in mind! Anyway, image #2 was submitted as well.
I got special drilling bits later on, to drill a hole in a knife to apply the idea I was seeking in the first place, but it's too late now with my lack of time and I would, and should, be applying that some time later. However, for the irony, I loved the patterns and luster for those drilling bits, and decided to include it with my submission.

Golden Strips
Canon EF 100mm Macro, f/32, 250-1sec, ISO200.

I took many shots at different angles, and had many problems with the flash systems (which I really find a solution for!). I was using 430EXII Speedlite here mainly, reflecting it off a reflector (silver car shade in fact). To my surprise, this speedlite specifically has no inlet for external power source, and thus I had to work solely on batteries, and in time, the power of the flash diminishes: The 1/1 power with full batteries is not as much as 1/1 power when batteries are low. I even made several shots in hope to make a focus stack (f/32 was not enough to include the whole depth of field!) but sorting through the files later on, I realized I didn't do the stacking right; it still needs a rail to do it correctly which was not at hand back then. Anyway, I'm satisfied with Golden strips, which was converted to B&W and tinted with golden hue (#ffd700). Originally, the bits got a slight yellowish tint but reflecting the flash turns them more into silver tint. This is the only shot which was not purely B&W shot but a tinted shot in my submission.

Art of Seeing

This was the title of a workshop that was over with in December and yet we had to work on a submission specific to this workshop. It took me a while to look for the feather as I've said above, and decided to apply cubism as I was urging to apply this concept in my future shots. I think I got just the chance here. Even though I'm not pretty convinced that what I did does enroll itself under the topic of "Art of Seeing," but I got the green light from the leader of the group to keep on going with this. Yet, it has to be judged and critiqued.

Version 1
Cubism in photography is mostly about shooting individual images for the same subject (with or without motion) and merging them together in some way, mostly resembling squares. This is at least what I've seen from examples online. As I shot my series for this project (as seen in Version 1), I tried to include the whole scene as much as possible; with a stack of feathers it's easy to lose track. It does resemble working with a panorama to some extent but my options to work outside Photoshop were limited here and I had to work in Photoshop itself. But first, I had to cut down the slides into squares. Then, fitting them manually and stacking them according to my vision alone.

Version 2
As I finished Version 1 manually, it occurred to me that Photoshop has some useful bundle of commands for panorama making that I could use. I'd love to discuss the results here but I have to conclude the final matter here with Version 2, which was composed using the Reposition option under Auto-Align Layers command. So far, I can say that these two, Version 1 and Version 2, are the ones that I like most. Merging these layers seamlessly doesn't look good at the end, and no need to mention how Photoshop consumes memory already, and with this number of large-size images, it was a hectic process. A question that still going on in my mind is: If any of these were accepted and must be prepared to be exhibited, am I going to print each slide alone and try to combine them physically as they appear in the image file? Or simply print the image as it is? Time would tell I guess.
The idea in the beginning was about killing peace, and that's why I wanted to use white feathers. Even though I always felt that the composition needed something extra. However, I've noticed that the grip of handle of the dagger is already white, so it is better to use black feathers to add contrast, and there came in the change in the original idea: Killing evil (instead of peace); and probably things has to be violent to reach the peace of mind at the end…

Finale

As it can be seen from this blog now, things are more drifting into photography rather than conlangs. Should I abandon my passion for conlangs just now? I'm not quite sure but I hate to think about it even. My life seems racing itself to nowhere. But I'll try to look into that matter later on. The only connection I do have with my beloved Ayvarith right now, is my instagram account (@ayvarith) which I post in weekly. I even managed to add new words to my lexicon.
From the events in this week, it seems I'm losing my grip on the handle slowly and the call for a vacation is even getting stronger. All incidents happening to me last Monday and my foot injury, all caused by a simple show of anger, and over a video game (yes, video game). I didn't play this type of games in a long time, probably since high school, but seems this anger is still roaming inside. I remember how it was when I used to get mad at such games back then and I didn't have this spark of anger for such stuff in a long time, and it's all back now. Makes me wonder if I'm really in need of anger management. But definitely, the thing that would sooth my ailments is, a travel.


Stock photography by Taher AlShemaly at Alamy