Showing posts with label 50mm. Show all posts

Thursday, April 14, 2022

Stroll IV (2022)…

So, I'm still up with my strolling posts. Meanwhile I'm typing also one blog post for my Arabic blog (about using Hα filter) and I was going to skip this week's blog post, but I've changed my mind. However, this could be a quickie one. The weather is getting warmer and warmer and soon I won't be able to go on strolls in the morning. In fact, as of the time of typing this blog post, the last time I went out to do experiments with my pinhole lens (and might make a blog post about it later, but I didn't check the shots yet at the moment of typing this), the flies then ate me alive and I couldn't bear with it longer so I had to return home as soon as possible after just about 20 minutes of strolling outside. The weather was nice, relatively, but the conditions were awful. Probably it's just the area I was strolling into. I'm not sure!

Stroll IV

So, this stroll is actually a continuation for the last stroll which was done with a UV filter, but this time using my favorite 50mm lens instead of 20mm. Also, as a destination for the stroll, this one was directed eastward from where I live, while the last one was done westward. And I have to say, the block next to us really blew me away. I think it has some great potential for future visits (when the weather allows it), and as of the time this is being typed, I've paid 2 more visits to that place with different filters. So, from now on, I will be calling it the Eastward zone! The stroll took place on March 11ᵗʰ.

ΟΔΟ

So upon walking Eastward, and just before entering the block I've noticed some trash outside, and as I always hold in belief: Trash places are treasure troves. This is if you are hunting for abstracts mainly, but of course it is not limited to that genre. In fact I've passed on this trash once more in another stroll which hopefully I will talk about in a post later.
What captured my eyes here is the geometrical shapes. My eyes was scanning for such abstracts. If you may notice in ΟΔΟ (and thanks for the Greek alphabet to give me the means to name this image!), the image here had been rotated clockwise, as I thought the triangle's apex gives some direction to the image better than being laid down (and pointing to the left). Of course the image had been cropped (and had to test various crops) and actually I still think that I do need to crop a little from the bottom as well. In the process as well I needed to test various colorization sets (or color corrections); Sometimes, Ultraviolet images can be quite hard to decide upon when processing them (specially when no image of real colors is merged along). In fact, I've been questioning my ultraviolet set of filters lately (the B+W 403 and Kenko D-655). I need to re-check the charts again to see how much infrared is getting through. From looking at the exposure times, yes, I would say it is blocking a fair amount. Yet, I have some doubts still!

Entangled


I'm going to skip here the long walk and all the snap shots taken along the way as most of them were shaky; no tripod and exposures range from 1 to 2 seconds or even more at f/1.4 AND automatic ISO!
Finally anyway I've reached a mosque with some bougainvillea branches dangling just out of the fence. It was a nice target but I had some hardship shooting because of the stability I needed, the hard-to-see LiveView, the slow focusing, and since I'm using 50mm I needed some space, which wasn't quite available (I had to stick my body to the wall of a house behind me to get enough space). Anyway, I've shot several shots for Entangled and I've even made a 3D anaglyph out of some of these shots in the series (and the image processing was synchronized of course). 

Entangled (3D)


The overall look is quite messy in fact but I still like Entangled for its somewhat dark and mysterious mood; to me at least. I think I got some nice comments about Entangled. Left to note that this image was taken at ISO3200, f/1.4, and 60⁻¹s. This is just to imagine how is it like to shoot in UV, specially with a lens that do have some anti-UV coating which makes things harder further. For this reason, a tripod can be a must for UV photography under such conditions, with not-so-adequate lens.

Одинокий
(lonely)


After leaving the mosque, I've also encountered some subjects but most of them were shaky or not quite interesting, but then comes my favorite moment in this stroll where I've encountered (what I think is) a Calystegia sepium; A white flower reminding me of some of the old cartoons I used to watch when I was a kid. The flower has many local names in English alone so I'm mentioning the scientific name only.
The flower (or I should say flowers) were growing naturally in between the cracks of the flooring in front of one of the houses. In order to increase my chances of getting a stable image here, and beside putting my ISO on auto, I've shot several shots in burst mode. It might be a bit of a sorrow to shoot in such high ISO here but nevertheless, it was worth it to at least keep the image and the memory. When processing the image, and after correcting the colors, the general tint was blue and I've added some more saturation to that, and even created another version of it with the reverse (or inverse colors); That is swapping the Red and Blue channels like in infrared images.

Одинокий 2
(lonely 2)


I've also placed the camera further away a bit and made a series of shots, but I didn't like them as much as these ones from the first trial. I need to re-check those though to see if there is any possibilities to create a 3D anaglyph out of them. In processing Одинокий, I didn't use any color-shifting techniques as I did with Entangled or ΟΔΟ, but a simply color correction (that is adjusting the White Balance only). The blue tint fitted the mood and the shape of this flower perfectly, I presumed.

So, technically, this was like the end of the stroll after taking some shots of this flower. I did take few shots here and there (and for part of my dirty car then!) but I don't think they are worth posting here (and in fact I didn't process the majority of them as I didn't see any potential). Worth noting though that this UV stroll was done in early morning and even the sun was not so strong; In fact, even Entangled and Одинокий were shot in the shade rather than under direct sun beams because, well, the location was in between buildings and the sun was not yet in a proper angle to cast a light through. But with some high ISO I was able to hasten the shutter speed a bit, despite the noise level that is hard to deal with. But anyway, I'm not printing those so no worries (for now) I guess!
Yet this experience do call for more UV work, indoors and outdoors, whenever possible. Now with the summer coming over and it would be almost impossible to take such walks in early morning (because the temperature can get well over 30°C in the early hours of the morning before even people leaving their homes to work!).

Finale

So, it's April already, and Ramadhan is ongoing too, and the weather is getting hotter and hotter by the day. It is a time now to be happy for being a retiree I guess. Yet, something out there is missing. I've put plans in the beginning of my retirement process that I should organize my time and specify some time for my own projects and specially camera work but seems nothing is coming together. I'm having a great deal of an urge to stay in bed all day if I can, if not for the damn back pain that I get every time I spend a long time in it.
I'm not sure where things went wrong here but probably I shouldn't waste my time thinking about the reasons and rather try to gather myself up. Yet, I don't know how. Is this normal? Do I need some more time to come to my senses? Many questions loom in my head and no answer in sight, so far.


Thursday, August 27, 2015

UV+IR…

This is a quick wrap for the last week, since I couldn't post back then. It was a time of problems, and this is usual around my birthday (August 17th). Had to spend some days without AC in my room so I kind of moved to the guest room, and while at it I tried to work a bit with my camera and try new stuff. I couldn't complete the experiment in my room because of the heat (hotter than the outside even!). Under such annoying conditions I could do nothing more than taking selfies!

Selfies

It was an idle time which vexed me a lot. I got my camera and some tripods and other stuff down in the guest room (and they are still there as I'm typing this). I've read somewhere that halogen lamps are good sources for IR and UV beams, thus I decided to try this out. The idea was also to remove the protection in the front but I was reluctant to do that. Removing that cover from the front is supposed to raise up the level of IR and UV, even though it is a pretty dangerous business!

IR Selfie
Canon EF 50mm, f/5,
0.5s, ISO400.
The halogen light I own is about 1000W. To take this infrared selfie, I had to keep it closer than 50cm to my body (~ 20in); a serious business here! I almost got myself blind for moments after the picture was taken! As you can see from the image caption, it was barely half a second with ISO400 even (and the worst yet to come!). This selfie on the left is actually the final crop; the original was half of my body, yet taking a selfie without a phone is a tricky business! It's a good thing though that the lens (Canon EF 50mm f/1.4 USM) does have an infrared marker for re-focusing, which helped significantly in ensuring the sharpness of the image (adding some sharpness later on in the process). Beside fixing the white balance in the image here, I've reduced the Clarity to give out soft complexions in opposition to what I usually do with masculine faces. But seems the infrared atmosphere is in favor for such touch!

UV Selfie
Canon EF 50mm, f/2.8,
10s, ISO2000.
The next shot was more aggressive. I can call the Die Hard type probably! Using the UV is way too demanding than the IR filter in terms of exposure time and ISO value. As you can see from the image on the right, I tried my best to be both, stable and in motion, to create some effect in the image. I did like this one after all because of the foggy look after all because of the body shake. What amazed me here is the blue sparkle in the eyes which appeared naturally after fixing the white balance. Here, just as in the IR images that I usually take, I did use a special profile developed specifically to expand the range of the white balance for infrared images. The UV shots are reddish in looks (but lesser in saturation than IR images). The image you see here is done using the profile for IR. You can get a sense of the hardships here by looking at the info of the image (10 seconds to complete the exposure at f/2.8 and ISO2000!). It is about time to own a converted camera.

Finale

That's all for now. In hope that I would be posting some coverage from the expo which is going on right now and in which our group is rolled in. The expo will last for 7 days, so I might snap (or take snaps from other snappers!) and post them here by next week. Moreover, I'm working on plans right now as I'm trying to make a setup for an idea.
I think I need to give my camera more trust and let it lead me through some hard times for now, just to forget some of troubles. It had been some hard 2 weeks lately that got me even to lose my appetite at large. Many ideas had been visiting, coming and going, while some are progressive, yet some are destructive; and yet I'm trying to convince myself it is all nothing but a mood swing… I so need summer to be over with, and my vacation to begin… so badly…

Thursday, March 27, 2014

Snooze...

I think I'm reaching the climax of my endurance capabilities through the past 2 weeks. It is just the fact that nothing goes as planned, and more unexpected events.
People here (and everywhere) are happy for the arrival of spring. However, it is my weeping time. My nighttime photography had already ceased and almost no power is left for me to leave at night. I technically spent 2 weekends sleeping most of the days. With the arrival of summer soon, I'm left to do tiny projects at home, specially in the macro field.
In the meantime, I've already signed for a 2-week leave from work just to rest my nerves from the amount of stupidity that lurks in this workplace (and all workplaces in this country; let's be honest). Everyone thinks I'm traveling somewhere - my chances are slim. The best I might be able to do is to head to Failaka island, if possible, and maybe spend a night there. My leave should start on April 1st and extends till April 17th. The best part of a vacation is to see people go to work while you don't!
Anyway, despite the hibernating activity with photography, I still had some few trials with my camera (and flashes) and might be interesting to share...

Ego

Don't read it wrong; Ego here is the Latin form for I or Myself! For the past week (and also for the coming few days) I've been trying to test my flashes and light modifiers on a real subject this time and not against some slid subject: me.
The fact that I don't really do well with portrait with other people, and yet I don't have someone to help me with testing my gear, leaves me with me! Experts usually advise the photographer not to be the subject of their own self; this is related to the degree of concentration and the attention paid by the photographer to the light formation - it would be lesser in such situations. Anyway, I'm working with my own face here and I don't have much options. The funny part is, as it is supposed to be a check-up for my gear and lighting positions, it became also a trial for some Photoshop experiments.

With RoundFlash
All of the coming shots are taken with my Canon EF 50mm lens, not only for its sharpness or wide aperture (f/1.4, which in fact is not used or needed here), but for its perspective in regard to the distance available for me in the room, and for the scale on the lens' barrel which I used to adjust the focus range properly. The first thing to try out with my flashes is the RoundFlash, beside another flash for the hair light on my right and above my head, with a diffuser. The rest is a simple processing in ACR (Adobe Camera RAW). One of the fascinating aspects of using the RoundFlash is, like the ring-flash, creating an interesting catch light in the eyes. The post-processing included some simple fill light, contrast, vibration, and clarity adjustments.

After the initial (simple) post-processing, I couldn't hold my fingers from doing further editing like I usually do for some friends photos. I have to admit that the edit does scare me a bit! When it comes to black and white converting, there are two possible paths actually: Convert in RAW, or convert in Photoshop. Each one of those has its own benefits and limits in fact. The image you see above is converted in Photoshop (and it is just one image from the series of shots).

RAW Edit
I've picked one of the many shots and this time tried to convert it to B&W in ACR alone without the help of Photoshop. The results, to me, were astonishing. Te image you see on the left is completely edited in RAW without any enhancement in Photoshop. The difference here is, while in Photoshop you can convert to B&W using the Black and White adjustment layer, which in return has specific tonal ranges to fix the black and white tones depending on the colors - in ACR, the tonal ranges available are varied and more delicate than the simple black and white adjustment layer in Photoshop. For example, in the adjustment layer we have tonal sliders for Reds and Yellows; However, in ACR, there are tonal controllers for Reds and Yellows, with another one for Oranges in between. This latter addition can prove very useful. in specific situations, like my selfie here. Usually, in Photoshop, raising the Reds tones to brighten the eyes would brighten the eyes and the face altogether, calling for a need to use layer masks. In ACR, however, the two zones are somewhat easier to control by the Reds and the Oranges tones (and with some fill light increment). At this level, it all looks normal. For more eye-catching bright eyes effect, then, of course, Photoshop is needed again.

The second experiment with the flashes was to light the face from top and bottom, in something like the so-called hatchet lighting. Usually, a hatchet lighting is when lights are used on the left and the right of the subject, but here it's on the vertical plane. To achieve this, beside the head light above my head (with bulb diffuser), I've placed a white cardboard on the ground and bounced the flash from it.

Selfie #4
After many trials to check the position of the lights, I had some nice shots. It seems that this hatchet method is good to show the details of the muscles of the face; though it might not be so pleasant to look at! In Selfie #4, most of the editing is done in ACR as well, including desaturating. However, some editing was needed in Photoshop to boost the eye of the color. Also, some drama was added by sharpening the image excessively.
Unblinking
And there is a big benefit of having some high resolution to your camera; It is some way to make an abstract with suitable resolution out of the general image, like it is in Unblinking. Probably it won't be a good image for a large print after all, but nice to see online! In Unblinking, the image was converted to B&W in Photoshop (except of the eye), and was given a tint to have some drama.

There is a method of manipulating images that I've read something about, in a long time, and back then I really didn't pay much attention. Probably because the talk was technical more than artistic. However, now with the ACR, it seems that this method is opening a new window for the world of Black and White manipulations. This is the method of tone-splitting. The idea is simple: give one tint to the highlights, and another tint for the shadows. The result was somewhat perplexing I have to say!

Selfie #5
I applied this method to one of the selfies taken with the hatchet technique and the results appear interesting. After converting the image (and adjusting the tones accordingly) in ACR, I've applied the tone-splitting (also in ACR) giving the highlights a tint of violet, and the shadows a tint of green. There is in fact no limit for the choices as you can control the tints and their saturation and also the balance between the shadows and the highlights in general. However, it seems reasonable and more appropriate to work within the circle of the laws of the Hue Circle. The method is simple, after adjusting the tint for the highlights by picking a specific hue and adjusting its saturation, I picked a tint for the shadows then after by adding (or subtracting) 180o from the hue value of the highlights; For this reason, it got to violet highlights, and green shadows. I've adjusted the Balance control in ACR towards the highlights simply to reduce the weird look of the hair and black areas of being too green. Also, to add more luster to the eyes, I had to sacrifice the contrast for the whole image, and yes, I could have done it in Photoshop editing later on, but my goal was to produce an image edited in RAW only without much editing in Photoshop; and I think I've done it. This in fact taught me a lesson for the time being: It's not all about pronouncing the tones by adding contrast, but contrast must be added carefully in regard to what features of the image I'm willing to express and show more than the rest.
A note as well I'd like to add: it is a common advise when printing Black and White images, it would be a good idea to add a slight tint (most probably a yellow tint) even in a small amount just to give a color to the image and show some of the details that might be lost in printing. This is because in printers' language, White is almost synonymous with "do not print a thing here". Thus, it is advised to have a slight tint to give some color and life to the image. Anyway, experimenting with your images is always the rule I presume!.

Heaven is Watching

Out of the desire to break my daily routine and also to try to produce something before the summer is finally and completely here, I've decided to do a panorama near my workplace. I have to say though that I was in a fighting mood as well; I was willing to fight anyone who would be interrupting me and try to stop me from taking photos near my workplace. Anyway, at the end things went smooth, but I wish if I can say that to what happened later when processing the panoramas.

Heaven is Watching

That day, I've decided to have lunch near my workplace and head back when the road is less congested. I've walked up to the roundabout which overlooks my workplace (and specifically the building where I work) and started to shoot there, even though it was congested little bit but the road was giving way and getting easier. That was not a big deal for me in fact as the whole thing was an experiment and I'm not looking for perfect conditions, but I did some mistakes later which became both: a regret, and a lesson. Anyway, I was astonished for the clouds hovering over the place and reminded me of the time I spent in Failaka 4 years ago when I had some marvelous shots under clouds of the same type. Bad thing though that I couldn't (for time limitations and capabilities) do any long exposures in that location. Anyway, after shooting the first panorama, I've moved the tripod manually for few centimeters and started to shoot again. I've measured previously the distance between the centers my eyes, which was 7cm, but here I had to do things blindly and I'm sure I've displaced the tripod for no less than 10cm - can produce a big problem, and it did indeed as you will see...

WARNING: DO NOT STARE WITH 3D GLASSES FOR LONG TIME.

The image you see above is not a perfect anaglyph (or as I called it before: panaglyph), but it is one its kind and I'm hoping to do more experiments with this kind of panaglyphs; Because it is a full panorama and not a simple horizontal panorama turned into an anaglyph as I did some weeks ago. However, I've tried hard to give a good alignment for this panorama but it never worked - needless to say the stitching errors that plagued me in between the two panoramas for the left and the right scenes. Without going into details of the stitching errors, I shall discuss here the points that made this unbearable to look at!

  • The distance of the displacement of the tripod seems too large which caused the difference in between the two scenes, visually, large. This would cause hardships when aligning the two scenes at some points.
  • The center of the panorama should have been one of the palms, and this is a misjudgement from my side. Centering the panorama around the center of the roundabout would have produced a more interesting scene like above. This also played a role in the bad alignment between the two scenes - the scene should have been aligned around the palm that was my zero point (and to which the movement of the tripod was parallel), but I was trying hard to align the two scenes to a new point (which was theoretically parallel as well but not quite accurate).
  • The ground on which I was standing was not even. This produced a change in the elevation of the tripod and the camera configuration after the displacement, and henceforth, another problem was added to the alignment process.
With these problems in mind, I'm hoping that these can be avoided in the future for another experiment like this. I just need the good location with interesting architecture or landscape to work with.
There was a plan to produce and work with a planet projection of this same panorama, but because of some internet problems in the current time I decided to delay this research to be posted in a later time. This would give me also more time to investigate the matter and the other possibilities to produce an adequate panaglyph out of this panorama. Just remember please: DO NOT STARE AT THE ANAGLYPH ABOVE FOR A LONG TIME!

Finale

I have to finish this quick and post it. I'm living a life now where I'm expecting a problem wherever I turn and wherever I go. My only escape would be a vacation outside, which I'm already planning for, hopefully to be in September of October. But I have to wait and see the circumstances. Day by day, I feel my luck is draining, and needless to say, my home is throwing my out. What is home, if you just don't feel the respect you need in it? Would it still be called home?
Everyone is telling me that I need a vacation. Everyone is seeing my bent back and my burnt eyes, and they are advising me of some vacation, far away from home and the work environment. But what can I do with added responsibilities? The least to be done now is to have my short vacation for 2 weeks just to rest my body from the everyday traffic, as well as spend some more time with my camera, and if possible go to Failaka. So many hopes I have for such a short vacation in the homeland, but let's see what is going to be achieved after all...

Thursday, November 14, 2013

Goodbye Tamron...

Here I am, after 2 weeks of being almost idle. As much as I hate to admit it, but seems my mood swings were at apex. The material I was trying to prepare for this post wasn't much as I couldn't work much with my camera. I was too lazy to touch it and prepare stuff for more nadir shots. Disasters didn't stop at this level yet, as you will be reading further!
On the other hand, I've started with the beginning of last week to do on some eye checking. From one clinic to another, and then to the eye hospital here (and let's not talk about the procedures and the hordes of people in the queue line). There is a big chance that I do suffer from retinitis pigmentosa just like my eldest brother and one of my sisters, but I'm not sure how dangerous my situation is. It was supposed to be a regular and a routine check up in fact, but oh well... I'm trying to cool myself down and enjoy my time as much as possible, with games and the camera when possible. I'm now waiting for November 25th to do some eye testing and check with the doctor.

Nadirology
There were many struggles to take nadir shots (or shots pointing downward) specially that I don't have much means to handle the camera and make it hanging in a vertical position.
Source: B&H
FAIL!
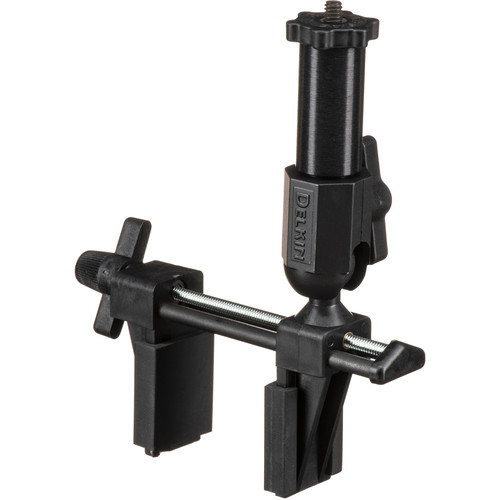
One of the "toys" that were supposed to help me with this such task is the (crap) Delkin Fat Gecko Gator Camera Mount which caused me a disaster the last (and it was the first) time I used it. I left it unused after that failure but with my limited hopes in such tasks like taking nadirs inside rooms I've tried to work around it somehow, and the result was another failure and the device totally disintegrated, piece by piece. I'm simply amazed how come I'm the only one who made a negative review on this item on B&H website (or so it seems)!

Above Hall
Rokinon 8mm fisheye, f/16, 1.3sec, ISO500.

One of the trials to take such shots, like in Above Hall, I tried to improvise something: a hard paper bag with a hole at its bottom for the camera lens. However, this method didn't work out properly because the body of the camera is not uniform and the result is a tilted camera dangling from the light fixture; a situation that persisted in all situations almost. The camera could hardly be balanced straight. Probably it is time for more of DIY solutions with some metal work - or simply order something! I already had some hard time doing the same procedure in my bathroom. Anyway, I did take a twisted picture but I won't post it here for the time being.

Shots like Above Hall aren't something that I applaud but it did teach me some aspects about taking such shots in terms of composition. Probably a congested place is a good thing for such shots, because in Above Hall, the hall was empty almost and not many features are presented, making the shot somehow boring, unless you appreciate the minimalistic approach!

Geometrical Amuse
Canon EF 50mm, f/16, 8-1sec, ISO800.
Not all shots, however, were for rooms (and I think I presented some 2 weeks ago). This time though I continued my work with the stairs but since shooting was awkward from upstairs to downstairs, this time I decided to put my monopod to some good use. However, using such a method and dangling the camera (with the portable monitor connected in hot-shoe) calls for a higher ISO to fasten the shutter speed ad get a stabilized image as much as possible. Geometrical Amuse is one portion of an image taken this way (with others being shaken and blurred). The crop changed the perspective of the whole image from landscape to portrait. Again it is a combination between abstraction and minimalism I suppose. Still, I didn't get enough amuse from such shots yet. Probably I should consider doing "zenith" shots frequently as much now with the hardships taking such nadir shots. I have to concentrate also on doing nadir shots on objects and other minimal features and not necessarily rooms or landscapes. Landscapes, however, are a good target for a monopod raised up with the camera!

Micro Macro
After such many failures doing nadir shots, I've decided to move my point of interest into another field: Macro photography. Or maybe I should say, Extra Macro Photography.
Source: Amazon
R.I.P.
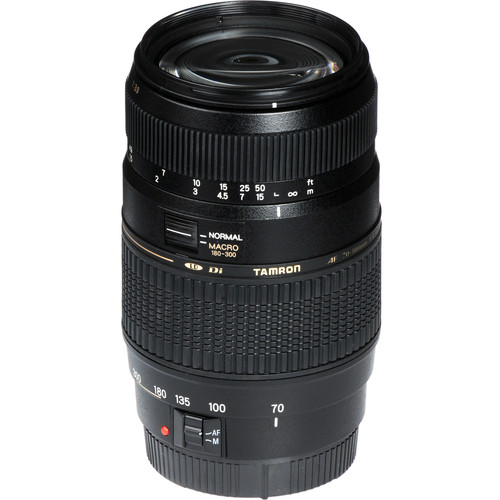
Tamron 70-300mm
Source: B&H
This change of interest in fact resulted in a disaster in the beginning. My Tamron 70-300mm lens got broken as it was connected in reverse with the Canon EF 50mm. I'm not sure what went wrong but seems I've used some power where it shouldn't be, specially that the body of the lens is plastic. What has been broken is the mechanics for zooming in and out. Thus, with any connected material to the front of the lens, it might make the lens front be dragged forward. However, I can still pull in and out the lens and the focusing mechanism is still working (manual focusing that is, I didn't try the AF!). It did some nice job for some time, but anyway, for the time being, it seems it is time to get a real telephoto lens other than this cheap choice. It was a matter of time. Anyway, with Tamron broken, I do get some choices now and maybe I have a bit more guts to manipulate this lens further somehow (and maybe try to disintegrate it and see what's in!).

Cutter Edge
Canon EF 50mm (R), Canon EF 100mm macro + 36mm extension tubes,
f/32, 60sec, ISO400.

As you can see from Cutter Edge, I really didn't have much of good targets. In such trials I just picked the paper cutter to shoot at some of the corrosion on its surface. I made several trials here with Tamron and Canon EF 100mm macro lenses, but this is my first time to use extension tubes in such macro shots, and I'm not quite sure if this is really effective in increasing the zooming power. I need to do a comparison between the two cases and see if extension tubes do really help. Extension tubes are normally used for macro photography but with the purpose of reducing the minimum frontal distance between subject and the lens. The situation here though when reversing two lenses is different though. Just to note, with direct measurements the distance between the 2 grooves in the image above is about 0.5cm (~0.2 in), and when the image was taken the distance on the image was around 22.6cm (~8.9 in). By finding the ratio between the two, the result is 45.2. Does that mean that the magnification factor for the whole system is x45? I'm really not sure how this is calculated. Anyway, we can still get awesome results!

Fibers
Canon EF 50mm (R), Canon EF 100mm macro, 36mm extension tubes,
f/32, 60sec, ISO400.
Portion of my blanket!

In the meantime, I'm trying to understand the processes behind reversing the lenses and seems I got the general image:
  1. Seems the first portion of the system is supposed to enlarge the subject with the reverse method. In my system this is done with the Canon EF 50mm lens. There are adapters, however, used to adapt a lens directly to the camera body in reversed position and they are efficient as well.
  2. The second part of the system is to enlarge the image taken from the reversed lens in step No.1, at least this is how I understand it. This was evident when I changed the lenses from the Canon EF 100mm macro, to Tamron 70-300mm and trying the lens at 300mm. The blade of the cutter in the first trial above was magnified further with the increase in the focal length of this portion of the system.
  3. Two problems, however, occur when trying out greater focal length, and/or trying to add teleconverters to duplicate the focal lengths: a) shake, and b) dispersion or chromatic aberrations. The shake of the system is so sensitive that I had to use the intervalometer (plus the timer in the camera itself for 10 seconds) to delay the shoot for around 30 seconds to give time to myself to step away from the (shaky) system. The system is so sensitive even to the steps on the ground nearby. As for the dispersion, this was magnified in Tamron, and this is natural because of the low quality (hence it was cheap lens). Also, teleconverters are made of low quality glass relatively, usually, and they do add to such distortion. So far, the best result is as seen above in Cutter Edge by using the Canon EF 100mm lens directly with reversed Canon EF 50mm lens without any teleconverters.
After these trials, I'm thinking now of building something like a glass table that would help me further with my macro experiments. Some methods and tips are mentioned in Cyril's book (cover above) which I've read some weeks ago. I need to go over the book again quickly to get some ideas and inspirations; not only for the macro shooting, but also for the nadir project!

Finale
Source: Amazon
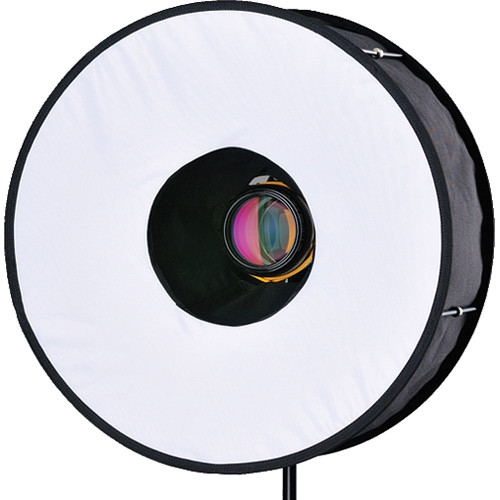
There are stuff that are on hold for the time being. After finishing the books in my arsenal, I've been almost idle at work and too lazy to do "work" itself. I didn't even write any reviews concerning the books (left and above) that I've purchased some weeks ago, or any reviews concerning some of the gear that I've got some time ago from B&H, like the RoundFlash. The RoundFlash specifically needs some time to be tried out and have some thoughts as it can be used for portrait and macro - two fields that I'm not quite friendly with (portrait even more). I thought of using the RoundFlash for my (extra) macro projects in the near future but seems to me that the length of the system of lenses attached together would hinder such addition useless.
Source: B&H
For this reason, right now, I'm thinking of building a small glass table which be lighted from below. Of course, it would be useful for transparent or translucent objects and not opaque ones but that's not a big deal. I'm sure there are ways to light opaque objects from the side or above without using the RoundFlash.
Further more, I've read an interview with Jonathan Boakes, one of my favorite game developers, and in my process trying to seek inspiration whenever and wherever I can, I think Jonathan sparked (again) the fire of photographing old deserted places (which are abundant on Failaka island). On the agenda as well, a trial for the new IR gel filter to make a panorama, but of course it would be a panorama at broad daylight, when possible!
I've been stuffing my schedule with games in the past 2 weeks (and writing reviews about them) and I think the trend is still going on. I'm not sure what is still going on in my mind but there was something that felt severe. Something I just needed to vent through games. Now with the probability of developing Retinitis Pigmentosa, it seems I have to push myself to do more photography before it's too late.


Thursday, September 5, 2013

The InfraWeek...

This week been somehow a busy week with my infrared filter. After some trials that were done last week with the infrared filter, and after learning some new methods to process infrared RAW files, I've been planning for new shots and even visiting old shots for re-processing.
Before I delve deeper into this matter of the infrared venue, I do like to thank all visitors for peaking up my Flickr profile to more than 2000 hits in a single day! This is a first time to be that way. I think my own personal record was something a bit more than 1000 hits in a single day before!

Click to Enlarge

Infra
One of the main problems in processing infrared images (beside working with unconverted camera) is the fact that the white balance is limited when working in ACR, or even in Canon's DPP. Canon's DPP though was somehow a good tool before but currently and with my new acquired shots from last week, it didn't make much difference. Anyway, I've gone through some articles online and I've discovered a free software provided by Adobe, namely the DNG Profile Editor.
I won't get into the details of this tool and how to use it, but in a brief sentence, all I can say is, it makes a profile to be used in ACR, and it would maximize the range of the white balance in some way. This step alone, made me re-think about previous shots and the possibility of shedding them under a new light.

Frozen Coal
Cropped from original.
One of these old shots was a shot taken in the beginning of this year, in winter specifically, when we were still using coal trays or something like that to enjoy some traditional tea! Anyway, the shot that was taken and processed in the traditional way and even back then, swapping the channels (of Red and Blue to give an alien feeling to the image) did not yield or give much sense. Right now, though, the story is completely different and swapping the channels after fixing the white balance in the RAW file can yield a promising result. I say "can" here, so don't take it for granted!

InfraCoal

However, the coal shot was an "indoor" shot and not outside, thus I had to dig in my archive and see if there is anything like that taken with infrared. I've found one shot, for which I needed DxO to deal with its distortion and other criteria and this one, too, did a good job in swapping the channels.

Infraarbeitplatz


Despite this promising result from a previous shot, but it didn't really work out for much of the shots taken back when I just had the filter. Some of them didn't work out as before and some of them were better rather in red shade like the Ciudad en Rojo.

Ciudad en Rojo
Canon EF 18-55mm @35mm, f/8, 3.2sec, ISO100.

Anyway, after looking back at my stock of infrared shots, I've decided to increase the stock a bit more just to work with processing more images of this kind. This is my preferred method of learning (specially in Photoshop), and reading alone won't do me any good!
For this reason I've decided to take my camera to work with me and try to find something just to shoot with my infrared filter.

One of the first trials at work is a little plant which looked like a palm tree (but it's not). I leave the classification of this plant for the professionals! Anyway, it was a shot in a hurry as the background and the distance were not suitable really.

Paulo Palma
Canon EF 50mm, f/2, 1.3sec, ISO100.

Naturally, some infrared shots would turn completely or partially to black and white. I think this is the magic of infrared photography. Somehow, the result can be unpredictable. Anyway, there is a major difficulty with unconverted camera (i.e. camera with modified sensor for IR photography). As I will show later, this was a problem in some shots which required a fast shutter speed in a breezy weather. However, in Paulo Palma, the weather was relatively stable and not much of a breeze in the air, but surely had a problem framing the image while the sun striking on my neck and on the LCD! I've used a wide aperture relatively (and hence the shallow depth) just to ensure a faster shutter. Otherwise, it could have taken up to 3 or 6, or even 10 seconds for this shot.

One of the major hassles while working with IR images is the noise level even when ISO is set to the lowest. Next, comes the soft focus. These two matters makes it uneasy for me to upload such images on the web, and specifically into stock agencies. Thus, imagine when you are forced to increase the ISO under such conditions. The noise are simply "ridiculous". However, the noise can be less pronounced and just get more attention when channel swapping is formed, that is, replacing the places of the Red and the Blue channels in the RGB mode. At this point, the typical noise reduction plugins in Photoshop won't do much good, but the major trick is to play around with Hue/Saturation to twist the colors and make the noise virtually negligible. Then comes the next trick of adjusting the contrast to suppress some grain, and then we have the change in the color space by using the Assign command in Photoshop (not Convert). The Assign command, for some reason, does reduce (or maybe re-distribute?) the noise level, sometimes to a great extent. This is some of what I've learned doing long exposures last summer on the beach!

Infra Columnae
Canon EF 50mm, f/1.4, 6-1sec, ISO200.
InfraDoor
Canon EF 18-55mm @22mm,
f/16, 8sec, ISO200.
Despite the general look of the infrared shots, which tends to be in black and white, but the fact is lot of shots I've done were low saturated and just close to the black and white level. This is done by virtue within the processing of such shots, specially via Hue/Saturation when I try to reduce the noise by such an adjustment layer. The fact is, IR photography got a potential for various aesthetic settings or processes just like, or almost like, the HDR technique. The hard part, might be, to predict the final look of the shot. With HDR and its processes, you can imagine what's the final image is on location (specially if it is some metallic surface). However, this is still not so evident for me when I work with IR. Shots like Infra Columnae and InfraDoor were so various and I didn't know whether they would be colored slightly, or I'll be needing channel swap, or simply turn everything into black and white. The main puzzle is how to settle down the white balance. Usually, I do like to set the white balance from any green surface in the image if there is any but that doesn't mean I would like it. I suppose the green surface is the first choice because the green color is in the middle of the spectrum, not sure about this theory though! InfraDoor specifically is a subject for an HDR shot and it got me back to my old habit of still life and abstracts by geometrical means, like I used to do before around my work place - anyway this might be a subject for another post some other day!

Then one day came a challenge that took me 2 days to perform. It's a small bloom that was barely 1cm (~0.394in) in height. Not only I had to get so low with the tripod, but approaching the bloom and getting closer to it was critical. The first day, I tried to get to it by the end of the day before leaving my work place but the sun was so harsh that, beside my personal troubles, the LCD was barely visible and I had nothing to cover it (things to put on my purchase list as it seems). Thus, I had to come the next day and try to get to it in the early morning time just before the sun strikes that spot specifically.

Truncartis Parvis
Canon EF 100 macro + ET, f/8, 30-1sec, ISO200.

I'm putting Truncartis Parvis here for comparison with shots that were taken with infrared filter later. In Truncartis Parvis there were two main problems: first, the low light level as the sun wasn't shining on the spot (ironic), and secondly, the breeze which required faster shutter speed to stop the motion of the tiny bloom. I didn't bring my speedlite with me that day thus I had to depend on the simple flash on-camera. Because I couldn't get so close to the bloom, I had to use the macro 100mm lens with extension tubes added gradually to it. By using 12, 20, and 36 tubes gradually I was able to make some estimate about the relative size of the bloom within the frame. Truncartis Parvis (which means the small jungle by the way) was taken with all tubes (i.e. 68mm) added to the macro lens. Thus, I was trying to hit some balance between the 3 variables: ISO, speed, and aperture. I didn't like the idea of raising the ISO too high for such a "normal" shot thus I had to put down the aperture to f/8 (after trying f/16). They say in macro photography, it's better not to go below f/8. However, such balance was even harder to achieve and I had to give up with the ISO when I started taking infrared shots with that setting (remember the sun was not striking the place, yet).

Glowing Bloom (Gold)
Canon EF 100mm macro + ET, f/4, 15-1sec, ISO1600.

As you can see above, in Glowing Boom (Gold), the shutter speed was barely acceptable amid the breezes in the weather, and this is only achieved with ISO1600 and  shallow depth of f/4 with maximum flash output. Probably it would have been an easier task if my speedlite was with me but I had to deal with the situation as it is and yet the shot was of a surrealistic approach somehow. The noise level, however, was a novel on its own right.
The shot above was done without channel swapping (and of course with some processing on the side to suppress the background noise). Hence the "(Gold)" part in the name. After Red and Blue channels swapping, it appeared as beautiful as the first as it seems...

Glowing Bloom (Blue)
Canon EF 100mm macro + ET, f/4, 15-1sec, ISO1600.

It is amazing how the infrared filter clears off the differences in tones and colors and makes the petals as if they are made with one color (compare with the one taken without filter above). At the end and just before I take off, I've decided to do one last trial but this time with one less extension tube just to include more background into the frame. Ironically though, I've decided to crop the final image into a square to reduce the background!

Gecenin Çiçek
Canon EF 100mm macro, f/5.6, 10-1sec, ISO1600.

That was "some" of the trials done with the infrared filter for this week, but not the end of it. I need to study the artistic chances and venues behind this filter. It is cumbersome to use it of course with an unconverted camera, yet it does help in long exposures anyway!

Conclusion
Potentially, there is so much to be done in the IR field. Something behind the typical vivid and surreal landscape shots that we usually see under this category of photography.
However, I do find myself debating myself about the aesthetic prospect of such shots. Usually, what I read in articles online about IR photography is that the grains (or noise) and the fuzzy focus is something natural and even characteristic of this type of photography. There are even some Photoshop tutorials that deal with photo manipulation; that is to edit a normal photo and make it look like it is taken under IR, and one critical step in the overall process is to add grain or noise to the whole image (beside reducing the saturation). However, do people accept that, or do agencies? I'm reluctant about uploading such images to stock agencies. I did already upload to some of them but it's just a test and I'm very doubtful about their acceptance for such shots with such high grain level. This, somehow, makes IR photography a highly fine-art branch I believe, and agencies wouldn't love this type of photography much, unless some of them do know what does it mean to take IR shots with all that noise and defocus.
The almost-random aspect of processing IR shots makes it as vivid and wild as HDRs but let's say with different tones. You can do crazy things with the HDR techniques and lot of people hate the halos produced in over-tone-mapping HDR images, and IRs also got the same potential. If you check Infra Columnae back up above again, you'd notice that the image is almost black and white except of a spot that shows clearly as green. I'm pretty sure some people won't like it that way; just a matter of how the human brain works I believe.
In the near future, however, I do need to work more with such filters specially to see how does it change the skin tones. I've done some simple trials on myself but these are not enough and I need more. First though, I have to know what kind of relation there is between studio (or let's say the speedlites) light and this kind of filters.
After all, it is just something to get my mind busy and away from my collapsible life for the time being. I do miss doing lot of things; panoramas specifically. Anyway, got to wait for winter to arrive. This summer I'm literally melting down my body, and mood...


Thursday, March 21, 2013

Dubai Back and Fro...

Well, been to Dubai for 3 days this week and I couldn't have much time to take some photos or work on some pictures. I received and invitation (as I've mentioned in previous post) from HIPA to attend to the ceremony of awards giving.
The stay was fine and Dubai is a nice place to stay (I couldn't imagine there was no traffic jam!), but unfortunately way too expensive for my budget. In just 3 days I've spent what I would've spent in Ireland for 5 days or more!
Despite the beautiful atmosphere it was hard for me to take any pictures from there, and the sum was a total of 3 images only and 2 of them were, well, fine.

Dornige Schönheit
Canon EF 50mm + 20mm tube, f/22, 160-1sec, ISO100.

I went strolling outside of the hotel after breakfast on the 18th, first without any camera just to check my surroundings, but then I went back to my room and got my stuff and went out again to catch some weird looking plant (but then I've realized it is abundant in UAE). Weird for me at least as I'm no botanist! In here, I've used an extension tube (20mm I think) and took several shots with and without flash, but I think after all Dornige Schönheit was the most stable of all. I did took shots from above but I needed a larger zoom to hide my other hand which was holding the stem. Lately, I've been using the extension tubes a lot with my 50mm lens as I see it a nice and fast substitute for the heavy 100mm macro lens and would give a single hand the power to control the camera body properly more.

Columns and Columns
Tamron 70-300mm @300mm, f/8, 500-1sec, ISO100.


I've walked and wandered further away and took some shots (mainly of abstract nature) but lot of them didn't turn well, and finally reached a construction site where I've noticed some raising columns under construction - probably the only thing that really caught my attention.
That night there was the ceremony which I went to Dubai for, the HIPA awards ceremony. Nicely done and I got the chance to see such amazing photos indeed. I'm checking with HIPA to see if the ceremony will be published on youtube.

I do realize that lot of people are surprised for the fact that I didn't take much pictures and I didn't go out a lot in Dubai - but this is back to the simple fact that I don't really consider it a vacation (or completely a vacation let's say). I would spend a vacation in a calmer place like the countryside or a sea village probably, but not in a big city. Also, I'm not a shopping person and I didn't go there for shopping in the first place, and photography-wise, the urban scape is not greatly inspirational for my mind. However, it is a nice city with nice people and there were lot of things to think about by observing my surroundings - Culture, attitude, and arts. Dubai is a big city but not within the same reputation line as other big cities like New York or London. This would seem hard to explain but probably easy to observe in Dubai itself!
Anyway, after a fast roll over Dubai events, I'm back to my previous regular work with my own humble photos the week before.

Flora Mood:

Well, they say it is spring already but years of living here as a native, I sort of realized that Kuwait has no spring. It's simply: Winter, Summer. It's an On-Off case, so to say. However, some blooms and flowers had sprung already and I didn't want to miss the chance. I think after my last workshop with my teacher about geometrical plays in floral arrangements, it seems that I'm (or my mind is) more aware of floral arts and the inside arrangements of floral lines.

Aglow
Canon EF 50mm+ tube, f/16, 50-1sec, ISO400.

These images were taken the week before I travel on two days, when I started packing my camera and taking it with me to work. This time, however, I decided not to take my tripod. In fact, a tripod can be a hassle in such situations specially for one heavy and cranky tripod like mine!
Quinquenia
Canon EF 50mm + tube, f/20, 60-1sec, ISO400.
As you may notice from Aglow above, that even f/16 can have a shallow depth of field in such situations (with extension tubes in used). Lately, I've been using the tubes a lot (I've mentioned that already above) because it is fast and easy to get a close up and ALSO because I can use 50mm lens which has a maximum aperture of f/1.4. This is of course a very shallow depth of field and when you compare it to f/16 which still has a shallow depth, f/1.4 might not be that good as an option. However, adding this value to the range of stops available is pretty valuable and I wouldn't know when would I need it. Anyway, in both shots here, Aglow and Quinquenia (and also shots that would come later) I was forced to raise the ISO little bit and use the on-camera flash. Here comes another advantage for using extension tubes: the length of the 50mm lens with an extension tube (be it 12, 20 or 36mm) is shorter most of the time (I'm talking here about connecting only one tube) and it gives a good close-up abilities. This relatively shorter than 100mm macro lens length makes it feasible and possible to use the on-camera flash easily because if the lens is too long like the 100mm lens, then a shadow cast is most likely to occur. A cast from the lens itself that is. Of course, we are talking about on-the-go photography and not the precise and making-art photography in which a photographer would spend many minutes if not hours studying the situation and settling the tripod and picking the lens and then choosing the appropriate moment.

Green Ankh
Canon EF 50mm + 12mm tube,
f/22, 200-1sec, ISO100.
The on-camera flash solved lot of problems, and mainly allowed me to use the manual mode on the camera to speed up the shutter speed as much as I like. I would say though, if I was to use my 580EX II speedlite here, I would need help or something to stabilize the plant's stem at least. In most of these situations, both of my hands were busy and the on-camera flash seemed the appropriate solution for such situation, even though a slight shadow might burst out as in Quinquenia or to a lesser degree as in Green Ankh. The on-camera flash as well helped to create that translucent look and glowing atmosphere in Aglow; but the talk about the ISO noise is something else of course.
Yes, the on-camera flash does eat out some of saturation of some colors specially if no gels are used as it is the case with Green Ankh where the plant's stem was faint in color and I had to reduce the highlights and boost the vibrancy of colors (not the saturation) to some degree. But such situations are easy to deal with in general.

Quadraspinasphere
Canon EF 50mm + 36mm tube, f/20, 20-1sec, ISO400.

As I've said before, using the on-camera flash allowed me to work with manual mode but this is not always the case. Like in Quadraspinasphere, I was not so sure where to begin with my shutter speed so I've just turned the the dial to Av and let the camera choose the shutter speed for me (in combination with the flash). Here, I was lying on the ground after putting the car shade on the floor out of my work place (and thank God no one was there to watch me do it!), thus it was reasonable to concentrate on my approach to the plant in such a low level, rather than work or think about the shutter speed. I had to crop Quadraspinasphere to make it as a quarter of a sphere as I envisioned it, but one of the hardest points in taking this picture is the fact that I have to work in manual focus most of the time. A fact that had been persistent with using extension tubes, as the auto-focusing function seems to be baffled when it comes to extension tubes, probably!
One of the tricks that I usually do in such situations with manual focusing (and with such bad eye vision like mine), and with a shaky situation (like a plant in the wind or breeze or a shaky hand) is to do a scanning with continuous shutter speed clicks. Meaning: with relatively high shutter speed (20-1sec seems fast enough but slower with flash turned on), I set the camera with continuous (or burst) mode/drive and check out a point where the sharp focus is most likely to occur (all within the viewfinder). After that, I get closer to the subject little bit (not much!) and press the shutter button and keep holding it while moving my head slowly to the back getting further away from the subject. This way, I get load of pictures of course, but at least my chances for getting a sharp image in between are more. It is a talk of probability and statistics if I should say. 

Thoughts:

There is a hard mix in thoughts right now, specially after this trip to Dubai, and regarding many aspects. In Dubai, it seemed to me that people talk about arts wherever you go, and galleries of art are displayed in public - it was like a public education concerning arts. How was this done? What elevated the level of consciousness of the people of Dubai, at least those I've been meeting on the way, about arts. Such level of thought that I didn't encounter so far in here. Needless to say, that such big city get a traffic jam only in the rush hours time (morning and evening), unlike us with 12 hours a day.
I remember back in the 1970s and 1980s Kuwait was something like that, and the simplest form of art appreciation would be seen in the National Day celebrations, when people and schools used to go out on the streets in an organized parades with props and stuff made memorizing and emphasizing the history and the identity of this country. Where did all that go? All these parades are now replaced by a bunch of sanitarium inmates going freely outside and splash each other with water and foam and traffic jams blocking the roads. Is this the identity we are commemorating?
It is clear and evident that the foreign policies and the openness of Dubai to the world made it a global center with an elevated level in most aspects of life - but do we really need to be open that much as much as to indulge in (mostly) western culture to be elevated in the level of consciousness? Logically and from the perspective of history, Arabs did conquer such place in time and now it is gone, hence, I think building over what was achieved and not merely adapting to the western way is possible; thus, creating a self-identity awareness. The thing is, where and how to start and what could spark people about such advantageous endeavor? One particular clue lies in the ruling family of the UAE and Dubai specifically. I was surprised that HIPA (which stands for Hamdan International Photography Award) was established by the crown prince of Dubai, His Highness Sheikh Hamdan and he, himself, was a contributor. He is a young man, and I thought he was old, or not-so-old type of person. I realized at this point that the upper class and those under in a community like UAE's is really entwined to some extent and the leaders themselves push people in that direction and encourage the openness of thoughts and arts. He should be an example to be followed in the region, and the ME in general. This is what I believe.

Writing this now, with a call from the main organizer in the group about another fair or expo that they want me to get involved in. I have to say frankly that I'm getting tired of this. At the time that I want to raise consciousness and arts appreciation in the group members and make them stronger in spirit facing the criticizing of their images, needless to say raise their technical skills, the management of the group on the other hand concentrate so much on the aspects concerning the group's reputation and pronouncing its name. I wonder now, how this can be done with members that don't even shoot in RAW format?!
I've been chitchatting with a friend on dinner last Friday and he made a note that he felt that the group and its responsibilities are pulling me down, and I'm pulling or carrying the heavy load of the group's well-being on my shoulders like Hercules. He suggested that if it didn't quite work well, I should quit.

I'm not memorizing all those beloved projects that I've established some time ago along with Ayvarith conlang, like the Bulughman and the Betenic for example. I need to continue and I need to spend more time with these projects that suddenly stopped in time. My Geltani project is also postponed and can barely touch it with all these responsibilities over my head. I have to say NO to many stuff just to sit down and complete some of these fantasies of my own. That might mean, for some time, saying "Goodbye" to my camera and have some rest from all the mess and confusion that I've got myself into with photography world - specifically here in Kuwait.