Showing posts with label polarizer. Show all posts

Thursday, January 24, 2019

The Banana Affair…

Breathing some air now and then with the schools being off, and yet trying to get my emotions ready for the stress and frustration with schools' return by next week. Temperatures here dropped down drastically and it was pretty cold, which I like! Unfortunately though, I didn't go out as I was hoping to take photos outside. I managed though to do my promise to myself and took the camera with me to work with Voigtländer 20mm lens and tried to snap some images. Well, I had to admit though that I did a bit of cheating here (if I can call it so) since I did take some accessories with me to help me out with the task. Anyway, this is not the main topic for this blog spot but let's see what I've managed to catch with this lens and camera combination!

20mm Fishing

As I've stated above, I did some cheating here (always in fact) when I did take the 20mm lens and camera with me to work. This cheat was to include, in the pack, some filters and the intervalometer. The filters were: Big stopper (10 stops) and a polarizer. Testing my eyes with this combination of camera and lens didn't happen in a single day in fact. I did take it with me wherever I went for 3 days. I couldn't touch the camera at work in the first day (got busy out of nowhere!), while in the second day, I was actually in a friend's workplace. Initially, I've wanted to shoot something but no one was there and I got bored alone and felt so tired so I needed that nap, until one friend came in and decided then to try something with him, as he was enjoying his breakfast on the desk!

An Taibhse Ag Obair
(the ghost at work)
Voigtländer 20mm, f/9, 10m, ISO100.

 Despite the dim light inside the office, yet the exposure time was not slow enough. Of course, if my desire was to show a motion blur in a suitable manner, I would have used that slow shutter speed and would have asked my friend to do some specific motion. However, this was not my aim. My aim was a complete abstract with a stable background (and for a bonus, a stable object as it appeared with the bowl of cereals!). To help lengthen the exposure time further, I've used (of course) my big stopper which ads 10 stops to the exposure time (and of course each stop is a double), so the total time happened to be 10 minutes. He was shocked at first, thinking how come he would remain stable on the chair for 10 minutes! Anyway, I've explained the idea for him and told him just to stay in the chair but he can move freely as he likes within the chair. I've placed the camera on a small tripod which I got years back (even before my travel to Ireland in 2010; I know because I used it there!) which was sturdy enough to carry the weight of the camera and lens, plus the lengthy intervalometer. It was cumbersome to straighten the image in-camera though, but it was good to some degree, yet I had to depend on the vertical line formed by the board on the wall (its edge) to straighten the image. The bulk of the work on the image was focused on turning the image into a dramatic and yet smooth black and white image; A combination of sharpening and smoothing the noise will always be the nightmare to achieve.

It's Changing
Voigtländer 20mm, f/13, 30s, ISO100.
The next day, in my workplace this time, I had another chance to try out the same camera and lens combination in addition to the same big stopper as well (with the polerizer as well but its effect was minimum). The cloudy weather was encouraging to some degree, even though to my experience, an overcast sky would not quite suitable to show clouds line in the sky with long exposures but I tried anyway and the result was It's Changing. I tried a longer exposure of 10 minutes but the image was so bright and the highlights could not be saved as I hoped. To make sure everything is in proper sharpness, and because the camera was to be placed on the ground near the pillar which did not allow me to see the LiveView or LCD, I depended here on the hyperfocus principle on setting the focusing ring and then I added one third of a stop (hence using f/13 instead of f/11) just to make sure that things are in good sharp level and enough depth of field. I placed the camera on the ground, on the box of the big stopper filter just to avoid scratches to the LCD, and that in fact allowed me also (when I did the 10 minutes exposure) to place a coin under the camera to see the reflection of the red light (which notes the camera is busy exposing the image); That way I was able to see for myself if the camera finished the exposure or not in case I don't hear the click sound when it finishes. Some might wonder why I don't just check the intervalometer, well, for some reasons I didn't want to move or touch the intervalometer: The camera was a bit shaky and easy to rotate on the box, so I kept the cable remote beside the camera, AND, it is better to check the light as I was having a walk in the garden instead of bending close to the camera to see the intervalometer. The red light from the camera's body is way clearer than trying to figure out the numbers on the LCD of the intervalometer. Anyway, I've picked the one with 30 seconds exposure here for processing and the rest of the game with this image, again, was to settle down with proper black and white tones. The highlights were a bit over but I was able to pull them down away from the cut-off region when processed. Strangely how this image was exposed for 30 seconds only at ISO100 with such a filter as the big stopper. I called this image It's Changing because it kind of gave me the chills in the spine for everything that is changing around me and in my life, from simple things such as likes and dislikes, to morals and priorities of people around me. It's changing.

The Two
Voigtländer 20mm, f/16, 1/3s, ISO100.
I wandered a bit around while exposing It's Changing and did notice some good approaches to minimalism and abstracts in some spots, but unfortunately, later on I've found out that many of these images were shaky because I was trying to bend or take them in some hard angle without any help from any tripod or mini-tripod, so I had to forget about them from the time being, unless I can figure our some creative way to edit my mistakes in some form of art! However, I was able to capture The Two here which is, to me at least of some sort, gives and shines some hope in me; About good things that happen in desperate times without me being in control of anything yet make me grow and flourish. I hope. Again, in The Two, I've used the principle of hyperfocus and with even greater f-stop (f/16 this time). I've taken several shots at various distances and angles around these 2 plants but probably the best one was the very first shot I've made (with some re-alignment and crop). Taking such pictures with bent back has never been an easy job, and I wouldn't be lying down in this dirt! I still didn't upload all these photos to the stocks yet. Didn't have the time to keyword them. As for the time being, I need to think about my next challenge and what lens I'm going to use. Should I go with a telephoto this time? Or change the camera and move to my converted 7D? We'll see…

The Banana Affair

The bulk of the previous two weeks, on the other hand, was focused on another experiment done at home, and not a mere challenge with a single lens and camera combination for one day. This, in fact, is a process that took me 10 days to finish! Well, with professionals I'm sure a period of 10 days of shooting is nothing really. The experiment? Rotting bananas. And just for fun, I've called the whole thing "Operation Banana."

 Footage from the 2nd day.

So, before delving into the details, I just want to talk here a bit about the idea, which was simply to document the process of rotting for bananas, and since I didn't know what the exact outcome would be, I've decided to place a peeled one and unpeeled one, side by side. To get some good contrast with the white banana body, I've placed the set on a black paper (then acrylic board). The shooting took place under black lights (UV lights that is) and, of course, used my UV-pass filter (B+W 403) and DR-665 hot mirror to block any infrared, and after fixing the white balance, the result was a monochromatic image.
In the beginning, as you might have heard in the video if you watched it already, I've set the timer to take a picture every 2 minutes, but then I realized this was a bit of an exaggeration to get a smoother transition when frames are merged into a video. Thus, by the 5th day, I've changed the interval of shooting to every 5 minutes instead. There was some degree of disappointment though, mainly because I didn't realize some biological (botanical) facts, such as that bananas do not turn brown because of some bacteria of fungi, but it turns brown or black in time because of some enzyme. Also, after the 5th day, I've decided to warm the set up during the shoot, so I placed a hair dryer not far from the set (which actually made the whole room warm and cozy in one or two hours!). Finally, the end result was actually a shrinkage in size for the peeled banana while the unpeeled turned into a "fluid" form, but I didn't dare open it! They were 10 days full of running around checking batteries and memory cards (used 2 memory cards in the process, exchanging one when it's almost full with the other one), and the total shots taken here were more than 4000 shots (yes, four thousands).

 The Banana Affair

The hurdles were not limited to the physical realm with the set, but also in the digital realm with the preparing of the photos. Shots were all done in RAW. You might see the video here is a bit shaky and cumbersome with some movement? Well, blame my clumsy movement which caused me to shake the tripod in the process many times. Anyway, the video above is the total one and it was adjusted later on. Originally, the video was 2m14s long but I've shortened that later on by increasing the fps (frame per second) rate. 
To do such a massive and huge edit on these files (done in patches each time I would have to change the memory card) I had to dig out the old Digital Photo Professional (DPP), or namely the Canon's software which is installed along with the drivers long ago but I seldom use, if ever. Despite its controls, I managed to achieve the look on one image and generalize the "recipe" (i.e. the parameters of editing) on the whole set of images and then save all those edited as JPEGs with resize and changing the name of each file in sequential manner. All this process was to be so hard to be done in Photoshop - Maybe someone might say Adobe Bridge is the tool for this task? Not sure it would do so, besides, the controls and menus are some what complicated for me to dig out. DPP was much easier to work with and simple (and its simplicity sometimes is what makes not edit in it as well). Oh, and I could even change the color space to Adobe 1998 space along with the conversion to JPEG. 
This was the story of the Banana Affair, and guess what? It is now uploaded to the stocks and accepted exclusively on Dreamstime! It was hard at first because I don't know many aspects about uploading videos or footage to the stocks and they have special requirements, but I've done it after all with some trials, and now I'm up to do one more if I can! Let's see if it ends up well.

Finale

Well, as you can see I'm trying to keep myself busy with the camera as much as possible, but on the other hand I do have my moments of inspiration which I translate into some quote writing of some sort. I didn't write or think of words to pin a poem for some time now (since December if I recall) so probably my plan for the next coming weeks is to focus on this more, but more importantly, to focus on my feelings. 
Many things are troubling my mind; Life, work, future, as well as death in fact. I'm trying my best to stop my mind from triggering panic attacks and anxiety, and to keep thinking that it is all in the hands of God. This alone, is really leaving me tired to the extent of not taking care of what I'm supposed to take care of, or even indulge myself in. I think this exhaustion is even placing some love inside of me to hatred, to some aspects or some... people.
Some people do think that I do believe in horoscopes and the stars, but I'm really reading and checking those to ease things on myself and to feel the pat on my shoulder, not because I do believe in them (even though they are an interesting thing to study somehow because of my interests in occult in general). These things promise a happy and a promising new year; I'd like to keep that thought but I'm sure that the reality has another venture for me. Probably I'm due to a short vacation, not to travel, but just to stay home and sleep or do things and work with my camera without trying to manage the damn bedtime and the sleeping pattern…


Thursday, January 31, 2013

Festum Culturalum

It had been a slightly busy week, but a tiresome one too. I'm typing the opening of this post at the location of the expo of Kuwait University, entitled Cultural Festival, and in hope that I will get some time later to do the rest.
The situation in the morning is quiet relatively but it was a busy at the time of the opening ceremony despite the humble preparations. The time was not on our side, and we had to do everything in the haste; even the TV set the I've planned to use for our advantage to display videos of the group and maybe some QTVR directly from laptop, all these ideas were abandoned facing the technical problems and the unavailability of technical items (specific wires and cables).
However, the opening ceremony was nice and I was the first to explain my photos for the vice president of Kuwait University. My photos were already framed and printed since last year for last March's expo; Mawahb 2.
Back at home, during the second day of expo (and I told the group members that I can't be there afternoons in the rest of days), I've noticed that on TV they showed the expo, and then to discover that I was shown while I was explaining my photos to the vice president. No interview was done with me (but with other members of the group) and I was shown with background music playing... better if you ask me, as I hate my own voice!
I'm currently looking for an online source of this program but so far, nothing useful.

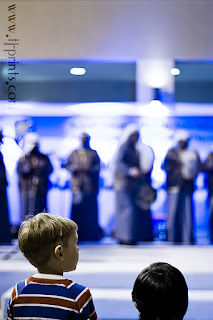
I leave you now with some coverage of the event. The total number of images is huge and I need some time to sort them thoroughly, but I've sorted out some snap shots. Of course such shots are documentary and not aesthetic in any way: Please give some time to load as some of the images are 1-2 MB in size.


The main part where and when the bulk of the documenting took place was at the end of the ceremony when the TV musical band started doing some folklore songs and dances on stage outside (beside a swimming pool). The main problem was that I couldn't get any help and everyone was putting responsibility over my head. I needed someone to shoot videos while I work on documenting with still images, but none wanted this job and I went on doing videos and still shots. Videos were shaky of course since I didn't bring my tripod there, but only a camera and 2 lenses: 50mm, 18-55mm; while the guys who got tripods already, didn't use the tripod and didn't want to shoot videos as well! However, I was fluctuating between the two missions and I've recorded some short movies (but large in size).


The video above is just one of a total of 7 videos. However, away from the technical thoughts, there was also a mental process on the side that sparked my thinking about the local folklore and music. My mind was completely absent from such arts and always concentrating on foreign music and arts, specially the Irish folk. It's just amazing how it sounds and looks like I've discovered something new and exciting, while the fact is, it is my OWN culture.

Compressor!


The new logo for the group
With the expo at Kuwait University more pressure is building up and weighing down on my shoulders, specially after the last meeting with the group. A new system for the membership as well as a new logo and a whole load of some protocols. Further more, I was appointed as a responsible persona for competitions and organizing for them. Also, after asking the leader about giving some info to the members about the concept of the workflow and the color space in order to enhance their work (after serious and bad surprises in preparation for Kuwait University's expo). He asked me if I'm able to give a lecture about that, and I agreed. I've created some outline for the type of lecture I would be giving but of course it's only a draft so far and I would need to check up with him further in order to make it efficient. Yet, more expos and events are coming on the way and another load of pressure shall be prevalent soon! I'm afraid that the group is spreading itself too thin in all directions.
A main issue at hand right now is to organize for a library with ready-made prints for any coming expos in the future in order to avoid all the hassle and the technical problems.

Mr Coffee!

A History of Coffee 2
Canon EF-S 18-55mm @40mm,
f/5.0, 1000-1sec,
ISO 100.
Last week I've been working on some shots for some local coffee brand as part of a competition for making an ad. After making some of the shots with an old map as a background (posted in my last week's post) I've worked out on some photo with my brother as a model.
One of the hard things to work out with a model who is a relative (or a friend) in the same time would be the inability to control the situation as it would please you. A professional model, for example, would just do whatever the artist (photographer) want him or her to do without interrogating about the usefulness of the pose. One the other hand, the fact that I'm not owning a proper place or studio props and tools, made my work pace sluggish.

Mr Coffee
Canon EF 50mm, f/5.6,
400-1sec, ISO 100.
One of the first things to ask from my brother was to wear black clothes in hope that the steam would show in contrast to his clothes (however, the effect was weak as it showed later), as well as wear a turban made by my scarf and beanie for more comical look of a guru-like appearance. My idea in the beginning was to have flying books but he emphasized the idea of adding a table and books. An idea that proved to be a focus of criticism from some criticizing groups on Flickr - and I agree with them as well. My brother looks like in a balancing act instead of levitating in the air!
Technically, the problems were abundant starting with the speedlites. Apparently, two speedlites aren't enough right now and I do need a third (and even a fourth). I can imagine this now in high-key technique - something hard to be achieved with only 2 speedlites, if not impossible.
After taking a shot of my bro with a mug and beans bag, inclined on two chairs with pillows to make an angled tilt (to break the usual levitating look), I asked him to remove the chairs slowly out of the scene and I took a shot of the scene being empty except of the books and the table. The rest was a Photoshop work to layer the two shots and clean the chairs off while enhancing the lights of the background and contrast of the foreground (my brother's).
On the side there are other problems, like the floor and some light spill on the right, the harsh shadows a bit on some areas, the tiles and lines on the ground are not so proper for the scene as well. I'm going to submit the image anyway - if any time limits is extended, I might re-do it again without the table and the ground.
I wanted to do another idea expressing the eruptive energy of the coffee, which required some splash to be happening in some unusual way - not the usual dropping something into liquid. I was trying to use a paper cup and blow some air on the side with a thin hose but this idea is not secure enough and water would keep dripping on the side. Finally I've tried using a vacuum cleaner which can be flipped back to be a blower, but I got stuck with my speedlites not being able to direct enough and suitable light beside making harsh shadows. It is times like this that make me think of another speedlite!

Eerie:

It was last Friday's morning, January 25th, and the fog was so dense that I could barely see for 50 meters in front of me while driving. It was a surprise in fact as I was supposed to go to Al-Salmy for some star-trailing the night before but the plans got canceled. However, they say the fog was only close to the seaside, but the sky is clear far from the sea side.

Eerie
Canon EF 50mm, f/16, ISO 100
HDR
Despite the apparent fog, I've decided to head out since I've been sleeping on and off all night and found myself quite awake in the early hours of the morning just before the sunrise. I headed to seaside to the (usual) gazebo. As I was walking to the gazebo, I've noticed some scattered clouds even though faint ones, and I thought they are a good target for long exposure with the gazebo in the foreground.
Ironically, however, as I was settling down with my stuff, the fog accumulated by the time I've finished the configuration for the camera. Slowly, my thought developed and decided to do a HDR but in a long exposure format. The configuration was as follows:
  • White Balance is set to Fluorescent, to add that bluish-pinkish atmosphere. My favorite WB for early hours of the morning and evening.
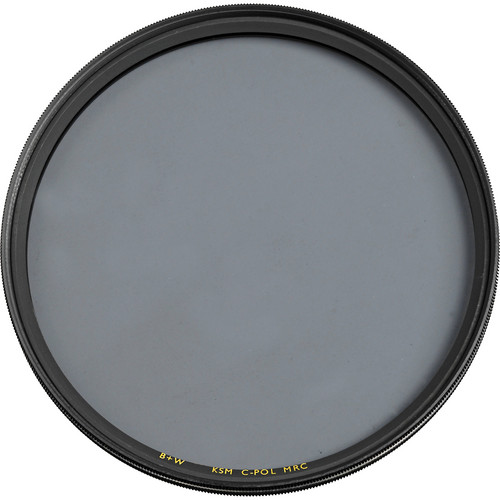
  • A polarizer was used to darken the sky (t this point I didn't notice the fog was accumulating).
  • An adapter ring for filter was fit upon the polarizer and a 3 stops ND filter was fixed on top. I've used only one slice of ND filter in order to avoid any unnecessary color tints with such experiment.
  • Several shots were taken with different exposure times: 5, 10, 20, 40, 80, 100 seconds.
Banding while tone-mapping
Source: B&H
When merging this HDR, however, I had to face other technical problems. It seems that the usage of a polarizer with HDR is not a good idea of some sort. As tone-mapping process went on, the image showed some hard banding in shape of circular or semi-circular lines all across the image. Having in mind that my new polarizer is of a circular type (as the specs say), I do feel that such banding is caused by the polarizer and not the rising sun behind the fog (and it was faint light after all!). To overcome this problem, I had (and probably for the first time in my life ever) to use the Highlight Smoothness slider in Photomatix when tone-mapping; and to the max.
This image, Eerie, after being over with, did send a chill through my spine. Maybe lot of people would call it a failure because of the blurred appearance, but the atmosphere and the blur itself made me remember the mysterious aspects of life, those Agatha Christie's novels, and Jonathan's The Last Crown game. I was simply not in Kuwait for moments. I'm in love with winter even more.

Geltani:

The work, or should I say, the thought, is still going on to digest and produce some aspects of the new conlang. I've decided that since Ayvarith, as a conlang, is already a conalang based on memorization of words at most, so may Geltani be. This is the resolve the issue of confining the word into either one or two characters altogether. It would take a trial and error to find a suitable division for the characters I believe - and both might be suitable as well. Also, I'm not intending on explaining how I did derive these strokes of lines from Arabic, thus I think there is no need to systemize the conlang in the eyes of foreigners.
One big issue now, which stands off like one big rock on my way that baffles my thoughts, is Arabic words of similar letters and different vowels. As an example:

Root: R J L
RaJoL = Man
RiJL = Leg

The vowels are in minuscules here, since usually they are not written in a regular Arabic text in modern times except in times where some elaboration is needed. Since Geltani is based on the letters (consonants) without the vowels, how am I going to implement a method of differentiation between the two words? I might go around this problem by substituting one word for another that has a similar meaning but how long I can keep this practice with a vast language like Arabic? Digging for answers in my thoughts seems to be a hurtful process for the mind!
Another idea occurred to me is to add sounds to Geltani that are Semitic in nature, and this might help a bit for making more diverse sounds giving chances for more different dual-letters (as I called Leading and Driving in previous posts) combinations. It might also create a weird sounding language and might, just might, attract some attention when the language is Chinese sounding but with Semitic sounds in between.
Plural, for the time being, might be composed by a repetitive mean of the last syllable in the word. Meanwhile, on the grammatical front, I think the first step is to start a sentence with a verb only. 

Finale:

Source: Amazon
A book that I've ordered since 2011, has finally arrived few days back. There were some delays in its publication which was supposed to take place in 2012. Anyway, the new book arrived in a time with so much pressure on my schedule, and since I'm a book-worshipper, I find it as just another obligation. I'm trying hard to divide my time at work to read and to work on Geltani, and sometimes chasing after some other duties, specially those for the group.
Seems, however, that being busy most of the time is good somehow. Making my mind busy with ideas and plans rather than daydreaming, or even using daydreams to organize my thoughts and enhance my planning - even though I get those limitations with my exhaustion and my body's behavior. It is, however, times like these that I'd wish for a patting hand or a supporting shoulder. Even a German engine needs some rest from time to time...
Sometimes though, I would stop and look back and see all the things and the steps taken alone. An ecstasy of pride occupies my mind at times, with a sense of pity deep at soul in other times. How would it sound or feel, if I did have achieved what I've achieved already, with someone holding my back? Am I really strong enough?...

Thursday, January 17, 2013

Infra Me, Infra You, Infraday...

Things are getting busier and busier! Not sure how long it will last but seems that January is a season for many events locally. The photography group seems to be chasing lot of butterflies in all directions, which makes me fear a bit for its well-being. However, I'm not forced to go to all of these events, but I do have my own share of load of things to do for the group already.
Kuwait University (Kuniv) presented a personal offer to me to represent myself with some of my photos in a special expo dedicated to the youth with the beginning of the second semester at January 27th. However, I've informed the organizers that I'm a member in a group, and it is better to have a group of photography presenting itself rather than a single photographer; that will provide a high potential and provides a greater number of photos. On Tuesday we paid a visit, the group's leader, the chief organizer and myself, to the place and the leader seemed to like it and we are in already. What's left now is a burning engine work to filter and provide photos (and print) - and who knows, maybe add some digital media since there were some usable flat TV sets hanging.
The location is awesome in architecture and I'm really considering doing a panorama inside when possible.

Infra:
It had been almost 2 weeks since I got my infrared filter and I'm still doing experiments on this venture. The experiments done so far were mostly... silly, if I should say.

InfraCandle
Canon EF 50mm, f/1.4, 5sec, ISO 100.
One of the simplest trials was just to light a candle and try to snap it. My aim was generally to see the type of patterns, if any, that a flame might produce under infrared. The image was later converted to black and white and some adjustments followed. Probably a significant attitude for such images when converted to black and white is the abundant of the gray tone - and sometimes a fuzzy feeling to it related to the focusing shift when doing infrared photography (did you not notice a red dot on the focusing ring on your lens?).

InfraCoal
Canon EF 100mm macro, f/5.6, 30sec, ISO 100.

Long story short. When talking about infrared filters (with unconverted cameras), then we talk about tripods as well. One night after coming back home I've encountered the family gathering around a typical coal tray and grilling (or frying) chestnuts and hamburgers and sausages. Since it's hot, I've directly brought my camera and fixed the infrared filter and tried to capture something with it. The view is abstract of course and my aim was to try, and not to create art by any means.
You might be wondering why 100mm macro lens, well, simply put, this is to stay away from the coal and its heat and also to frame the coal only. I've tried the 50mm but I couldn't achieve the same framing, while it kept me close to the coal and its heat. After uploading the image, first thing was to settle the white balance to the completely red image. After doing some reading online (specially at www.infrared-photography.co.uk), I've started to formulate some workflow aspects for such type of photography. After the white balance is set (which sometimes doesn't change much) I've reduced the red saturation which left some areas as white while some as magenta or orange. Contrast and Vibrance were added slightly too.
In Photoshop I've tried to swap the channels (red and blue) to create a look that is similar to those colored infrared landscape shots, but here, with no sky or anything, the red was simply replaced with blue, and I didn't quite like the new look, so I kept the original as is.

Meanwhile on The Moon
HDR

The journey with my infrared filter continues when I tried to combine it with the polarizer and also do HDR on the beach one morning. Sometimes I would face hard time focusing so it is time to raise the ISO to max, focus and measure the exposure and push it back to ISO 100 and do the calculations, but in early morning hours when the sun did shine already it won't be much a hassle after all - yet it is considered a long exposure of some sort.
When processing Meanwhile on The Moon, I've tried different approaches to the RAW files taken in brackets to produce the HDR:
  • Merge the originals into HDR and tone-map them then.
  • Convert each RAW file in a similar way as it was done to InfraCoal, and save the files into TIFF, and merge into HDR from there.
Seems, however, that the second approach is more feasible and more pleasant. I have to do more research on this aspect. That session from the beach still has some (normal) images that I didn't process yet - I've just remembered that while typing these words!

Blind Me!
In some effort to create some new images, specifically as a homework for the Philosophy of Light workshop, I've tried to create something; anything.
Many ideas raced through my mind and eventually settled down with an idea of a light bulb and a water drop. I had my plan for the water drop specifically to make it hanging in the air but I ran out of possible capabilities to make it so, and hence I had to drop it for the time being.

InfraLight
Canon EF 50mm, f/11, 0.5sec, ISO 100.

Since I'm at it, I've decided to take a picture of the light bulb with infrared filter. It was not much of a design or anything, and when I tried my 580EX II speedlite, it didn't quite effect the lighting drastically. I had to work a bit with dodge and burn in Photoshop to emphasize the edges of the light bulb. Significantly though, the infrared filter reduced the halo around the filament of the tungsten bulb without the need to use a high-shutter speed, as it was done later in Lighting Through.

Lighting Through
Canon EF 50mm, f/3.5, 8000-1sec, ISO 100.

After playing around with the infrared filter, it was time to get serious a bit and start my speedlites: 580EX II and 430EX II. In the beginning I've tried to use the manual mode, but I've realized it is hard to control it in such conditions, specially with such high speed. So, directly, I've moved to E-TTL. mode. The 580EX II being master and 430EX II being wireless slave, I've tried to change the power of the speedlite by controlling the aperture, after finding that a slight change in the shutter speed had some catastrophic effects from both, the speedlites and the bulb itself. The location of the 580EX II was fixed on the right side of the bulb while 430EX II was carried by hand and always changed while taking many shots and trying the polarizers to reduce the flare on the glass. In the final result, Lighting Through, I've cloned out some flare as well. Using the polarizer filter with flashes is hard specially that it does not have an indicator of the direction of polarizing, while using the polarizing sheet on the flash head while not on-camera, it is even harder to judge to what angle the polarizer on the lens should be. Anyway, the final image was emphasized in contrast in Photoshop by setting the Black Point in Curves layer to eliminate some light noise around the bulb (and had to use layer masks to confine its effects). Dodge and Burn were used again to emphasize the edges of the bulb. In this final image, the 430EX II was on top (and close) to the bulb and tilted little bit toward the camera's direction (to avoid casting light on the black board as much as possible).

Lingua Aevarica:
In the meantime, I'm trying so hard to organize my time but to no use. I think I should probably finished reading some of those books before I get my time re-ordered in order to work more with Geltani and Ayvarith. As for Geltani, it is a not-yet-finished business with its syllables and some basic grammatical structure of the language and its script, while for Ayvarith, there is always the matter of establishing a website capable of holding my media files (images and sounds) and also working further on creating something new out of it. My love for fantasy and conlangs is almost a match for my love for my camera and photography - it is the first thing why I've created this blog in the first place after all! It is just sad that I can't do much about it for the time being. I have to make some plan, but how, I'm not quite sure. I think photography did suck me in greatly that I've paralyzed other areas of my life, like the conlangs and the poetry. Now imagine how my life would be if I was married already. Simply, dead.


Thursday, January 10, 2013

Game Time!

Ouch, Ouch, Ouch. What a fast and a busy week it was. I miss sleeping so much like a lover missing his heartthrob! I'm missing this opportunity even on weekends (but that's not something new).
My schedule had been busy; so much that I barely had the time to think about my camera and process new images. However, I had the chance to test my new toys a little bit - yet more testing is needed. More to come about that later.

Splashing:

Dimensionality
Canon EF 50mm, f/16,
60-1sec, ISO 100.
By last week we had one of our first practical outdoors workshop in part of the Philosophy of Light workshop with the group. The appointed location was Shuwaikh beach area. The day was windy and really refreshing. While everyone was struggling with jackets seemed to be I'm the only one who was satisfied with a T-shirt!
I was the first to arrive and started to work straight away with some shots of high-speed flavor trying to freeze the water splashing on the rocks. But soon I've moved to long exposures and ND filters.


Nature Paints
Tamron 70-300mm @228mm, f/40,
0.5sec, ISO 100.
Maybe the exposure in some of these shots didn't exceed 30 seconds but it was hard to achieve even a one second exposure with the sun being tough. I ended up setting up 6 stops of NDs in front of the Tamron lens and trying several shutters. I've cut back to do more high-speed shots and then back to long exposures, and then was able to achieve 8 seconds (mainly because the sun was approaching the horizon and level of light was going down), but after all, I've found out that a half second is just fairly enough to give a surreal look. With the waves being so strong and splashing against the rocks (and almost made me have a full shower too!) it is not necessary to make very long exposures. Even times less than half a second might be quite enough to give the desired look. Lengthening the exposure time with strong water waves would erase most of the features on the rocks and too abstract. After exhausting all my options with the waves, I've simply stood up on the concrete barrier and started to shoot with minimalism in mind as in Dimensionality. To me, at least, this image seems a breakthrough because it is a simple structure, but yet has a depth with a vanishing point in the horizon. Maybe I was lucky? One bad thing back then though is that I didn't get my polarizing filter yet.

Der Sanfte Zorn
Canon EF 50mm, f/1.4, 8000-1sec, ISO 100

Let's Play!

My new toys have arrived with the beginning of this week, and I didn't have much time to test them thoroughly, but few clicks here and there.

Source: B&H
One of the toys that I was eager to try and learn about is the Infrared B+W glass filter. Even though my camera is not converted (i.e. sensor adjusted to receive IR radiation), yet after some surfing about the topic a bit, seems the only problem with this is the long exposure times required, while the converted cameras would react normally with normal exposure times as in normal cameras. This is what I understood so far.

Canon EF 50mm, f/1.4, 200-1sec, ISO 100

The title-less image above was captured as I was waiting for the TV crew who were supposed to do an interview for a program on TV with the group's members. As I was waiting I've decided to try some aspect of this filter and even it was hard to be done without a tripod. One of the hard things to do is to match the exposure metering done without the filter to the exposure metering after fixing the filter. In a quick inspection seems the difference is 4 stops. However, such calculations are not quite correct, because the type of the light to be received by the sensor (specially unconverted) is completely different. I imagine metering the light and doing a correct exposure would be done nicely only when the camera is converted, or maybe if there are special light meters that read IR only and compare its level to 18% gray!
The image above looks a typical black and white shot (after being converted from a completely red image), but certain details made me think it made some difference, like the details of the tiny clouds (which were hard to notice in reality) beside the building in the horizon on the far left which looks hazy.
I'm reading more about it for the time being and seems I could achieve more interesting shots by adjusting the white balance instead of converting to black and white. This is what I've inspected by reading so far.

Source: B&H
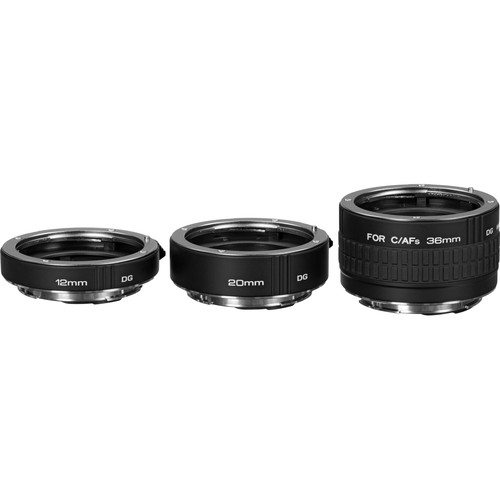
I didn't get the chance yet to test the polarizer thoroughly, but I got a little chance to test the Kenko extension tubes set. Extension tubes works by allowing the lens to focus in a distance closer than it is on the original lens.
After doing my part with the TV interview (which barely went on well), I've stayed away doing my own trials with the extension tubes on some plant leaf. It is a hard task to shoot with such degree of closeness and zooming without using a tripod of course.

Lamellae
Canon EF 100mm macro + 68mm, f/8, 25-1sec, ISO 100

I've found it mandatory here to use the on-camera flash to fasten the shutter speed and reduce the shake effect. In the beginning I thought it won't work because usually with such long lens combination, the on-camera flash would cast a shadow on the subject, but probably not here in such close distance. It could be time to use rails (or maybe some parts of my VR-head) to move the camera smoothly on the tripod for- and backward.
This test is still not enough, and I'm eager to implement this with reversing lenses technique and see what effect does it yield, specially with my new 58-58 adapter ring which arrived along with the new toys!

Reality of Shadows
Canon EF 50mm, f/1.4,
50-1sec, ISO 100.
Away from testing the new stuff (and mainly because it was night time already), the TV work was not over by then and boredom filled my head. Yet, my eyes weren't.
I noticed some decorative plant in one of the corners which inspired me for some shot with a shadow, but the problem was that I didn't bring my speedlites, thus, I had to use the available data-show device with its blue/purple light and projected it onto the pot or vase from the side (after hardly stabilizing it over a couch!).
Maybe what I personally like about Reality of Shadows is the fact that I've used the Fluorescent WB to add more bluish streak to the already-blue light. Yes, I needed to adjust the WB little bit later and reduce/add some saturation for some colors, but the starting point was fair enough. No HDR rendering.

Now for the coming week,  I might have some plans, and a busy schedule too. For sure I need to test more procedures with the IR filter. On the schedule, there is giving my own tips about Photoshop in a special session; it is not a paid service of course, but a friendly help. Also on the schedule, there are plans to get involved in more local expos, and one of them is supposedly sponsored by Kuwait University. Bearing such responsibilities do feel heavy though. A shoulder for a burdened head, is all what I would ask for in such days...


Thursday, December 27, 2012

Stranded...

This week took off with some busy rhythm going on. Not enough sleep and time seems slipping away. Ironically, the first thing that takes over my time (and power) is my work itself. If I can grant no rushing on the roads every morning, I would have slept more and went to work like the others do, but no, I have to be awake before everyone else.

The past week was a week of showers. Kuwait received some nice amount of rains and some areas were even flooded. It's weird for such a dry place like this to get flooded in such a way! Lot of people though get melancholic feelings for winter time, but all it takes for me is something green, and a window with some rain pouring outside.

Halb Grün, Völlig Grün
Canon EF 100mm macro, f/11, 8-1sec, ISO 100

It rained one night heavily and the next morning the sun was shining outside but with some damp feeling in the atmosphere. I couldn't resist the green that shows from my window (which is covered with a green curtain as well) so I decided that I must do something about it. The result was Halb Grün, Völlig Grün. The image had been tilted for around 10o to fix the diagonal line to be dividing the square evenly when being cropped. The image itself is in fact a compound of two shots of different focal points: first image with curtain in focus and trees out, and the second is the reverse. Some cloning and fixes were needed later to adjust the not-so-perfect blend from Photoshop itself. 

Starting from Monday I've started my new workshop with the group, entitled Philosophy of Light, which will discuss supposedly the creative aspects of controlling the light in images. I'm not sure how many days it will take, but I think I heard them say it's 5 days long. My teacher had been inactive for some time because of his daughter's illness. Pray she's alright by now.

My Teacher Mr Bahaa Al-Qazwini in first day of the workshop

In the mean time my mind is empty of any ideas to photograph, but on the other hand, I'm sitting here waiting for some new toys to arrive at my hand. Let's call it my own gift to myself (since there's no one who would give it to me anyway). This time my toys are of the light (weight-wise) type.

Source: B&H
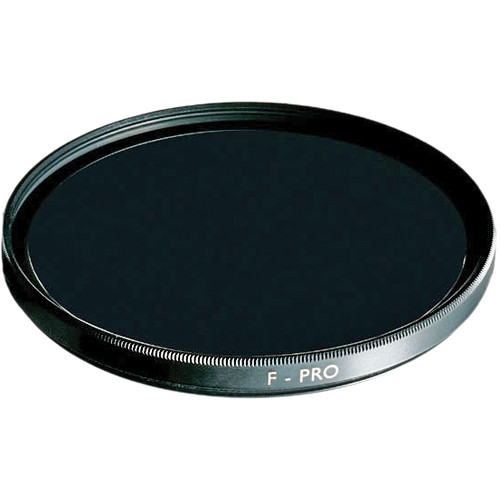
My first toy would be the B+W 58mm IR Dark Red (092) Filter. In the beginning I was going to order a Hoya Infrared filter first because it was cheaper, but then I've noticed the specs which say it is for infrared films
, and since I'm new to this with my digital camera, I decided to head to another filter. The B+W is almost double the price but seems to be working with digital as I've figured from little research online. It is not expected to be working extremely good because, as I've reckoned, it would be better to convert the camera by removing the protective layer on the sensor to receive IR radiation. Even though it is said to be an easy process and harmless, but I'm not into any risks right now. I did a simple test with my Canon EOS 7D and a remote control and found out that the remote's LED was blinking while I press its buttons, so I assume this filter will work with my camera for infrared photography to some extent.

Source: B&H
My second toy would be a polarizer. Finally. A polarizer, with no sheet cutting and fitting in front of the lens, but a 58mm polarizer that fits the lens perfectly. The B+W 58mm Kaesemann Circular Polarizer MRC Filter is, according to the specs, said to be made of a special type of glass and a special polarizing technique. I'm not sure how that works anyway, but the circular polarizing as they say works with autofocusing more than the usual linear polarizers do. I believe this piece specifically would do me wonders with long exposures. I need it badly right now!

Source: B&H
My third toy is one of the funniest as I believe. The General Brand 58mm Macro Coupler
is a ring that enables you to connect two lenses in reverse. It is an old technique for achieving a macro level. Maybe you wonder why all my stuff are in 58mm range, it is simply because 3 out of 6 lenses I do have, have this diameter. In fact, I was able to simulate this procedure but I will come to that later.

Source: B&H
Finally, we have here a set of toys. The Kenko Auto Extension Tube Set DG for Canon EOS Lenses is a set ot tubes to help with macro shooting by shifting the focal plane further away from the sensor, thus allowing for a closer approach. I believe combining these with my Canon EF 100mm Macro lens would yield great results. These tubes are supposed to support AF functioning as well but even with my 100mm macro lens alone, I do have a problem sometimes with focusing and I must resort to manual stuff. However, better have AF capabilities after all rather than manual; 2 are better than 1!.

Reversing lenses experiment at home.

I've mentioned before that I've ordered one cheap macro coupler where two lenses are attached in reverse order and connected to the camera allowing for closer shots. I've done already some time ago and also this week but with my Tamron 70-300mm which has a diameter of 62mm. Since I have only one 58mm adapter ring and one 62mm (and one 52mm) I can't reverse two lenses of the same diameter (like two 58mm lenses) - hence, I've decided to reverse two of different diameters: 50mm lens, and 70-300mm lens.
I've simply connected the adapter rings that I use to carry the ND filters, and then combined the lenses in reverse as you can see above and held them together with hard paper clips. Tried an experimental shot with a tea spoon and it was sort of hard to adjust anything but merely the distance of the subject.

The result: the handle of tea spoon

From this simple experiment I've drawn some conclusions about this process, but I would still need to do further experimentation with this method - and it would be easier with a macro coupler.
  • This method would do better when applied to manual lenses rather than auto-lenses, because then, you can control the aperture on each lens solely.
  • I still don't know if extending the zoom of the Tamron lens would increase the magnification factor. The image above was done while Tamron lens was set to 70mm.
  • Because of the bulky setting, it is better to move the subject rather than the camera and lenses, but then it would require some guessing somehow if one person is operating the whole thing. In my shot above, I asked my brother to hold the spoon (and he was shaking as well) and I moved the camera back and fro as I was shooting on high-speed. Later on I've filtered the images and luckily I got this one.
  • Maybe it is better to fit Tamron lens to the camera and Canon 50mm reversed on that. I think the circle of light or harsh vignette is caused because 50mm has f/1.4 max aperture, while Tamron's is f/3.5, and because of that the smaller aperture of Tamron is projected into the Canon 50mm and then into the sensor causing a peek-effect or whatever it is called!
  • Focusing is somehow something to forget about. You have to depend solely on the distance to the subject.
  • I'm not sure that increasing the f-number on the main lens is useful to increase the depth, but I'll try it later when possible. 

All of these procedures now are somehow tempting to go deeper further in the field of macro photography. Maybe we don't have much of a wild life around here but of course it is not confined to such field. Macro could be done to almost any subject when inspiration strikes. I'm more into architecture and panoramas, but yet into abstract as well, and macro photography gives a good hand in this.


It feels now a bit like stranded now. I'm not sure what's my next move, and I do have an urge to increase my income somehow but I don't know how. In the same time I'm outraged for many things in my life. I feel my work position is not respected by the admins there, and flashbacks are visiting my mind often lately to remind me how much I suffered for others but then left alone. I have a firm belief now, or maybe I have to believe, that one day, all of that will pay off in some way - the least I'd be asking for is, a peace of mind.

Thursday, August 30, 2012

The Race Begins...

Well, first week after Eid now and my engine is still greasing. I've enrolled myself in a workshop with the group now concerning the Manual mode and the Bulb mode techniques. Even though I've been using these two for some long time now, but I need to know where am I standing, and most importantly, my teacher would slip some info here and there that I would pin them down in my notes. That, and I'm still trying to figure out some concrete method to cool down the sensor during long exposure. The temperature is going down gradually here in Kuwait (but I think it is still too hot for people outside!); instead of 38oC at around 6:00 a.m., it's becoming 25oC~28oC around the same time! This might give a good indication for some "safe" long exposures at night. Also, I'm considering the typical and traditional methods for long exposures, or should I say Segmented Exposures, where many small exposures (20sec~30sec) are taken successively and then blended. This method would of course reduce the noise dramatically (reduce, not eliminate), however, some aspects would be lost like clouds movements at night (which I happened to capture once only but was severely affected by noise).

Rosco Polarizing #7300 Filter
17x20" Sheet
Source: B&H

However, there is this one experiment that I've tried using pieces from the polarizer sheet that I've ordered some weeks ago. I've done this experiment at work during Ramadhan but I've completely forgot to put it down here.
The setting was simple: on-camera Speedlite, and pointed directly along the camera's axis (i.e. camera and flash pointing in same direction), pointed at the window in my office with its metallic frame.
I've took turns in putting the polarizing sheet on the Speedlite once, then once on the lens, and then on both of them. Notice that the polarizing axis for the Speedlite and the lens must be perpendicular (i.e. one is horizontal, while the other is vertical). Shooting was done in AV mode, at f/16.

The window without any flash

The window with direct flash

The window with flash and a polarizer on flash (horizontal)

The window with flash a polarizer on the lens (vertical)


The window with flash and polarizers on flash (horizontal) and the lens (vertical)

As you can see, the flare and reflection from the metallic frame of the window just vanishes as if by magic! Now, of course this is not a practical solution when it comes to shooting in open air, like a lake for example, but it would be a good trial for a studio I'd say. Cheap solution, and it works!

One of the weirdest problems that I've encountered a week or two ago, was to frame a side shot of my brother's eye. Well, might not be so weird for some people but for sure it was weird for me. I'm used to frame lines and shapes when it comes to abstract and industrial shots or landscapes, but faces? This is something I've never encountered before and proved to be challenging a bit for me.

Gaze To Future
Canon EF 100mm, f/2.8, 400-1sec.
ISO 800

Well, pardon moi he is not Miss Universe but, oh well. The space in the image allowed me to crop it in a squared frame, and I was free to move it around in such a way that I might put the eye and nose on the left side (and showing more cheek skin) or, as you can see it above. Particularly, the shapes of lines here amazed since I'm not used to study the human face in terms of abstract lines, but here it is sort of obvious - we have the eyebrow which shaped almost a flipped check mark, and the eye which naturally forms a triangular bracket (>), beside the nose of course which forms a curve. The struggle was to decide whether should I make the nose tip touch the left side, or should I let the upper right corner being touched with the eyebrow line. As you can see I picked the latter, because it serves a clearer idea better - the future. Well, he was watching TV but it doesn't matter, does it?

I'm into some activity now with my photography group, and as we have finished already a meeting on Tuesday, it is officially announced that the coming period will be somewhat intense and serious. The plans for now are to get pronounced work and to get involved in more public activity with our photography. It does feel like a burden somehow and scary, but what do I have to lose? I don't know yet...
On the other hand, I've enrolled myself in Techniques workshop within the group which discusses topics like the Manual exposure mode, and the Bulb mode with other things. On first day, our teacher, and after some talk about the ability to see, he had assigned a homework to us to take one image only and bring it the next day.
It was hard to decide what to snap with my camera but in the next day I've taken my backpack with me at work and suddenly I got the urge to shoot the hypothetical shade which I've shot before - but this time in different angles.

Triangularia I
Canon EF-S 18-55mm @28mm, F/6.3,
250-1sec, ISO 100.
I did take many shots in fact but I think only two that got my Likes at the end. The sun was harsh and I had to pick up some specific angles to hide the sun. In Triangularia I, for example, the sun was up and behind my back, but blocked by the building side, which I was leaning on to support my body as I was bending my knees and going down while pointing up. I've used here the on-camera flash just to put on some light into the shaded areas. The background behind the pipes is not to my liking but I think it is one of these situations where and when you simply can't help it out. Just click, and go! I've tried to use the minimum f-number as possible with keeping some sharpness to the bottom triangles since they are far away from my point of view, yet that didn't help much with blurring the background after all - notice that the f-number would also control the amount of fill flash.

Triangularia II
Canon EF-S 18-55mm @24mm, f/4.5,
250-1sec, ISO 100.
On the steps of George Barr here, I've tried to wander my head around me taking the subject from different angles and trying some tricks of illusion, if I can call it so, and came out with Triangularia II. The semi-hexagonal formation is in fact formed by two layers of pipes but I've tried my best to align them in a shape of a hexagon. Some fill flash from the on-camera flash was added too, and I should thank the ProPhoto color space for providing such blue sky, since the original image was dull. Well, some people liked it already, but I do prefer Triangularia I despite its distracting background. Maybe because of the complexity of the design. This is intriguing as I also do believe that simplicity has the priority in the photographic design. But there are shots, however, that do serve certain ideas, like Apocalypse.

Apocalypse

Apocalypse is not particularly a single shot, but the devastation in the location served the idea (and hence the name of course!). Some people did make a note for me that the view is disorganized, and I've made it clear that the idea is about devastation and collapsing. Now, to have an organized image that expresses devastation, THAT is a challenge indeed. Worth a while of thinking. Triangularia I might be complicated, but yet it is organized, and maybe that's why I like it more despite its complexity. I guess I can draw a conclusion here and say: Simplicity, is not a priority. Order is.
Now, after these simple shots, I suddenly got the urge to do a panorama from that location... but the time is critical because of the sun's movement so I have to think about it for a while, and make some notes about it!

One of the notes that brought a new concept to my attention is what my teacher said about one of my images, as we were training inside the meeting room.

Stalking...
Rokinon 8mm, f/3.5, 0.8sec, ISO 100.

The image was taken as our teacher asked us to take pictures within the room itself and not wander outside. It was a training for the eyes and to come up with an interesting look and view that a regular person would, usually, not think of. After taking several shots from some corners, I've found this gap between 2 chairs appealing and with my vision with the fisheye effect, I've shot from there, in between the 2 chairs. What my teacher said when he viewed the images later was alerting, if I should say.
He said about some of my images (well most of them in fact) that they are a product of Lens Capabilities, while the image above, it is better because it is a product of Photographer Capabilities. The surprise for me here is that, I always thought that the two are complimentary or united together. When I work with a lens, ain't I supposed to know its capabilities, hence what view it can provide and that would aid me in visualization for the next shot? I need to check more on this concept. The image above, for example, occurred to me because I know how the fisheye distorts the view and automatically I thought this angle is more suiting for such a view and more expressive. I don't think I would take it with another lens. How would I separate the two? Do they work alone in some instances? It needs some deep thoughts here. Maybe the deciding factor is: which thought comes first - what lens to use, or what angle to shoot?

Well, beside all this fuss now, I've been re-discovering my shots from Ireland specifically and I do have some fondness for Black and White (tinted and not-tinted) and I can say there had been awesome shots that I've never thought of before in black and white (and didn't like them in color). Just for example though, I will post 3 images here of the same image, and I do like all of them...


Junglaria - B&W

Junglaria - tinted B&W

Junglaria - color

This is just a sample from the many many images that I've been re-processing in order to upload them into Flickr. The statistics from the committee of the group stated that I'm the number #1 contributor to the group's photo pool on Flickr, so I have to keep on the trend until the time of my travel.
One month is left and off we will go in a long journey - and a tiresome one too! Wish me luck...