Showing posts with label flower. Show all posts

Thursday, December 22, 2022

The Twins…

The weather is getting colder and colder (and makes me happy that way despite other things in my personal life)! It is time to prepare for some morning walks if possible, so we'll see to that.
In this quick post, I'm keeping up with the trend of macro shots, but this time, I'm going "extreme" macro, as at this point, I've tried to shoot at 5X, but this time, indoors. I hope the bougainvillea in the yard forgives me picking up one of her blooms!

Twins

Well, for this post, I will start with the "second" experiment and then go to the "first" because the second experiment gives a general outlook at what has been shot in the first experiment; Does that make sense? Hope so.
The story here began with picking another flower from one of the bougainvillea we have in the yard (hope they forgive me for that!) and started to shoot it indoors. This time, though, and unlike the flower in the previous post, the little white blooms of the bougainvillea were wide open, so I thought it is a good target. Since I need stability, I had to pick it and do my work inside.

雙胞胎
(the twins)

As I said, I will show those shot in the second trial before the first. Here, The Twins was shot using extension tubes (36mm) along with 50mm lens (typical). The image here was made soft on purpose (using the Clarity in ACR) and more softness was added later in the post-processing phase in Photoshop. Shooting at slightly different displacements made it also possible to create a 3D anaglyph!

The Twins (3D)

You might notice a horizontal flipping here between the normal and the 3D versions. Well, the 3D version is the original orientation. For some reason, I've felt that flipping the normal one was proper and going smoothly from right-to-left (maybe because this is how I read even though I'm reading English text more than I do with Arabic actually). Anyway, it just felt more normal that way for some reason!

So, at this point, this little experiment finished, but as i said, this is the second one and I will go through the first experiment now. I've actually made some artistic version(s) of this shot but I don't think I'll bother much about them for now.

Extreme

The first experiment, and the one for which I've actually picked this (poor) flower, is to do an extreme macro shoot, using focus stacking methods, to go deep into the flowers. Anyway, I have to say this now, I'm quite disappointed for the final results after all, but since it is a work that I've done and spent quite some time with, I guess it is worth of posting here. 

BouganBloom

Artistically, I don't think it is much to consider. Challenge-wise? Too much to bear with! Despite my initial plans to go at 5X, but I've pulled it back (for details sake and to have it slow this time) and shot the whole thing at 3.2X, and stacking about 211 shots (yes, two hundred and eleven). Despite this, there was still some gaps or artifacts when the stack was merged. I've actually tried many methods for stacking using other programs (e.g. EnfuseGUI) but all my trials failed in having a proper stacking blend. Maybe the best I could do in some of these programs is to align the images. The problem with Photoshop here is the consumption of memory in the process (same thing with panorama stitching). It made me doubt the process of shooting the stack and actually I've decided to get a new rail, which turned out later it's not the best option, but this is a story for another time for now (and I might do a review post and a comparison to my old rail), as I got that rail after all of the fuss done here. So, in a nutshell, I had to go back to the ol' Photoshop to do the stacking and the blending for this stack and you might notice that BouganBloom is cropped out of the 3:2 ratio, as I had to do it that way to keep artifacts or points that didn't blend properly out of the image but the blend is still not quite that good in general. Many of the details in BouganBloom were kind of "extracted" by excessive sharpening. Maybe new editions of Photoshop did fix all of these issues? Maybe it consumes lesser memory than my older version here? I'm really not sure about it, since I've never used one. 

Anyway, at this level, my work was done with this poor bloom, which actually had to be done quickly since the whole bloom withered and "melted" down few hours later and wasn't suitable to be shot further. I'm still planning to shoot some stacking in the future (specially at 5X which was supposed to be done here) but I'm still on the look for some good target to do so. The new rail kind of disappointed me but anyway it was comparatively cheaper and maybe it has other uses; Not all wasted I guess.

Finale

In the past few days I've spent a considerable time preparing for a special post about the Arabic Language day (December 18ᵗʰ), and actually ended up 9 of them so far, but I don't think I will be posting them here. They are, however, available on Instagram. The link leads to the English post, but it is available in other languages as well (Russian, Chinese, Japanese, Korean, Irish, Turkish, Farsi, and Greek), and I've tried my best to get over the randomness or faulty translations provided by Google Translate. Anyway, maybe I didn't succeed much with that, but I've tried!
The thing is that, in creating this post, I've thought quickly about doing light painting in some dark room (which I could barely make or use in the house). This actually made me think seriously about doing more light painting in the future. I had some humble trials in the past but never took it seriously. On another note, my phone does have a "light painting" mode which various options (using AI) which I've used before and it can create some interesting images indeed, but it lacks the flexibility in other things (mainly focusing and shooting in RAW for this purpose), yet it can come in handy at some point too, but my focus for now is using the DSLR to do the work. Not sure where I'm going with this though and I don't have quite have a specific target but we'll see if creativity kicks in (or something kicks me in).

On the mental plane, every day seems to be an occasion to hit a new low. In the past few days I've come into almost complete isolation (even online). I had the urge to talk, but there was none to talk to, literally. Gone are the days of those chatting programs that offer random people to chat with. I miss these old days, they definitely filled such a gap in my social life (which barely exists). Having a random chat like now on social media would sound more like stalking.  Nevertheless, I have to keep this isolation for the time being because I need to sustain some mental peace and health away from the family. They say to surround yourself with good vibes and positive people, and I just can't stop wondering how this is possible at all? I can't find it, I can't reach it, and I don't even know where it lies. All I know is that I just wish I had my own place, somewhere far, far away…


Thursday, December 8, 2022

Sisters…

I'm posting this late, I know. But things were forced upon me actually. I've tried to finish it for Thursday but I was struck with some ailment (stomach bug probably) that kept me awry and exhausted (more than before) most of the time. Luckily though it all happened after I've already finished my post for my Arabic blog (phew!). Anyway, as I've mentioned in the previous posts, I've been working on some macro trials lately and I've already posted some pictures previously, so this one is actually a continuation of this trend.

Sisters

After trying to shoot some macro outside in the open, and without a speedlite even, I've decided to take a step further and actually do it indoors. One of the reasons that I don't like doing macro indoors, specifically with plants, is that I would most likely need to chop or pick something to work with indoors. These pots are quite heavy and dirty so picking them inside is not an option at all! However, for art's sake, I've decided to break "some" of my principles this time…

粉红手指
(the pink finger)

So, for starters, the first question to answer was: How am I going to let he flower stand. The bougainvillea flower is quite small and the inner parts are, of course, even smaller. The solution came about in the end with (drums): … a can of PRINGLES! Yes.
Unfortunately, I didn't shoot the setting as i would do usually (with phone) as i work in a hurry a bit because with such flowers, I guess things would go pale quickly and I have to do whatever I can, racing time. I've just pierced a hole into the plastic cover of the can and let the stem of the flower go through it and that's it! 

Details Oriented

In this trial, as far as i remember, my trials to shoot at 5X ratio (or 5:1), using reversed Voitgländer 20mm lens and some extension tubes, all failed. Naturally, since I wasn't using a rail yet at this point. So, the rest of the shoot proceeded with extension tubes and my trusted Canon EF 50mm f/1.4 USM lens. Since the shooting is indoors (which actually is still slightly shaky because of the AC breeze!) but I was a bit free to shoot in HDR, without a speedlite of course. Both, The Pink Finger and Details Oriented are shot in HDR, but each has a different story, since each was shot in a different extension tube. Shooting objects or scenes in HDR gives a wide variety of choices for creativity that might follow up at a later time even. Here, The Pink Finger was shot using 36mm extension tube and when tone-mapped from HDR, I've tried to make it as normal as possible with a catch of rim light. Meanwhile, Details Oriented was actually a test shot and I didn't quite intend to put it up because it was shot with 20mm extension tube and contained a lot of background elements that were distracting. Later on (weeks after the fact) I've decided to do the HDR for this shot, and crop it tight, and work on suppressing the background as much as possible. I was able to make it pitch black but then I've realized that it might not quite normal that way so I've put down the opacity a bit. When tone-mapped, I've tried to add details via tone-mapping as much as possible (hence the title). Sharpening in the post-processing phase added even more structure to the whole image here. I'm still considering visiting these images now and then and see if I can do more HDR tone-mapping work differently to have different results.

三姐妹 (一)
(three sisters 1)

Then comes the part where I stopped using HDR bracketing and started to work with the speedlite to have more of a dramatic look. At this level I've returned back to using the 36mm extension tube and tried to get around the flower to find a special angle of some sort. The result was a series of 3 shots, of the same scene, but with change in the light directions. I've called it the Three Sisters after the three stems (or stamens) at the center.

三姐妹 (二)
(three sisters 2)
三姐妹 (三)
(three sisters 3)

Interestingly, out of these three, the first and the last had greater number of likes (specially the first) than the second. I'm guessing because there is some element of darkness and contrast in them more than the bright second version in the series. Worth noting here also that shots were taken at f/22 (maximum) and yet the petal in at the center in the background is slightly out of focus (as I've set the focus on the front stamen mainly). In the macro world, this is normal, and this is why focus stacking is used even with large f-numbers such as f/11 or f/16. These two values are advisable usually rather than using the max of f/22 because most lenses got their "sweet spot" for the sharpest image and least diffraction or chromatic aberration around these values, and as it can be seen, the depth of field is considerably shallow even at f/22. At this point, I didn't care about these elements at the back but my main interest was the stamen at the front, but if I was to take everything into focus, then I'd definitely need to do focus stacking (which I've tried later but that's for another post to come, hopefully).

At this point, I've finished the "experiment" but there had been other trials with this set, like shooting at 3.2X or even 5X but I'd call them a fail really, so no need to post them now. On the other hand, I think I will still check this folder to re-check the images (specially test shots) to see if they have some potential, and also to re-work the HDR brackets I've shot already and tone-map them in different ways, if possible.

Finale

At this level, I'm trying hard to push my creative juices forward a bit. Ironically, though I want to focus on using my DSLR, I often find myself switching to my phone because it is in my hand most of the time right now (starting with this habit around the time of doing my retirement procedures). I've also remembered a project or two that I was supposed to do and finish in 2021 and totally forgot about them. Let's see if I can just put my mind (and mood) into these things and finish them for good! Meanwhile, I also need to think of something to do for the Arabic Language Day on December 18ᵗʰ.

My physical health is recovering a bit right now after rounds of bloating and diarrhea, topping that with a tearing mental stress caused mainly by the people in this house. I think it is time for me to give up hope in fixing things here and talk about things are go wrong in this house; It's fruitless, and putting more stress on my back and unnecessarily causing more mental ailments, more than what I do have to deal with already. I guess this calls for more isolation in my room and to learn how to not give a damn, even when this house collapses altogether. Not sure where I'm heading to, but I do need a long rest, for sure… and a "home".


Thursday, April 14, 2022

Stroll IV (2022)…

So, I'm still up with my strolling posts. Meanwhile I'm typing also one blog post for my Arabic blog (about using Hα filter) and I was going to skip this week's blog post, but I've changed my mind. However, this could be a quickie one. The weather is getting warmer and warmer and soon I won't be able to go on strolls in the morning. In fact, as of the time of typing this blog post, the last time I went out to do experiments with my pinhole lens (and might make a blog post about it later, but I didn't check the shots yet at the moment of typing this), the flies then ate me alive and I couldn't bear with it longer so I had to return home as soon as possible after just about 20 minutes of strolling outside. The weather was nice, relatively, but the conditions were awful. Probably it's just the area I was strolling into. I'm not sure!

Stroll IV

So, this stroll is actually a continuation for the last stroll which was done with a UV filter, but this time using my favorite 50mm lens instead of 20mm. Also, as a destination for the stroll, this one was directed eastward from where I live, while the last one was done westward. And I have to say, the block next to us really blew me away. I think it has some great potential for future visits (when the weather allows it), and as of the time this is being typed, I've paid 2 more visits to that place with different filters. So, from now on, I will be calling it the Eastward zone! The stroll took place on March 11ᵗʰ.

ΟΔΟ

So upon walking Eastward, and just before entering the block I've noticed some trash outside, and as I always hold in belief: Trash places are treasure troves. This is if you are hunting for abstracts mainly, but of course it is not limited to that genre. In fact I've passed on this trash once more in another stroll which hopefully I will talk about in a post later.
What captured my eyes here is the geometrical shapes. My eyes was scanning for such abstracts. If you may notice in ΟΔΟ (and thanks for the Greek alphabet to give me the means to name this image!), the image here had been rotated clockwise, as I thought the triangle's apex gives some direction to the image better than being laid down (and pointing to the left). Of course the image had been cropped (and had to test various crops) and actually I still think that I do need to crop a little from the bottom as well. In the process as well I needed to test various colorization sets (or color corrections); Sometimes, Ultraviolet images can be quite hard to decide upon when processing them (specially when no image of real colors is merged along). In fact, I've been questioning my ultraviolet set of filters lately (the B+W 403 and Kenko D-655). I need to re-check the charts again to see how much infrared is getting through. From looking at the exposure times, yes, I would say it is blocking a fair amount. Yet, I have some doubts still!

Entangled


I'm going to skip here the long walk and all the snap shots taken along the way as most of them were shaky; no tripod and exposures range from 1 to 2 seconds or even more at f/1.4 AND automatic ISO!
Finally anyway I've reached a mosque with some bougainvillea branches dangling just out of the fence. It was a nice target but I had some hardship shooting because of the stability I needed, the hard-to-see LiveView, the slow focusing, and since I'm using 50mm I needed some space, which wasn't quite available (I had to stick my body to the wall of a house behind me to get enough space). Anyway, I've shot several shots for Entangled and I've even made a 3D anaglyph out of some of these shots in the series (and the image processing was synchronized of course). 

Entangled (3D)


The overall look is quite messy in fact but I still like Entangled for its somewhat dark and mysterious mood; to me at least. I think I got some nice comments about Entangled. Left to note that this image was taken at ISO3200, f/1.4, and 60⁻¹s. This is just to imagine how is it like to shoot in UV, specially with a lens that do have some anti-UV coating which makes things harder further. For this reason, a tripod can be a must for UV photography under such conditions, with not-so-adequate lens.

Одинокий
(lonely)


After leaving the mosque, I've also encountered some subjects but most of them were shaky or not quite interesting, but then comes my favorite moment in this stroll where I've encountered (what I think is) a Calystegia sepium; A white flower reminding me of some of the old cartoons I used to watch when I was a kid. The flower has many local names in English alone so I'm mentioning the scientific name only.
The flower (or I should say flowers) were growing naturally in between the cracks of the flooring in front of one of the houses. In order to increase my chances of getting a stable image here, and beside putting my ISO on auto, I've shot several shots in burst mode. It might be a bit of a sorrow to shoot in such high ISO here but nevertheless, it was worth it to at least keep the image and the memory. When processing the image, and after correcting the colors, the general tint was blue and I've added some more saturation to that, and even created another version of it with the reverse (or inverse colors); That is swapping the Red and Blue channels like in infrared images.

Одинокий 2
(lonely 2)


I've also placed the camera further away a bit and made a series of shots, but I didn't like them as much as these ones from the first trial. I need to re-check those though to see if there is any possibilities to create a 3D anaglyph out of them. In processing Одинокий, I didn't use any color-shifting techniques as I did with Entangled or ΟΔΟ, but a simply color correction (that is adjusting the White Balance only). The blue tint fitted the mood and the shape of this flower perfectly, I presumed.

So, technically, this was like the end of the stroll after taking some shots of this flower. I did take few shots here and there (and for part of my dirty car then!) but I don't think they are worth posting here (and in fact I didn't process the majority of them as I didn't see any potential). Worth noting though that this UV stroll was done in early morning and even the sun was not so strong; In fact, even Entangled and Одинокий were shot in the shade rather than under direct sun beams because, well, the location was in between buildings and the sun was not yet in a proper angle to cast a light through. But with some high ISO I was able to hasten the shutter speed a bit, despite the noise level that is hard to deal with. But anyway, I'm not printing those so no worries (for now) I guess!
Yet this experience do call for more UV work, indoors and outdoors, whenever possible. Now with the summer coming over and it would be almost impossible to take such walks in early morning (because the temperature can get well over 30°C in the early hours of the morning before even people leaving their homes to work!).

Finale

So, it's April already, and Ramadhan is ongoing too, and the weather is getting hotter and hotter by the day. It is a time now to be happy for being a retiree I guess. Yet, something out there is missing. I've put plans in the beginning of my retirement process that I should organize my time and specify some time for my own projects and specially camera work but seems nothing is coming together. I'm having a great deal of an urge to stay in bed all day if I can, if not for the damn back pain that I get every time I spend a long time in it.
I'm not sure where things went wrong here but probably I shouldn't waste my time thinking about the reasons and rather try to gather myself up. Yet, I don't know how. Is this normal? Do I need some more time to come to my senses? Many questions loom in my head and no answer in sight, so far.


Thursday, June 10, 2021

Kika IX…


Kika IX

And on with the 9th Week in Kika's challenge, which bore the topic of "color". This theme kind of coincided with a separate work that I was planning for and working on away from the Kika series, and just happened that the photos I've shot were full of colors; Though in abstract sense. And that is my work with the bubbles. However, the work with the bubbles, then, was still in its beginnings and I didn't quite find a valid or perfect way to capture these bubbles, and yet was doing some stroboscopic and macro experiments. Anyway, I think I will keep the majority of these posts for later, but for the time being, I'm just going to post those that I've dedicated specifically to Kika's photo-challenge with "color" as a theme.

Bubbly
Some abstracts shot with a macro lens.


The first problem with the bubbles was not being able to blow a proper bubble, so instead of having one big bubble, there was a cluster of small bubbles, Not wanting to lose the chance, I've decided to shoot those anyway. With a bit of processing, colors popped out more. Not sure why, but these images brings me nostalgia for rainy winter days, specially in my old home.

Set A

Then, there are the trials with stroboscopic flash. As for Kika's photo challenge, I've posted only one set, and that is Set A. Now, the reason for this name is that this image is made up of various images and not a single one, all shot in stroboscopic flash. Because of the empty spaces in each image of those, I thought it might be a good idea to combine them altogether and fill the gaps with other photos in the series. Then there is another series, and that was dubbed as "Set B" but I didn't post it for this theme of Kika's photo challenge. I'll keep that set when it's due when I'll be talking about the bubbles project.
Anyway aside from bubbles, I still had one last try here, and posted it on Instagram on the last day for Week 9 challenge.

Pantone Eye


The idea in the beginning was far from the photo challenge really, as taking a macro shot of my eye was something I wanted to do in a long time. I did it before but usually with 50mm or 50mm plus extension tubes (which provides moderate magnification of 1x or a bit more). This time I was aiming for a bit more but with me failing to get any good perspective, I reduced my ambition down to 2x magnification.
It's not the first time I do take a shot of my eye but with such magnification it was so hard; harder than before even. I had to use a hand mirror and hold it behind the camera to see the LiveView in order to frame correctly. Barely made it there actually with few shots with proper lighting. As the lighting goes, I had to hold two 430EX II near my face (and feel the heat of the pulse!).

Pantone Eye (details)


As the title goes, I thought of coloring the iris to pantone's color of the year (2021) which had a hex value of #F5DF4D. I thought this would also be suitable for the theme of Kika's photo challenge for Week 9. Anyway, coloring was not an easy process; It's not as simple as picking a brush and go over the iris. But I wanted the iris itself to adapt this color to have a more natural look. Thus, I've color-picked somewhere in the brightest region of the iris and started twitching colors to arrive at the proper CMYK equivalent for #F5DF4D (I think that was 8,7,78,0 in CMYK). This might initially resemble the pantone color but of course these digital values would change as I downgrade the file from 16-bit, change the color space and save the file as 8bit JPG. But the visual outlook should be the same since I use conversion of color space and not assigning  the color space. In the end, for the love of details, I've created another image from the first one (a crop) to show more details from the iris. I just can't remember was that my right or left eye!

Oxeneye

Usually, when shooting macro outside, I wouldn't go beyond 1x or 1.5x magnification. Even with such magnification, it is quite a hurdle to get a stable shot. Anyway, I've decided to take this further up, using my Voigländer 20mm lens (in reverse) and reaching up to 4.2X, and shooting outside. It was March, so many blooming plants were still available, in contrast to the situation now in May, as the temperatures already started to reach beyond 40°C here. So, my work begins with the oxeye bloom, or in fact it could be something of that family but not exactly the oxeye daisy itself, as the petals for the bloom here are yellow instead of white.

عَيْنُ الأُقْحُوانِ
(oxeye eye)

I have to admit, despite the hurdles and difficulties (and the back pain) for setting up the tripod and the camera (with or without a rail), the view at 4.2X for such small parts of the flower is simply amazing! I used to work afternoon when the sun is almost gone and not shining on the yard; This way it would be easier for the camera to communicate with my handheld 430EX II speedlite via infrared. Otherwise, it would be impossible to shoot using a speedlite unless I use a cable or a radio transmitter, which I don't have at the moment. Holding the speedlite freely at hand also enabled me to change the light direction and experiment with the looks by changing the light direction and distance even. 

عَيْنُ الأُقْحُوانِ 2
(oxeye eye 2)


As I've stated already, changing the light direction can make quite a difference in looks, as can be seen here in Oxeye Eye and Oxeye Eye 2. In the former, the dark background wasn't quite to my liking (hence cropping to get closer to the stamen), while in the latter, the background was harmonious to some extent in terms of color (keeping the foreground darker a bit). All that change was done by changing the direction of the speedlite and/or its distance from the flower. And it's not only the background here in fact, but also the texture of the stamen's surface popped out clearly (well, in the former version it is clearer because of the crop). Probably with a lesser than 4.2X, such texture won't be visible much.

Cornered


Probably the awkward part of shooting at such high magnification and shooting such a subject, is fixing the composition. In fact, as I was working behind the camera keeping an eye on the LiveView, I would have snapped any clear details I could get there. Images like Cornered and Last were originally aimless without concrete composition, but I've tried to fix things by cropping, sometimes to some severe measures here. I'm not sure if this is normal or not, but I'm guessing that more professional photographers in the world of extreme macro photography do have their own techniques to pinpoint the composition properly. As for me, it was a mere trial-and-error and a game of chance!

Last


Finale

Something is going on with my mind and body lately, and I just can't figure what it is exactly. I've been lethargic most of the time and taking a nap after a nap, after a sleep. I'm starting to wonder if this is a normal thing to have at 40? Or should I say 42, if I want to count my age according to the lunar years. Is this part of what they call the "mid-life crisis"? Or it's just a fleeting influence or transit from the planets upon my life and would soon go away? Or maybe it's just escapism at its best? I'm hoping, as I really need to get going and work with my camera more.
I'm still going on with the process (and the bureaucracy) of attaining my "special needs" papers. And who knows, I might work on getting a medical retirement afterward, but the long from here is long and hard to speculate. I'm not sure I'm going to attain the retirement yet. It sounds inevitable though, specially with the move of my workplace to a new location which is double the distance from home almost; I can't imagine myself driving that much on a daily basis, twice a day. My body is not what it was in my 30s and 20s. Trying hard not to think ahead about it but my brain can't stop flipping the channels.
As days pass by here, I just realize how awesome it would have been if I had my own home, and yet how hard it is to gain one. Even my trials years back to settle down and get my own place were never fulfilled, and interrupted with my mother falling sick for kidney failure. I was the main carer for her for 3 years then and I've totally forgot about myself then. More chances came in later, and never worked out, and now here I am… at 40, not knowing where am I heading, nor what I'm supposed to do, or what to be…


Thursday, March 19, 2015

Unprecedented…

Two weeks of upheaval with sickness. Respiratory system infection, and then Conjunctivitis; I was surprised to know that the two are actually connected, as mention in this article. The bright side of the story is a 3 days of medical leave from work, connected to weekend. Not bad. My health still shaky with the tearful cough, but it is the usual story I believe. Coughing always lasts for some days if not months after treatment. I'm not having any medications to treat all of that, just some eye drops and cream for conjunctivitis.

With conjunctivitis. It was redder than this!

With this, and with the closure of Winter's end, seems that my plans to go out at night are somewhat, or completely, diminished. It is clear that my health and immune system is not what it used to be. However, I got myself little boots just in case I need to get a bit deeper into the shore. With this temperature it might not be a good idea to do long exposures here for the level of noise will be something unprecedented, but with more technical knowledge that I've gained along the years, hopefully I'll manage, in case that happens.

Infrolling

Because of the lack of opportunities to go outside at night, I've decided to work more on some infrared shots indoors or in the yard. Some simple experiment. Experiments like this refresh my mind a bit and breaks my idleness with the camera. Thus, I don't necessarily have a goal of achieving a good shot in my mind.

InfraPetals
Canon EF 50mm + 56mm ET, f/16, 4m20s, ISO100.

My first (and second trials) last week were with some small blooms in the yard. Despite the lack of breeze back then, but the shots were not sharp enough, and probably it is for the fact that I didn't adjust the focus (after focusing without the IR filter) to fit the IR range. The Canon EF 50mm f/1.4 lens has a marker for infrared re-focusing, even though, to me, it looks useless - because the distance ring is not marked thoroughly but only at specific distances. Thus, sometimes, you must use intuition and approximation in moving the focusing distance over the red dot for IR focusing.

InfraQuad
Canon EF 50mm + 36mm ET, f/20, 4m20s, ISO100.

The second trial that day wasn't any better. Anyway, I'm not planning to upload those to stock websites (or might try to do so into specific ones). The problem with this quadratic bloom is the way it should be cropped to be enhanced. In fact, I've never got myself satisfied with it, but I tried to remove some of the excess lines.
That was a simple trial outdoors. However, the real work was later done indoors when I noticed a vase with withered flowers and roses. It was made ready to disposal so I picked the vase to my room and made a simple setting. Probably the hardest part is moving around with the Speedlite without fixing it on a stand. The space in my room is not suitable anymore, and spaces around this house were taken. Anyway, work started and first it was by using two Speedlites.

Sigh
Canon EF 50mm, f/8,
5s, ISO100.
It seems, as seen in Sigh, that two Speedlites were not necessary after all. The major one was that made the effect was handheld and pointed directly to the dead rose, while the other one was placed on the side and bounced off a metallic-like surface supposedly to light the front. However, this second Speedlite proved to be a major problem when it showed glare on the glass of the vase, and hence I had to spend a considerable time cloning that out in Photoshop!
Thinking about it now, I could have used the second Speedlite to light the background a bit, but unfortunately, I do not have a proper background here, and nothing was behind this vase except the mess of my room! Anyway, it was a lesson learned the hard way. Yet, Sigh gained some Likes after all for its dramatic look. I doubt it is printable or to be uploaded though for the humongous level of noise, despite the short exposure time of 5 seconds only (and both Speedlites were on full power!).

Eski Güzellik
(old beauty)
Canon EF 50mm + 20mm ET,
f/22, 40s, ISO100.
I wasn't over with this subject yet. I liked the idea of some long exposure "indoors" with this infrared filter. The lights in my room are all energy-saving CFLs and those are a bad source for infrared radiation. Thus, naturally, the exposure without any help from Speedlites is going to be a long shot! However, I tried. The estimated time was about 5 hours and 20 minutes! I did it after all in overnight; put things on and went to bed, and tried to sleep with lights on! To my surprise, the camera didn't record the time properly (probably for the unusual time period) - it was recorded was 15 seconds only! The image was bright and good but unfortunately, shaky and the noise level wasn't promising. The shake is surprising in fact, but probably the only explanation for this is the working A/C in my room which delivered gentle vibrations to the set. Anyway, decided to do it again but with a spot light bulb (which should produce quite enough brightness and infrared as well). The result, Eski Güzellik, received many likes and favors as well. It does have some abstract sense with a side of melancholy to it. Considerable work was done to crop it, and then rotate it (and flip it). For some reason which I'm not sure of, the actual positioning was not quite right for me (maybe because of my left-handedness?). I've finally settled down with the look shown here. And that was the last trial with infrared in past few weeks.

The set used for the final shot.

Finale

Well, I would have liked to talk a bit more about the panoramas that were stitched, specifically old panoramas into new suit, but probably I'll leave that for another time. As always I'm having here a time crisis and I've realized that with my systematic time-schedule to work on some of the projects, I did in fact neglect lot of things, and specifically my Geltani conlang. I'm not sure what's the solution to this so far, but I guess I have to give myself some free time first.
I guess, at least how I think it is, I've been indulging myself into projects and stuff to work on just to let myself forget many things in my life. But this is leaving me exhausted and I'm not sure if all of that is really keeping me going forward. It feels numb here. It's hard to feel something anymore...

An Loch Codlata
(the sleeping lake)


Thursday, September 5, 2013

The InfraWeek...

This week been somehow a busy week with my infrared filter. After some trials that were done last week with the infrared filter, and after learning some new methods to process infrared RAW files, I've been planning for new shots and even visiting old shots for re-processing.
Before I delve deeper into this matter of the infrared venue, I do like to thank all visitors for peaking up my Flickr profile to more than 2000 hits in a single day! This is a first time to be that way. I think my own personal record was something a bit more than 1000 hits in a single day before!

Click to Enlarge

Infra
One of the main problems in processing infrared images (beside working with unconverted camera) is the fact that the white balance is limited when working in ACR, or even in Canon's DPP. Canon's DPP though was somehow a good tool before but currently and with my new acquired shots from last week, it didn't make much difference. Anyway, I've gone through some articles online and I've discovered a free software provided by Adobe, namely the DNG Profile Editor.
I won't get into the details of this tool and how to use it, but in a brief sentence, all I can say is, it makes a profile to be used in ACR, and it would maximize the range of the white balance in some way. This step alone, made me re-think about previous shots and the possibility of shedding them under a new light.

Frozen Coal
Cropped from original.
One of these old shots was a shot taken in the beginning of this year, in winter specifically, when we were still using coal trays or something like that to enjoy some traditional tea! Anyway, the shot that was taken and processed in the traditional way and even back then, swapping the channels (of Red and Blue to give an alien feeling to the image) did not yield or give much sense. Right now, though, the story is completely different and swapping the channels after fixing the white balance in the RAW file can yield a promising result. I say "can" here, so don't take it for granted!

InfraCoal

However, the coal shot was an "indoor" shot and not outside, thus I had to dig in my archive and see if there is anything like that taken with infrared. I've found one shot, for which I needed DxO to deal with its distortion and other criteria and this one, too, did a good job in swapping the channels.

Infraarbeitplatz


Despite this promising result from a previous shot, but it didn't really work out for much of the shots taken back when I just had the filter. Some of them didn't work out as before and some of them were better rather in red shade like the Ciudad en Rojo.

Ciudad en Rojo
Canon EF 18-55mm @35mm, f/8, 3.2sec, ISO100.

Anyway, after looking back at my stock of infrared shots, I've decided to increase the stock a bit more just to work with processing more images of this kind. This is my preferred method of learning (specially in Photoshop), and reading alone won't do me any good!
For this reason I've decided to take my camera to work with me and try to find something just to shoot with my infrared filter.

One of the first trials at work is a little plant which looked like a palm tree (but it's not). I leave the classification of this plant for the professionals! Anyway, it was a shot in a hurry as the background and the distance were not suitable really.

Paulo Palma
Canon EF 50mm, f/2, 1.3sec, ISO100.

Naturally, some infrared shots would turn completely or partially to black and white. I think this is the magic of infrared photography. Somehow, the result can be unpredictable. Anyway, there is a major difficulty with unconverted camera (i.e. camera with modified sensor for IR photography). As I will show later, this was a problem in some shots which required a fast shutter speed in a breezy weather. However, in Paulo Palma, the weather was relatively stable and not much of a breeze in the air, but surely had a problem framing the image while the sun striking on my neck and on the LCD! I've used a wide aperture relatively (and hence the shallow depth) just to ensure a faster shutter. Otherwise, it could have taken up to 3 or 6, or even 10 seconds for this shot.

One of the major hassles while working with IR images is the noise level even when ISO is set to the lowest. Next, comes the soft focus. These two matters makes it uneasy for me to upload such images on the web, and specifically into stock agencies. Thus, imagine when you are forced to increase the ISO under such conditions. The noise are simply "ridiculous". However, the noise can be less pronounced and just get more attention when channel swapping is formed, that is, replacing the places of the Red and the Blue channels in the RGB mode. At this point, the typical noise reduction plugins in Photoshop won't do much good, but the major trick is to play around with Hue/Saturation to twist the colors and make the noise virtually negligible. Then comes the next trick of adjusting the contrast to suppress some grain, and then we have the change in the color space by using the Assign command in Photoshop (not Convert). The Assign command, for some reason, does reduce (or maybe re-distribute?) the noise level, sometimes to a great extent. This is some of what I've learned doing long exposures last summer on the beach!

Infra Columnae
Canon EF 50mm, f/1.4, 6-1sec, ISO200.
InfraDoor
Canon EF 18-55mm @22mm,
f/16, 8sec, ISO200.
Despite the general look of the infrared shots, which tends to be in black and white, but the fact is lot of shots I've done were low saturated and just close to the black and white level. This is done by virtue within the processing of such shots, specially via Hue/Saturation when I try to reduce the noise by such an adjustment layer. The fact is, IR photography got a potential for various aesthetic settings or processes just like, or almost like, the HDR technique. The hard part, might be, to predict the final look of the shot. With HDR and its processes, you can imagine what's the final image is on location (specially if it is some metallic surface). However, this is still not so evident for me when I work with IR. Shots like Infra Columnae and InfraDoor were so various and I didn't know whether they would be colored slightly, or I'll be needing channel swap, or simply turn everything into black and white. The main puzzle is how to settle down the white balance. Usually, I do like to set the white balance from any green surface in the image if there is any but that doesn't mean I would like it. I suppose the green surface is the first choice because the green color is in the middle of the spectrum, not sure about this theory though! InfraDoor specifically is a subject for an HDR shot and it got me back to my old habit of still life and abstracts by geometrical means, like I used to do before around my work place - anyway this might be a subject for another post some other day!

Then one day came a challenge that took me 2 days to perform. It's a small bloom that was barely 1cm (~0.394in) in height. Not only I had to get so low with the tripod, but approaching the bloom and getting closer to it was critical. The first day, I tried to get to it by the end of the day before leaving my work place but the sun was so harsh that, beside my personal troubles, the LCD was barely visible and I had nothing to cover it (things to put on my purchase list as it seems). Thus, I had to come the next day and try to get to it in the early morning time just before the sun strikes that spot specifically.

Truncartis Parvis
Canon EF 100 macro + ET, f/8, 30-1sec, ISO200.

I'm putting Truncartis Parvis here for comparison with shots that were taken with infrared filter later. In Truncartis Parvis there were two main problems: first, the low light level as the sun wasn't shining on the spot (ironic), and secondly, the breeze which required faster shutter speed to stop the motion of the tiny bloom. I didn't bring my speedlite with me that day thus I had to depend on the simple flash on-camera. Because I couldn't get so close to the bloom, I had to use the macro 100mm lens with extension tubes added gradually to it. By using 12, 20, and 36 tubes gradually I was able to make some estimate about the relative size of the bloom within the frame. Truncartis Parvis (which means the small jungle by the way) was taken with all tubes (i.e. 68mm) added to the macro lens. Thus, I was trying to hit some balance between the 3 variables: ISO, speed, and aperture. I didn't like the idea of raising the ISO too high for such a "normal" shot thus I had to put down the aperture to f/8 (after trying f/16). They say in macro photography, it's better not to go below f/8. However, such balance was even harder to achieve and I had to give up with the ISO when I started taking infrared shots with that setting (remember the sun was not striking the place, yet).

Glowing Bloom (Gold)
Canon EF 100mm macro + ET, f/4, 15-1sec, ISO1600.

As you can see above, in Glowing Boom (Gold), the shutter speed was barely acceptable amid the breezes in the weather, and this is only achieved with ISO1600 and  shallow depth of f/4 with maximum flash output. Probably it would have been an easier task if my speedlite was with me but I had to deal with the situation as it is and yet the shot was of a surrealistic approach somehow. The noise level, however, was a novel on its own right.
The shot above was done without channel swapping (and of course with some processing on the side to suppress the background noise). Hence the "(Gold)" part in the name. After Red and Blue channels swapping, it appeared as beautiful as the first as it seems...

Glowing Bloom (Blue)
Canon EF 100mm macro + ET, f/4, 15-1sec, ISO1600.

It is amazing how the infrared filter clears off the differences in tones and colors and makes the petals as if they are made with one color (compare with the one taken without filter above). At the end and just before I take off, I've decided to do one last trial but this time with one less extension tube just to include more background into the frame. Ironically though, I've decided to crop the final image into a square to reduce the background!

Gecenin Çiçek
Canon EF 100mm macro, f/5.6, 10-1sec, ISO1600.

That was "some" of the trials done with the infrared filter for this week, but not the end of it. I need to study the artistic chances and venues behind this filter. It is cumbersome to use it of course with an unconverted camera, yet it does help in long exposures anyway!

Conclusion
Potentially, there is so much to be done in the IR field. Something behind the typical vivid and surreal landscape shots that we usually see under this category of photography.
However, I do find myself debating myself about the aesthetic prospect of such shots. Usually, what I read in articles online about IR photography is that the grains (or noise) and the fuzzy focus is something natural and even characteristic of this type of photography. There are even some Photoshop tutorials that deal with photo manipulation; that is to edit a normal photo and make it look like it is taken under IR, and one critical step in the overall process is to add grain or noise to the whole image (beside reducing the saturation). However, do people accept that, or do agencies? I'm reluctant about uploading such images to stock agencies. I did already upload to some of them but it's just a test and I'm very doubtful about their acceptance for such shots with such high grain level. This, somehow, makes IR photography a highly fine-art branch I believe, and agencies wouldn't love this type of photography much, unless some of them do know what does it mean to take IR shots with all that noise and defocus.
The almost-random aspect of processing IR shots makes it as vivid and wild as HDRs but let's say with different tones. You can do crazy things with the HDR techniques and lot of people hate the halos produced in over-tone-mapping HDR images, and IRs also got the same potential. If you check Infra Columnae back up above again, you'd notice that the image is almost black and white except of a spot that shows clearly as green. I'm pretty sure some people won't like it that way; just a matter of how the human brain works I believe.
In the near future, however, I do need to work more with such filters specially to see how does it change the skin tones. I've done some simple trials on myself but these are not enough and I need more. First though, I have to know what kind of relation there is between studio (or let's say the speedlites) light and this kind of filters.
After all, it is just something to get my mind busy and away from my collapsible life for the time being. I do miss doing lot of things; panoramas specifically. Anyway, got to wait for winter to arrive. This summer I'm literally melting down my body, and mood...


Thursday, June 20, 2013

Let's Play!

I'm not sure what kind of week is this, as I'm typing this in the middle of the week to be posted on Thursday. However, one problem with the car and the whole week seems to be like a disaster.
I didn't post a thing last week despite the simple material that was available just because I did need some vacation from writing here, and because of the hectic life pace and with such heat that already exceeds 40oC at just 10:00 a.m. sometimes, my mind and brain were completely out of words and order and all what I was thinking of was sleep, sleep and sleep.
The material, however, was not much more than simply some floral shots that were taken around my work place just because I felt the need to work with my camera. I've done as I've done the 50mm challenge  before, when I would pick up my camera and the 50mm lens only and try to train my eyes to find something; the only difference here though is the fact that I've picked up my extension tubes with me.

New Born
Canon EF 50mm + tube, f/11, 30-1sec, ISO400.

Working out without a tripod and extension tubes is certainly not a work for the faint heart! One particular scene that really got my interest and surprise is some tiny blooms in a bud beside my work place, just like the one in New Born. These tiny blooms were actually almost 1 cm in diameter when fully open; and when I saw them first day I was without tubes, and when I visited them next day with the tubes, they were all gone. Most of them died because of the heat and probably the petals flew away with the hot wind. I was lucky to find this one in New Born and I had to dangle my body and holding the camera with one hand while balancing myself with the other against some rail and with the help of the on-camera flash, I've barely managed to get some stability (but not completely stable) at 30-1sec.

Floral Abstract
Canon EF 50mm + tube, f/22, 80-1sec, ISO400.

Generally speaking, one should not try to do macro without a tripod, either using a macro lens or extension tubes. Kids, don't try this at home!
However, sometimes it just happens that you need to try. After all, we do photography for fun here and not for a serious paid job to do, and yet we get somehow extra happy to find one or two shots that went out OK despite the instability of the situation. The situation becomes harder when you have to use high f-number (smaller aperture). Maybe you've noticed that New Born was taken with f/11, and Floral Abstract with f/22 and both were taken at ISO400. This is one of the reasons that I had to use the on-camera flash even though it is not a good source of light specially in macro shots but playing around can do some achievements anyway. The core purpose of the whole thing is to go light and take whatever comes your way, thus no speedlites were taken along. The shutter can be increased a bit though if the object is under the sun as in Floral Abstract which was half lit by the sun. If I'm to take this shot again I would have done it differently, with more close-up approach, and, of course, a tripod!

3D Seeds

One of the interesting findings, if I should call it so, is when I've discovered two images for the core of a sunflower that are close to each other with some change in perspective, which ignited in me directly the desire to make an anaglyph, or a 3D image. The different thing about 3D Seeds is the fact that the two shots were not exactly different in point of view, but they are different little bit in focusing distance. However, some points did coincide (not completely), mainly those in the center of the focus region of course. I'm not sure if this is a good 3D effect in fact but with red-cyan viewing glasses, the composition looks fine and almost no ghosting appears! Maybe a trend for some new studies for 3D composing? Who knows!

Revolving
It had been some time since I did a brainstorming session but some times you don't really need it when some items are available at hand to give you some kind of an idea to do and work with. This is exactly what happened when I've found a small plastic globe that my older sister brought to teach my nephews (from another sister and my brother) about geography for some of their tests.
I thought tabletop photography is, relatively, something easy to do indoors but believe me if I say it is lot harder (and even harder when you have to move your equipments out of home!). Moving stuff from my room to the guest room where I usually shoot is not any easier task, and while there is a table that is good to use for such projects, yet I can't use it because it is in a small place and I can't move it often here and there to do my projects. Thus, all I got is one small place in one corner of the guest room.

Test Shot

My plan was to record the movement of the globe with somewhat a spot light effect from the side or from top, while having a background of some old map (I do have this already on size A2 from previous project, and yet not a good size!). Lot of technical problems were in play here, mainly the question of how to rotate the globe and have a long exposure - and in the same time how to make a coherent exposure with my speedlite. In the beginning, the speedlite has to be set on 2nd shutter sync so that after the blur of the movement is recorded with the long exposure, the speedlite would freeze the motion to get a concrete image of the globe and its map at the END of the exposure. However, long exposure with an extra speedlite light meant possible overexposure, thus many test shots with varying exposure times were taken to make sure that the background is dark but not invisible while the globe is lit with the correct power from the speedlite (with honeycomb grid attached to it); a very delicate matter, and I was going to use some ND filters as well (as in the Test Shot above) but I've abandoned this idea later as the exposure was long enough just by switching off most of the lights in the room, and a double ND would tint the image magenta.

Welt im Wandel
Tamron 70-300mm @109mm, f/4, 4sec, ISO100.

However, despite the test shots, the whole game changed when the question of the motion came into play; mainly, how to do so?
After looking here and there, I've finally arrived to the idea to use my own vacuum cleaner which can be used to jet air from the other end as well as the regular vacuuming. It did achieve something in the beginning but I've realized that pointing the hose is not an easy task and the pointer should be precisely set (as I kept holding the hose with my own hand while putting the camera on timer to take the shot). However, this step rose many other problems, like the movement of the globe itself because of the power of the air (and to solve it I had to use lot of duct-taping skills!), and also, even though there was some blur movement but the freezing motion of the speedlite was dominant and the image appeared stable and not moving, thus probably requiring more exposure time and doing that I might screw the whole mathematics of the experiment! I think it was better to use one dominant light, like a desk lamp, instead of a speedlite here. Anyway, I had to satisfy myself with Welt im Wandel and few other experimental shots.

Revolving Australia
Tamron 70-300mm @109mm, f/4, 4sec, ISO100.

In one of the trial shots I was lucky to get something close to what I had in my mind, but it wasn't created with the effect of a spotlight from a speedlite, but rather by the sluggish movement of the globe as the air flow from the hose was not precise enough, but rotating the globe for a little then it would stop. The movement blur here is not quite strong and it might need more time, but with a speedlite I believe it would all stop completely and no motion blur would be obvious as well.

One point I'd like to mention here is a website that helped me now on keywording my images and I'd love to share it with you. I've mentioned some previous website in some previous post but this one now works better for me with its functionality. It belongs to Microstock, which is another photo stock website (but I didn't make up an account there yet).

It was such a long experimenting but the main part was to set and configure the gear around which consumed most of the time (and power). One of the major problems here as well even before working with the light and motion is the fact that the cable or cord from the camera to the speedlite was quite short and bulky to be dealt with - for this reason I had to keep close to the globe and bear with the reflections on the surface (but I've managed to clone some of it in Welt im Wandel). However, this problem will hopefully vanish soon with a new set of toys!

Let's Play!
What I didn't mention last week is the fact that I've placed a new order for some new stuff. Mainly light gear but one major bulky device that I've been waiting to have (and my hands got all itchy!).

Source: B&H
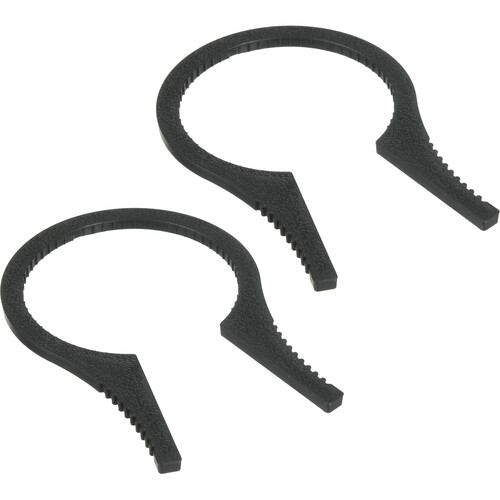
First item is the Sensei 48-58mm Filter Wrench which should be very useful when I deal with my IR filter and polarizer along with, probably, other attachments. It is probably more useful when attaching the IR filter and the polarizer together, since I had problems with these two before, specially in winter. I think in winter almost everything tends to jam a bit. These two wrenches will be useful in the near future.

Source: B&H
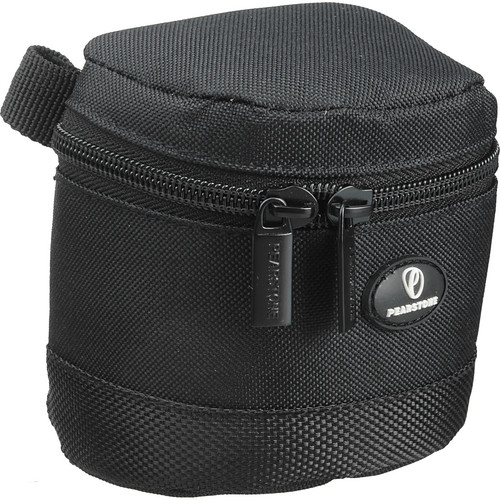
Next item is the Pearstone Onyx 30 Lens Case and this one is mainly to carry my dear Canon EF 15mm fisheye lens; my one and only lens that I usually use when creating panoramas (haven't done those in some long time now!). The cover or cap of this lens is easily removed and it doesn't click over the lens' front, thus I thought such a pocket is a better protection for it.

Source: B&H
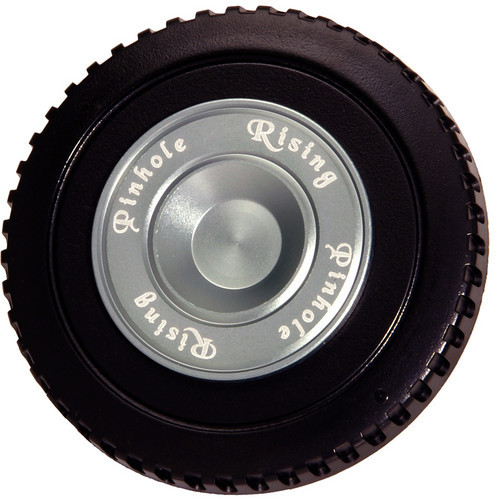
Then we come to the fun part with the Rising Standard Pinhole; yes, pinhole. Just like in the old times. This one is specifically made for Canon mounts and I believe you can find it for other type of mounts. From what I gather, the larger the sensor/film, the better for the total sharpness of the image. The f-number for this pinhole is f/222 (but in the instructions manual it's f/223 for APS-C type cameras), so just imagine the depth of field (and the length of the exposure!). I'm still interested in the mathematics involved here though and who knows, I might be able to do my own pinhole measuring to something higher than f/222. Remember that Diameter (of aperture) = focal length / N; and from there we can start on manipulating stuff.

Source: B&H
And then comes the savior! The Vello Universal Duo TTL Off-Camera Flash Cord (33'), and by "(33')" it is meant to be 33 feet, approximately about 10 meters! Unfortunately, I've done the globe experiment above before the arrival of this cable (and till the moment of writing this, I didn't test the cable). This cable would and should push the limits of my speedlites significantly. One question hovers in my mind though: what would be the situation with High-Speed photography? I'm pretty sure there would be some time delay to transfer the signal (we are talking about microseconds here). In High-Speed photography, each single micro- or even nanosecond counts. We shall see about this matter in time.

Source: B&H
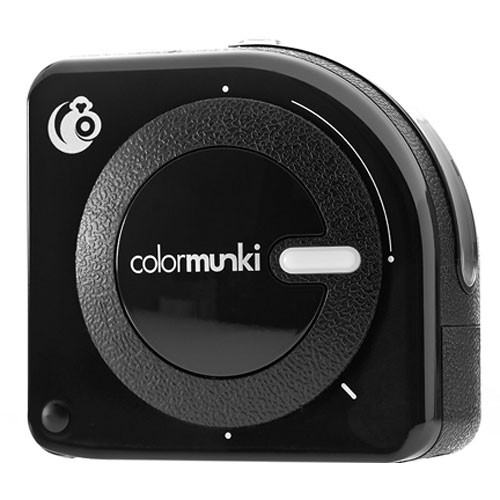
Finally, comes the one big toy that I should spend more and more time with. The X-Rite ColorMunki Photo Color Management Solution. Even though I do already have a ColorMunki device to calibrate my monitors (laptops and desktop), yet this device is here is far beyond calibrating monitors only (hence it costs more!). With this, I will be able, hopefully, to calibrate monitors, and make profiles from prints and analyze ambient light or even calibrate a projector! The perfect tool, I would say, for creating showrooms and proper digital darkrooms when needed. I'm thinking of installing this into my (old) desktop and my (new) laptop to make them ready for any task in the future. Just a point here about analyzing the ambient light; it is something important but unfortunately I don't see many people care about this tiny detail, at least in expos here in Kuwait. If you are a photographer and you really care about displaying your photos in printed form in a proper way as you envision them, it is not enough to calibrate your monitor to get the right colors. You have to get profiles for the printing but this is a matter that might be skipped for good in many cases (yet it is good to have profiles for various media). Then we arrive at the ambient light criteria. It is a good thing to know what kind of light and what color temperature the ambient light would be in the place where the photos are to be shown, because with this information, you would be able to examine the effect of such light on the colors of your photos on your (calibrated) monitor before even printing. Thus, you might think of making your photos more yellow-like to balance the extreme blue-colored light in a showroom or vice versa. It is all about taking care of the balance of colors and soft-proofing on your monitor before printing and displaying the photos.

Now with all these loads of new stuff, I think I do need an extra case to keep lot of these stuff and abandon that old small case (which was used for my old Canon 350D!). I'm thinking of getting one of those small traveling cases with wheels to keep my speedlites and related stuff in them. It is about time to organize some stuff (but not my room!).

Bücher
Source: Amazon
In the matter of books, I've finished my Lens Design book but in a fast rhythm. I've realized that such a book can't be read and completely digested without a tutor and without a practical workout. The many mathematical concepts involved are not so weird for me even though they include a high order of complexity, but in most times, many terms there within are familiar to me. However, in mathematics, at least with me, it never works without a practical workout and some tutor to walk step by step along the process. You'd think lot of the concepts here are relatively new but the fact is, most of such mathematical endeavor was developed long in the 18th and 19th centuries! Anyway, after passing through the pages quickly and read some articles, I've decided to look at some of my old books or even look into some books about optics in the library near by. That might help to achieve a better basic understanding for this topic.

Source: Amazon
I've started now reading the last book in the queue line, Handbook For Classical Research, in hope to flavor my mind with some archaeological spice. From the first few pages that I've read (and I didn't delve deep yet!) it seems that the whole book is about the Greco-Roman studies and culture. I was hoping for further expansion but anyway I still do think it is an interesting topic. The good thing about this book is that it is written by a single person, single author, and not scattered among various authors with an article or two for each. Such books with many authors involved are kind of scattered in thoughts and it's hard to keep a chain of thought going through the whole reading session. In linguistics and humanities, I've faced numerous books done in that manner and I have to say, it is kind of a waste of time to read but probably better be kept as a reference material when needed. I'm hoping this new book would give some amusement into my dull brain!

Unsettled Geltani
Maybe I didn't write much thoughts in my notebook about Geltani lately but nevertheless I was active in my mind. Yeah, I'm wondering why do I have a notebook anyway! However, I'm still planning slowly on assigning phonetic values and on the other hand I think I will abandon the newly-created system of possession articles. I think my problem was to create everything in idle and concise manner, but I think a language is more random than concise or systematic. Thus, I've decided to work on another method which might work as: pronoun-subject-suffix. For example, My Cat, would appear as: I-Cat-(suffix here). Development is slow naturally because of my stuffed schedule, and problems!

Finale
Scandinavian Eyes - Frida
Troubles on the home front keeps me busy and alert. I do say "front," yes. Because it seems that way; a game of dominance and reliance. There are moments that I do wish, and do imagine, how my life would be with another form of a family. They say you can't choose your family, but you can pick up your friends. However, under the current circumstances, it seems that I don't have the former, nor the latter. It feels like I'm floating with no support; not physically, nor emotionally. Mom is doing her best to keep me happy and I know it. I can see it in her eyes and actions. However, I'm the one who's supposed to keep her happy. I have a family that I can barely relate to.
Here and there, I'm keeping myself amused with some brush-up jobs with some photos from instagram users. It is something that I used to enjoy doing long before I take photography as a hobby. It might be just the desire to make something beautiful but trust me, if the original photo/person is not beautiful in the first place I would really have hard time creating the "uncreated". I think I do get satisfaction from the gratitude and happiness that those people show when I create some art with their pictures. I'm not a psychologist, but probably I'm projecting my needs outward - something that I've lost in my inner circle is satisfied with deeds to the outer world.
There had been some thoughts about resigning and chasing my own career but such thoughts are still cooking. It bears great responsibilities as well and even stepping into such realm should be done carefully without leaving the main job at once. However, with the current circumstances at work and the great disrespect that I face from the admins who think that my work place is something vain, I'm seriously getting sick of everyone around here and do wish to break free from all these master-slave relations. How, I don't know; but every good meal, needs a proper cooking...