Showing posts with label VR. Show all posts

Thursday, September 21, 2017

Dreamer…

In a nutshell, I'm sick of summer. Can't wait to have winter around me here. In Kuwait, we don't have the typical 4-season scheme; It's either summer, or winter. Winter though is more or less like spring for us.
Anyway, there had been some good news around and some more experimenting with my camera as I'm feeling more free and out of my obligations. Yet, I'm trying to find the power and time to work on some projects.

Peeking

One of the projects I've started to experiment with here is the usage of my idle pinhole camera cap from Rising, which I've used only twice previously before this time. Now, I'm trying to get used to it and trying to be more creative about it, specially with its fuzzy and blurred images.
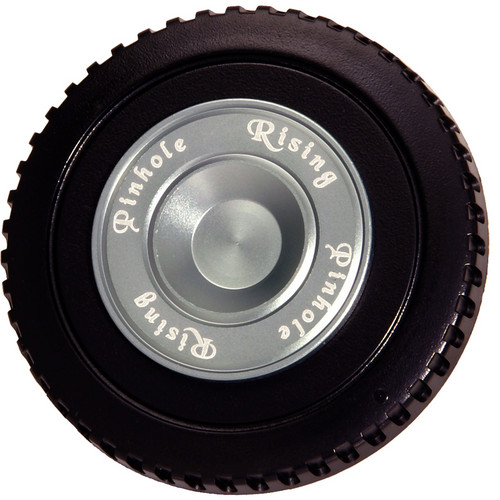
Rising Standard Pinhole
Source: B&H
The "adventure" of using such a pinhole to take pictures took me around with some simple mathematical ventures as I was trying to calculate what is the proper wavelengths and what are the proper sizes for pinholes, and I'm even thinking of making my own. Surfing around about pinhole photography, there is a plenty of text (or most of it actually) talks about analog rather than digital, and even though most people do state the fact that it is one of the features of pinhole photography to be blurred and fuzzy and create such a mood, but some others do also speak of infinite sharpness as well! Well, people in the latter type are few. This makes me think continuously of finding a way to merge such a small aperture with some lens. But what do I need to create a sharp image with such small aperture (and high f-number)? The answer is kind of complicated and involves lot of calculations but I'll leave it there at the moment.


According to the Specs mentioned for this pinhole (one of two types), it states that it is 0.22mm in size with f-number of f/222. However, I'm not sure how it was calculated since according to my own investigation here, this should be f/200, because the focal length or the distance from the mount to the sensor (a.k.a. flange distance) for EF and EF-S mounts is 44mm, and calculating the f-number using the relation: N=f/d yields 200, and not 222!

Visionem Infirmus (weak vision)
0.22mm Pinhole, 6m51s, ISO100.

Away from calculations what is supposed to be or not to be, I've managed to try it out and I really like some aspects about using a pinhole, specially when it comes to the flare as seen in Visionem Infirmus. Lot of people think those are light bulbs, but they are candles actually (long and short ones). Because of the perfect circle of the aperture here, the flare is more pleasant it seems and provided such a halo effect; How I wish my regular lenses would do the same! While doing Visionem Infirmus, I didn't really know what I'm doing exactly, it was a random setup just to test this pinhole. There is a mystic feel to it after all (probably because of the talisman too).
0.22mm Pinhole Selfie
6m51s, ISO100.
Even though the exposure times are pretty long (since I prefer using ISO100 most of the time), but I think this is what creativity is about after all; doing something unusual. Thus, I've decided to go on and do a selfie that took almost 7 minutes to do. I wouldn't mind the long exposure here as long as I'm cozy in my lazyboy. Hope you pardon my tired face and sleepy eyes! I could have done something more creative here even, like moving my head slowly or striking some pulses of flash or many things with such long exposure, but this is enough for now as I'm doing these tests and doing some calculations.
Calculations-wise, there might be a hope to create something sharp, or at least sharper than usual, if I just find a way to nudge the pinhole cap for about 5mm forward (or to be precise even further, for 4.8mm). Taking images with my Canon EOS 7D with a manual lens (e.g. Rokinon 8mm f/3.5 fisheye) or like this pinhole, it rigesters the value of 50mm as the default focal length of the camera, which I have to consider as the real focal length. However, my previous work with macro photography and shooting into the microscope, made it clear that the flange distance (or distance from sensor to the mount) which is supposed to be the pinhole focal length is indeed 44mm (all my calculations for the magnification ratios were based on 44mm and shown correct in practice). Mirrorless cameras do have a shorter focal length by the very nature of their design, but they might be more appropriate for pinholes because of this shorter focal length under the light of the relation: d=2√(fλ); where "d" is the diameter of the pinhole, "f" is the focal length, and (λ) is the wavelength of the light (typically fixed at 550nm). With some algebra here and solving for (f), it seems the proper focal length for 0.22mm pinhole would be 22mm. As far as I know, Canon's mirrorless cameras have 18mm flange distance; close.
Meanwhile, I'm expanding my experiment with the pinhole further to my converted Canon EOS 7D, as I'm trying various filters with the pinhole (taping it on the top of the pinhole). Pinholes though, under the light of the formula mentioned above, can be quite sensitive to the wavelength under inspection. However, thinking about it, it seems this is my only hope to get a proper UV image; since most of the lenses I have are coated with Anti-UV protective layer and might not be blocking essential wavelengths in UV range. Thus, I'm set to try this out soon (and of course using a hot mirror to block IR over my UV B+W 403 filter). Pinholes, of course, do not have coatings and thus might be the only way for me right now to shoot decent UV despite the fuzzy image I'm going to get.

Dream Coming True

For about a month or so I've been going around and trying to find a way to get a permit to shoot some pictures inside a theater. Not any theater. It is a theater that bears a memorial for the Giant of Kuwaiti acting field, AbdulHussain AbdulRidha, who passed on August 11th, and we are still mourning him almost every day since then. A rare man who witnessed the rise of this country, as well as its changes from old to modern (and not to say I do like the modern). The significance of this work is that, I dreamed about it, and it came true indeed. I couldn't apply some ideas I had in my mind prior to the work but at least I've done a masterpiece panorama for this memorial.

زارع البسمة وفخر بلادي
The Smile Giver and Pride of My Homeland.
 I will not get into much of the details of how I got into the theater, since it is a lengthy talk and took me around a month o talking my way through. Who cares for an amateur photographer trying to take a photo for a memorial on a wall? Anyway, let's get down with business about the panorama-making.
First of all, I paid a visit once I got a phone call that I can go into the place. This visit is to set some ideas straight and a get proper vision for the place. In fact, I once thought that there are two paintings: a mural and a portraiture painting. However, later I've discovered that it is actually one painting, and it is the mural that everyone was talking about. The mural or painting is a masterpiece painted by the artist Ahmad Muqeem. Not sure about its dimensions, but the height of the painting is surely somewhere beyond 2 meters (~ 6ft) and the width is around  2 meters as well. This changed some of my ideas as I was planning to pick my brother and make him read Quran in front of the mural, but since it is elevated off the ground, I think it won't be of much use here (or it might in fact but I didn't think that way back then). My main focus was the panorama.
Rear view of
Canon 15mm f/2.8 fisheye
with its gel filter pocket.
In 2 days time, I was ready with my gear (spent the day before cleaning them and tidy up my scattered tools and cameras). Headed there around noon time with my brother (as a model). Despite the fact that I've picked my location in my visit before, but I noticed that the artwork would appear small relative to the whole scene, thus I've decided to do it up-close and climbed the stairs. However, much of the details of the place (which were important for me) would disappear and I decided to go back to my original place (after shooting some already) as it can be seen in the image above. In this panorama, I've used my UV gel filter for the first time in a panorama. It is a gel filter equivalent for the typical UV-reduction filters which are placed on lens, but this one is placed at the back of my Canon EF 15mm fisheye lens (in a special pocket for filters). In fact, thinking about it a bit, it might have helped a bit to reduce any bluish streaks, but since the job was indoors, it is unlikely that UV would affect my work here much. Nevertheless, it is an experiment and the panorama was clear with no problems.
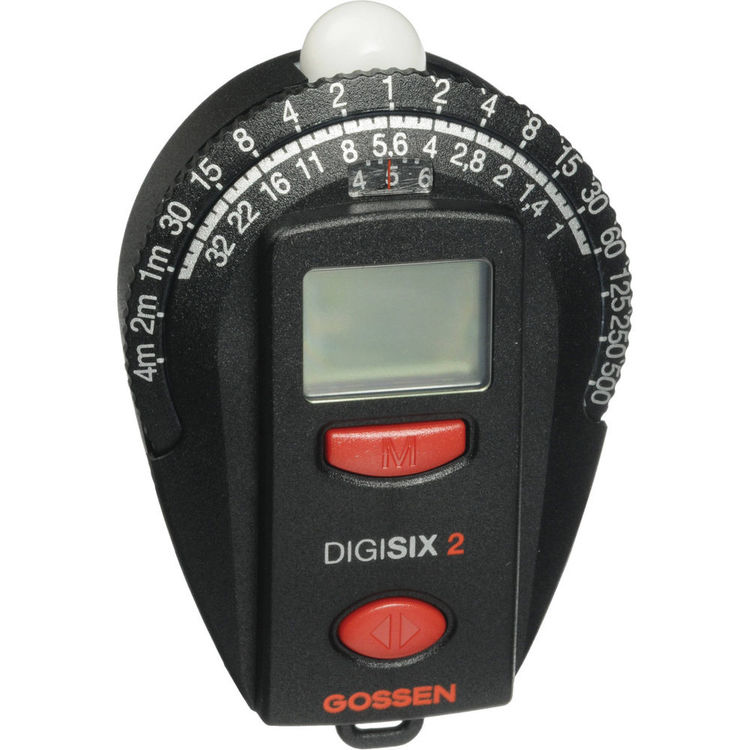
My old light meter.
No ON and OFF button,
thus I have to remove the batteries
after using it. I'm literally sick of
changing batteries for it!
Source: B&H.
Typically, when I do such panoramas that involve merging people, I would do the whole panorama first, and then start shooting the model separately and merge the two in the stitching process. This plan makes me at least grant my chances for a regular panorama in case the merging of the model or there was some shake when the shot for the model was taken (the shooting was for HDR, i.e. bracketed shots, and I do not guarantee the stillness of the model during the whole 3 shots). Before shooting, I've started metering the light all around the tripod-camera set and made an estimate about the least EV. It had been my practice, when shooting bracketed shots for HDR and doing a panorama, to reduce 1 or 2 stops from the minimum reading possible by the light meter. This practice, so far, proved to be a great savior. Sometimes, stretching the dynamic range does make gaps in the HDR histogram and some details are lost for good. Here, even though I've used my White Balance disk before the work is done, during the process (specifically when tone-mapping), I had to adjust the WB further for a nudge or two, as the whole image was a bit bluish (and I don't mean the blue streak from the glass facade, but the wall of the mural and the white details in the mural itself). Posing my brother here as a model took place in the end after finishing the regular panorama shooting and I've tried several poses at the same angle, and seemed to me that the prefect pose (and size ratio) was for him to stand on the stairs instead of up close against the mural. Nevertheless, there is the problem which could not be solved whatsoever, which is the absence of the facial expression (and it is almost impossible to get anything clear with this lens and at that scale). Thus, I had to depend heavily on hand and body gesture and pose. For this, I asked my brother to change the gesture several times with the change in his position relative to the mural.

زارع البسمة
The Smile Giver
After finishing the work with the panorama, I've started planning for a single shot. I had plans prior to the visit to the theater, but as I've said before, I had to change, and because of the fact that I cannot re-visit the place again (for the lack of time and probably I won't be allowed to easily), I've decided to get my essential gear without any lighting gear (speedlites and power packs, plus some modifiers) which I keep in 2 traveling cases. Here, again, I had to rely on (and trust) bracketing for HDR to be able to control the light as much as possible. Again, I had problems with a proper angle. When shooting these single shots from a close distance as seen in The Smile Giver, I was in dilemma as to what lens I should use. However, because of some "wash" out or undesired light reflection on the mural, I had to think about using a polarizer, which eventually forced me to use my Voigtländer 20mm; the only problem here is my limited space to move backward a bit to include the whole scene and give some space around the mural. In The Smile Giver, I had to fix the distortion and straighten some lines (or rather make them parallel) and, of course, crop the surplus. The photo was tone-mapped from HDR twice, as the first time had some problems that I didn't notice in the first glance. Probably, The Smile Giver, so far, gained more popularity rather than the panorama itself, but I'm not sure is it because of the details that show up clearly, or for the nature of the shot (portraiture) itself.

Planeta AbdulHussain
كوكب عبدالحسين

Vertical AbdulHussain
Finishing from all that essential work, it was time to try out some surreal projections for the set. Here, again, comes the benefit of shooting without a model first and then merging the model. With such surreal projections, the model would be stretched extremely and would add such a disturbance to the general view. However, because of the nature of this panorama, and the concentration over the mural itself more than anything else, the geometrical play here was not important for me but rather how to pop-up the mural to the eyes of the viewer. Because of this, my choices for these various projections was limited. Generally speaking, I think I was lucky here with this architecture, as I noticed that the lines (floor lines and the surrounding wooden decor) do point somehow to the mural and act as a guide line to the eye. I didn't notice that in the first place when I was doing it till I had to process the panorama. Anyhow, I think my choices here are limited to vertical and planet projections; and the latter required some angular adjustments to displace the location of the mural in the scene.

VR

Of course I wouldn't pass the chance of creating a VR out of this panorama. Moreover, I think I will adapt to the practice of uploading my panoramas to 360Cities and get an embed link for my blog here. This way I can avoid many plugins issues I guess and they provide further options to view the VR as well. Unless the VR is not significant, I might upload it the old way (spawning the file somewhere and embedding the link here).


The Smile Giver

A good thing here is that 360Cities provides the option for viewing the VR with VR goggles (on smart devices) which enables the viewer to roam the place by moving his head (or the device that is) around instead of being static and roaming the place by the controls.
If you are reading this and do enjoy VRs, I'm asking you to, please, Like it and share it with people you know. Unlike the rest of my panoramas, this is a work and a job I'm proud of, as a tribute to a personality that means so much to me, personally. Thank you.

Finale

Well, I feel like a bulk of load is removed off my shoulders. Some issues at work are finally done for good, and I've finished the panorama that I've always wished to do, I think now it is time to dream a bit again and think of something else to do. I do have some ideas to experiment with, like the pinhole and UV photography, beside some other ideas of "regular" photography. The problem though, as usual, time, and further more, the need for help (from my brother mainly who has other responsibilities). I think detaching myself a bit from the photo-club which I'm part of did give me further motivation and time to try out my camera. Probably I'm the type of photographers who cannot work in a team and rather establish himself alone. Anyway, time to post this, and go on dreaming, again…

Stock photography by Taher AlShemaly at Alamy

Thursday, July 28, 2016

Θoughts…

Been awhile since I've posted something here. Seems summer is indeed a time to be idle whether I like it or not. I had plans to, at least, getting more into Geltani conlang project which had stopped completely for ages now, but my life pace in between mood swings and tired body because of the heat, all that left my activities dwindling. Yet, I'm still waiting for my new toys which had some delays and lags in placing their orders.
Anyway, things were not completely idle, but I've been busy somewhat trying to fix VR panoramas, old and new, in order to upload them to Facebook and 360Cities. I'm glad that Facebook enabled this feature already; I used to struggle with QuickTime VR photos. I have though to make a little twitching in the EXIF data of the image to trick Facebook machine into believing that my panorama image is taken with a dedicated panorama camera; a new trend apparently.
On the other hand, I'm a new comer to 360Cities, despite the fact that it is an old website for viewing and uploading VRs. I needed an easier medium to share my VRs, and after long hesitation, I've arrived to this one. I'm still learning to use the features in the website and it has some advanced viewing options (such as the architectural view) which expands the enjoyment range a bit.
Despite being a new comer, but one of my uploaded panoramas was an Editor's Pick and was displayed in the website's homepage! The VR is for a corridor just in front of the entrance to the main praying hall in Sultan Qaboos Grand Mosque in Muscat, Oman; a VR I shot during a photography trip with the group to Oman in September 2015.


The Corridor

This same panoramas was also a subject for various projections as well as 3D rendering in various projections. The good thing here about 360cities is the fact that I can embed my VRs into this blog without the need to follow my old procedures and without the need for the viewer to have QuickTime installed! It is such a relief indeed, though it might be a bit clogged with tags displayed.
This is an encouraging start, and now I'm checking old panoramas that I've neglected doing a VR for. Some of them are troublesome of course and might need a lengthy work (and yet fixing them wouldn't be assured); while some of them are tempting me to re-shoot.

Thought

 Meanwhile, with some of this tiny success and reaching the 100-viewers limit for the previous VR, I come to think about the future aspect and how things would evolve in the future specially with the advent of specialized panoramic cameras, like the Ricoh Theta.
Generally, for the public this seems a plausible solution and an amazing tool with some artistic potential. Even though I didn't use any of those specialized cameras or GoPro, but I know they do have specific advantages that my classic methodology wouldn't compete with:
  1. Such cameras provide (supposedly) an instantaneous 360o capture. Which means moving subjects are captured with relative easiness.
  2. Judging from the few samples I've encountered so far, seems that such cameras do provide a good exposure expanding the whole width of the panorama.
  3. Easy to carry and place.
  4. Some of them are able to make a VR Video and not only a stable VR Photo, which is more active.
These are just some of the points that crossed my mind right now. Anyway, I still don't believe those are a replacement for a "true" panoramic photography, or let's say the "classic" method of doing panoramas. This is for a number of points:
  1. The higher resolution (not only in numbers but in sensor size as well) that is involved naturally with using DSLR cameras.
  2. Even though it is not instantaneous, but it's a great deal for using the HDR technique.
  3. More stable with a tripod (but I'm sure the new technology has its own methods).
  4. More creativity in terms of using filters and converted cameras for shooting the panorama.
  5. Stitching freedom and flexibility for more creative endeavors.
It would be nice to have one of those to try out, even though I'm quite busy developing my own style with panoramas specially with the addition of a converted camera to my collection. However, this classical approach is quite what businesses would need to publish and promote themselves. Just a comparison, I do already own panoramas that might be printed on 3 meters (~ 9ft) width of paper under 72dpi. One might argue that the file size for these 360 cameras is relatively small, and I'd say this is natural; their resolution is supposedly low (in terms of sensor size and photoreceptors size). The resolution is directly connected to the capabilities of printing later on, as well as the noise level and how much the image should be cleaned and sharpened. Let's face it, even DSLR images require that at the end, but the degree of work needed would differ (and full-frame cameras are more resistant to noises for various reasons). All that, makes me believe that the classic panoramic ways are still valid. Those new technologies might be just a "traveler" level devices (if I can call them so), which are used to document the moment rather than making art, or let's say delve deeper into the art. I won't talk about the VR Videos here since it's out of my "appetite."

Dawwar tal-Qaddis
Infrared panorama done with unconverted camera, and stitched in tunnel projection.


Finale

Now with the upheavals, and the ups and downs in my life, all I'm looking forward to is getting the new gear and start to work on something; anything. Not sure where life is leading me, but bit by bit and slowly, I'm seriously forgetting my interest in this world.
Seems there will be no traveling for me this year as I'm trying to restrict my budget beside other domestic issues in my life. I'm eager though. The name of Morocco is still a frequent visitor to my mind. The architectural adventure there must and should be an enormous one.
Till that day comes (hopefully), I have to work my mind out on my projects here, specially those forgotten ones…


Thursday, July 4, 2013

Peel!

Long and boring technical post. Read at your own risk!

As of writing these words I'm still struggling with my car's AC problem. It works fine one time and not working again; just like that on and off. 
In the meantime, I got some time to do some ideas with my camera back home, and in this post, I'm dedicating my efforts to an old idea that I've long abandoned, for some time, for the sake of other ideas. I've tried to do it before with some specific approach so to say but now it is completely a new door that I'm peeking through!

Peeling Hope!
After many many trials done in very long time ago to do such an effect, I've came about to some kind of a breakthrough; yet it needs more work to be done, I have to say.
The thing I'm talking about here is what I call the Peeing Effect or maybe some people refer to it as the Reverse Panorama or Internal Panorama. The idea is simple: instead of doing a panorama of the space around you, do it in perspective to one object.
The idea is not new in fact. It is used extensively in many websites (specially retailers) to offer a complete view of the object at hand, where the user can click and drag to rotate the object virtually. This is also called Object VR (for Virtual Reality). But my story, somehow related, yet completely different!
What I wanted to do long time ago is to provide a flat 2D view of a 3D object without the need for rendering into a 3D environment with some interaction from the user. A simple image that tells it all. This is all what I wanted to do!
I have to say though, I did indeed try to do an Object VR before using PTGui but I didn't go deeper into that (since I've realized that there is a special type of software to deal with this render) but what got me more interested is the artistic touch of flattening a 3D object; just like planet Earth flattened by Mercator!
My very early trials did involve PTGui but they also failed, and I've done the effect manually using layers in Photoshop. However, now with some change in wisdom and the amount of knowledge I received from previous experiences in (regular) panoramas, I wanted to try it all over again (and for weeks, but only now I got the time!) with PTGui.

Peeling a seashell, done manually by stacking layers in Photoshop (2011).

 With such trials, one thing is for sure: The more mistakes you make, the better you get! As simple as that. For the time being, my simple target was one of my favorite mugs at home! Yep, I had this one (and it has a twin!) since I was 17 probably... or 16... some time before 18, I'm sure!
The first thought about capturing this with a smooth movement is to fix the rotating table in 5o segments. Of course this is done with the help of the base of my Manfrotto 303SPH VR-head. Up till that moment, I really had no idea of how am I going to connect images together using PTGui to make out one long connected peeled mug! I just had to do it. Total images: 360o/5o is 72 images. No HDR intended here but simple RAW files.

Manfrotto's rotating base with improvised disk fixed on top by velcro. Pardon the lousy quality. The image was taken in a haste and not by artistic means!

 As I uploaded my first trial, I was searching the web for some tips, but most of the tips are dedicated to Object VR and not for what I'm trying to do here: a peeling effect! However, the idea stroke me like a bullet when I was reading an online book sample (an old book as it seems) about panoramas and tips about camera types and what methods are appropriate in each case (unfortunately, I can't remember the book's name now, it seemed good!). Within the context, there was a discussion about Slit Cameras (also called scanning cameras I think) in which the shutters of such camera do actually move over the sensor providing a thin band of light covering a portion of the sensor, and this band eventually sweeps through the entire sensor (not sure in which direction though no difference I guess!). The word Slit here inspired me to do the same: what if PTGui only picks the control points from a specific region in which movement is recorded? That would be like a reverse scanning! The proper tool to do this is the Crop tab inside PTGui. The Crop tab is dedicated, originally, for those images in which you don't like to include some portions of the scene to be implemented in generating control points for the whole panorama - the exact thing you want to do when dealing with lower level shots showing your tripod's legs and portions of the VR-head (like the bulky Manfrotto 303SPH). It is like, literally, telling PTGui, please be blind in regard of all these regions and just look at this; a technical retinitis pigmentosa.
However, in my first trial, the mistakes were apparent: so much tilt in shots and such a disturbing background. Probably the background won't do much disturbing because of the slit I'm trying to implement, but the tilt can be a problem indeed for the overall image look. Add to the problems is the uneven light around the mug which changes on the surface of the mug while rotating. The critical question, however, was: of what portion should I take the slit? In other words, what should I crop in PTGui? Naturally, the answer would be: the middle portion of the mug. However, this approach still as so much thoughts going on in my head.

Example shot from the first trial. Notice the uneven light across the surface and the tilt, and of course, the disturbing background. I've tried to isolate it as much as possible with shallow depth (low f-number), yet I had to increase it and consequently, sharpened the background more.

Since the rotating base moves in segments of 5o, I thought first that putting the crop lines for +/- 5o around the middle point of frame would suffice. Anyway, more troubles came about. First, PTGui deals with pixels, not degrees! How many pixels are equal to 5o? The answer was not so obvious in the beginning but it was just in front of me and I didn't see it, until the second trial was done! The answer was simply to find out the movement of the edge of the handle (or any point) from one side to the other (that is for 180o) and voila! You got the equation: 1o=ΔPx/180o; where ΔPx is the difference in pixels for the relative location of any point on the mug (I've taken the handle of the mug to check for this) from one side to the other exactly opposite to it. Care must be taken here because pixels are not divisible; pixels must be an integer number! Thus whenever fractions appear (and they will appear of course) it is the approximation that shall be taken.

The width of the rotation in pixels as I've measured it. Measuring in the Crop facility inside PTGui can be better and more accurate rather than Photoshop. Also, it keeps the work all in one place instead of running 2 programs.


In the beginning, I've based my calculations for the crop on the central point of the frame as a whole (i.e. the middle point of the frame which lies at pixel #2592 width-wise of course), but with my second trial to shoot the mug, I've changed this approach (mainly because it was hard to situate the mug exactly in the center of the rotation), and I've decided later to take the edges of the mug (not including the handle) and find the middle point between these two edges and increase the crop to the left and right of that middle point.

(1) The width on which I based the central crop in my first trials. (2) The width I've used later to specify the central crop.

Originally, +/- 5o was not quite a sufficient quantity because it is so small that PTGui can not find matching points between one slide and the next, thus I've increased the crop to +/- 10o, 15o, 20o. I think it did work smoothly up to +/- 30o, but the more you widen the crop, the messy PTGui gets. This is natural because we have a curvy surface that rotates and that means distorted features from one shot to the other, thus making the alignment of the slides a hard task to do and frequently, no good results at the end. So, after all, we have to keep it minimum and sufficient to include details from one slide to the other (but of course this depends on what you are scanning with this method). In many occasions there were hard times with regular panoramas when I had to, ironically, take the seat of the computer and place control points to aid the computer on aligning images. However, in the case here with the peeling effect the matter goes to the extreme somehow with zooming in and trying to find some common features between 2 slides however possible, even if it takes you to the pixels level!

Down to the second trial after few achievements with the first trial with that lousy background and annoying light levels. This time, I've placed the set in front of a plain wall, and using the lateral arm, I've raised the speedlite (with a reflector and a diffuser on) on the top of the set to illuminate the mug and reduce shadows on its side. It is at this moment only that I've realized I can fix the lateral arm with a 1/4" thread instead of the typical 3/4"! With 3/4" I would have to place it on the monopod which, of course, is not a stable fixture, but here I've used the lateral arm with a regular tripod in a 1/4" thread, which was more stable, not completely!
Source: B&H
The next surprise was still waiting for me though! My savior is now indeed my savior! The 33' Vello cable did work as if by magic! I could access the menu of the speedlite from the camera's body and even work in High-Speed mode. I'm not sure what went wrong in the first trials, but now it is working. I was going to work manually already and I was ready to change the settings from the speedlite itself since I can't access the menu from the camera. However, I was saved! Everything was set and ready, even though with some tiny tilt in the mug still but it is far better than in my first trial (you can compare the images above).

Bring Me Your Mug
First stitching trial for the peeling, with the help of Photoshop to fix some stitching errors.

Generally speaking, there is so much to learn, but Bring Me Your Mug (After UB40's song Bring Me Your Cup) sounds promising. Initially, this is not the look that I've intended to stitch as I wanted the handle to show from the side and not in the front. Anyway, some Photoshop tricks were needed to finalize the image and fix some stitching errors, and also to bring the handle to the middle of the image, as it was, originally, on the left side of the image. The experimenting is still going on in fact and the image above is just a sample for this post as I'm still working on a better image, if any!

Mistakes and Thoughts
This experiment specifically sparked many things that I've never thought of before while working with PTGui. For example, the detailed options for Field of View and the Crop were some sorts of a taboo for me to touch. Not that I can't, but I've never felt the need to do so when working with a regular panorama, because these specific options were fixed automatically by PTGui. Now, however, things had changed. I need to know more specific details about the works of these options to guide PTGui to stitch exactly what I want it to stitch - Talk about a LOT of experiments to be done, not on camera, but with the software itself.
Moreover, there were some points that I think I'm still doing wrong. Even though I've tried to get over the mistakes done in my first trial, yet I don't think I'm able to get over all the issues at once. Typical. Probably I can list some issues in the form of points:
  • Center: Probably one of the latest issues that I've noticed. The center of the rotation to me was the center of the base of the mug. Apparently, this is not the case here because we have a handle dangling on the side! Thus, the diameter of the whole shape must be taken into consideration. Unfortunately for me, my eyes were concentrating on the bulky body of the mug and forgetting about the handle issue as if the body was a perfect cylinder.
    Possibly a better rotation center would be closer to the handle somehow.
  • Shape: I think, possibly, every shape is a project by itself. When doing such peeling effect to shapes other than this mug, I really need to pay attention to how things would turn out while this specific shape is turned around. I'm quite sure at the moment that whatever techniques I've used to compose this peel for this mug, won't absolutely work smoothly for other objects. I guess it is my mistake as well to start off with somehow irregular shape to do the peeling effect on; Should've started with a more regular shape.
  • Control: Up till now, I'm still not controlling PTGui as it should be. Mainly, I'm still not aware of a possible way to specify for PTGui what should be the central part of the stitch. It does it all automatically. Also, the way to make the panorama encompass 360o field of view is still not obvious to me. One time it works as if by magic, then once again it can't be done. The demonstration above, Bring Me Your Mug, was wrapped around by Photoshop and originally, it is not a 360o stitch.
  • Dimensions: So far, all the hassle is for a single point of view: horizontal. What if there are more freedom levels, like taking the object with the same rotation pattern at 45o (either by raising the camera up and pointing down or, which is easier, by tilting the object)? How things would go on with this approach? Definitely, a novel of technical talk.
  • Rotation: Is 360o stitch a must? With different objects that I can place, I'm pretty sure that at some point for some objects there are no interesting details at some angles. Take the mug above for example. I could have done it (and will work on it soon) with stitching 180o rotation only, I presume. Yet, I'm not sure how it would look. I have to look further into this. Moreover, what if I divided the stitch for the whole 360o peel into two 180o? Is it possible to stitch the two parts together? Also, more experiments need to be conducted.
  • QTVR: Unlike the typical panorama and the typical Object VR render, what if I try to make a QTVR out of a peeled object? How does it feel to the viewer? Interesting? Not? We shall see!
  • Photoshop: Stitching errors are inevitable even with a regular, well-done panoramas. Here, it is no exception. However, I know my limits in regular panoramas, and when to rely on Photoshop to fix the errors. Yet, I'm not sure what are the conditions here with peeling. I've been mangling a lot with the Blending option in PTGui trying to reduce the stitching errors, but my attempts were unsuccessful. What I've discovered is, for such stitches, the Blending option is so sensitive (probably because of the tight Crop), making a single digit change leading to a drastic change in the blend - That way, making things hard for me to control. Either way, Photoshop is absolutely needed, either to add or to fix features.
These are my thoughts so far about it and I can't tell many things until I work more with this peeling issue. Next time, I need to get me a simple object, with no handles!
I have some ideas cooking in my head as well other than this peeling effect but the excitement about this ruled me over and made me forget about other stuff that I've set my mind to. Hopefully, some stuff will be ready by next week! 

Finale
Source: Amazon
Currently, I've been reading the last book on my list, the Handbook For Classical Research after finishing with the previous Lens Design book. It is a relaxation book if I should say. Yes, it is dedicated for, probably, college students but here I'm reading it in a fast pace without much intelligence needed to digest the contents. However, without much intelligence doesn't mean no sparks of ideas or a dull mind, I presume. The book got some nice discussions, questions and arguments, but majorly it is a resources book if I should say to help the new comers to the field. Even though it is about the Graeco-Roman culture in general, but still, many ideas can be generalized, even into the venue of natural sciences.
Geltani, on the other hand, got some time out of my brain in the past two weeks but I didn't standardize anything yet. This venue is walking slowly I'd say. Probably I will post about it next week, if possible!
Meanwhile, I'm starting to get sick of things around me and specially my car. I'm trying to vent as much as possible through camera work or music. However, I've noticed that to some extent, my daydreaming habit was reduced with the reduction in music consumption. I'm now almost like a quasi-confident that in the Islamic culture and literature, music was frowned upon for some reasons like this one - Daydreaming. Anyway, with the pressure at home, and with my car that persists on giving me headaches, I'm finding myself thrown into a dilemma. I need to vent, to dance, to sing, and simply, to smile. Been a while since I've smiled from the heart, and I've been doing it mostly as a compliment to others. Let me tell you, I'm sick of the others. Closest ones, before the furthest.
In a world where everyone tends to be a philosopher, the classy and the mundane, who has the time for a gazing wretch trying to find a meaning for the word "Happiness," like me?